• Hi all and welcome to TheWoodHaven2 brought into the 21st Century, kicking and screaming! We all have Alasdair to thank for the vast bulk of the heavy lifting to get us here, no more so than me because he's taken away a huge burden of responsibility from my shoulders and brought us to this new shiny home, with all your previous content (hopefully) still intact! Please peruse and feed back. There is still plenty to do, like changing the colour scheme, adding the banner graphic, tweaking the odd setting here and there so I have added a new thread in the 'Technical Issues, Bugs and Feature Requests' forum for you to add any issues you find, any missing settings or just anything you'd like to see added/removed from the feature set that Xenforo offers. We will get to everything over the coming weeks so please be patient, but add anything at all to the thread I mention above and we promise to get to them over the next few days/weeks/months. In the meantime, please enjoy!

Mike's ext'n & renovation (solar panels)

If you go back through this 10 year long thread, Mark, you'll find all sorts of stuff which doesn't normally pop up on a woodworking forum! :)
Yes all sorts of well written interesting information that will be very helpful to a lot of people. If you put it in a book it would end up as a best seller. Keep it up Mike.
 
Best seller? Hmm......

One famous author once said "everyone has a book in them...........and that's where it should stay"!! :)
 
The tallow is in the limewash only, not in the render....and the limewash hasn't bonded terribly well with the lime render. It isn't completely straight forward to pressure-wash off, but it does come off, albeit slowly. I've done a test patch on the back wall.
Would it not be be better on the lime render to use a Doff or Thermatec machine to remove the limewash, less chance of damage to the substrate. however, I'm assuming that if you've trialled then you are comfortable with the results
 
If you go back through this 10 year long thread, Mark, you'll find all sorts of stuff which doesn't normally pop up on a woodworking forum! :)

I can't believe it's been 10 years!

I joined this forum to read your workshop build but have kept coming back for updates on this amazing project.
I don't think I could adequately put into words how much respect I have for your abilities, work ethic, perseverance and artistry that you have shown in this build, and the generosity in putting all the extra work in to sharing it with us!
I do hope that you can enjoy it all and that one day when it's finished (will it ever be finished?) you would do us the honour of a final showround.

Chapeau Mike. 🤠
 
They're very kind words FFTC. Very much appreciated.

I am very close to being finished. Outstanding items are some trivial decorative trims here and there, door stops, wardrobe doors (they'll be covered here very shortly), and the re-rendering. We've some minor decorating to do, mainly because the design team can't agree on colours (!), and some gates. That's about it. It will certainly all be done in the next 6 months, ready to put up for sale to start again on the next wreck.

(Everything after "next 6 months" was a joke!)

There's still plenty of furniture to make, though, including a dining suite (table, 8 chairs, and a court cupboard), and multiple small tables, and shoe racks etc.

I'm not sure what form a "final show-around" might take. What did you have in mind?
 
It will certainly all be done in the next 6 months, ready to put up for sale to start again on the next wreck.

(Everything after "next 6 months" was a joke!)

Phew. That's a relief!

I'm not sure what form a "final show-around" might take. What did you have in mind?
Probably just imagine you were putting it up for sale and doing a brochure for it. Nice pictures showing the whole house off and some maybe highlighting the most significant features as you see them. The bits you are most proud of.
 
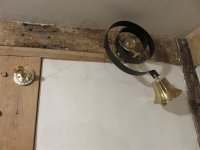
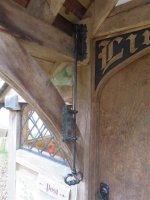
My door bell isn't standard, and I am not sure whether or not I have posted about it previously. It's very much "Upstairs Downstairs" or "Downton Abbey". The door bell itself has been in and working for years. You pull a handle outside:

IMG_7873.jpg


This pulls a braided wire over a series of pulleys:

IMG_7874.jpg

and ends up pulling a bell on a big spring:

IMG_7875.jpg

So far, so good.

The problem is that there are two doors between the person pulling the handle outside, and the bell inside. This means they can't hear any response to their effort, and so end up pulling it again and again, assuming that it isn't working.

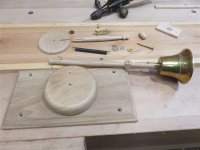
I decided to put another bell on the system, just inside the door. I bought a bell on Ebay, then made a mock up and worked out what I wanted to do, before heading to the lathe.

Here are the bits:

IMG_7864.jpg

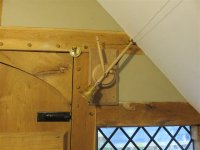
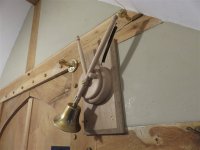
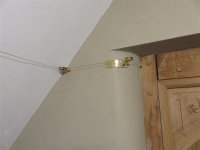
And here it is in situ:

IMG_7872.jpg

IMG_7876.jpg

The wire will be looped around the near-vertical arm (once the glue is dry), which nudges the bell arm via the little knob and sets it all ringing. It has to be like this, rather than attaching the wire direct to the bell arm, because otherwise the new bell would be fighting with the main bell, and the latter wouldn't work. I know, because I tried. This was a more complex design issue than you'd think.
 
I do like your woodwork Mike I expect a tour of your house would be a real adventure. The bell is a real gem too!
 
Brilliant!
Now I know why Victorian diy manuals devoted so much space to doorbells!
 
That doorbell thing is really cool. I keep meaning to hang a bell on our main entrance, though it's a bit pointless since you can't get down the drive without us opening the gates.

Edit: bought an old bronze ship's bell for the job and just have never managed to actually do it.
 
This is most interesting Mike as I have never seen a door bell like this!
Whilst not exactly common, I have seen one or two like this over the years. My best buddy lives in a house a couple of hundred years older than mine, and he has one virtually identical that came with the house. I bought mine new.
 
WMost ingenious Mike mine is relatively simple compared, ships bell- real-with a D shaped pull on a chain etc, but I missed out the spring so unfortunately when it’s pulled you only get one ding per pull, thank goodness as it’s Loud! Certainly don’t need your clever secondary bell.
 
My door bell isn't standard, and I am not sure whether or not I have posted about it previously. It's very much "Upstairs Downstairs" or "Downton Abbey". The door bell itself has been in and working for years. You pull a handle outside:

View attachment 31728


This pulls a braided wire over a series of pulleys:

View attachment 31729

and ends up pulling a bell on a big spring:

View attachment 31730

So far, so good.

The problem is that there are two doors between the person pulling the handle outside, and the bell inside. This means they can't hear any response to their effort, and so end up pulling it again and again, assuming that it isn't working.

I decided to put another bell on the system, just inside the door. I bought a bell on Ebay, then made a mock up and worked out what I wanted to do, before heading to the lathe.

Here are the bits:

View attachment 31732

And here it is in situ:

View attachment 31727

View attachment 31731

The wire will be looped around the near-vertical arm (once the glue is dry), which nudges the bell arm via the little knob and sets it all ringing. It has to be like this, rather than attaching the wire direct to the bell arm, because otherwise the new bell would be fighting with the main bell, and the latter wouldn't work. I know, because I tried. This was a more complex design issue than you'd think.
Absolutely splendid work Mike, love the doorbell!
 
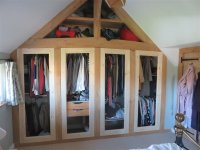
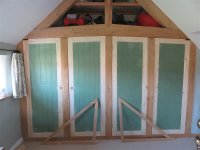
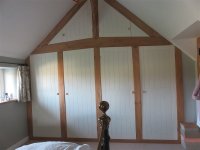
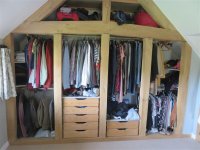
For the last 8 years, this has been our view of the end wall of our bedroom:

IMG_7940.jpg

IMG_7941.jpg

Ignore the wooden lamp mock-up. That's for another day.

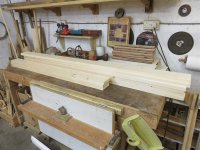
Anyway, time to hide our clobber. I bought some softwood door liner, taking great care to select the straightest stuff in Huws Gray. I also bought some 9mm MDF. I spent a day or two flattening the boards by hand, then thicknessing with my P/T:

IMG_7942.jpg

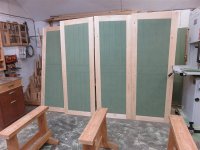
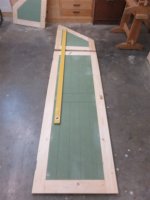
Now, you can probably tell from the gaps that there has been a lot of shrinkage and twisting in the green oak frame, so it took lots of careful measuring to work out what size doors to make (and of course they're all different). Here I am laying out one of them. They all have a square bottom and a sloped top:

IMG_7943.jpg

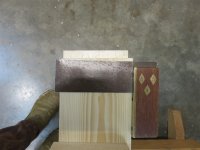
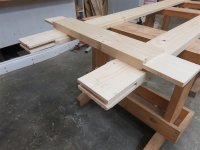
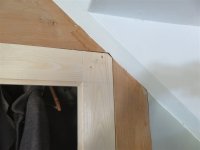
This isn't a joint (it's just another board below), but it clearly shows the top of the stiles not being square:

IMG_7944.jpg

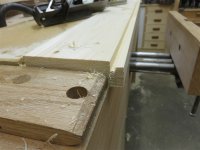
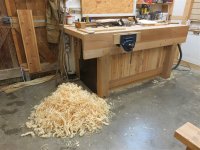
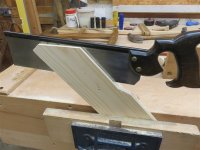
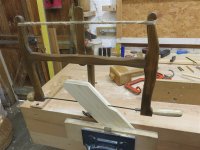
We were somewhat short of shavings for lighting the woodburner, and I was somewhat short of (professional) work, so I decided to do the rebates by hand. Now, I've tried doing rebates in the past just using a rebate plane, but I've found that the back edge gradually works its way out of vertical, and you end up having to correct it with a shoulder plane. So, this is what I now generally do instead:

IMG_7945.jpg

I run a groove with a plough plane (in this case, a combination plane), and then follow up with a rebate plane. The process produced the desired results:

IMG_7947.jpg

You can tell from the fact that I'm making rebates rather than grooves that this is going to be a flush panelled door. The idea is that it looks like a framed ledge and braced door. If you go back to the first photo you'll see that there are drawers built in behind the door locations, and there is only about 30mm depth to play with. Thus, I couldn't build actual ledged and braced doors.

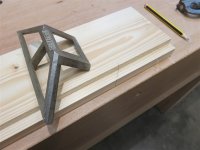
I don't use this little mitre marker very often, but with any mouldings it's a really useful little bit of kit:

IMG_7948.jpg

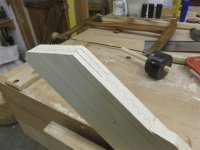
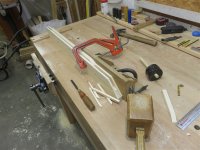
I cut out mason's mitres for all of the joints (I forgot to say, all of the joints will be bridle joints). I cut out the faces for the joints on the bandsaw, and cut and chiseled the shoulders by hand:

IMG_7949.jpg

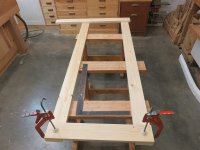
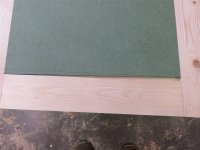
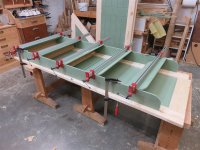
Note that I hadn't cut the mitres to the line, but left them over-sized. I went around with various handsaws (of varying plate thickness) kerfing the mitre part of the joints as they came together. When I had done (ie glued up) all 4 frames, I took them up and fitted them......but without the panels. This allowed easy access to reach in and mark out where I needed to plane:

IMG_7950.jpg

It took the best part of a day to get all 4 fitting into their holes properly, walking in and out to the workshop with each frame multiple times. That's OK, I'm not in a rush.

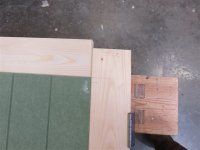
Note this little issue:

IMG_7951.jpg

Clearly, that would stop the door from opening if left as it was (on the hinge side). We'll come back to that.

I then started cutting up the MDF, and immediately made a cock-up which would change the proposed design of the doors:

IMG_7952.jpg

I marked the top of the first panel to the wrong line, and cut it. This meant a tapered gap. I didn't have spare MDF, and the stuff costs a damn fortune. So, what would you have done?
 
Well I'd replace the MDF by either buying a sheet and putting the rest in stock or trying to find a small piece on ebay/freecycle/marketplace etc.

However thats clearly not what youve done. I'm not quite sure how you're intending these doors to look so maybe a bolection moulding?

Mark
 
It’s the old joke “ well sir I wouldn’t have started from here” crikey Mike you’ve given yourself a challenge fitting flat sort of square doors into that framework.
Not sure what I would have done differently, and I agree a Bolection moulding to fix the c/up. Glad to know it’s not just me!
 
If you can't see it from the front I would just add a filler piece of MDF. I know you will always be reminded of it when opening that door.:(
 
Isn't there an offcut shop somewhere in Essex?
Or someone on here might have a spare bit?
I could offer non-MR and 1/2" thickness but I suspect that would be much worse than what you have now.
 
Possibly a middle rail ?
Bead detail all around the panel periphery?
Projection hinges to get past the corner binding?
Cheers, Andy
 
No mouldings, and yes, it's on the front of the door. Here's what I did:

IMG_7953.jpg

IMG_7954.jpg

IMG_7958.jpg

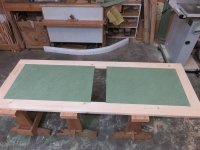
I corrected the cut at the top, and then cut the panel in half before inserting an off-cut in the gap. The last view is the inside of the door.

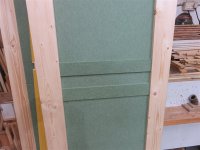
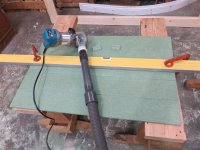
Instead of putting continuous vertical grooves in the MDF to mimic T&G boarding, I needed now to put two horizontal grooves in and divide the door into two panels:

IMG_7955.jpg

IMG_7956.jpg

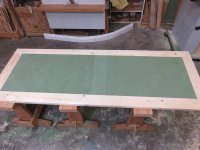
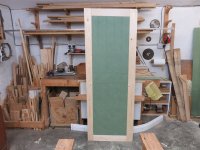
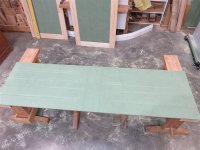
The other doors were then made properly (!) of one panel, but with the same pattern replicated:

IMG_7957.jpg


IMG_7959.jpg

And the corner fouling issue.........well, that's a compromise:

IMG_7960.jpg
 
Staff bead. A nice staff bead to set the panels in. Or a bolection moulding.
 
Staff bead. A nice staff bead to set the panels in. Or a bolection moulding.
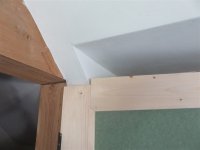
Everything is flush, Peter. Anyway, have a quick look up and you'll see the answer I came up with.
 
With the hinges set into a mortice (a double-depth mortice so that they can be surface-mounted on the oak posts), I took the doors in and hung them:

IMG_7961.jpg

This is how that corner door works:

IMG_7963.jpg

Obviously, there will be a painted bit of wood fixed to the opening, rather than the door, to fill the hole. Quirky, I know.

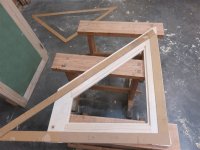
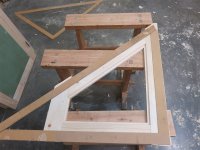
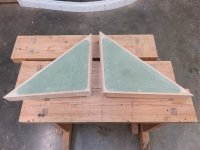
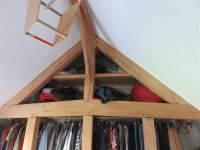
On to the triangular opening above. I made some patterns with 3mm stuff and some hot glue:

IMG_7964.jpg

I'd cleaned up the stock right at the start of the job, so it was just a question of doing the bridles. Because the joints weren't even close to right-angles, I had to cut the bulk of the cheeks by hand rather than doing it on the bandsaw:

IMG_7965.jpg

IMG_7966.jpg

IMG_7967.jpg

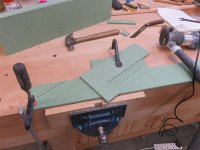
Holding the work for chiseling out the female side of the joint was a bit of a pain, but I had an old fence from my pillare drill and managed to cobble something together which worked:

IMG_7968.jpg

My marking out confused me again, but this time, it was too big rather than too small, and quickly fixed:

IMG_7969.jpgIMG_7970.jpg

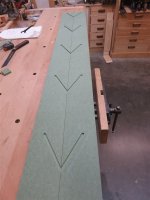
After gluing it all together I did the MDF without any issues. I wanted the routed grooves to line up with the door below:

IMG_7971.jpg

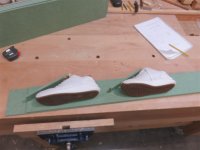
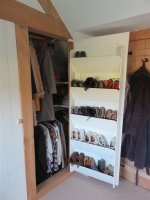
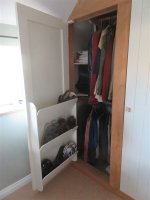
I noticed that there was a bit of available space behind the door, and I had some MDF left over, so I decided to make a shoe rack for the back of the door:

IMG_7972.jpg

IMG_7973.jpg

IMG_7974.jpg

IMG_7976.jpg

That lot is inserted in a groove on the back of the stiles, but I removed it after the glue dried to expedite painting.

Finally, the little remnant triangles:

IMG_7978.jpg

I also made a small shoe rack for the back of one of my doors, but didn't bother photographing it.

As an aside, I left the doors hanging in our room overnight, and the off-gassing/ smell drove my wife out of the room in the middle of the night, and gave me a horrible sore throat. I'm sure all will be well when it's all painted.
 
Mike, I have a question regarding my ignorance of the UK MDF. The colour of your MDF is different to ours being brown. Curious is this to identify the type of sheet good , being moisture resistant, from standard MDF?
 
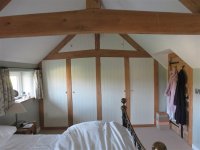
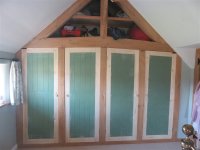
I painted the doors (3 coats of Bedec MSP), glued in the shoe racks, and fitted everything:

IMG_7985.jpg

IMG_7986.jpg

IMG_7987.jpg

IMG_7988.jpg

Handles are coming in a few days time, but I shan't trouble you with photos.
 
Last edited:
The speed and quality of the work on this epic build never ceases to amaze. I have said it before and will say it again, I have worked with joiners who would be hard pushed to turn out anything close to this quality (even with the plethora of power tools and miscellaneous items strung around their waists on tool belts).

Looks fantastic Mike.
 
Thanks guys.

There was no speed involved here. These doors took a week or two to make, and 3 or 4 days to paint. I really am drifting to a gentle halt at the moment as the whole project comes close to completion. I need another project, badly.
 
Back
Top