
Paisawood
Seedling
The next job was making up and fitting edging pieces for the board. I had planned to use narrow lippings but increased their width having decided that the veneered border was too narrow. The edgings were cut from a piece of walnut, mitred and each was then fitted with a couple of locating biscuits before glueing.
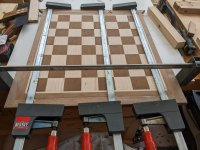
Keyways were then cut in the corners on the router table. Not really essential but I wanted a bit of extra reinforcement.
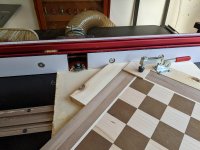
Walnut keys were added and the board was then scraped and sanded prior to applying 6 coats of Liberon satin varnish.
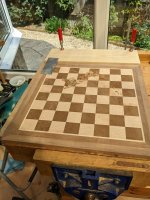
To hold the blank I made up a simple screw chuck with a 20mm diameter spigot on the end.
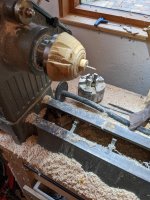
20mm sockets were then cut into one end of the blanks which were then fitted onto the spigot and turned round using the tailstock for support,
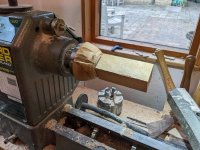
Plywood templates were made up and marked with dimension from an existing chess set and the individual pieces were turned. There was a bit of trial and error involved in getting reasonably consistent sizes and a few attempts went into the firewood box!
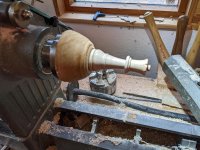
Knights were made by turning the bases and then roughly cut using templates downloaded from the internet and cleaned up with rasps and sandpaper. I didn't attempt to carve any features onto the knights as I didn't think that I would be able to get consistent results.
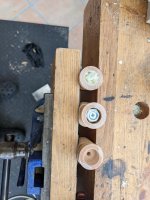
Finally, all of the pieces were finished with Chestnut friction polish. The pieces were the weighted with M.10 nuts which were fixed with screws and a drop of Gorill glue. Pieces of self adhesive flock were then fitted to the bases .(Not shown)
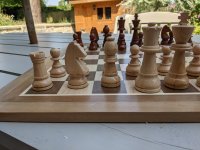
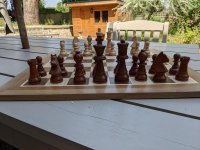
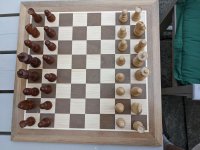
A few pictures of the final result. Grandson was very pleased and if currently on his way back to Sydney.

Thanks for looking.
David
Keyways were then cut in the corners on the router table. Not really essential but I wanted a bit of extra reinforcement.
Walnut keys were added and the board was then scraped and sanded prior to applying 6 coats of Liberon satin varnish.
To hold the blank I made up a simple screw chuck with a 20mm diameter spigot on the end.
20mm sockets were then cut into one end of the blanks which were then fitted onto the spigot and turned round using the tailstock for support,
Plywood templates were made up and marked with dimension from an existing chess set and the individual pieces were turned. There was a bit of trial and error involved in getting reasonably consistent sizes and a few attempts went into the firewood box!
Knights were made by turning the bases and then roughly cut using templates downloaded from the internet and cleaned up with rasps and sandpaper. I didn't attempt to carve any features onto the knights as I didn't think that I would be able to get consistent results.
Finally, all of the pieces were finished with Chestnut friction polish. The pieces were the weighted with M.10 nuts which were fixed with screws and a drop of Gorill glue. Pieces of self adhesive flock were then fitted to the bases .(Not shown)
A few pictures of the final result. Grandson was very pleased and if currently on his way back to Sydney.
Thanks for looking.
David


 - Rob
- Rob