• Hi all and welcome to TheWoodHaven2 brought into the 21st Century, kicking and screaming! We all have Alasdair to thank for the vast bulk of the heavy lifting to get us here, no more so than me because he's taken away a huge burden of responsibility from my shoulders and brought us to this new shiny home, with all your previous content (hopefully) still intact! Please peruse and feed back. There is still plenty to do, like changing the colour scheme, adding the banner graphic, tweaking the odd setting here and there so I have added a new thread in the 'Technical Issues, Bugs and Feature Requests' forum for you to add any issues you find, any missing settings or just anything you'd like to see added/removed from the feature set that Xenforo offers. We will get to everything over the coming weeks so please be patient, but add anything at all to the thread I mention above and we promise to get to them over the next few days/weeks/months. In the meantime, please enjoy!

Marquetry advice

StevieB

Nordic Pine
Joined
Jul 21, 2014
Messages
944
Reaction score
58
Location
Chatteris, Cambridgeshire
Was not sure if this was the best forum for this or not, so feel free to move if not Mods.

I have been having a play with marquetry and lasers. While I have some way to go in terms of getting pieces with an exact fit (laser kerf is the main problem) the other problem I am having is how to keep all the pieces in alignment while preparing an image. The picture below is from playing over the weekend and is approx 100mm in diameter, which makes some of the feathers and small pieces far too tiny to use masking tape or veneer tape in the conventional sense. In this example, I have used effectively a double sided sticky sheet and taken the backing off one side such that the pieces can be held in place. I would then remove the backing from the other side and stick to a substrate. The problem with this is that there is no compression involved, so if the veneer is wrinkled, it stays wrinkled, rather than being dead flat as it would be with glue in a veneer press. Has anyone done any similar work with tiny pieces and has a better way of fixing these? removing the sticky sheet after gluing the image face down is not going to be viable, but if there were 'less sticky' sheets available then this might work? The only other thing I can think of is to use layers of blue masking tape upside down which might then peel off after the image is glued face down but all other suggestions welcome.

Marquetry Hummingbird.jpeg
 
Not sure how it works with tiny pieces, veneer tape, lick and stick type, and as it dries it shrinks a tiny bit pulling the parts together, it’s stuck to the top surface I think then removed afterwards, but It’s a VERY long time since I did any. The sort I used had a row of holes running along it’s length, the tape was about 9mm wide.
Ian
 
I don't have any direct experience but I do have one of Jack Metcalfe's books, where he explores the techniques used in really very elaborate marquetry work by Chippendale. He uses hot animal glue and a veneer hammer. The glue grabs instantly, so each tiny piece can be pressed down individually. Glue that has set can be softened to stick again, by heating locally. You can carry on fitting lots of pieces in a long session if you want, but are free to stop and start as you please.

That's the short answer, and his explanation of what Chippendale did. He has also made large scale panels using PVA, a LOT of veneer tape, a professional vacuum press and then specialist belt sanding to remove the paper and level the surface.

The same book goes on to mention that he has also used liquid hide glue and fish glue (in a fine tip applicator by Anne Read, in conjunction with a heated spatula, pressing tiny parts into glue softened by it.
 
I've done loads of marquetry pictures Steve though not for many years but using the usual scalpel and window method. ( you've just given me another reason added to my list to buy a laser - thanks for that :eusa-naughty: )

Most of the pictures have very small pieces but the method I use is to build the picture from the back so the tape, in my case plain old clear sellotape is applied to the face of the project and when completed it's glued down complete as is and when dry the sellotape carefully scraped off the face. It is however pressed so if you can't do that I'd think it's feasible to use hot glue and press it down as you would with any veneer.

I don't know if any of that helps but maybe food for thought.

Isn't there an offset facility in Lightburn to make the parts a tight fit?
 
:text-goodpost:

I got into scrolling through marquetry. I did it for years when I was in the air force and stuck on bases in the middle of nowhere with nothing much to do (other than the gym and the bar). I wish there had been laser cutters in my day but perhaps I needed the patient cutting with a scalpel to pass the time. Eventually I found ways to cut thin woods with a scroll saw but I found that although it was considerably faster than using a scalpel, you couldn't make complex pictures.

I agree with everything Lons has suggested although I would use lo-tack masking tape rather than sellotape because sellotape can lift shards of veneer as it is removed. Whatever tape you decide to use, I'd advise you to dab it on a piece of cloth first to remove most of the adhesive.

Whatever pattern you are working from, remember that each piece that is cut will have a slight variance due to aspects such as blade/beam kerf. You might want to tape your cut pieces together (as Lons suggests) and use the assembled picture as a guide for a scalpel to lightly trace the contours of your next piece onto card. I don't know if you could program individual tiles like this into your cutter but I imagine you would get a much more accurate representation of the final image.

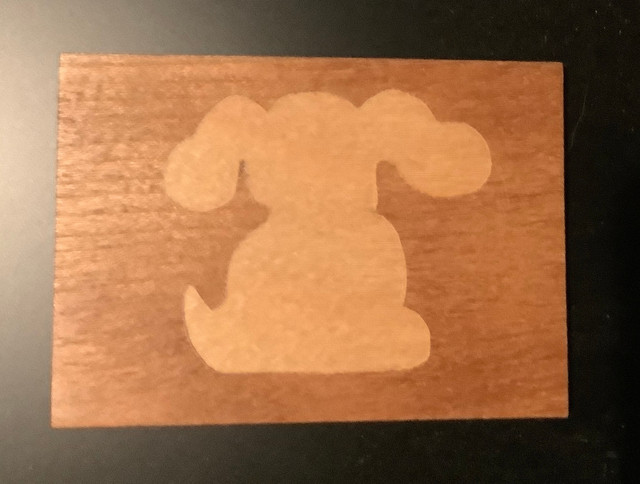
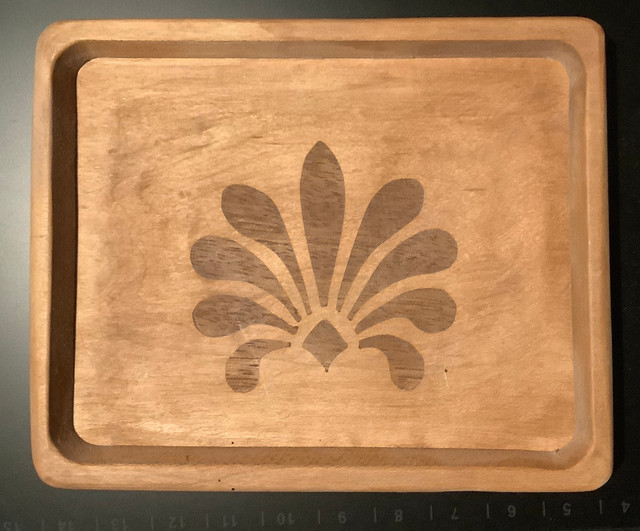
By the way, I've attached quickly taken photos of two small pieces of inlay work I did a couple of decades ago. These were cut from solid wood with the scroll saw table angled so as to compensate for the known kerf of the blade.


As you can see, there is practially no gap between the inlay although there are slight traces of where I had to drill pilot holes for the blade. I imagine pilot holes won't be a consideration for a laser cutter! Calculating the angle of the bed that will be needed to eliminate the kerf shouldn't be too difficult for anyone with a basic maths foundation.
 
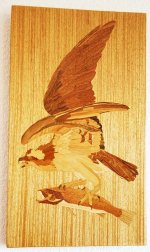
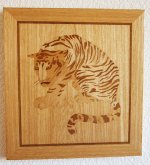
Just dug out four of mine, many were given away and as is my normal practice I have one half finished from more than 30 years ago. :oops:
Unfortunately the background veneers on these detract from the main subjects but I used what I had rather than buy materials which is a shame..
 

Attachments

  • Marquetry horse.jpg
    Marquetry horse.jpg
    75.6 KB · Views: 1,024
  • marquetry tree.jpg
    marquetry tree.jpg
    93.5 KB · Views: 1,024
  • marquetry osprey.jpg
    marquetry osprey.jpg
    100.9 KB · Views: 1,024
  • marquetry tiger.jpg
    marquetry tiger.jpg
    126.8 KB · Views: 1,024
Thanks very much for those suggestions. I am leaning towards 'de-tacked' masking tape or similar and placing the face veneer onto this so I can then invert the piece and glue to a substrate, then scrape/soak off the tape.

With regards Lightburn - yes it does have an offset, but that is not always helpful. For this image for example, I copied it from a google image search, then manually 'traced' it in Inkscape using Bezier curves (after a brief foray via CorelDraw I am not keen to repeat) and then copied the traced image into Lightburn. The issue with this is that where a line is both sides of a shape, separating out the pieces is not possible, so offsetting them is also not possible. Purchasing SVG images might improve things, but simply cutting and pasting an image into Lightburn is not effective - it puts two lines, one either side of a pasted image and even then only where it detects a threshold effect. Tracing manually seems to be common where you are not using an image specifically designed for lasers, and even then is somewhat variable.

What I have found, which may be useful for others, is that if you search for an image in stained glass e.g. stained glass hummingbird, this can give images which are pretty much perfect for using in terms of marquetry. I very much doubt I would be any better with a scalpel than with a laser (hands like shovels) and certainly slower!
 
Thanks Steve, that's helpful information. I haven't used Lightburn just came across some of the features whilst looking into how and what I would do if I took the plunge on a laser engraver, I'm still blowing hot and cold on that.
 
StevieB":19h51enu said:
With regards Lightburn - yes it does have an offset, but that is not always helpful. For this image for example, I copied it from a google image search, then manually 'traced' it in Inkscape using Bezier curves (after a brief foray via CorelDraw I am not keen to repeat) and then copied the traced image into Lightburn. The issue with this is that where a line is both sides of a shape, separating out the pieces is not possible, so offsetting them is also not possible.

In CorelDRAW at least (which I much prefer to Inkscape, but horses for courses and all that!) it would be possible to separate the pieces, although it would be quite tedious. I think the same method would work in Inkscape, but I can't be sure.

I also haven't thought about how you'd offset them after separating them.

To separate the pieces in CorelDRAW, I'd use the "node edit" (aka shape) tool to create nodes (if they didn't already exist) wherever there was a join between multiple lines (i.e. where three lines meet). I'd then split the lines at that node so you end up with a lot of separate lines. You could then duplicate (in place) the ones that are part of two objects. Finally, I'd combine the sections of each cut-out shape and use the node tool to rejoin the corners.

If that doesn't make sense, I can try to share some screenshots of the process. As I said, it's a bit tedious (especially for a complex picture), but it should work.
 
Thanks Al. I gave up on Corel Draw mainly because I only have version 9, bought many years ago. Most of the video's and articles online demonstrate much newer tools (such as smart fill) for separating and duplicating shapes - this looks a fantastic approach, but seems only to be in Corel 14 (or X4 if you prefer). I refuse to pay an astronomical monthly subscription for a piece of software and certainly cannot justify the several hundred pounds to buy a forever copy, so Inkscape it is as it is free! To be fair Inkscape does have smart fill as well, but for some reason I have not been able to fathom yet, it does not fill to the edges of a duplicated shape fully and certainly not by default. I am sure it must be possible but I have not had time to dig into all the settings properly yet.

For me, this is as much about fiddling with computers and software as it is about woodworking, I enjoy both but never seem to have the time required to do either competently - perhaps that tells me something and I should pick one or the other! :lol:
 
StevieB":3ij3nqxv said:
Thanks Al. I gave up on Corel Draw mainly because I only have version 9, bought many years ago.

That's fair enough. I have version 12, also bought years ago (although it was very old by the time I bought it). You can sometimes get old copies on ebay (and various other sites like blitzhandel) for a lot less than the cost of the new version. On my work PC I have CorelDRAW 2021, which is better than v12, but for most stuff I do, v12 is fine. I've wondered a few times about upgrading to a newer version (e.g. 2019, which is about £110 for the upgrade version), but I've never quite been able to justify it.

StevieB":3ij3nqxv said:
For me, this is as much about fiddling with computers and software as it is about woodworking, I enjoy both but never seem to have the time required to do either competently - perhaps that tells me something and I should pick one or the other! :lol:

Nah, if you enjoy it, it doesn't matter whether you consider yourself good at it or not.
 
Thanks Malc - I will add it to the list to take a look when I get a chance, but it is not the offset tool that is the problem (Lightburn also does this really well) it is getting the underlying shape you want to expand that is the issue!
 
StevieB":iuse6n1v said:
Thanks Malc - I will add it to the list to take a look when I get a chance, but it is not the offset tool that is the problem (Lightburn also does this really well) it is getting the underlying shape you want to expand that is the issue!


I'm not sure, Steve, but I'm sure I read in their blurb about being able to acknowledge the kerf of the laser, and I presume that means if it knows the kerf, then it can adjust the background shape to accommodate. (Which I think is like an automatic offset)

Might be worth having a look.

I know that for my cnc routing, especially of my MoP logos, that I have to manually offset the same image as the pocket, otherwise the MoP won't fit. It sounds like you want the converse of this.
 
on my list of things to do - and that looks stunning! (what woods / colours have you used?)

I did do some initial research and from memory it is more complex than just compensating for the kerf because that implies a consistent amount of material removed - whereas different words burn differently so the kerf will differ (oilier is a larger kerf I think...)

some info here...
https://forum.lightburnsoftware.com/t/a ... g/96637/10
 
akirk":169701dz said:
on my list of things to do - and that looks stunning! (what woods / colours have you used?)

Thanks - just a sample pack from here and a standard oak piece for the background:

https://www.thewoodveneerhub.co.uk/coll ... eneer-pack

You cannot specify the colours (which is why the hummingbird is a little dull) but this was just proof of principle. I have since bought an offcut pack from e-bay which is a mixture of woods (a lot of oak however!) just for a further play with contrasts and techniques. I am minded currently to then go for individual colours depending on the image I want to produce, but costs soon add up if you want several colours since they are approx £15 a go. I have not searched in detail however, so smaller defined coloured sheets may well be available.
 
ahh thank you - so stained tulipwood - I assume that i could possibly do that myself - something to play with... I did acquire quite a few veneers from a forum some years ago, so plenty to start with...
 
Interesting thread and read.
Not tried something like marquetry, not sure I have the patience.

I will however look at the software mentioned as I would like to dissect a picture for the scroll saw to try get more 3D looking cuts.
 
Back
Top