• Hi all and welcome to TheWoodHaven2 brought into the 21st Century, kicking and screaming! We all have Alasdair to thank for the vast bulk of the heavy lifting to get us here, no more so than me because he's taken away a huge burden of responsibility from my shoulders and brought us to this new shiny home, with all your previous content (hopefully) still intact! Please peruse and feed back. There is still plenty to do, like changing the colour scheme, adding the banner graphic, tweaking the odd setting here and there so I have added a new thread in the 'Technical Issues, Bugs and Feature Requests' forum for you to add any issues you find, any missing settings or just anything you'd like to see added/removed from the feature set that Xenforo offers. We will get to everything over the coming weeks so please be patient, but add anything at all to the thread I mention above and we promise to get to them over the next few days/weeks/months. In the meantime, please enjoy!

Mujingfang Mods WIP...Dun

Woodbloke

Sequoia
Joined
Jul 22, 2014
Messages
7,607
Reaction score
1,725
Location
Salisbury, UK
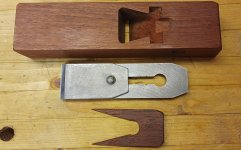
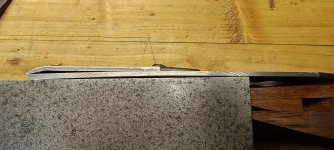
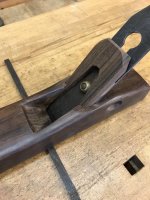
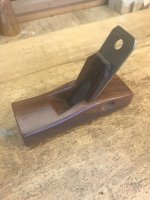
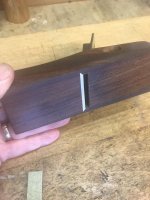
Some years ago, a 'certain firm' with a somewhat dubious reputation had in stock a range of Mujingfang Hong Kong style planes and unbeknown to me at the time, No.1 daughter bought me one as a Christmas pressie and a cracking little plane it is too:
IMG_7057.jpeg

IMG_7058.jpeg

Chinese rosewood body, single cutter, BD set at 60deg with brass wear strip on the mouth; I seem to recollect that one or two of use may have an identical one?

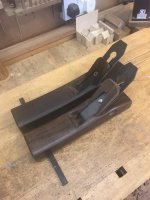
Over the last few months, I've been looking for them on line which resulted in numerous 'dry holes' and then a while back they turned up at Workshop Heaven, so being of unsound mind, I ordered a couple; ebony bodies this time:
IMG_7063.jpeg

...but if you look carefully, you'll observe that the longer try plane is subtly different; it's been modified but the jack in front of it hasn't, although both looked pretty identical (apart from the length) when they were unpacked.

The big issue is the cutter and cap iron (thanks Andy :eusa-whistle:):

IMG_7064.jpeg

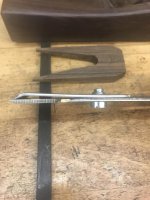
First and foremost, the cap iron don't fit...that's as far as it goes (I have pointed this out to Matt at WH)
IMG_7068.jpeg

Second and foremost, it's the old fashioned style which I thought had been relegated to the long grass decades ago; it's this type of 'old skool' cap iron which also bends the blade that today is deemed as rather unacceptable.

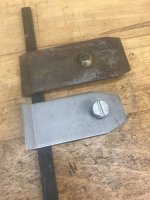
Thanks to the usual good offices of Andy T of this parish, who also happens to be a scholar and gentleman of the first order, I was supplied free and gratis with a:
IMG_7069.jpeg

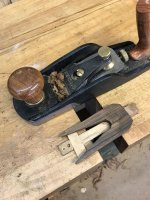
...much thicker 50mm wide replacement cap iron from an old woodie, which I intend to modify into a modern 'flat' style to fit the existing blade in the Mujingfang jack. Having done exactly the same job on the try plane (using one of my own cap irons from a much wider try plane) I can attest:

IMG_7059.jpeg

...that the modification does work superbly:
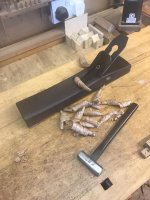
IMG_7062.jpeg

My own view is that if you're interested in this sort of plane, at the price these are an absolute snip but they do need some fettling and faffing to get the best out of them. More to follow, as and when and many thanks again Andy for the chipbreaker....oops, cap iron :lol: - Rob
 
I can guess the firm you bought the original one from..... I did the same - it must have been the thick end of 15 or 20 years ago.
The Mujingfang 'Hong-Kong' style is the same Rosewood, with the same brass-lipped mouth, set at bevel-down 60 degrees (half-pitch). That's why they were of interest - I was working some very obstinate Walnut at the time.

I bought one, realised how good it was and quickly bought the other two sizes.
I noticed that the body had a coloured 'finish' of sorts that came off on the hands but a wash with spirits followed by some wax cured that. The wedges on mine were all numbered as were the bodies.

Fettling? The original Hong-Kongs needed nothing more complex than polishing the back of the iron and honing a cutting edge, though I have reverted to a Japanese habit of slightly relieving the sole with a scraper from the toe to the front of the mouth and from the rear of the mouth to the heel, so that the whole sole sits and works on just three points of contact at the toe, mouth and the heel.

Even though the iron is not as hard-tempered as we now expect in blades, they are all capable of a very fine setting, will cut a very fine, wide and even shaving and I use them for dealing with particularly curly grain. It just means that I need a bit more sharpening..... but they are reserved for the final cuts.

In his book on Welsh Chairs, John Brown mused on what tool he'd grab if the workshop were on fire. In his case it boiled down to his card-scrapers, in mine I'd grab the Mujingfangs, because they don't seem to make 'em any more.

You are right, brilliant planes.

The newer versions appear from your pics to be set at about 50/55 degrees?
 
Argus":3dnpiq2m said:
You are right, brilliant planes.

The newer versions appear from your pics to be set at about 50/55 degrees?
Agreed, they're pretty good. Having just nipped out the 'shop and measured the try plane with a protractor, the blade is set at a bog standard 45deg. The plane body itself doesn't need any fettling apart from adjusting the wedge later on to account for the different geometry of the blade/cap iron thickness. It's the blade and existing cap iron that need some work insofar as the cap iron is replaced - Rob
 
Looking good Rob. Since we spoke, I've found the purchase record of my similar one from Rutlands. The iron was indeed listed as being made from HSS, which is unusual, but looking at the manufacturer's website, is an option across much of their range.

I have a Hong Kong style and a Taiwanese style, and both are useful from time to time, especially where the extra long toe helps with registration on the work, eg in chamfering. As you say, they are very good value for money.

I must check the cap iron on mine!

Information on the whole range (not all of it easily available) here:

http://www.mujingfang.com/t/eng/p2.asp? ... ols+Series
 
I suppose that the main reason behind my purchase of the Hong-Kong version was that the blade is mounted at 60 degrees......half pitch.

Very rare in this day and age, especially as I needed something to deal with curly grain, which these planes handle with no problems at all.

I must confess that I was surprised at the time at the quality of the plane.
I don't think that the three planes in the range totaled more than 60 quid.

I think that I saw an Aussie maker who did a copy of these H-K planes with the same angle presentation at the time.......can't remember the name.
 
Does it come with free postage for £339 :eusa-think:

Back in the day Rutlands used to sell some decent kit, I remember buying a few Veritas planes from them when they did their 20% off deals
 
Brilliant post. Very interesting.

On one of my Japan trips I bought a few J wooden planes despite having never used them except on a course there. They remain awaiting proper use in anger :oops:

You have inspired me to have another look. My workshop is knee deep in stuff and I really must get my act together. Having a lazy patch.
 
AJB Temple":32mji6f2 said:
On one of my Japan trips I bought a few J wooden planes despite having never used them except on a course there.
As you no doubt know Adrian, Japanese planes are an entirely different kettle of worms compared to the HK variety discussed here. I've used planes belonging to Mike Huntley (ex editor of F&C) who has some extensive knowledge of Japanese planes, but and it's a big but, they're an acquired taste.

What's particularly difficult for a Westerner to understand is that on some Japanese planes, sharpening the iron correctly and then fitting the (very expensive) iron to the dai is unquestionably not for the faint hearted as Mike was at pains to point out to me on several occasions. They look easy, but from my experience, they ain't - Rob
 
Yes Rob. I know. Expect you know I know. I was shown (and video'd being shown) how to sharpen and use. I am very used to Japanese sharpening methods but the "pull" approach with planes is very counter intuitive for me, except when tapering things like oak pegs. To be truthful, we bought a number of tools to fill a crate that I had arranged for shipping back when I was on a knife expedition and I had half an eye on selling the tools (not so much knives and stones) when I got back. Prices for "name" makers have near tripled in the meantime and selling a couple of big Shigefusas on a US forum paid for the crate and shipping and all of the tools. Insane. The tools were intended to keep for when I eventually retire and start learning to make things properly. Some were for my brother who is sadly unable to use them now.
 
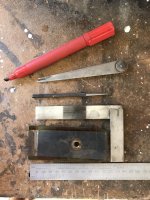
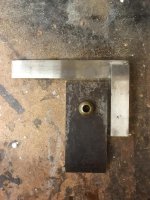
The next step is to mark out and hacksaw off the waste, using a red felt tip, jenny odd-leg calipers with a scriber and square to mark out the end:

IMG_7071.jpeg

IMG_7072.jpeg

IMG_7073.jpeg

IMG_7074.jpeg

These old cap irons are only made from mild steel so they're dead easy to cut and file to the line:

IMG_7075.jpeg

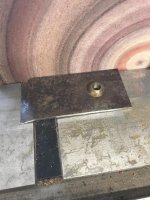
Once I'd filed almost to the line, I then used the disc sander to bring both long sides straight, smooth and equidistant from the tapped centre hole:

IMG_7076.jpeg

IMG_7077.jpeg

The next job was to disc sand the end which had to be at 90deg to the sides; the reason will become apparent later on:

IMG_7079.jpeg

IMG_7080.jpeg

IMG_7081.jpeg

With all three sides sorted out, the sharp corners were rounded off and edges smoothed with some 240g wet n'dry paper. More exciting stuff to follow after coffee (and biscuits) - Rob
 
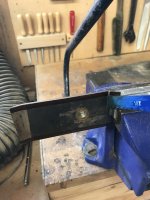
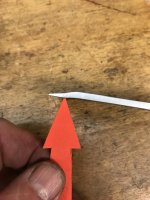
The next step was to bend the cap iron almost straight, taking out most of the original curve. I marked out a line 10mm from the end:

IMG_7084.jpeg

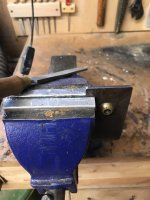
...and then placed the cap iron in the vice, so that by pushing steadily and carefully :eusa-whistle: away from myself, the bend was almost removed:

IMG_7085.jpeg

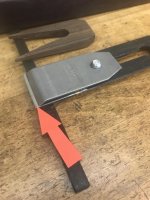
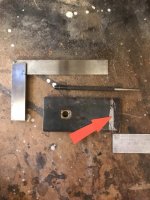
The problem now is that it leaves a 'bump' (arrowed) which needs to be removed:

IMG_7086.jpeg

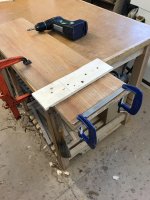
...and in doing so, the 'flat' created on the underside will hopefully make a very acute angle with the blade so the cap iron lies virtually parallel to the blade. To remove said 'bump' I built a simple, but extremely cunning little jig, the only caveat being that the base board had to be dead flat:

IMG_7099.jpeg

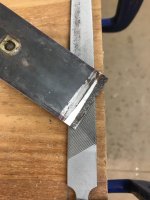
The square end of the cap iron butts against the pine cross piece; the iron is then simply moved laterally along the file to remove the 'bump'. A couple of passes showed that the iron was slightly curved:

IMG_7089.jpeg

IMG_7090.jpeg

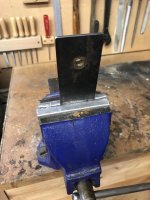
...so a little careful tweaking in the vice was enough to straighten it out. It took around 15 mins to file away the 'bump' to leave a flat surface:

IMG_7091.jpeg

IMG_7092.jpeg

IMG_7093.jpeg

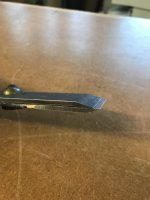
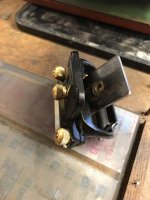
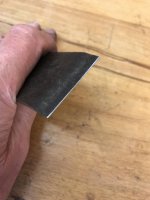
The cap iron is now almost finished; all that remains is to sharpen the reverse side at 45deg (not critical) in a honing guide of some sort. This produces a very sharp :o edge which needs to be slightly relieved with fine diamond stone:
IMG_7095.jpeg

IMG_7100.jpeg

I'm currently re-grinding the plane blade to 25deg as they come supplied with a single bevel which appears to be around 35deg - Rob
 
Interesting stuff and I'm looking forward to seeing the results.

How well did the plane perform with the supplied cap iron ?
 
AndyT":czwbbyri said:
How well did the plane perform with the supplied cap iron ?
Didn't even try it Andy as with the original cap iron, the blade was well and truly banana shaped. This is the first fitting:

IMG_7102.jpeg

...of the new cap iron you sent me and it appears to be 'light proof' at the edge. The slot in the iron needs to be filed out by two or three mm to bring the cap iron a bit closer - Rob
 
I said I'd look at mine to compare. Probably too late to be any use and although it's a similar plane it's not identical anyway. Mine has a 50mm HSS iron and is (I think) some sort of rosewood.

General view:

IMG_20220913_161048460.jpg

Iron from the other side, showing that there is still plenty of slot left to move the cap iron forward:

IMG_20220913_161118665.jpg

Iron and cap iron assembled and screwed up tight. Straight edge resting alongside to show the resultant shape.

IMG_20220913_161441731.jpg

It works really well.
 
Interesting Andy; your plane looks a bit more refined that these which is probably why they needed some work doing on them.

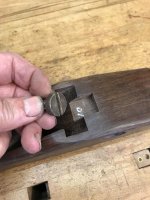
To finish this saga off, the plane body and wedge needed a tiny bit of adjustment; firstly the recess to contain the cap iron bolt needed to be enlarged:

IMG_7105.jpeg

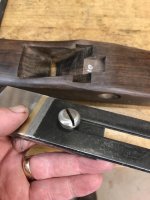
...but as the bolt was well mangled, I poshed it up a bit by spinning on the disc sander:

IMG_7106.jpeg

IMG_7107.jpeg

With the rounded bevel (do we dare mention such things? :shock: ) on the bolt, it fitted comfortably into the recess, so the cutter now slotted snugly against the bed:

IMG_7108.jpeg

The last thing to do was to adjust the wedge to fit the new blade/cap iron combo:

IMG_7109.jpeg

...using planes, scrapers and sandpaper. I don't think I achieved a Phillyplanes fit but it's close enough and holds the cutter righty-tighty with a couple of smart taps from a maul. I then gave the wedge a few coats of White Polish and the whole plane received a good slathering of CHT''s finest organic Swedish wax.

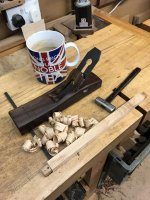
But was all the effort worth it and does it take shavings?

IMG_7111.jpeg

An interesting project and both planes might possibly get used one day! :lol: - Rob
 
Back
Top