derekcohen
New Shoots
A while back I decided to dip my toes in the MFT water, and built a table and rail hinge. The hinge was made from cutting boards, which likely sounds suspect, but worked very well ...

However, my OCD got the better of me, and I decided to build one in aluminium, inspired by both Benchdogs and Dashboard. I have dimensions for anyone who wants to copy it.
I had also built a fence from 8020, along with shopmade clamps ..

This turned out to be too high for the saw's motor to ride over. Back to the drawing board on this one.
The hinge rail first. It needs to be mentioned that everything was built over 2 weekends. The aluminium was purchased on eBay as 2 x 100 x 300mm (by 6mm thick) sheets, and 2 x 100 x 300mm (by 3mm thick) sheets. These were cut to side with a bandsaw (bimetal blade) - woodworking tools are fine with aluminium. Slotting was done with a router and straight bit. Holes were drilled on a drill press, and threaded tapped by hand. Just work carefully, and you will be rewarded with a great system.
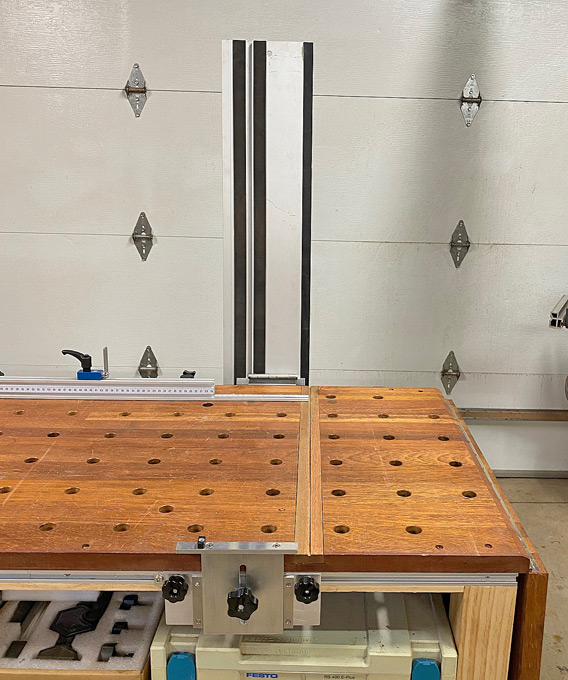
Here is the bench ...
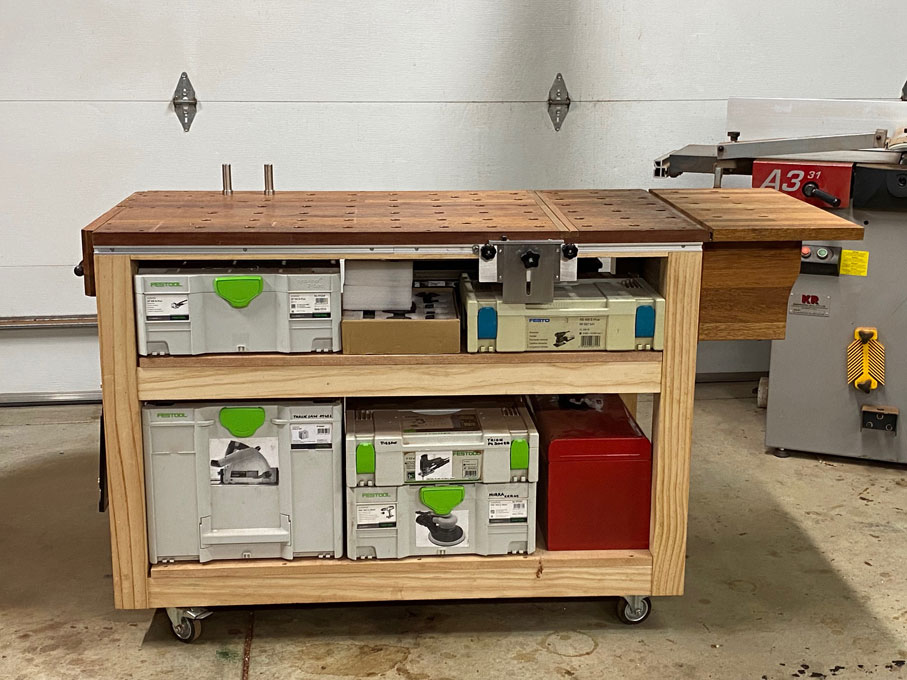
The rest for the rail (I am not sure if there is another name) ...
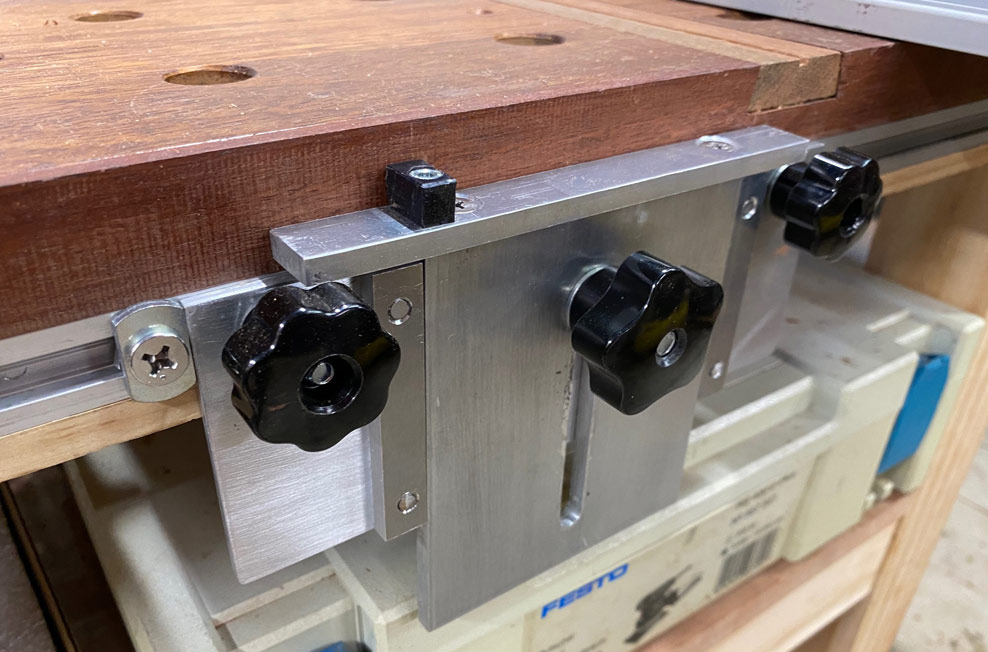
The rail has a height cutting capacity of a little over 50mm. The saw used is a Festool AT65E. The pin is UHMW, and slightly tapered, which allows the rail groove to fit without slop ...
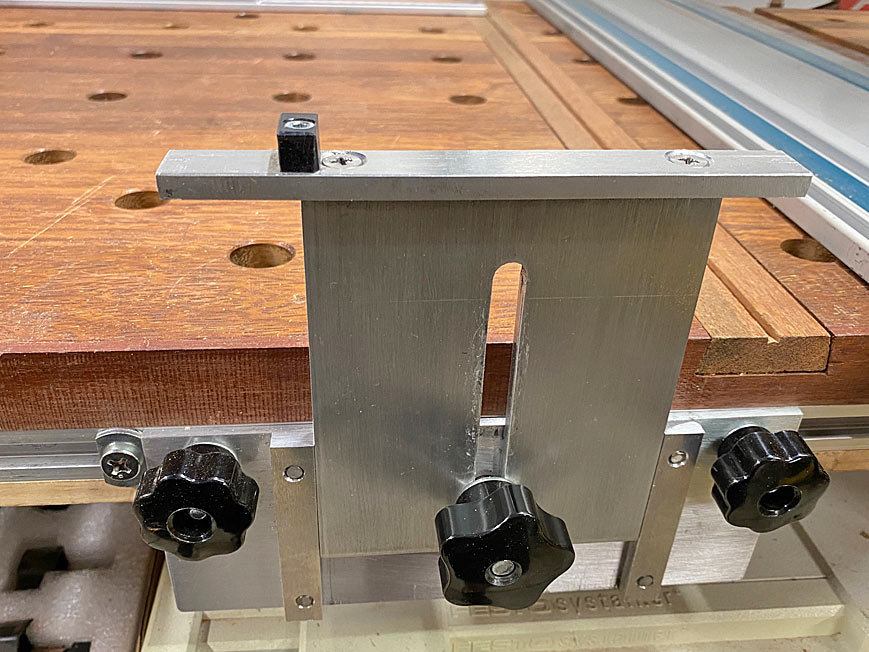
The dimensions here: 115mm high x 100mm wide. The rest at the top is 145mm wide. All built from 6mm thick plate. The 90mm long slot is sized for an 8mm bolt.
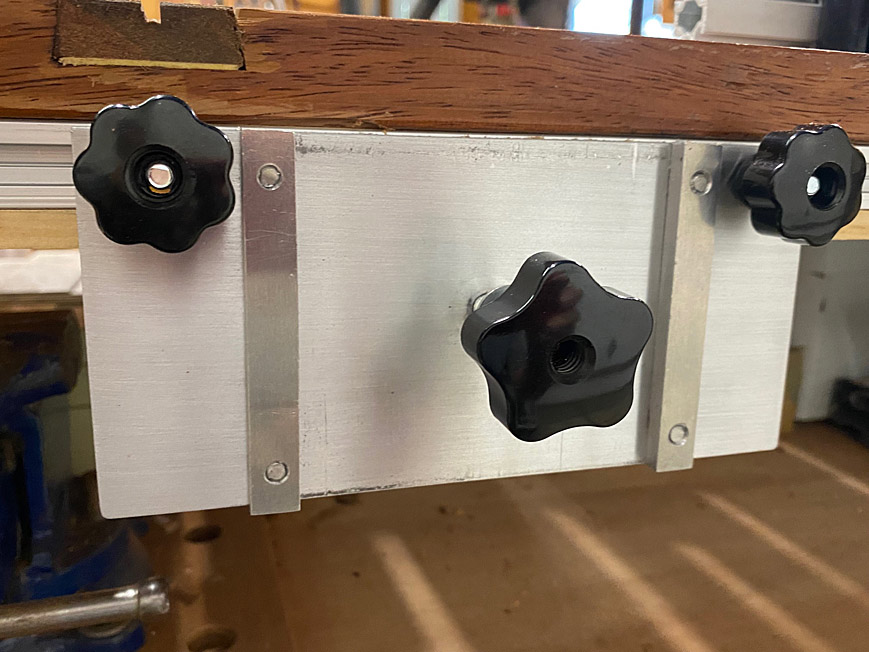
The base is made from 3mm plate and is 195mm wide and 75mm high. The two guides are 10mm wide and 35mm in from each side ...
The hinge
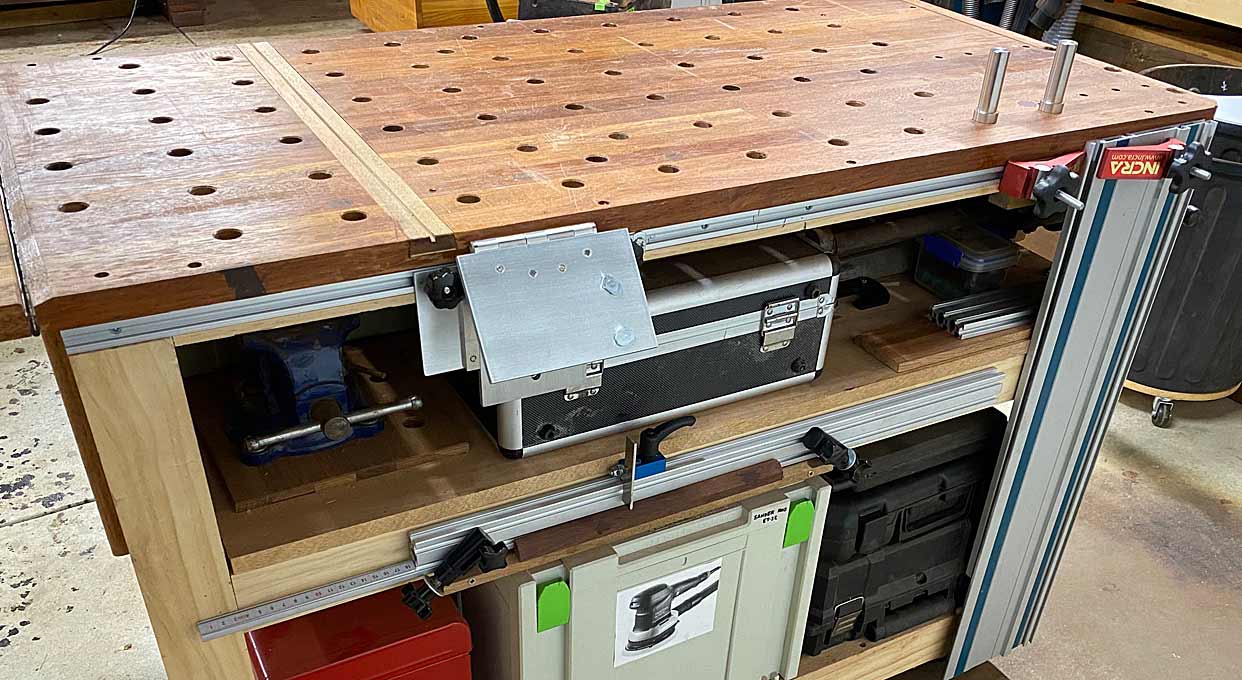
Close up ...
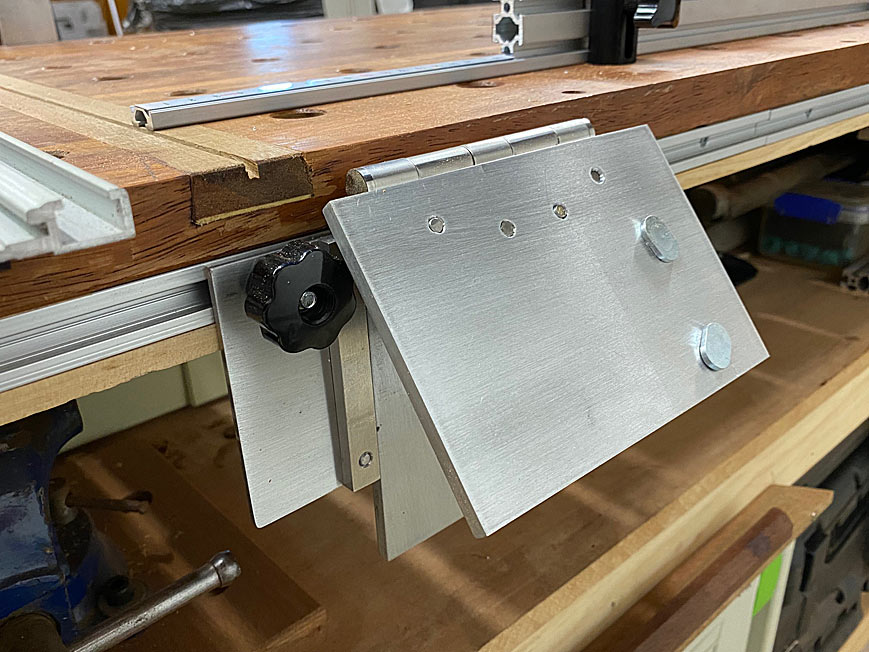
From this angle you can see the stop against which the mechanism can be returned, if moved ...
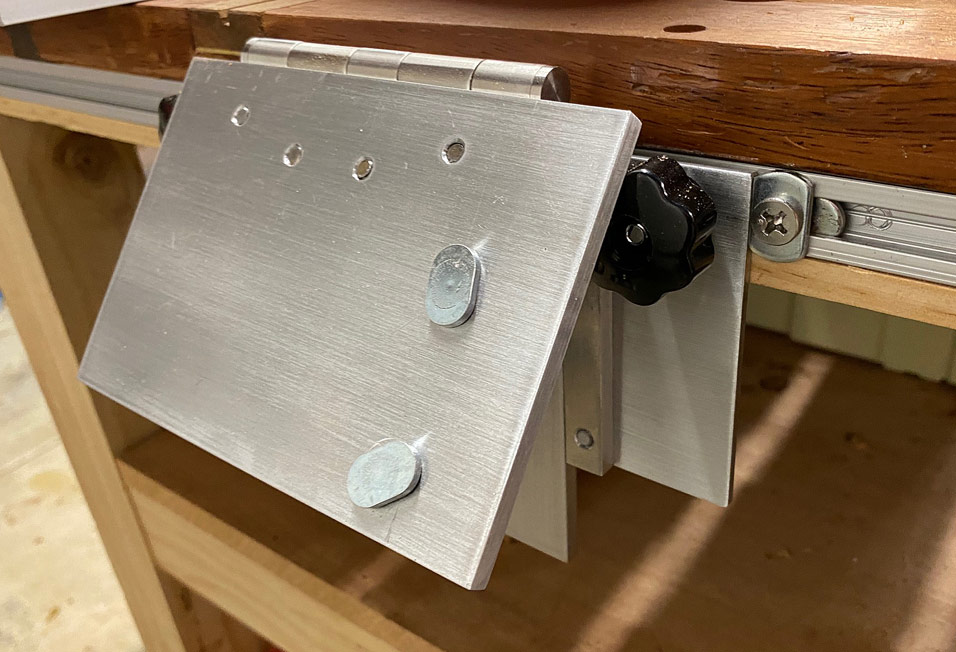
Rather than a bar to clamp the rail from this end, I used the Benchdogs system. This is secured with stainless steel wheels on the underside. Why not use a bar? I found it more accurate to drill two holes, rather than two holes AND then drill the bar accurately ...
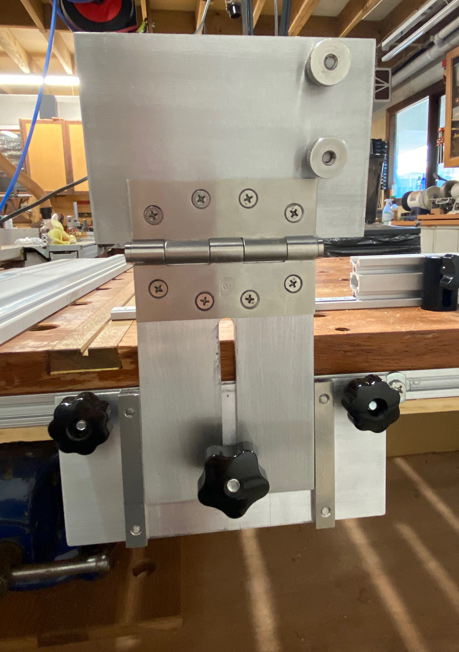
Here is a detailed picture ...
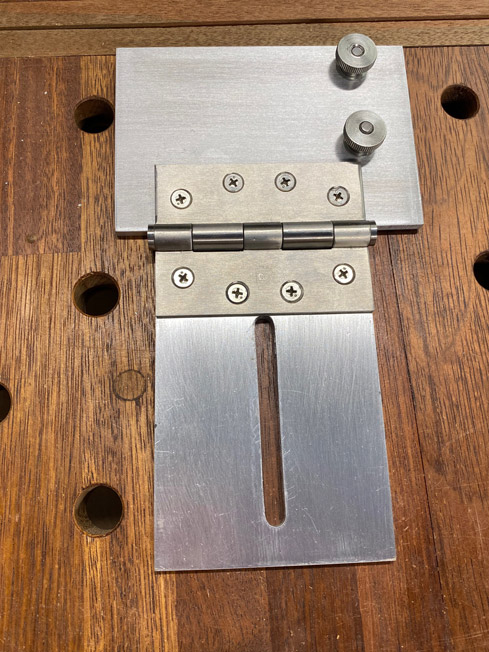
The top plate is 150mm wide x 100mm deep. The 100 x 75mm hinge is stainless steel and has nil movement. The riser is 100mm wide x 140mm high. The slot is 90mm long. All is built from 6mm plate and parts are joined with tapped holes and 5mm machine screws.
All the parts were sanded with a block with 180 grit to create a brushed appearance, and then finished with clear lacquer spray.
The Fence
The fence is made from 6020 extrusion, in the same design as the Benchdogs fence. The cut out was completed on the bandsaw ...
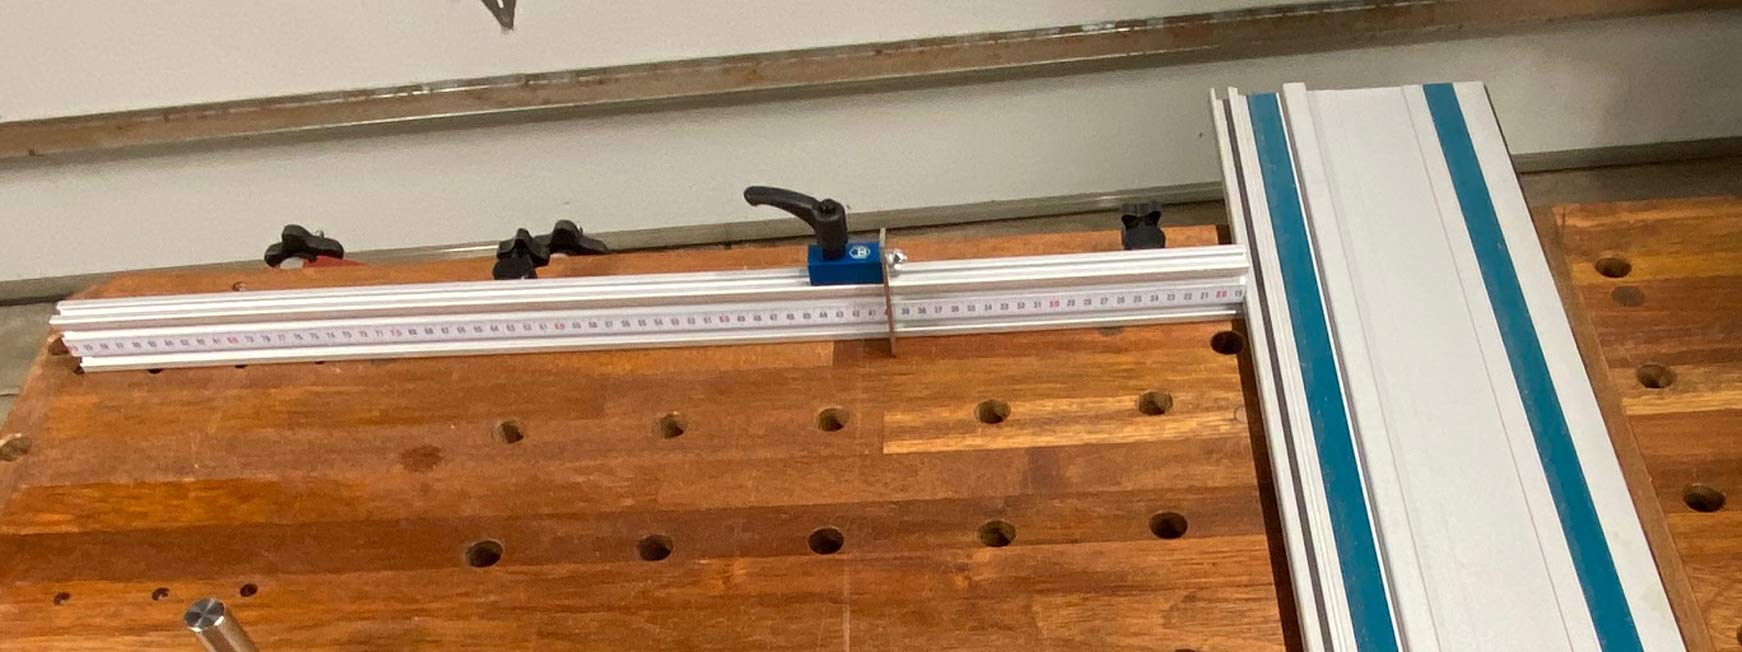
I ordered the Benchdogs Flagstop (flip stop), which can be seen here ...
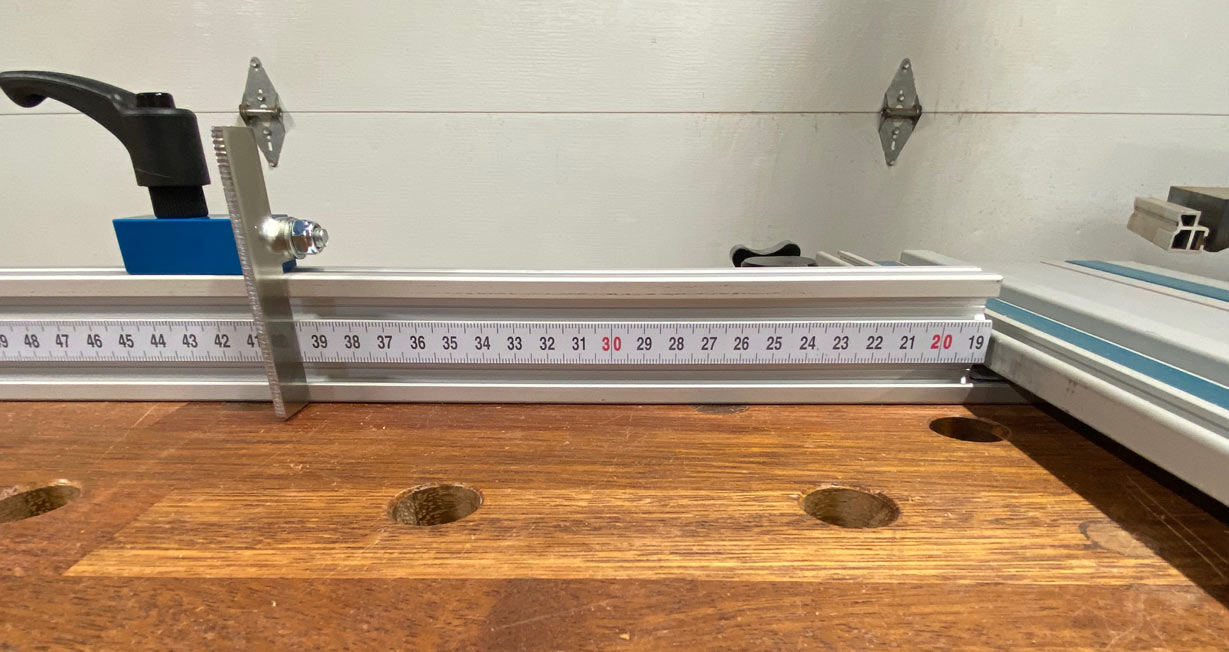
The fence has a scale along its 900mm length ...
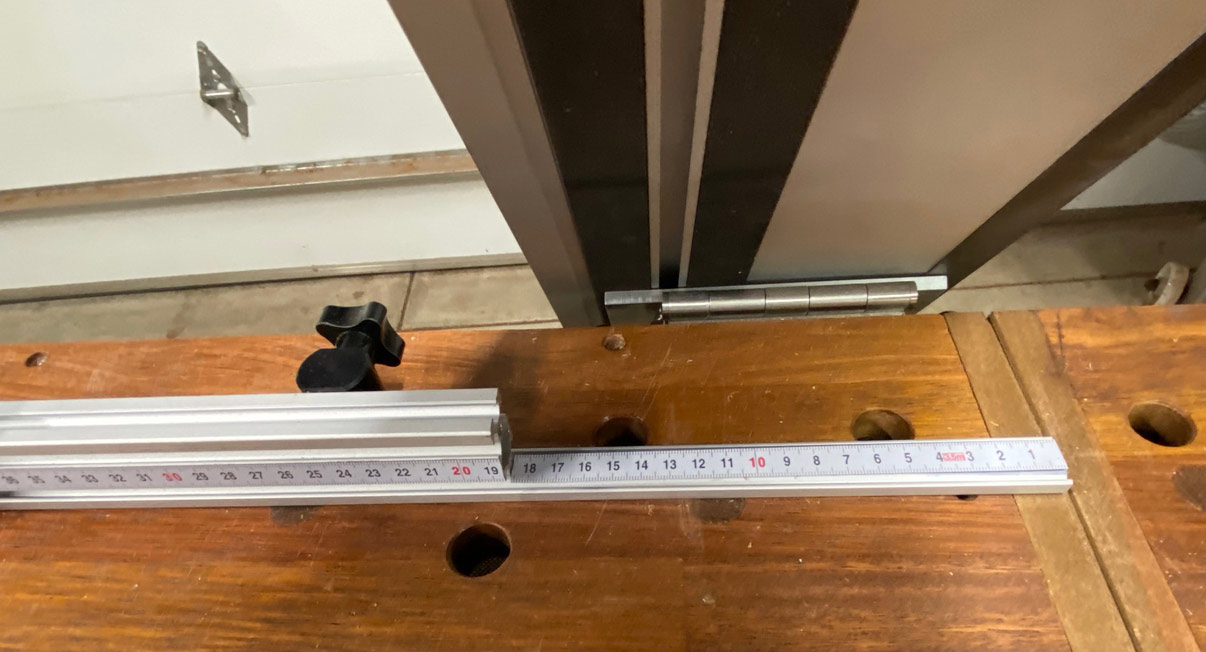
To add this to the aluminium extrusion, the centre section was routed to a depth of 1mm with a width of 1/2", and a Kreg tape attached ...
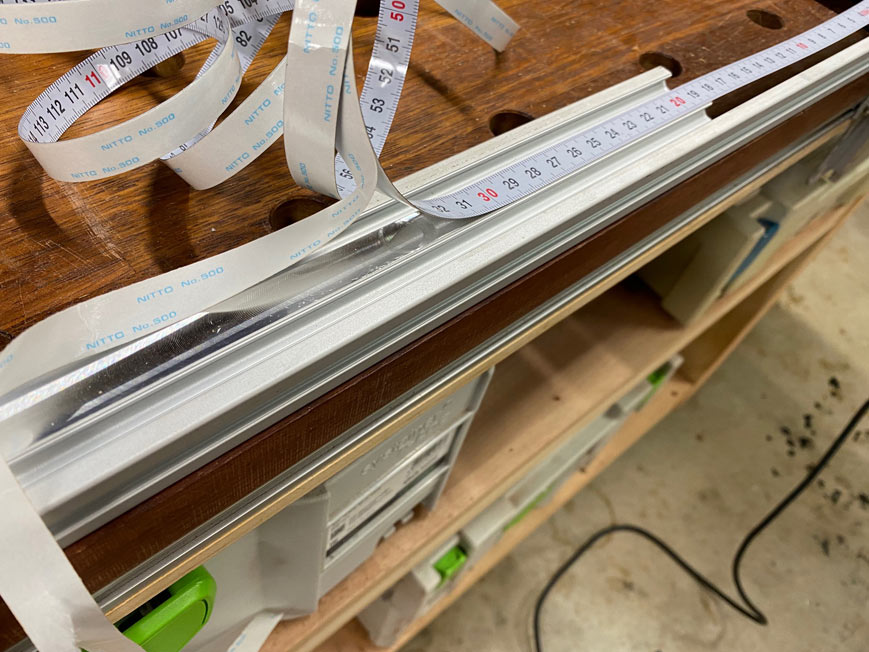
The rear of the fence reveal the Benchdogs "Fence Dogs", which replaced the shopmade versions previously used ...
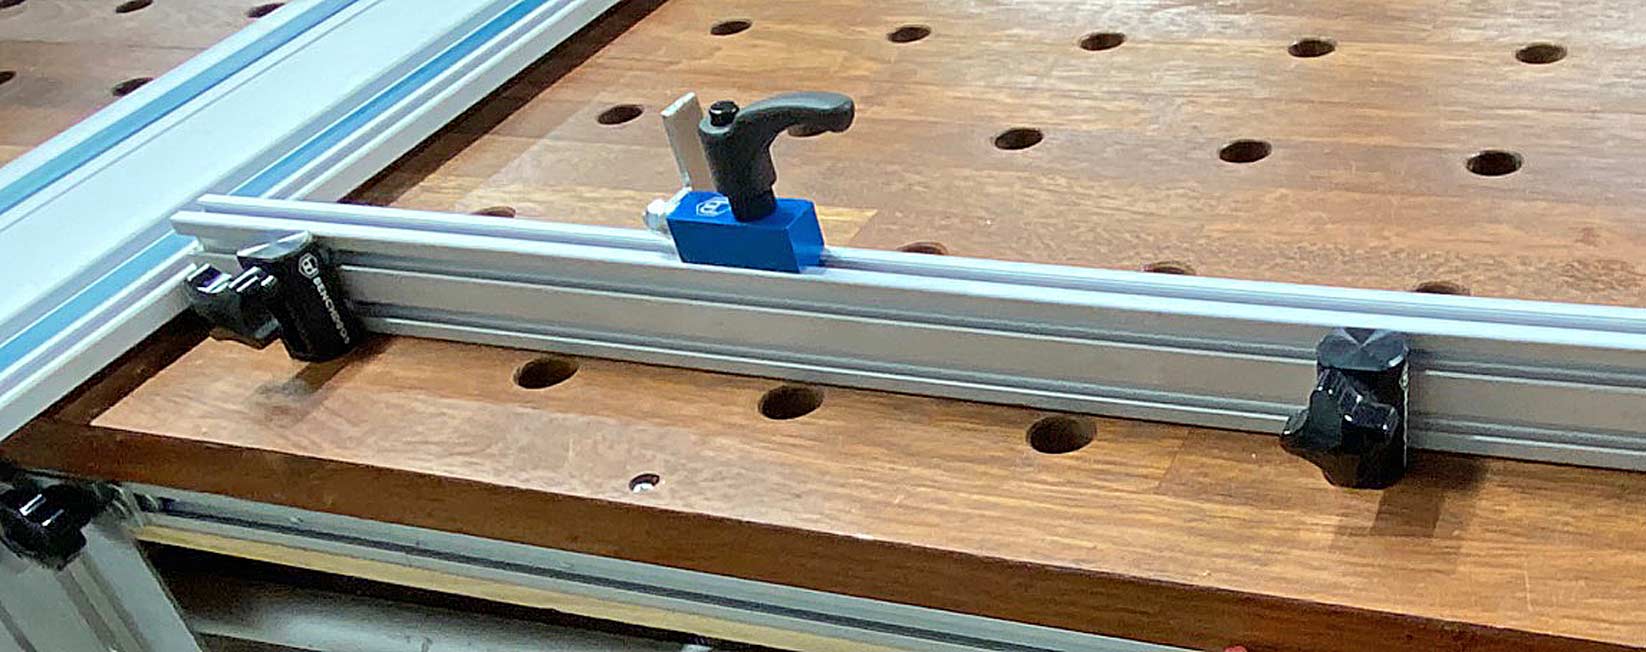
So all is now complete, and I can get on with the next furniture build.
Regards from Perth
Derek
However, my OCD got the better of me, and I decided to build one in aluminium, inspired by both Benchdogs and Dashboard. I have dimensions for anyone who wants to copy it.
I had also built a fence from 8020, along with shopmade clamps ..
This turned out to be too high for the saw's motor to ride over. Back to the drawing board on this one.
The hinge rail first. It needs to be mentioned that everything was built over 2 weekends. The aluminium was purchased on eBay as 2 x 100 x 300mm (by 6mm thick) sheets, and 2 x 100 x 300mm (by 3mm thick) sheets. These were cut to side with a bandsaw (bimetal blade) - woodworking tools are fine with aluminium. Slotting was done with a router and straight bit. Holes were drilled on a drill press, and threaded tapped by hand. Just work carefully, and you will be rewarded with a great system.
Here is the bench ...
The rest for the rail (I am not sure if there is another name) ...
The rail has a height cutting capacity of a little over 50mm. The saw used is a Festool AT65E. The pin is UHMW, and slightly tapered, which allows the rail groove to fit without slop ...
The dimensions here: 115mm high x 100mm wide. The rest at the top is 145mm wide. All built from 6mm thick plate. The 90mm long slot is sized for an 8mm bolt.
The base is made from 3mm plate and is 195mm wide and 75mm high. The two guides are 10mm wide and 35mm in from each side ...
The hinge
Close up ...
From this angle you can see the stop against which the mechanism can be returned, if moved ...
Rather than a bar to clamp the rail from this end, I used the Benchdogs system. This is secured with stainless steel wheels on the underside. Why not use a bar? I found it more accurate to drill two holes, rather than two holes AND then drill the bar accurately ...
Here is a detailed picture ...
The top plate is 150mm wide x 100mm deep. The 100 x 75mm hinge is stainless steel and has nil movement. The riser is 100mm wide x 140mm high. The slot is 90mm long. All is built from 6mm plate and parts are joined with tapped holes and 5mm machine screws.
All the parts were sanded with a block with 180 grit to create a brushed appearance, and then finished with clear lacquer spray.
The Fence
The fence is made from 6020 extrusion, in the same design as the Benchdogs fence. The cut out was completed on the bandsaw ...
I ordered the Benchdogs Flagstop (flip stop), which can be seen here ...
The fence has a scale along its 900mm length ...
To add this to the aluminium extrusion, the centre section was routed to a depth of 1mm with a width of 1/2", and a Kreg tape attached ...
The rear of the fence reveal the Benchdogs "Fence Dogs", which replaced the shopmade versions previously used ...
So all is now complete, and I can get on with the next furniture build.
Regards from Perth
Derek


 Nothing is sacred. My wife is constantly rolling her eyes