• Hi all and welcome to TheWoodHaven2 brought into the 21st Century, kicking and screaming! We all have Alasdair to thank for the vast bulk of the heavy lifting to get us here, no more so than me because he's taken away a huge burden of responsibility from my shoulders and brought us to this new shiny home, with all your previous content (hopefully) still intact! Please peruse and feed back. There is still plenty to do, like changing the colour scheme, adding the banner graphic, tweaking the odd setting here and there so I have added a new thread in the 'Technical Issues, Bugs and Feature Requests' forum for you to add any issues you find, any missing settings or just anything you'd like to see added/removed from the feature set that Xenforo offers. We will get to everything over the coming weeks so please be patient, but add anything at all to the thread I mention above and we promise to get to them over the next few days/weeks/months. In the meantime, please enjoy!

Saw blades cabinet? Completed

Phil

Old Oak
Joined
Jul 23, 2014
Messages
4,182
Reaction score
400
Location
Southern Africa 0054
Has anyone made a "cabinet" or "something" to store their saw blades?
If so, are there plans or pictures?

I need to keep mine (cross+rip * 2) a lot better and safer than currently.

It is for 9" blades (TS) 10" blades (RAS) and then the smaller circular saw.
It needs to be sized for 10"

Thanks
 
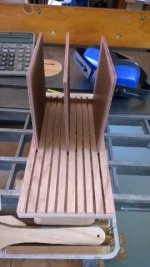
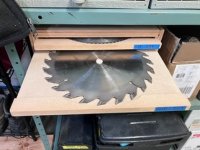
I cut kerfs in a pine board using my 12" sliding compound mitre saw. Set the depth stop and locked the blade from moving once positioned.
 
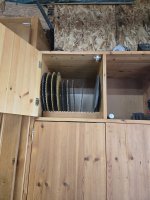
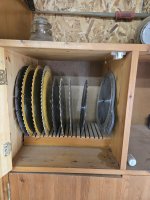
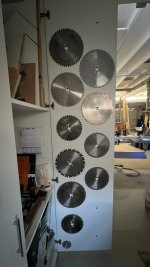
My are on the back of a cabinet door
 

Attachments

  • IMG_9464.jpeg
    IMG_9464.jpeg
    113.8 KB · Views: 5
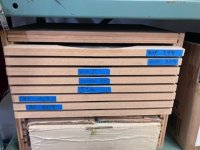
My original plan was as per Dukes but I did not want them hitting each other so I got some 3mm plywood and fitted that in the kerfs and made a matching top as per the bottom to keep it all square. OTT Yes. But no risk of damage to some very expensive blades.
 
Not sure what I’ve been missing out on all these years, only two blades! One general purpose on the saw and one being sharpened or waiting to be fitted.
But I suppose I never had/didn’t need a chop type saw or a circular saw. And the GP blades gave a very good finish on crosscutting and ripped anything I asked of it.
 
Agree Ian, most of my blades are awaiting sharpening other than the diamond tip stone saw blade. I will send them out shortly to be sharpened.
 
Thanks guys for the input and pics.

I did look at the 'Duke' one on WWW. but not that keen on the exposed blades (can already see the cuts and blood on my hands)


Gary, I also looked at that one and like the idea.
Would need to see where I could store it (space restriction)

I keep mine flat in a drawer in their cardboard wrappers.

Malc, that is how they are stored now, but upright on a shelf.
I thought it would make sense to store with more protection.
Changing blades is not a regular occurrence.
 
I have a few blades but just store them flat in a cupboard. I'm not constantly changing them so a few minutes to get the one I need isn't a problem. They're kept in original packing where possible but for those loose blades I just have a bit of cardboard separating them.
Bandsaw blade storage is similar and in the same cupboard.

Storing on edge would be better but I confess that making bespoke storage is wa...ay down on my priority list. :)
 
Storing on edge would be better but I confess that making bespoke storage is wa...ay down on my priority list. :)

I think storing on edge might take up less space. ?

This is on my TDL and also not a priority.
I now make out a "Job Card" with what needs to be done, attach pics where I can, draw up timber BOM etc.
This then gets attached to the TDL.

The table saw is heading for a Major Maintenance soon as I need to replace the one pulley. First need to find an engineering firm locally that can turn one for me.
 
I have sketched out (manual paper and pencil) what I think will work.
Upright, take 8 blades and high enough to fit on shelf.
Will procrastinate (chew the cud) for a week or two.
 
The design team (me) sketched the box using all the valuable input. Initial thoughts.
The sketch went to the production team (other me) in the workshop.
The comment “he must be smoking grass!”

First see what scrap is available, certainly not sawing up good board.
Found a piece of 18mm ply enough for the floor, roof and back. Piece of 12mm ply and piece of 16mm MDF for the sides.

The final design was to accommodate 10 blades widest being 250mm upright.
There would be dividers between each blade. Gap for blade 10mm which would be wide enough for the packaging.

Stock all trimmed on the table saw.

The grooves in the floor for the dividers were also cut on the table saw, very carefully. Fingers very close to blade.

A dry fit before assembly
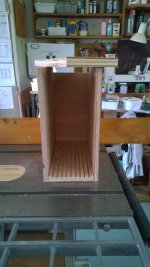
Dry Fit.jpg


Dividers being glued in

Assembly.jpg

The rest of the assembly using glue and panel pins.

Completed with 9” blades in their packaging. The 10” (250mm) just slides in (whew!).
It is a blade made in the UK and actually measures 250mm!
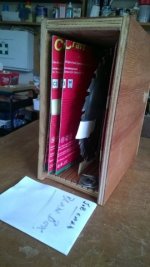
Completed.jpg

However the other 10” blade is 253mm, just a fraction too high to fit in! #$%^@(&^
The offending blade is a crosscut 62T American Vermont blade marked 10” 250mm.
The USA does not understand what metrication is!
I had marked the blade when changing blades and it is dated 2000, so if the teeth look ok after cleaning I might just screw it in the holder to the outside of the box.
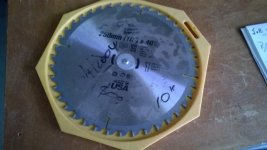
Offending USA Blade.jpg


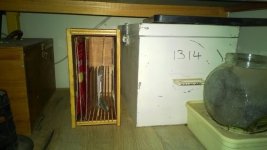
While making space on a shelf I pulled out a very well made box (not me) which has all the craving carving equipment. The box was a present with some very good expensive BBQ tools which son now uses.
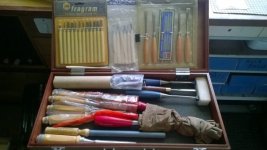
CarvingEquipment.jpg

Looks safe and protected, so no action required.

The carving equipment was given to me by the widow of an old chap I used to take with me to the woodwork shows.
He gave me all his woodworking magazines and books not long before he passed on.
 
Last edited:
Reply to Scott

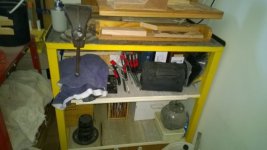
This the metal work table in the garage.

I worked at a food factory in the late 80’s and every Friday we could scratch in the metal waste bin, pick what we wanted, had it weighed and then paid for it.
The biggest problem was fitting it into the boot of the car or dragging a trailer to work. We lived 90km from the factory.
The stand of my big Hegner was from that bin as well as some steps which were used at the old house in the garage.

Shelf.jpg

Left the box with the glue gun.

Blade box.

Metal trunk was used to store “items” at the bank.

Rawl bolt in container with steel wool in bottle on top.

Metal Table.jpg

Left sanders covered
Some clamps
Bosch battery drill
Metal box with taps and dies
Carving box
Small Skil finishing sander

The top has small swivel metal vice and the drill press with its table.

There is a drawer on wheels at the bottom which has all the heavy-duty clamps.
 
Back
Top