Malc2098
Sequoia
I've been away for a while, a week and a bit, working with a professional ukulele maker who offers 1 to 1 courses. This was my opportunity to learn how an experienced luthier makes his instruments.
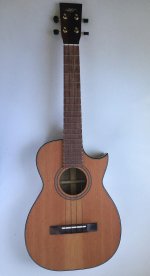
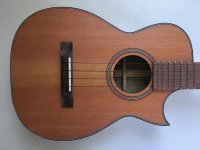
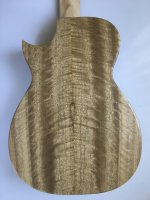
I chose Granadillo for the top and Flamed Myrtle for the sides and back. Both are from Oregon.

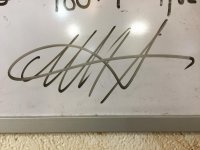
On the very first day, he asked me to sign my name on the whiteboard, photograph it and send it to him via email. He then imported the image into his Cad/Cam software for it eventually to become my logo in Mother of Pearl!
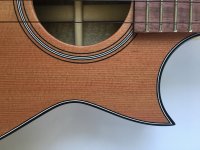
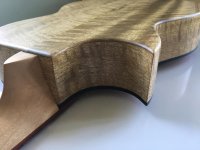
I was so engaged in the next part that I wasn't able to take any photos. The sides were laminated from two 1.05mm thick pieces of the Myrtle. Both leaves were hand bent around a bending iron to fit the form, without water. At that thickness, water isn't needed. Both leaves are glued with Titebond Original and clamped between two side shaped moulds. I also chose this model to be a cutaway design. So, the cutaway was also laminated.
The leaf joints were cut and the mitre joint for the cutaway carefully planed and all three were dry fitted to the outside mould. The tail and neck blocks and the cutaway mitre fillet were shaped on the CNC machine and the combination were glued in place.

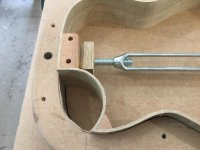

The back had it's centre joint reinforcement and braces glued in place.
 (Ha! The first one not to be in original orientation!)
The book matched top was glued. The CNC was then employed again to rout the rosette grooves, the soundhole and the pre-sized outline of the top.
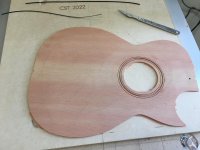
The top's sound hole reinforcement (CNC shaped), bridge reinforcement and braces were fitted.
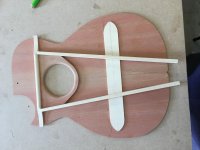
The rosette purfling was glued in.
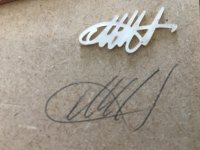
The CNC then cut the MoP logo of my signature, shown here with a pencilled version.
The sides were fitted to the back with kerfed linings, followed in the same way by the top.
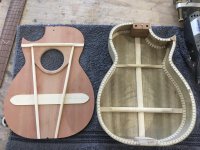
The top was routed to shape and the tortoiseshell binding and plastic purfling was fitted.
In the meantime, while the top was being glued, work had begun on the neck. It had been rough cut to shape. The headstock angle sanded flat both sides and the Indonesian Rosewood veneer fitted to the headstock. The carbon fibre trussed groove was routed and the trussed epoxied in the slot.
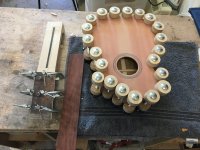
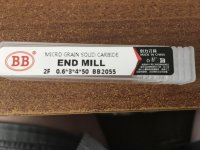
Work now started on the fretboard. traditionally the fret slots have been cut with a fine saw. These days, the CNC router with a 0.6mm diameter end mill cutter can cut the slots much more consistently and accurately.
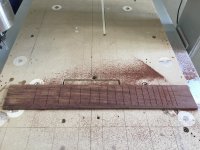
The CNC was then used with the same 0.6mm end mill to rout out the socket for the signature logo.
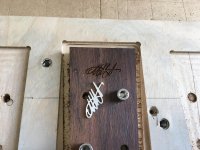
The MoP did not fit straightaway, but the CNC is then programmed to offset the socket by 0.005mm. It still did not fit, but after the second 0.005mm offset, it pushed in like a dream!

Frets were fitted.
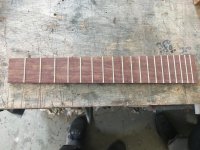
The neck carving began.
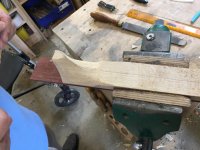
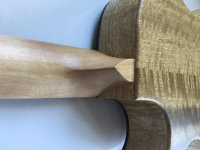
This was the single most difficult thing I found to do in the whole project. But then that's why I paid to be taught by a professional. I used various rasps to achieve the eventual shape which was then finish sanded.
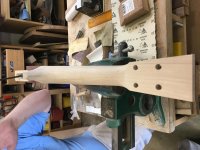
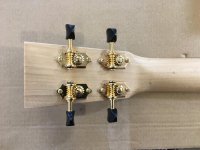
I chose gold plated hardware to complement the timbers.
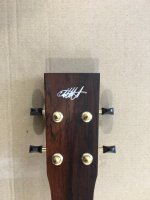
The bridge, nut and saddle were fitted.
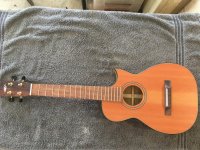
I chose Granadillo for the top and Flamed Myrtle for the sides and back. Both are from Oregon.
On the very first day, he asked me to sign my name on the whiteboard, photograph it and send it to him via email. He then imported the image into his Cad/Cam software for it eventually to become my logo in Mother of Pearl!
I was so engaged in the next part that I wasn't able to take any photos. The sides were laminated from two 1.05mm thick pieces of the Myrtle. Both leaves were hand bent around a bending iron to fit the form, without water. At that thickness, water isn't needed. Both leaves are glued with Titebond Original and clamped between two side shaped moulds. I also chose this model to be a cutaway design. So, the cutaway was also laminated.
The leaf joints were cut and the mitre joint for the cutaway carefully planed and all three were dry fitted to the outside mould. The tail and neck blocks and the cutaway mitre fillet were shaped on the CNC machine and the combination were glued in place.
The back had it's centre joint reinforcement and braces glued in place.
(Ha! The first one not to be in original orientation!)The book matched top was glued. The CNC was then employed again to rout the rosette grooves, the soundhole and the pre-sized outline of the top.
The top's sound hole reinforcement (CNC shaped), bridge reinforcement and braces were fitted.
The rosette purfling was glued in.
The CNC then cut the MoP logo of my signature, shown here with a pencilled version.
The sides were fitted to the back with kerfed linings, followed in the same way by the top.
The top was routed to shape and the tortoiseshell binding and plastic purfling was fitted.
In the meantime, while the top was being glued, work had begun on the neck. It had been rough cut to shape. The headstock angle sanded flat both sides and the Indonesian Rosewood veneer fitted to the headstock. The carbon fibre trussed groove was routed and the trussed epoxied in the slot.
Work now started on the fretboard. traditionally the fret slots have been cut with a fine saw. These days, the CNC router with a 0.6mm diameter end mill cutter can cut the slots much more consistently and accurately.
The CNC was then used with the same 0.6mm end mill to rout out the socket for the signature logo.
The MoP did not fit straightaway, but the CNC is then programmed to offset the socket by 0.005mm. It still did not fit, but after the second 0.005mm offset, it pushed in like a dream!
Frets were fitted.
The neck carving began.
This was the single most difficult thing I found to do in the whole project. But then that's why I paid to be taught by a professional. I used various rasps to achieve the eventual shape which was then finish sanded.
I chose gold plated hardware to complement the timbers.
The bridge, nut and saddle were fitted.


 - Rob
- Rob