• Hi all and welcome to TheWoodHaven2 brought into the 21st Century, kicking and screaming! We all have Alasdair to thank for the vast bulk of the heavy lifting to get us here, no more so than me because he's taken away a huge burden of responsibility from my shoulders and brought us to this new shiny home, with all your previous content (hopefully) still intact! Please peruse and feed back. There is still plenty to do, like changing the colour scheme, adding the banner graphic, tweaking the odd setting here and there so I have added a new thread in the 'Technical Issues, Bugs and Feature Requests' forum for you to add any issues you find, any missing settings or just anything you'd like to see added/removed from the feature set that Xenforo offers. We will get to everything over the coming weeks so please be patient, but add anything at all to the thread I mention above and we promise to get to them over the next few days/weeks/months. In the meantime, please enjoy!

Cutting post formed laminate worktops

meccarroll

Nordic Pine
Joined
May 12, 2016
Messages
815
Reaction score
180
Hi all been working on a kitchen for my daughter and about to start fitting it next week sometime.

I have fit a lot of units and kitchens in the past but not a huge amount of postformed laminated worktops using a worktop jig.

In the past, when on my own jobs, I have simply used a router and staight edge to cut the woktops then mitred the end (corner joint) with a tenon/dovetail saw and that has worked pretty well.

One I did 20+ years ago using a router and dovetail saw.
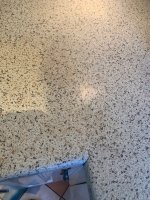
AWorktop.jpg


When I have been on site and seen some of the carpenters fit worktops with a jig they seem to take an age to fit and can burn through several router bits in the process. It does seem that fitting the corner joint on a worktop can be/is time consuming and can also eat into the router bits. I am lucky I only have one corner joint to do so hopefully get away with just one router bit.

In more recent years I have obtained my own worktop jig so will most likly use it on the worktops I have to fit. I have used it on a few jobs but not many so looking for advice/tips etc as it's not something I do a lot of.

Any of the more experienced kitchen people on here got any tips they would be willing to share?
 
I go through in 3 or 4 passes keeping the router guide bush referenced against the 'away' edge of the slot. When it comes to the final pass I go in one pass with the bush referenced towards opposite edge, leaves a nice clean cut. I often use old bits for the first passes as your just hogging waste away. No real preference on the bits, the Screwfix packis good for a couple of jobs.
Another way is to precut the worktop, taking a merk from the jig slot then you only have final passes to make. I don't really like this way when I use it.
Hogging out for the bolts, use a blunt bit.
Always been a fan of of the colourseal joint compound, don't go overboard with the thinners as it can lighten the worktop surface.
Go steady with doing the bolts up as you will be dealing with a bit of bow across the tops. Don't cinch the bolts up super crazy tight, I find it can start to lift the upper edge of the worktop up and pull half the mitre towards the back opening it up. The zip bolts are pretty good for this.
Not all chipboard is created equal, some of the cores are absolutely awful after the compressed layers.
Seal everything. Completely cover the exposed sink cut out edges.
Glue on edges are the devil's work, there is a double sided tape available but it can leave a slight fine line between the worktop and edge.
 
I often use old bits for the first passes as your just hogging waste away. No real preference on the bits, the Screwfix packis good for a couple of jobs.
Another way is to precut the worktop, taking a merk from the jig slot then you only have final passes to make. I don't really like this way when I use it.
Hogging out for the bolts, use a blunt bit.
Always been a fan of of the colourseal joint compound, don't go overboard with the thinners as it can lighten the worktop surface.
Go steady with doing the bolts up as you will be dealing with a bit of bow across the tops. Don't cinch the bolts up super crazy tight, I find it can start to lift the upper edge of the worktop up and pull half the mitre towards the back opening it up. The zip bolts are pretty good for this.
Not all chipboard is created equal, some of the cores are absolutely awful after the compressed layers.
Seal everything. Completely cover the exposed sink cut out edges.
Glue on edges are the devil's work, there is a double sided tape available but it can leave a slight fine line between the worktop and edge.
A lot of useful information there.

I go through in 3 or 4 passes keeping the router guide bush referenced against the 'away' edge of the slot. When it comes to the final pass I go in one pass with the bush referenced towards opposite edge, leaves a nice clean cut.

I never thought of doing it that way (the reference edge) but makes sense.

Always been a fan of of the colourseal joint compound, don't go overboard with the thinners as it can lighten the worktop surface.
I have never used a coloured compound for worktops (Not done many with a jig either) but the worktops are Howdens and they have included compound in the delivery. Is it just a resin type of filler?

Thank you for the reply.
 
Your discussion about counter top jointing brings back memories. I have renovated three homes that the missus and I have lived in since our marriage, every one required a kitchen redo and guess ,counter tops (laminate) . Bear with me! All three required a 45 degree joint somewhere. She likes to use the crockpot a lot, all I said is don't have it over the joint. She did with all three homes and the heat swelled the joint. Ahh! Warning! :cry: Sorry about the thread hijack :(
 
Your discussion about counter top jointing brings back memories. I have renovated three homes that the missus and I have lived in since our marriage, every one required a kitchen redo and guess ,counter tops (laminate) . Bear with me! All three required a 45 degree joint somewhere. She likes to use the crockpot a lot, all I said is don't have it over the joint. She did with all three homes and the heat swelled the joint. Ahh! Warning! :cry: Sorry about the thread hijack :(
Hijack...Not at all, it worthy mention.

The first kitchens I fit had sheet formica for worktops (the old days of formica worktops and evo-stik) the next few had metal jointing strips and it's only in the past 25 years that I think I have ever used a router and worktop jig and then only about five times so it's not something I do a lot of.
 
What MJ80 said. (y)

I fitted well over a hundred kitchens as part of my business with all types of worktops, solid wood, laminate Corian type and granite.

Except of course for granite I followed similar methods using a jig and router but I always cut slightly oversize first with a jigsaw / downward cutting blade which means the router cuts are just finishing the edge so no overheating bits or inaccurate cuts. I still have long 1/2" straight bits that have cut many worktops, even the solid surface ones and are still reasonably sharp and useable so not at all sure why cutters are being ruined unless they are poor quality or 1/4 " which aren't really suitable.

I still have the jig and if you are located anywhere near me in Northumberland I'm happy to lend if you need one. Otherwise I think you can still hire them but they are now a lot cheaper than they were and sometimes come up second hand as well.
 
The joint seal from Howdens is likely to be colourseal, its made by Hilka in a range of different colours. There is a sheet from the manufacturers which match. Good luck with the Howdens worktops, they can be a bit of a lottery.
Remember which way up and which way you need to attack the worktop - always leading cutting into the post formed edge. If you have it set up and that is the end of the cut them something is wrong! Stop and look!!
If the room is out of square you can fiddle the angle of the cuts slightly. Only slightly because you can end up changing the jointing angle of the masons mitre and it won't pull up properly.
Remember your going for as "smooth " as possible for the finished surface, you might need a shim here or there on the cab to help twist errant pieces in the joint area to get the top down.
I've got a load of wealden bits that I have used for Corain fabrication for years, they seem to last for utterly ages and Corian etc. is hardwork on the cutters. Found them cheaper than the Titmans and the service was always excellent.
 
What MJ80 said. (y)

I always cut slightly oversize first with a jigsaw / downward cutting blade which means the router cuts are just finishing the edge so no overheating bits or inaccurate cuts
That sounds good advive.
I still have the jig and if you are located anywhere near me in Northumberland I'm happy to lend if you need one. Otherwise I think you can still hire them but they are now a lot cheaper than they were and sometimes come up second hand as well.
Thank you but I do now have a very good jig. Very nice offer though.
 
If the room is out of square you can fiddle the angle of the cuts slightly. Only slightly because you can end up changing the jointing angle of the masons mitre and it won't pull up properly.

I've got a load of wealden bits that I have used for Corain fabrication for years, they seem to last for utterly ages and Corian etc. is hardwork on the cutters. Found them cheaper than the Titmans and the service was always excellent.
Thank you for the advice regarding if the room is out of square and the possible problem of pulling up the masons mitre, it is far better to know in any potential problems in advance than making a mistake and wishing you had done things differently!

Sounds like the Wealden bits would be a good purchase for future projects. Thank you.
 
I think all i can add is watch the cutter direction and work from both faces of the worktop (I have done a few but like Steve it's not something I want to do again, but probably will). This is a fairly useful how to (scroll through the bumph for the how to bit) How to masons mitre
Not a bad article, thank you.
 
Back
Top