• Hi all and welcome to TheWoodHaven2 brought into the 21st Century, kicking and screaming! We all have Alasdair to thank for the vast bulk of the heavy lifting to get us here, no more so than me because he's taken away a huge burden of responsibility from my shoulders and brought us to this new shiny home, with all your previous content (hopefully) still intact! Please peruse and feed back. There is still plenty to do, like changing the colour scheme, adding the banner graphic, tweaking the odd setting here and there so I have added a new thread in the 'Technical Issues, Bugs and Feature Requests' forum for you to add any issues you find, any missing settings or just anything you'd like to see added/removed from the feature set that Xenforo offers. We will get to everything over the coming weeks so please be patient, but add anything at all to the thread I mention above and we promise to get to them over the next few days/weeks/months. In the meantime, please enjoy!

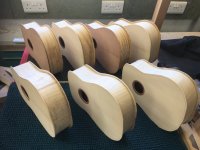
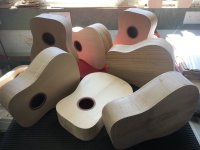
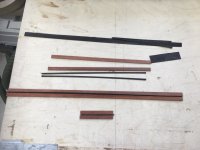
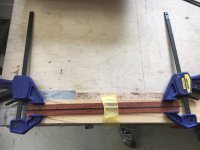
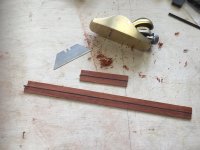
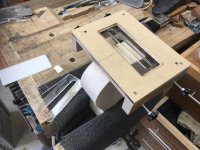
Seven Heirlooms - and one for my great niece, too.

That's brilliant, @Dr.Al. I might do that for other work I've yet to do.

But, Im not overly concerned about any breaks. The stock comes from a slab that did have tiny almost imperceptible shakes in it, so it wasn't expensive. And Padauk being quite open grain can let go like this. If it breaks now, then I don't have the frustration of it breaking while bending it to shape on the heating iron.
 
Malc, as you're probably aware I haven't commented in here very much. This is all completely outside of my skill and knowledge sets, and I've no interest in musical instruments. I just wanted to say, though, how jaw-droppingly wonderful all this work is, and if you are starting out in this field, what an incredible journey you have been on to be so good so soon. Bravo.👏👏

@Mike G, that's kind of you to say. Having got to the stage where my woodworking skills exceeded my guitar playing skills, it seemed natural to continue woodworking. 😆 I had the background going back to my 7 years at school, and the interest stayed with me till I was able to take evening classes to make my first instruments. Following retirement, building the workshop and then lockdown, the little bit of spending power that retirement enabled, let me buy a kit, and the desire to build from scratch again was rekindled. I looked for somewhere to do a course, found that and then was asked back by the pro to do an internship. He described me as meticulous, and you say my work is jaw-droppingly wonderful. Those are two expressions that never in my life have been associated with me before.

I try to write down the processes involved to remind me on the next instrument build, but I also try to make each successive build a little more challenging to keep the old grey cells going. I then record the processes on here and a couple of other platforms, which helps me remember - sometimes! But if it entertains and informs or even inspires others to consider doing similar, then that is extremely satisfying and encourages me to continue and try and improve my skills.

I like wood. I like the myriad of differences you come across and how it looks when you finish it. I wish I could be able to make instruments entirely from completely native timbers, but our forestry industry, if we have one, doesn't attract the grants that the farming industry does, even though many of the forests are on farmed land. I hate having to buy imported timber, when we have so much of our own left unprocessed. But that's another story. Don't get me started! 😁
 
What MikeG said about commenting, goes for as well. Your skills and techniques, will be cataloged for future use.
I do not have a plane, with skates, but I have used a channel like fixture, to get strips to size. Your plane would seem to be more versatile.

following
 
Interesting take on the thicknessing of thin stuff, which you don't often see on the luffiers forums.
Is that mentioned in the Cumpiano book?

Things are looking quite productive.

Cheers

All the best
Tom
 
Interesting take on the thicknessing of thin stuff, which you don't often see on the luffiers forums.
Is that mentioned in the Cumpiano book?

Things are looking quite productive.

Cheers

All the best
Tom
Thanks, Tom.

I don't know. It's not a book I've read. I think the design of that plane is relatively;y new and recently copied in China.
 
Thanks, Tom.

I don't know. It's not a book I've read. I think the design of that plane is relatively;y new and recently copied in China.
I'd be interested to know if you have any, as that is one of the "go to's", but I suspect there are a few "bibles" which I
cannot recall...
Perhaps you're a member of some other luthiers forums, like the OLF, MIMF, ANZLF,or some others?

Re-the planing, I was referring the pins rather than the plane, as most of the forum users use a drum sander, or luthiers friend
for that job, so curious to see where you picked that up?

Cheers
All the best
Tom
 
I'd be interested to know if you have any, as that is one of the "go to's", but I suspect there are a few "bibles" which I
cannot recall...
Perhaps you're a member of some other luthiers forums, like the OLF, MIMF, ANZLF,or some others?

Re-the planing, I was referring the pins rather than the plane, as most of the forum users use a drum sander, or luthiers friend
for that job, so curious to see where you picked that up?

Cheers
All the best
Tom
There was a sort of instruction book included with the 12 String kit I imported from the US, but no drawings/plans.

I bought my my Concert Ukulele and Dreadnought Guitar plans from this company and I also bough their construction guide.

I also remember the processes I used at the luthier course and internship. And as I challenge myself with each successive build, I have to adapt the process to my worksop size and the tools and machines that I have. I also have to problem solve when I don't have the exact tool or machine, and I've recorded those processes here over the years.

My tutor/pro first used the little skids plane and so I thought I'd give it a try. Like any bladed tool, it gives a different finish than sanding, especially on a very open grain. I use the drum sander for the top, back and sides and I used it this week to hog out the strips before I planed them. But the drum sander is not accurate a sub 2mm dimensions.

I'm not on any other forums ( fora? I did O Level Latin). I choose to post exclusively on The Woodhaven 2 because it was so much help to me when I was building my worksop. And, by and large, you're an OK bunch of chaps. :)
Cheers.
 
I'm not on any other forums ( fora? I did O Level Latin). I choose to post exclusively on The Woodhaven 2 because it was so much help to me when I was building my worksop. And, by and large, you're an OK bunch of chaps. :)
Indeed, I found that I was missing a lot of practical stuff when looking strictly on the luthiers sites,
which many of the folks here had the answers to.
Mainly getting away from all the sanding and jigs, after reading the effects of what can happen doing so long term,
with tropicals and whatnot, at least in a hobby environment,
so nice to see the hand tool skills, hence my question about that earlier, in Cumpiano's book, I believe there's an
emphasis on that.

Cheers
All the best

Tom
 
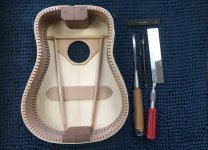
First dry fit of a soundboard to its rim. The braces have to be cut to length to fit with the kerfed linings. And all the centre lines lined up. Phew!

15350006-C25F-4105-B84A-14595DA1AB5E_1_201_a.jpeg

I just love this view. Once the 'box is closed', no-one is ever going to see it again. You're lucky, you saw it here. :)

Time to set the go-bar deck up again.
 
Last edited:
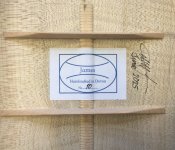
I had a dry run locating the instrument labels before 'closing the box'.

2A5A8B07-6FCC-4DD3-8D38-D11BB325A4CC.jpeg

I think the offset camera on the iPhone makes it look off centre.


39EAB7D3-05F8-4753-B84E-46E3C7DD68B7_1_201_a.jpeg

So I got up close and put the flash on.


AA486851-011F-4A85-ADA6-357E0E93E5CC_1_201_a.jpeg

Then I stuck the first label and signed the back.


Then I realised that before gluing the soundboards and backs to the rims, 'closing the box', I need to drill the holes for the neck securing screw.
And to do that, the neck has to have its threaded insert fitted.

And to do that I have to square off the necks and create the tenon that will fit in the body mortise, which is why the neck block is fatter than the tail block.

Then drill the tenon for the threaded insert.

I've also got to drill the tails for their jack sockets.

Hey ho, time to put the body components aside and start working on the necks again.
 
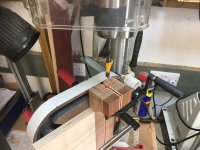
Jerry rigging the pillar drill to create the holes for the threaded inserts in the neck tenon, before they're routed to shape.

B07FE9A2-F616-4F1E-877C-D43E8D02A6B7.jpeg

It took a bit of doing to get the table coplanar with the axis of the drill. But I've got 7 nice holes now.

On with the routing of the tenons.
 
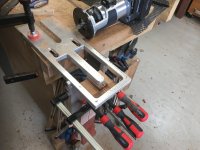
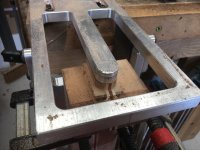
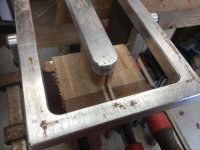
Using the very expensive American jig, I've carved all seven neck tenons.

D4EE5BB3-C325-4F2D-974F-786061548CBE.jpeg

I cut as much out as I can on the band saw before fitting in the jig.


70B2028D-BC47-4B44-ACCF-0C5DBD893ADD.jpeg

First pass.


501C8C0D-DE4E-4280-A172-59347BFD8757.jpeg

Last pass.


7879F955-5A2E-45AB-9FF7-4288D37F4157.jpeg

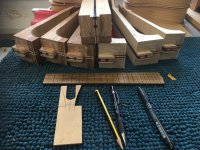
Seven tenons routed and the neck shape marked out ready for shaping. There's two more bandsaw cuts per neck, then the hand carving starts to properly shape the necks.

I really enjoy that part.

The beauty of this jig is that without resetting it, I can then rout identical shaped mortices in the bodies when they're ready.
 
Using the very expensive American jig, I've carved all seven neck tenons.

View attachment 34129

I cut as much out as I can on the band saw before fitting in the jig.


View attachment 34130

First pass.


View attachment 34131

Last pass.


View attachment 34132

Seven tenons routed and the neck shape marked out ready for shaping. There's two more bandsaw cuts per neck, then the hand carving starts to properly shape the necks.

I really enjoy that part.

The beauty of this jig is that without resetting it, I can then rout identical shaped mortices in the bodies when they're ready.
Nice Malc, are you bolting the necks to the body?
 
So, before I can rout any mortices, I need bodies to rout them into. I start with gluing the backs to the rims.

I use the micro clamps to hold the back against the rim, and the lamp to see where there maybe any gaps along the glue line.

Because the backs are contoured, there are always gaps the light shines through and I have to do a spot of sanding fettling.

EFF8B305-A1E0-4BBA-8EF9-F1D0307B6E8F.jpeg

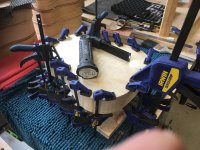
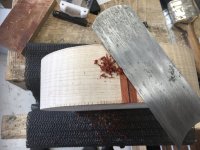
The clamps do not have the pressure to hold the back against the rim around the contour, so in the absence of bobbin/spool clamps, I have to come up wit another method.


9FEDE4A6-B17A-45F9-801D-6561025DF886.jpeg

The radiused sanding disk is the exact contour shape, so I place the back on some anti-slip mat to protect it from the 80 grit, and clamp cauls across. I know it's worked because I have glue squeeze out all around the outside of the rim.
One back down, and six more to go, then 7 soundboards to be glued.

By gluing the back first, when dry fitting the tops, I can put a light through the soundhole to see if there are any gaps along the top glue line.
 
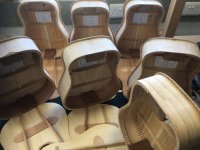
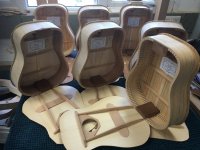
All seven backs glued on the the rims. I glue the backs first so I can clear off any glue squeeze out, which might be seen through the soundhole. Any squeeze out from the soundboard can only be seen with a mirror on a stick.

B8BDB481-F7D2-4C6B-9C5A-926A26A34C9A.jpeg

So, take a good look, this will be the last time the insides will ever be seen again.

9CA699FE-243B-4D94-8FFF-8D130C256FE6.jpeg

Next week I'll start gluing the soundboards the their rims.

4E2891DE-3460-4D05-A429-0CD0AEF5BBB9.jpeg


I've only been gluing one a day, as this glue join is critical, as will next week's.
 
No photos of the go-bar deck contraption:(. That’s my favourite bit.

:) Sorry, Andy. I'll give you a special demonstration in September.
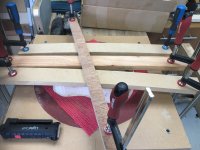
Actually, I decided not to use it this time, because I was getting a gap or two along the glue line. I say a gap, I could get 0.1mm feeler gauge through without any resistance and I knew from experience that the go-bar deck couldn't always consistently close the gap.

So, I arranged the sanding dish and clamped the rim down onto the curved back, thusly.

9FEDE4A6-B17A-45F9-801D-6561025DF886.jpeg
 
Great Malc, what's next, routing the tops and bottoms flush with the sides?
Thanks, Duke. Gluing the tops to the rims next, followed by routing tops and bottoms flush. Then probably routing the mortices with the expensive aircraft grade aluminium jig.
 
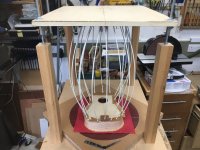
Just for you, @AndyP, I got the Go-Bar deck out again.

I find this the most efficient way to glue the flat soundboards to their rims, with the radiused backs sitting in the radiused sanding dish.

850526D3-AF9B-4CA4-9BDE-7AD8BF989C42.jpeg

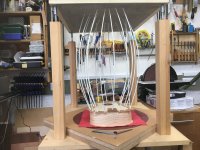
You might have noticed that I have raised the roof over the deck by the depth of the instrument body since I fitted the braces to the soundboards and backs. And when I work on guitars, I have to raise it even higher.

99510CC6-3A1C-45D8-BAED-953AC3FF7425.jpeg

Anyway, here's a perspective image of how the go-bar deck works.
 
Nice Malc, How long till you remove the go-bars and what are you checking with the feeler gauge?
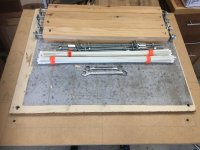
Thanks, Duke.

As it's my hobby and there's no business time pressure, I leave them on overnight. So, it'll take me 7 separate days to complete them all.

The feeler is at 0.1mm, so I feel all the way round to find if there's a gap on the glue line. There shouldn't be, but you know wood. :)

If I find a gap, then I can adjust the bars till the gap disappears.
 
All 7 bodies no have their backs and soundboards glued on courtesy of the G-BD. Time to dismantle and stow it.

90FDCB36-3C13-4DE6-9FBD-169EC599D1D1.jpeg

The roof is lined with abrasive so the the fibreglass bars don't ping off and take your eye out!

It's stowed in the rafters now leaving space on the bench to trim the edges with the router.

84544D81-8BC0-452B-ACC7-1C6E3ECE4FA8.jpeg


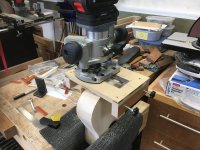
Sorry. Rubbish photo taken one handed because the router, switched off, is too heavy to balance on the edge of the instrument body. But you get the idea.

I shall use the tilting base on the router for trimming the backs because the the backs are dished. It will be tilted a degree-ish so the cutter and bearing are parallel to the side.
 
All seven instruments have had their tops and backs trimmed with the bearing guided cutter on the router.

909004D4-063F-4BD5-9BE4-06C555124045.jpeg

Before I can route the binding channels, I'll be using the Padauk binding you saw me milling a while ago, I shall have to sand the rims, so that the rebate cutter's bearing has a smooth surface to follow all the way round, leaving a channel/rebate the same thickness all the way round.

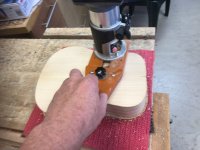
This where the Rolling Pin Sander comes in. The instrument body is held using a vacuum clamp.


I'm using a 120 grit sleeve which appears to remove stock to a flat level without leaving too many sanding marks.

I'm quite pleased with the finish. Six more to go.
 
Having finished sanding the sides to flatness, the next thing I need to do is make and fit end grafts. As I am not an expert in instrument building, the tail joints of the rims are not always, if ever, perfectly centralised, so the end graft covers that joint and can also provides a visual link to any binding and purfling. I shall not be purfling, but I shall be binding with the Padauk you saw me manufacture previously.

EC48EA7E-C4AC-4A53-B424-7BA9992DA478_1_201_a.jpeg

These are the components loosely placed together; Padauk strips, black dyed Tulip veneer strips.


0918BB44-E981-4C1D-A9AA-27CF07B928CB_1_201_a.jpeg

Glued and squeezed together.


B3F706FD-F759-4D9A-9CBF-57AA6992D84D_1_201_a.jpeg

Reducing the black down to the thickness of the Padauk, then scraping both to an even finish.


703E33C7-8B0F-4175-A21E-FC396752150E.jpeg

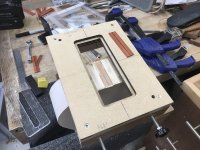
My end graft routing jig. I have three inserts; a cross hairs, a tapered graft and a parallel graft seen here. The cross hairs help me align the jig over the two centre lines of the instrument top and the back.


2184FFA4-CFFF-4E63-AC9C-2E6A6DF69B88.jpeg

Routing the housing.


28B69BD9-4EA6-401F-A9CF-BFB8874E39A3_1_201_a.jpeg

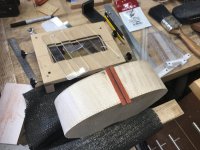
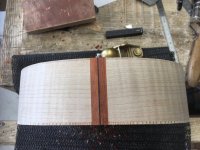
The graft and its housing. The housing is 15mm wide. By fitting two thicknesses of veneer between the Padauk strips, the width a nadge over 15mm. All I need to do is gently wipe it along a sanding board and it fits nicely.


2555E10A-E7C5-4215-B4BF-20E99285C24B.jpeg

Six more to go. :)
 
Malc, do you make your own router templates of or do places such as Stewmac have most of what you need?
Nice jig for the end graft.
Thanks, Duke. I generally make my own. Have you seen Stewmac prices?! I have to add shipping, import and local taxes on to their price. One of the members here a couple of towns away does laser cutting and he does some of the more accurate stuff for me, like the acrylic inserts in this jig.
 
I haven't commented on this (as I have nowt useful to contribute) however I have watched the whole series and am in awe of the incredible work that goes into these instruments. I only wanted to comment to say that these are fantastic and teh recipients as so lucky to be getting them.
 
I haven't commented on this (as I have nowt useful to contribute) however I have watched the whole series and am in awe of the incredible work that goes into these instruments. I only wanted to comment to say that these are fantastic and teh recipients as so lucky to be getting them.
Thank you, Alasdair. Kind of you to say.
 
A scrape to bring it down to rim level.

4E1290B2-0B88-4FC3-90E0-D1B6ED23EE64_1_201_a.jpeg

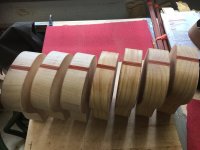
Waiting with the others for the binding channel rebate.

3C0C5625-B30F-4A64-8B79-7C2F0B075A6A_1_201_a.jpeg

Like all book matches, they're not mirror images. But the graft can disguise that and sometimes they can look like mirror images.
 
Last edited:
Before routing the binding channels, I decided to bend the strips of Padauk on the side bending machine.

5E03B94C-F03B-4E35-AAF6-3B519C8801DB.jpeg

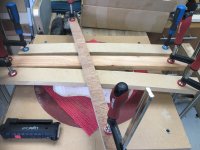
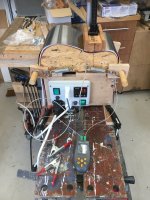
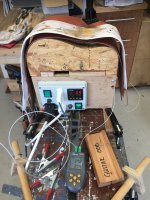
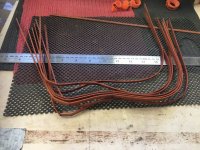
The strips have been soaked in water, wrapped in baking parchment then sandwiched with the heating blanket between two sheets of very thin shim steel. I've then heated them to 120 degrees C before I switched them off and let them cool to room temperature-ish.


C34F62E2-8DAF-44B7-AF44-96ABF7EB25F9.jpeg

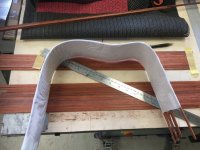
I can see already things are not looking good.

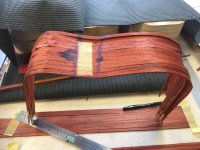
30F02145-DB13-4817-A108-EDBBCB146C38_1_201_a.jpeg

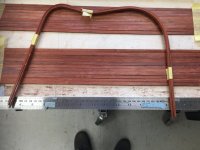
Out of 12 strips, only 3 have survived.

D0579121-BAC2-4088-81CE-3BD2F798727D.jpeg

79AAE221-2B6E-4866-A330-4D654A74580D_1_201_a.jpeg3503B90A-F9B8-4192-BE2C-ABE4BFB487CF_1_201_a.jpeg

I then went on to do two more batches of 12, and only another three survived.

So, I had to analyse what has happened.

The stock of Padauk I used is not the best in my store. I use the best for structural stuff like neck laminations.

The thin shim, particularly the top one looked like it was not tightly parallel/concentric, whatever, with the bottom one.

So, if I had used the thicker shims I have for guitars, would that have kept the strip from snapping? (Rhetorical)

Perhaps my better timber stock is quarter sawn and may respond to bending better.

I'll have to mill some best stock Padauk and try hand bending to see the results. But hand bending 28 strips is going to be tedious. If it works manually, I'll then test a few strips with thick shims in the machine.
 
From what I've heard padauk is notorious for breaking when bent unless the grain is dead straight. What moisture content did you start at? They've mostly cracked in several places around that quite tight radius front curve. It would be interesting to know if they cracked during the bend or when coming out of it. Did you hear them cracking? Sympathies btw.
 
Would those side bending heat mats that you are waiting for have helped at all?
No, I don't thinks so, Andy. I used rubber gloves in case the breaks in the silicone could be dangerous. The thermocouples reported expected temperatures.
 
Back
Top