• Hi all and welcome to TheWoodHaven2 brought into the 21st Century, kicking and screaming! We all have Alasdair to thank for the vast bulk of the heavy lifting to get us here, no more so than me because he's taken away a huge burden of responsibility from my shoulders and brought us to this new shiny home, with all your previous content (hopefully) still intact! Please peruse and feed back. There is still plenty to do, like changing the colour scheme, adding the banner graphic, tweaking the odd setting here and there so I have added a new thread in the 'Technical Issues, Bugs and Feature Requests' forum for you to add any issues you find, any missing settings or just anything you'd like to see added/removed from the feature set that Xenforo offers. We will get to everything over the coming weeks so please be patient, but add anything at all to the thread I mention above and we promise to get to them over the next few days/weeks/months. In the meantime, please enjoy!

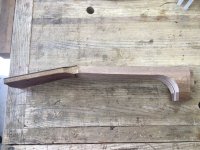
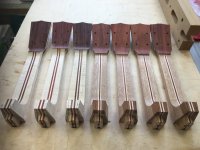
Seven Heirlooms - and one for my great niece, too.

How do you use fabric softener in the bending process? I'm about to do quite a lot of bending......

What size timbers are you proposing to bend?

I haven't used fabric softener for bending. Most of my bending is done to timbers that I've sanded down to around 2mm, or even less. There I use water and heat, either with my bending machine and its heated silicone mat, or directly on a bending iron.

I researched the veneer softening route after Tomtrees' comment and came up with this Veneer Softener. It released the red colour of Padauk all over my fingers when I used it to soften som bindings before heating. It took a few days to disappear.

I have no experience of bending thicker timbers like chair makers do.

I can add that for some of my binding/purfling laminations, I would use Polyurethane glue to laminate, because other wood glues, like TBO, soften and let go under wet heat.

P.S. Laminations before gluing bend easier. e.g. Ship Happens laminate hull frames before bonding and force into place with the resin still wet.
 
Last edited:
How do you use fabric softener in the bending process? I'm about to do quite a lot of bending......
Not used the stuff myself Mike, and unfortunately the OLF has gone offline last week!
There was a very prominent member only mentioning he'd try to buy it or recent, as the place was getting very quiet,
with the owner seemingly not logging in for a very long time.
Older software wasn't updated, which I believe is lots more expensive to run.

Though there are a few other luthier forums, which I'm less familiar with,
i.e the MIMF or ANZLF, unofficial martin guitar forum, luthiers section.
The OLF was the biggest around 15 or more years ago, and that's when and what got me into woodworking,
(or the lack thereof, haha)
At a time before youtube, I bought some John Mayes DVD's from fleabay, which I haven't watched in a long time.

Even back then, John was using two heating blankets with the wood sandwiched between.
(with spring steel wrapped in tin foil, and de-ionized water)
This adaptation was seemingly the norm in the bending form, the form of which started life as a hollow affair,
(I've not seen other, older takes on this fox bender method)
with spreader bars using lightbulbs,
(some still were using this method at the time, and that being more likely where you'd find the use of Supersoft.)

Bearing in mind the cost of some guitar sets, i.e just for the back and sides, amounting to the cost of a machine that would cut it.

That was the usual theme, though there was another fella by the name The Padma, who used to be a frequent poster there,
who worked with local woods IIRC, and made seemingly experimental instruments, if I've got that right.
I must have a look to see if he's still posting, should you be able to find some postings of his bending setup(s?)
I do recall him having a big pot with the wood sticking out like raw spaghetti.

Other methods being a blow torch with blanked off pipe offcut, or the forms with an element, some very fancy like the LMI bending apparatus, Stu-Mac likely would get some hits, if you were thinking DIY copies of either.
Here's a good example of the use of such...

Haven't found much from "duh Padma" of recent, well not elsewhere apart from some older facebook posts,
though I'm sure it might be possible to find some posts, if you're looking for different ways to skin the cat.

What might be noteworthy is burning happening on non exotic and extremely dark timbers,
and I'm sure you can still get lists of folks preferred bending temps for each species.
There's a few guitars out there like the Gibson J45, which might help with finding bending guides/temps for maple,
as it not seen as frequently.
That's mostly about the only info I've got, as far as this thickness goes.
Seems some luthiers on going on youtube in recent times, like Kevin LaDue "The pragmatic luthier"
I enjoy his videos, and it's likely you'll see bending there, which may be of some use as he also utilizes domestic timbers.

Hope that might be of some use to you.
All the best
Tom
 
Last edited:
What size timbers are you proposing to bend?

I want to end up with 4-5mm around the inside* of a 150mm radius bend, so I was assuming 2mm thick laminations. I'd like to avoid steaming if I can. I had planned to just heat it locally (flat) with an iron and give that a try.


* I've remembered I'll have to also do around the outside of the same radius.
 
I want to end up with 4-5mm around the inside* of a 150mm radius bend, so I was assuming 2mm thick laminations. I'd like to avoid steaming if I can. I had planned to just heat it locally (flat) with an iron and give that a try.


* I've remembered I'll have to also do around the outside of the same radius.
Hmmm. I find that the water I spray on to my woods and then let be absorbed is what really heats the fibres through the wood thickness, whether on my bending machine or on the heating iron, which is curved to help create the shape. It's cold water; the heating mat or the heating iron cook the water. It's possible that your 4-5mm soaked in a solution of fabric conditioner could prepare the wood for heating.

On the heating iron, I use the change in colour of the wood, darker wet to lighter dry, as the moment to feel if it wants to bend, which it usually does.

I would only dry heat something around 1 to 2mm thick.

Using the curved heating iron, the process is to heat a little at a time and evolve along the curve rather than heating the flat timber and pressing into/onto the curved former. My heating machine is set to around 160C.

As with most things practise on similar timbers to see what works best.
 
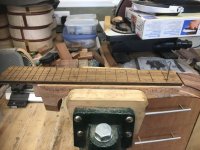
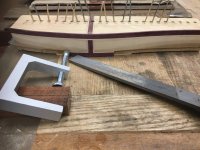
I've nicked a couple of my wife's Tee pins. I then use the centre line and equal measurements outside the fretboard to align the fretboard on the neck. I then drilled a 1mm hole through two of the fret tang slots and just into the neck, and use those two pins to locate the fretboard after the clamps are removed.

2CA4D84E-36CD-438A-9ECE-F9F332F96AE5.jpeg

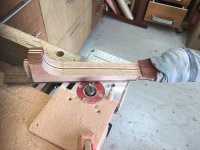
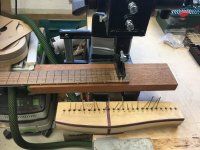
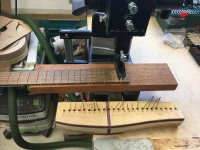
I will then use the masking tape and CA glue sandwich to retain the fretboard to the neck while I rout the front elevation waste from the neck using a bearing guided cutter in the mini router table.
 
Mini router table and the fretboard template.

1E04E2BF-36CA-4800-9BB8-620151D71F83.jpeg

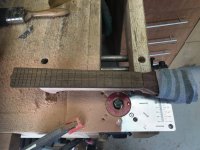
One side...


93787E85-7D84-4200-9FA0-ADE0C9B10161.jpeg

…and the other. Plan view looks OK.

DCA5555B-FF76-4767-84CE-A5A4857E77EA_1_201_a.jpeg


Side elevation still looking OK.

E5D321C4-757E-4616-9CE7-E1F07C63BC84_1_201_a.jpeg


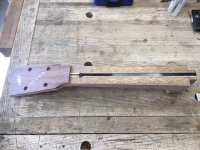
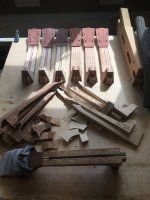
Got to lose some waste on those heel wings.

14F3CEBF-1AD4-4CAF-BA7C-3BE3444114FF.jpeg


Six more to go.

FA243EE5-09CE-4187-997C-73BC43D4FF99.jpeg


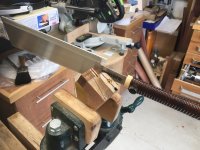
Six cut on the bandsaw and handsaw, but more routing to do to get the plan shapes like the lower one.
 
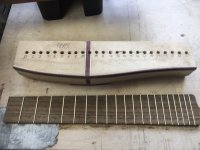
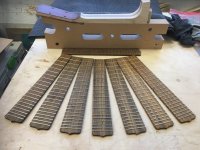
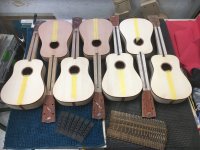
Seven necks routed to the shape of the fretboard. But before I can carve the necks, I have to glue the fretboards to those necks, and before I fit the fretboards, I've got to fit 140 frets (20 per instrument) to the seven fretboards, dress 240 fret ends and dress 140 fret crowns. 🙂

F270D120-9A8E-4888-B136-D6F3BA46E56B.jpeg


Fretful time ahead.
 
Hmph. A blooming' expensive American fret tang nipper doesn't work with my fretwire. It's some of the smallest because it's for small instruments, so has less mass. When the guillotine cuts the tang against the anvil, it distorts the fret.

Back to filing them off: all 240 of them!

BF6F4D90-5315-4924-A0BF-ADCE7A453E06.jpeg

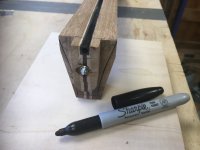
I made a little wooden clamp to hold the fret upright while I file away the tang.

01FFAB9D-DC32-4254-A5D0-D294FB868782.jpeg

First forty tang ends nipped.

Got some family stuff going on. I'll press them in when I can, and then start on the next 40.
 
So it's taken me almost a couple of weeks on and off to finish the ball aching job of filing the 280 ends of the frets. But I've got there, spurred on by a visit from your one and only @AndyP mod yesterday. Gosh, there was a lot of cud we could chew!

Anyway……..

0B77679E-4A25-4E80-A87A-8D653E92659B.jpeg


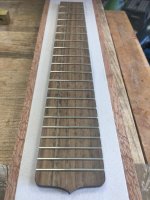
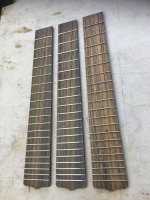
….140 frets fitted; 3 x Ovangkol and 4 x Bocote.

Now I've got to dress them all.

Later.
 
Will finish chewing another time eh?

Those instruments, part finished and the finished ones are a delight to hold and behold. The photos here do them justice but actually getting hands on was a delight, and a little scary (what if I dropped one?)
 
Nice work Malc. That is a lot of fretting to do. I've always disliked dressing frets having had an early experience when I was about 20 of seriously overdoing it on someone else's very buzzy D45 copy, and ended up refretting it.
 
Really enjoying seeing your progress with these.

Can I ask why you fit the frets before the fretboard is fixed to the neck? I'd have thought it would be easier to fix a fretboard to the neck without frets but much the same to do the fretwork on neck as on an unattached fretboard?
 
Really enjoying seeing your progress with these.

Can I ask why you fit the frets before the fretboard is fixed to the neck? I'd have thought it would be easier to fix a fretboard to the neck without frets but much the same to do the fretwork on neck as on an unattached fretboard?
Good question. I've done both ways in the past. But I'm making seven this time, not one or two as previously. So I try to think in terms of production techniques. Using the arbor press, or using the mallet, the fretboard alone always has a base on which to absorb the effort. With the fretboard already glued to the neck, the neck has to be supported, and it is tapered, and part of the fretboard overhangs the heel end, so is unsupported. That's what I find works for me. I will then glue the fretboards to their necks, and carve the necks to the width of their fretboard.
 
I think without a neck and headstock support jig (a lot of effort to make) you made the right decision Malc. I would have done the same.
 
Part dressed; the left side fret ends are only ground back level with the fretboard edge so far, but the right side are ground back to a 45 degree angle.

CA3F00A5-3C2B-4ACD-8A32-0B14511AC58B.jpeg

Still more dressing to go.
 
I may have asked this before, do Uke's ever have a zero fret adjacent to the nut? I quite like them for intonation reasons.
 
I may have asked this before, do Uke's ever have a zero fret adjacent to the nut? I quite like them for intonation reasons.
I've used a zero fret on one electric and one acoustic guitar that I've mede, but not on any of my ukulele or other guitars. I have an original Epiphone FT145 that I bought new in 1972 and that has a zero fret. I think it provides a brighter response, but back then most nuts and saddles were plastic. Now we have bone readily accessible for nuts and saddles, I think the transmission of string energy into the soundboard is as good as it might be. Zero frets seem to have had a bad press due to adverse wear affecting intonation, and perhaps combined with the then plastic saddles were part of the problem.
 
I guess these things go in fashions. I've mainly had electric guitars with a low action. At one point there was a fashion for brass nuts. Martin promoted graphite nuts and lots of people started using Tusq. I think the bridge has a lot of influence on guitars. But for electrics the biggest tonal factor is the amp I find. Not relevant to a Uke.
 
Hopefully, you can tell the difference of which one is dressed.

29D08C92-C2B5-424C-A1D3-28A67C6207C4.jpeg

No sharp edges and everything above wood is polished.
 
Repair shop last night had the luthier repairing a Venezuelan ukulele. If you didn’t catch it I am sure you would find it interesting.

The middle one looks shiniest but I cannot make out rounded edges on any of them.
 
Repair shop last night had the luthier repairing a Venezuelan ukulele. If you didn’t catch it I am sure you would find it interesting.

The middle one looks shiniest but I cannot make out rounded edges on any of them.
Yes, I did see it. That poor instrument was in a bit of a state.

Yes, the middle one is the one I've dressed. The two outer ones still have only 45 degree sharp edges and no frets have been polished yet.
 
Last edited:
I've dressed 4 of the fretboards' frets but have ordered a new smooth cut file to replace the cheap miniature file that I've been using.

So while I'm waiting for that file to arrive, I started to mark the bolthole in the mortice.

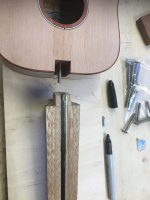
First, I fashioned a length on M4 thread into a point and screw its blunt end into the threaded insert of the tenon. The I dob a bit of ink onto the end of the point.

2F1842F6-D27F-4C1A-A762-D9BC3A006A84.jpeg

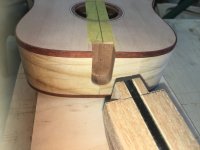
I turn both the body and the neck over on a flat piece of ply so their faces are on the same level, and slide the tenon into the mortice.

This instrument has a flat soundboard, so the neck without its fretboard is level with the soundboard. (The fretboard overhang will sit flat onto the sounboard.)

9A6C94AC-8A8B-47BD-B3EB-C7D82041B02E.jpeg

The ink on the point is transferred into the mortice. I choose a drill 0.5mm wider than the bolt to give me a tad of wriggle room and drill the hole.


E693C887-93B3-4A9C-B050-965E9FE22081.jpeg

Out of all my 90 degree adapters and allen keys and hex keys and drives, I struggled to tighten the bolt. The soundhole is only 50mm wide so getting the bolt into a hole you can't see is a struggle, then getting it tightened was as well. So I've ordered a 9" Tee handled 3mm hex drive to pass through the tail jack plug hole that I've not yet drilled. (Yes, these will all have under-saddle pickups.)

But tightened I got it.

3F74ECF0-CF77-401F-91FD-7585742EBEAC.jpeg


So I checked the side joins.


27B25BFF-369D-4643-9C25-134A3D501D50.jpeg


Not bad.

AEB53775-D331-4FD9-8C5E-E25501B8B4CC.jpeg

Nice.

This'll keep me busy while I wait for the ordered tools.
 
Do you listen to music or something while you do a long repetitive job like that? Or just zone out into the work?
 
Do you listen to music or something while you do a long repetitive job like that? Or just zone out into the work?
Being a teenager of the 60's, I download Tony Blackburn's Sounds of the 60s, then Bob Harris' Sounds of the 70s and a some of the other oldie programmes on BBC sounds and then play them through a very good speaker in the workshop. I do switch them off for some jobs where I need absolute concentration.

Being a child of the 50s, I occasionally stream Boom Light, reminiscent of the BBC Light Programme.
 
All instruments satisfactorily bolted. Only a couple needed their holes fettling to align the neck correctly.

BB07F5C1-8A1A-4982-9535-5A95B9020269.jpeg

So that is now all the timber components manufactured. The only component that I bought ready made were the kerfed linings.

Gluing the fretboards to the necks next, before carving the necks.
 
What are the bridges made from Malc? Looks similar to ebony, I must have forgot if you have already mentioned it.
Nice lineup!
I believe they were from a stick of African Blackwood that I bought from a piano repairer.
 
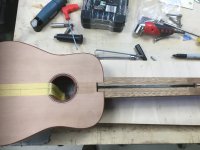
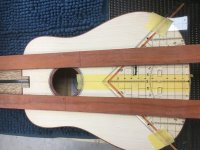
Now the necks are bolted to the bodies, it's time to check the neck alignment.

A2B8CCF6-A292-4A47-AC93-93ECE5216115_1_201_a.jpeg


In the absence of two long, and light, enough straight-edges, I used a couple of strips of Padauk. And this one looks OK, but none of the others did. They would only be out by around 1 degree, but that has consequences.

I can only think that the very expensive aircraft grade aluminium mortice and tenon routing jig was about 1 degree out when clamping it to the body; operator error.

The consequence is that if I locate the bridge centrally on the centre line of the body, then the high treble string will not align parallel to the edge of the fretboard. But if I offset the bridge by about 2mm to the bass side, i.e. about 1 degree, then both outer strings will be parallel to their fretboard sides.

And I don't think anyone would visually notice that offset. Anyway, I hope not.
 
Is there room to do a micro adjustment with the neck to the body or does that create a further problem?
At the moment, all the necks sides at the heel fit tightly against the bodies with no gaps. I think that if I make adjustments to the M&Ts to recover that one degree, that will introduce gaps at the joint which will then have to be further adjusted.
 
Malc, I think it's fundamentally important for the two outer strings to be dead parallel to the fretboard edges. Any deviation will be very noticeable to any player. I suppose your other option is to centralise the bridge and slightly offset the bridge pins to compensate. Key not to throw intonation off by changing the scale length, even slightly.
 
Back
Top