• Hi all and welcome to TheWoodHaven2 brought into the 21st Century, kicking and screaming! We all have Alasdair to thank for the vast bulk of the heavy lifting to get us here, no more so than me because he's taken away a huge burden of responsibility from my shoulders and brought us to this new shiny home, with all your previous content (hopefully) still intact! Please peruse and feed back. There is still plenty to do, like changing the colour scheme, adding the banner graphic, tweaking the odd setting here and there so I have added a new thread in the 'Technical Issues, Bugs and Feature Requests' forum for you to add any issues you find, any missing settings or just anything you'd like to see added/removed from the feature set that Xenforo offers. We will get to everything over the coming weeks so please be patient, but add anything at all to the thread I mention above and we promise to get to them over the next few days/weeks/months. In the meantime, please enjoy!

Kity 619 table saw rise and fall repair

toolsntat

Nordic Pine
Joined
Apr 4, 2021
Messages
722
Reaction score
372
Location
Leicestershire
Name
Andy
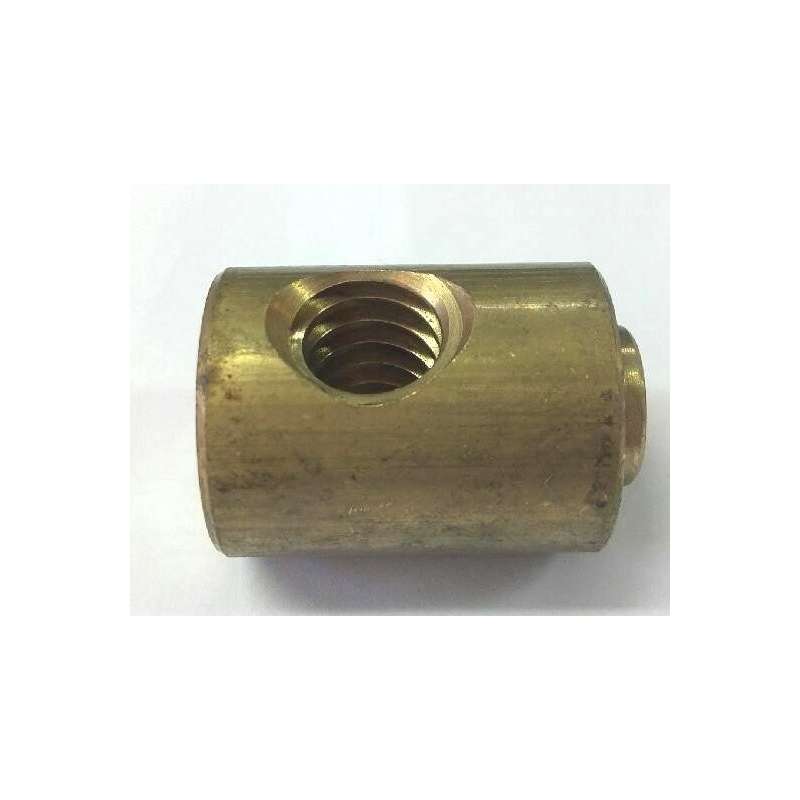
Asking for a friend, has anyone had this problem and solved it on the Kity 619 table saw please ?

He has tried unsuccessfully to gain access to the area to facilitate a diagnosis/repair ?

I'm going over to have a look for him and just seeking any hints/tips thank you.
Cheers, Andy
 
Last edited:
I'm not sure if the rise & fall mechanism on the Kity 619 is similar in design to the 618, but I have a 618 and there is a meshed pair of gears that need regular cleaning and attention to ensure that it works correctly.

The gears are really exposed to sawdust and clog up easily. When I first got my second hand 618 quite a few years ago, I found a previous owner had greased the gears and this just compounded the problem in the long term.
I stripped the complete mechanism apart, cleaned everything up and sprayed the gears with Silicone Dry Lubricant and it's been okay since, but I do make an effort to clean the gears as often as I can,.....when I remember to do so!....😁
 
Ackshully, I had a 419 (which I passed on to Rafezetter of this parish). Looking at the limited number of pics of the 619 I could quickly google, it looks like the mechanism is different. The 419 combines the tilt and rise+fall mech, with a delightful, spring-loaded plastic-on-steel gear quadrant - what could possibly go wrong with that?

There seem to have been several (many?) variants of the 619/1619, but I couldn't see one with that aberrant arrangement. All the ones I found had a separate tilt handle to the right, under the table extension.

So that means it's probably a fairly conventional leadscrew arrangement for both axes (rise & fall, and tilt). The most likely thing is that one end has got disconnected, or the plastic crank handle has come loose, or similar.

Someone who knows will be along in a bit, I'd guess. Also photos and/or video clips would help remote diagnosis...
 
Thank you, interesting information.
He is saying that he could not get access to the mechanism and thought the table needs to come off, mind you the right hand side is against the wall at present which may be the way in ?
Cheers, Andy
 
I've just had a look at a couple of pictures of the 619 and the 618.....It appears the rise & fall and the blade tilt are both on the same mechanism on the 618, but the 619 has a separate adjustment to the lhs of the machine for the blade tilt.

I wonder if Kity decided to change the design of the mechanism on the later 619 model, due possibly to the issue of the sticky gear mechanism...??

618 model....

1100526603.jpeg

619 model....

1100354874.jpeg
 
The 618 seems to be a sibling or, more likely, descendant of the 419.

It looks like the orange ring does tilt and the inner handwheel only does rise and fall. That means it's less likely to strip the teeth on the pinion (or it will take longer to do so), but at a guess, it's still metal-on-plastic -- really not clever. You'll be able to tell if the price of that orange bit is extortionate--that's the case with the 419!

In the 419 there's only a black handwheel. but the inner end of its boss has moulded pinion teeth. The handwheel slides on the shaft against a spring: pushing it in engages with the quadrant rack to do tilt, and disengages it from the rise+fall mechanism. Letting it spring out engages the rise+fall and the pinion teeth clear the quadrant rack at the same time.

On the 619 pic above you can see the functionality is split out. The second handwheel, which does the tilt, is on the left, behind/under what looks like a blue 32A inlet plug: I've seen Kity publicity with that handwheel on the right, so I assume it's swappable. There's a quadrant cut out for the rise & fall handwheel, but presumably it moves freely in that - my guess is that the uppermost Bristol lever locks it.

The same Bristol lever is used on the 419 and 619 planer fences. I don't know if Kity make them themselves, but they're pretty chunky. The shaft is M8. It might be possible to break the rise and fall mech by attempting to turn the handwheel without first releasing the Bristol lever -- it doesn't look like it operates on the leadscrew mechanism at all, but probably clamps one end of the saw carriage, so it can't tilt.

That would allow an enthusiastic but misguided person to try to force it to move, thus bending or snapping the mechanism. I nearly did this myself when I had a 419, and it's worse on the 619, as that Bristol lever is well out of sight (up under the table) for anyone standing in the normal position to operate the saw. And the other issue with Bristol levers is that you can reposition them, so it might look disengaged if somebody moved the lever round without loosening it.

So my money is on the mech being damaged. The owner will probably have to strip the machine down to find out, but it can probably be MIG welded back to full functionality...

Just a guess, mind.
 
The gear mechanism on the 618 is all metal, no plastic!
Both the black and orange hand wheels for Tilt and rise & fall are cast alloy.
There are Bristol levers to lock both the Tilt and the rise & fall which are also alloy, as opposed to cheaper plastic ones.
 
The gear mechanism on the 618 is all metal, no plastic!
Both the black and orange hand wheels for Tilt and rise & fall are cast alloy.
There are Bristol levers to lock both the Tilt and the rise & fall which are also alloy, as opposed to cheaper plastic ones.
Then my guess is that the 618 came first, and the 619 was a cost-reduction exercise. It sounds like you have the better made machine!

The big Bristol lever on the fence clamp of my 439 P/T looks identical to the 619 one in the above picture (below the tilt wheel). Mine definitely is plastic, probably glass-filled.

Aside: that P/T fence design is definitely something I'd change if I could - getting it square is tricky, but woe betide anyone who wants to use the fence at a specific tilt angle!

I have a large decorative moulding router cutter, for making cornice/crown mouldings and big picture frames. The stock is rectangular, but you have to plane the corners off the finished moulding, in order to get the necessary vertical and horizontal surfaces to do the joinery on the mitre saw. I'm never keen on using the P/T for small stock, and this is a downright scary process. Next time I do it I'll have a rethink about the order of work and which cuts are made using which tools.
 
So, after lots of hassle trying to get inside to the rise and fall vertical screw we had to call it a day.
To confirm this has both metallic gears.
The likely prognosis is that the thread, in the boss the vertical screw engages with, has worn away.
Many things learned to this stage including that they used threadlock during assembly.
Not sure it will be repairable, need to remove the vertical screw first, which I must assume the two m10 nuts locking it to the assembly are going to be threadlocked as well?
How they assembled it is a mystery.....
By the way removing or attempting to remove the table doesn't work to gain access as the whole lot hangs from the two tilt pivots fixed to it.
Cheers, Andy
 
The easy way to deal with threadlock is heat - from a small blowlamp ("torch" in the US). It usually softens quite quickly. A soldering iron usually isn't quite hot enough, although a hot air paint stripper might work.

I was mystified as to how the 419 was assembled, too. I concluded it was done upsode down, then the table inverted with the rise and fall mech hanging off it. I agree it's really awkward.

Thoe other thing to watch out for is that it is really, really hard to align the two trunnions (pivots). The saddles they sit in are a rather stupid design. If you can, it's worth re-doing them so that, instead of two nuts, you have a bar that has two threaded holes at the correct distance. Then you don't need to get a spanner under the table! When Axminster produced their 419 copy, they did exactly the mod I suggest.
 
Last edited:
Without an actual breakdown instructions manual I would say the following is possibly the order of attack for dismantling....

Remove all the tinware, riving knife assembly, blade etc
With the carriage elevated unbolt and remove the motor from behind where the saw blade should be.
Lower the carriage.
Remove the height locking spindle, washer and packer.
The rise and fall vertical screw is probably next to be made loose by undoing the two bottom lockbolts from underneath. This is possibly going to need the two m10 locknuts drilling off as I think they are threadlocked on.
Remove the screws holding the height indicator.
Clean off any detritus from the rise and fall alignment bars because they need to slide out past their bottom bushings
Tilt the carriage to 45°
Try and undo the bolt at the top of each rise and fall alignment bar. This required a hefty pair of grips biting into one as it was spinning and both bolts sheared off owing to threadlock.
Smooth off the nasty marks left by grips if used.
Lever, twist and coax the bars out the bottom of their slides.
The rise and fall assembly may drop off at this point?
If not, return carriage to 90° and attempt removal.

To be continued and possibly amended.....

Cheers, Andy
 
Last edited:
The easy way to deal with threadlock is heat - from a small blowlamp ("torch" in the US). It usually softens quite quickly. A soldering iron usually isn't quite hot enough, although a hot air paint stripper might work.

I was mystified as to how the 419 was assembled, too. I concluded it was done upsode down, then the table inverted with the rise and fall mech hanging off it. I agree it's really awkward.

Thoe other thing to watch out for is that it is really, really hard to align the two trunnions (pivots). The saddles they sit in are a rather stupid design. If you can, it's worth re-doing them so that, instead of two nuts, you have a bar that has two threaded holes at the correct distance. Then you don't need to get a spanner under the table! When Axminster produced their 419 copy, they did exactly the mod I suggest.
Thank you Eric, I did attempt heating the threadlock but the only blow torch available was one of the micro types. I think the surrounding metal was probably dissipating the heat too quickly.
If it ever goes back together I'll drill it, heat it and try a stud extractor.
Thankfully I hadn't undone those two saddles.
Yes, factory assembly is a mystery.
Cheers, Andy
 
The sheared bolts
20260317_181337.jpg

The two nuts, one behind the other, for the rise fall screw hiding under the carriage
20260317_181206.jpg

20260317_181404.jpg

20260317_181351.jpg
20260317_181250.jpg
20260317_181243.jpg
20260317_181141.jpg
 
That's the part I was expecting to have failed, or at least come undone! If you can remove the bad one, check the thread - M10, with the end thread M8 possibly?

The two threads need to be aligned, but the shape of the part probably doesn't matter much. You might make one, even with hand tools. Also, a part for an Axminster cabinet saw might possibly fit (or be modifiable to fit).

But I suspect AndyP might know a man with a lathe :cool:
Yes, all will hopefully be revealed when I pop back over shortly.
It might even be the same thread as a black and decker workmate and I have access to scrap ones and a compendium of other tat to try.
As you say other similar parts may be available.
Cheers, Andy
 
Update, many thanks to Andyp. You have email.

Going back to the job we finally removed the motor, something we should have done first and in the process of lifting it to get at the fixings the two locking nuts at the bottom of the rise and fall screw were exposed and easily undone.
Lifting the assembly out was restricted by the bevel gear being under its partner in crime and needed removal from the shaft.
This was done by extraction of a roll pin.
With great relief everything was taken out easily to expose a completely stripped thread in the steel boss that the aforementioned brass one is supposed to replace.
All being well we have a plan to position suitable nuts to the top and bottom of the boss after "letting" them in a bit and maybe fastening with a couple of spot welds.
To be continued.
Cheers, Andy

20260318_163610.jpg20260318_163602.jpg20260318_124634.jpg20260318_124611.jpg20260318_124538.jpg
 
Last edited:
Getting those two nuts welded in the correct position is very tricky, one big nut would be easier.
Good luck
 
As far as I can see, there's no need for that boss to be a cylinder shape. If you don't want to weld inside the machine, you could use a rectangular block of steel with a big M10 hole sideways through it and a couple of smaller threaded holes vertically. Hold it in place with two setscrews. You could position it beside the stripped boss, no need to remove it.
 
Getting those two nuts welded in the correct position is very tricky, one big nut would be easier.
Good luck
With the nuts mounted on the existing thread, that will be used as the reference for position.
As I see it, it is imperative that the virgin unused section of thread is used as any moderate wear will cause binding towards the top and bottom of its travel.
One big nut is not ruled out.
Cheers, Andy
 
Andy is quite right: Just a block of something - brass/bronze would be ideal as it's self-lubricating to an extent - tapped to whatever the main thread is, and also threaded for a pair of mounting screws. The latter get red loctite (permanent type). Brass is very nice to hand tap, especially if you use a lubricant such as Trefolex.

Whenever I have tried tacking nuts to things it has rarely ended well...
 
Tapping anything for the thread would require the purchase of a Trapezoidal tap.
The nut we have coming is a TR14mm x 3mm used on a leadscrew.

Cheers, Andy
 
Last edited:
You could still weld that nut to a block of steel and leave the current stripped bit as it is.
Further thought, the acme isn’t by any chance the same size as the ones found in car scissor jacks?
 
The replacement nut.
20260328_222747.jpg

With the size of the new nut I decided to completely cut off the top of the boss and not as previously mentioned .

Before removing the top section of the boss I used the threaded rise and fall screw to make an alignment jig, luckily the ply was an exact fit.
To get all parts parallel I routered off of the edge of the ply.


20260324_145533.jpg

The top part of the boss was sawn off.

20260324_145621.jpg

20260324_145424.jpg

With all parts held firmly the nut was tacked, checked, welded and then all areas carefully cleaned.

20260325_105011.jpg

The sheared off bolts in the ends of the vertical guide bars were drilled, heated and removed with a stud extractor.
The dusty residue from the thread lock had to be removed completely with a thread tap.
TBC
Andy
 
Last edited:
Now for reassembly.

NOTE, MAKE SURE YOU CHECK THE ALIGNMENT OF THE HOLES FOR THE ROLLPIN and mark up accordingly.

20260325_111344.jpg
With the benefit of hindsight I should have removed the other bevel gear when taking to pieces as getting the rise and fall thread to travel down through the bevel gear required me having to saw a slot in the end for a screwdriver.

Screw the thread through the boss just enough so that you can clear the loose bevel gear and thrust bearing assembly when being offered into position.

Insert the guide bar furthest away, tilt to 45° and bolt into position.

Back to 90°

Attach the spring

20260329_130548.jpg20260325_145506.jpg

Place the bevel gear assembly under the rise and fall thread, the screwdriver helps to line up the parts and then use it to screw it downwards


Line up ready for the roll pin and use a small temporary nail to check all is working up and down properly.
Next insert the roll pin and nuts .


20260325_122735.jpg

20260325_141739.jpg


TBC
Andy
 
Last edited:
Remove the locking lever and check it threads into the left hand guide bar easily.

Before inserting the left hand guide bar, which takes the threaded end of the height locking lever, you have to get technical with a bit of masking tape.

Upon disassembly a spacing washer dropped out from between the two plates of the body and the rise and fall carriage.

At this point of assembly you cannot get it back in without sticking it to a bit of masking tape.

Punch the hole clear of tape and rub the long tail of tape in some dust to kill the stickiness.

The tape can then be inserted between the two plates, passed through the slot and washer speared with the locking lever thread.

Put a bit of tape on the tail to stop it dropping if you accidentally withdraw the locking lever too much.

20260325_142826.jpg

20260329_125957.jpg

Slide in the left guide bar and carefully screw the locking lever into the threaded hole.

Tilt to 45° and put in top bolt but not fully tightened to temporarily hold it.

Now back to 90°.

Carefully unscrew the locking lever and insert the large spacer in the cut out.

Screw the locking lever back in and tighten up.

Now go back and fully tighten the guide bar bolt.

20260329_125636.jpg

NEXT mounting the OVERSIZED motor.
 
Kity machines are a nightmare to work on because they cram so much into a compact package. I had a hell of a time replacing the bearings in my Kity 623 spindle moulder when I had it.
 
The refitting of the motor had numerous pitfalls.
It transpires that the motor is bigger than it should be as at full height the capacitor just presses on the metal above it and the cooling fins at the bottom have been broken off.
This also made getting the mounting bolts in on the left side difficult because the holes in the blade trough were now offset.

The motor was positioned on a wedged support and the belt fitted.

The final hurdle was to get four large spacers between the mounting plate and the motor which turned into a two man job.
I had to grip the spacer sideways in my fingers to get them to the position while my mate tried to spear it with the bolt. Three were doable like this but had to resort to the masking tape trick for the forth.

Hopefully this all made sense and might help someone in the future.
All in all a difficult but very mentally rewarding job.

20260325_171313.jpg20260325_171155.jpg20260325_170108.jpg20260325_145629.jpg

20260329_161826.jpg
 
Last edited:
Back
Top