• Hi all and welcome to TheWoodHaven2 brought into the 21st Century, kicking and screaming! We all have Alasdair to thank for the vast bulk of the heavy lifting to get us here, no more so than me because he's taken away a huge burden of responsibility from my shoulders and brought us to this new shiny home, with all your previous content (hopefully) still intact! Please peruse and feed back. There is still plenty to do, like changing the colour scheme, adding the banner graphic, tweaking the odd setting here and there so I have added a new thread in the 'Technical Issues, Bugs and Feature Requests' forum for you to add any issues you find, any missing settings or just anything you'd like to see added/removed from the feature set that Xenforo offers. We will get to everything over the coming weeks so please be patient, but add anything at all to the thread I mention above and we promise to get to them over the next few days/weeks/months. In the meantime, please enjoy!

How would you make this stopped housing joint?

SteveMP

Sapling
Joined
Jun 18, 2026
Messages
315
Reaction score
307
Name
Steve
LOCATION
San Diego
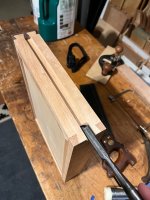
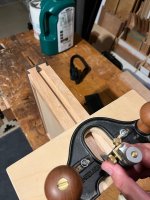
Making 4 more of these drawers. I did this one as follows, and it was doable, but seemed kind of slow.
Step 1. Mark lines with mortise gauge. Mark depth with gauge on end.
Step 2. Saw down on the lines to the depth marked (this was not fun to do due to the stopped end. So the front of the saw is kind of “scraping” the kerf more than sawing)
Step 3. Use chisel to get most of the waste out between saw kerfs.
Step 4. Clean it all up with router plane to even depth.


Just curious if someone more knowledgeable/experienced had a better way.
Thanks in advance

IMG_2031.jpeg

IMG_2032.jpegIMG_2033.jpeg
 
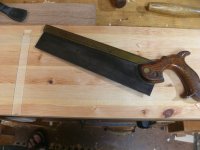
Well the thing is, as you’ve probably realised the groove is done before glue up, now in another situation where you want a stopped housing say across a plank for a bookshelf, it’s done pretty much as you’ve done it but at the stopped end about an inch of the groove is removed with a chisel, this gives the saw somewhere to go.
Ian
 
Ian's covered it, but here's a photo of the other sort he mentioned, where you want a stopped housing to hold a shelf. There's a chiselled out space for the saw to run in.

P1100464.JPG

If you're not in a rush, this was from my recent bookcase build where there's a lot more detail and pictures

 
Having cut something like Andy T's picture except they were sliding dovetails in oak, I did figure out the trick of cutting out the stopped end first to make somewhere for the saw to go. But that still leaves nowhere for the sawdust to go, except for tediously sawing a bit, cleaning out the sawdust, repeat. I wondered if a saw with a curved (breasted ?) edge like an azebiki or even a floorboard saw might be useful here ?

I did also try just alternate use of a knife to cut the sidewall a bit deeper and the router plane to remove a skim of material between them - also tedious.
 
I think that, as with so many jobs in woodworking, the "best" combination of technique and tools depends on many factors.

In the example I showed, I'd probably already gone down 2-3mm by knifing and chiselling so only had about 3mm more to saw down. So a small working space at the end was ok, with a very fine saw and a not very wide piece of wood.

But for something like a wardrobe with twice the depth, I'd have needed a coarser saw and more room.

I think your suggestion of an azebiki is a sound one, that Al has used and shown on here. I prefer western style saws and don't have one, but if I didn't have so many saws already I'd be tempted.

Another option would be to cut through housings and plant a face frame on to hide them. That would justify my boxful of quite a few dado planes in various widths! 😏
 
Ahh yes, the best approach to stopped grooves is to design them out if you can ! As in the original post, move the two dovetails apart a bit, and groove before assembly.

I also prefer western style saw. Except for pruning or greenwood work where you can't hold the work well. But I guess that is why Japanese use pull saws as well as planes you pull. Having spent some time in Japan, my hips do not well tolerate Japanese styles of work, or dining !
 
Bla
Unless I'm very much mistaken, I don't have an Azebiki so I don't think I've shown one on here!
Oops!
I should have searched before posting. I was misremembering this thread

 
Well the thing is, as you’ve probably realised the groove is done before glue up, now in another situation where you want a stopped housing say across a plank for a bookshelf, it’s done pretty much as you’ve done it but at the stopped end about an inch of the groove is removed with a chisel, this gives the saw somewhere to go.
Ian
Agreed, that's the hand tool way to do it, but it relies on ensuring that your glue up is absolutely 100% level and and out of 'wind'. If it is you're fine; if it's even slightly out then your stopped grooves are also going to be out of kilter and twisted, which leaves you in a whole world of pain to fix it, init?

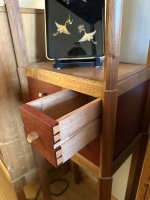
I know it sacrilege to mention the 'screaming monster' in the Hand Tool forum and in times past I would have been deported to the colonies for life but the really, guaranteed accurate way to do it is to glue the drawers together, level any 'bumps' in the bottom, take off shavings here or there to remove any twist and then use that flat, true drawer bottom face against the router fence:

IMG_8128.jpeg

...to machine a pair of dead parallel grooves for drawer runners, which is exactly wot I did here on this JK piece. I'll crawl back under me rock now - Rob
 
Last edited:
Ian's covered it, but here's a photo of the other sort he mentioned, where you want a stopped housing to hold a shelf. There's a chiselled out space for the saw to run in.

View attachment 56879

If you're not in a rush, this was from my recent bookcase build where there's a lot more detail and pictures

Now that i see the picture of it, it makes perfect sense! Thank you!
 
Having cut something like Andy T's picture except they were sliding dovetails in oak, I did figure out the trick of cutting out the stopped end first to make somewhere for the saw to go. But that still leaves nowhere for the sawdust to go, except for tediously sawing a bit, cleaning out the sawdust, repeat. I wondered if a saw with a curved (breasted ?) edge like an azebiki or even a floorboard saw might be useful here ?

I did also try just alternate use of a knife to cut the sidewall a bit deeper and the router plane to remove a skim of material between them - also tedious.
I have a small azebiki, but the problem with it is that you pretty much have to clamp a guide piece on for it to run straight. The way i had to clamp this drawer in the vise to hold it made it really difficult to clamp a guide on top so i tried the dovetail saw instead. But yeah in theory the azebiki would have worked if i had some other way to hold the drawer.
 
I have a small azebiki, but the problem with it is that you pretty much have to clamp a guide piece on for it to run straight. The way i had to clamp this drawer in the vise to hold it made it really difficult to clamp a guide on top so i tried the dovetail saw instead. But yeah in theory the azebiki would have worked if i had some other way to hold the drawer.
If you first knife the sides of the housing, then chisel down to the knife line (conventional hand tools method) wouldn't that provide suitable guidance for the azebiki, like it does for a tenon saw?
 
If you first knife the sides of the housing, then chisel down to the knife line (conventional hand tools method) wouldn't that provide suitable guidance for the azebiki, like it does for a tenon saw?
Hmm, good question, i’ll try it on a scrap later on and see. Tbh, i’ve only used it to make sliding dovetails. I’ll try it and report back
 
Have to say I'm with Rob. True the drawer up and 10 seconds on the router table or spindle. Dead accurate both sides.
 
Have to say I'm with Rob. True the drawer up and 10 seconds on the router table or spindle. Dead accurate both sides.
I’m not against machining per se. If i was on a time crunch and needed it quickly, or if i had to make 100 of them I would machine them. However i work in IT and sit at a desk all day working on high tech stuff “in the cloud” all day. So working wood with my hands is the only thing that grounds me back to real life.

Plus i cut my router table down to turn into a table saw extension that i never finished so i would have to finish that old project first
 
I’m not against machining per se. If i was on a time crunch and needed it quickly, or if i had to make 100 of them I would machine them. However i work in IT and sit at a desk all day working on high tech stuff “in the cloud” all day. So working wood with my hands is the only thing that grounds me back to real life.
It's a lot quieter and more pleasant as well. If you're not in a rush (or trying to do it for profit) then hand tools are much nicer. My electric routers get used, but they're always the tool of last resort.
 
If you first knife the sides of the housing, then chisel down to the knife line (conventional hand tools method) wouldn't that provide suitable guidance for the azebiki, like it does for a tenon saw?
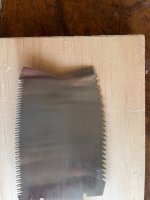
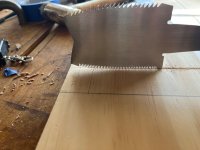
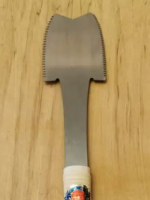
Ok so it works pretty well. The only issue is the teeth don’t go to the end, like on a western saw. And you have to be mindful of the curvature of the blade as you go down so the nose doesn’t dig into the wood. But it is quite a bit easier to pull, i guess since its pulling the sawdust out instead of shoving it into stopped cut.

image.jpg
image.jpg
 
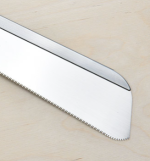
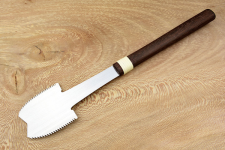
Interesting that the teeth don't go to the end. For some reason I had it in my head that an Azebiki had teeth going round like my cross-cut Dozuki has: Workshop Heaven photo:

1785340001201.png

I've never used an Azebiki so I'd imagine that's just me misunderstanding.
 
There are so many ways to skin a cat, no matter what colour it is, how big, how fierce... ;)
 
Interesting that the teeth don't go to the end. For some reason I had it in my head that an Azebiki had teeth going round like my cross-cut Dozuki has: Workshop Heaven photo:

View attachment 56892

I've never used an Azebiki so I'd imagine that's just me misunderstanding.
I have that same saw and it works great! But i bent the nose of mine and haven't gotten a replacement blade yet.

So as for azebiki saws, I know there are quite a few varieties. There are also "kamabiki" which are similar but less curvy. FWIW, the rip side is more curvy than the crosscut. All the ones I have seen do not have teeth to the end. That doesn't mean there aren't any, just not that I have seen. It does work quicker than my dovetail saw though, since it is pulling the sawdust out.
 
Last edited:
It's a lot quieter and more pleasant as well. If you're not in a rush (or trying to do it for profit) then hand tools are much nicer. My electric routers get used, but they're always the tool of last resort.
Lately, I have only been using my compact router for making carved signs. I have a CNC bit in it for hand routing letters etc and then I hand carve around with gouges. I learned from an old Disneyland imagineer that carved a lot of the signs inside Disneyland. I haven't used my big router in years.
 
Back
Top