• Hi all and welcome to TheWoodHaven2 brought into the 21st Century, kicking and screaming! We all have Alasdair to thank for the vast bulk of the heavy lifting to get us here, no more so than me because he's taken away a huge burden of responsibility from my shoulders and brought us to this new shiny home, with all your previous content (hopefully) still intact! Please peruse and feed back. There is still plenty to do, like changing the colour scheme, adding the banner graphic, tweaking the odd setting here and there so I have added a new thread in the 'Technical Issues, Bugs and Feature Requests' forum for you to add any issues you find, any missing settings or just anything you'd like to see added/removed from the feature set that Xenforo offers. We will get to everything over the coming weeks so please be patient, but add anything at all to the thread I mention above and we promise to get to them over the next few days/weeks/months. In the meantime, please enjoy!

American here in Oundle (Peterborough) - Brand new to woodworking

Hmmmmm.. Maybe you are right. I do have quite a bit of 18mm birch plywood, and it would make things a bit easier, as I would need to worry about wood movement with the mahogany, which I don't think is as much a condern with the birch plywood. Plus, it would not require stripping.
There you go. Nice to put the kidneys to work eh. ;)

Pete
 
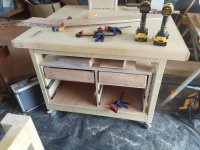
Making some progress on storage. All rails in the drawer box, and a second drawer built and installed.
 

Attachments

  • 20260913_115154.jpg
    20260913_115154.jpg
    206.5 KB · Views: 7
  • 20260913_150050.jpg
    20260913_150050.jpg
    187.1 KB · Views: 7
  • 20260913_150041.jpg
    20260913_150041.jpg
    230.9 KB · Views: 7
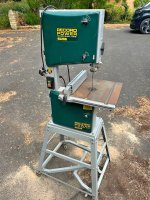
Also picked up a nice bandsaw for 150£ today. Wife is moderately annoyed as this tightens up the garage space for now.. But our referencing went through for the new rental, and the owners are great and have agreed to clear out the garage first, and allow me to move the woodshop before the official start date.. So she'll get over it..:-)
 

Attachments

  • 762883341_1354140550231312_2834363699148755908_n (1).jpg
    762883341_1354140550231312_2834363699148755908_n (1).jpg
    179.6 KB · Views: 6
Also picked up a nice bandsaw for 150£ today.
Congratulations on the purchase! The cast iron table will clean up nicely with some elbow grease and a random orbital sander. When you get settled in, contact Ian at Tuff Saws for good blades.

I have the Record Power BS350S that had the same mobility kit. After the first year of moving the saw around, the wheels started failing and I wanted to improve the base while adding some storage in the wasted space. Here is the thread on UKW showing my base, which should be ideal for your saw as well:


After nearly five years of use, I am very happy with the modifications I made to my saw and the base is perfect for my limited space basement shop.
 
Congratulations on the purchase! The cast iron table will clean up nicely with some elbow grease and a random orbital sander. When you get settled in, contact Ian at Tuff Saws for good blades.

I have the Record Power BS350S that had the same mobility kit. After the first year of moving the saw around, the wheels started failing and I wanted to improve the base while adding some storage in the wasted space. Here is the thread on UKW showing my base, which should be ideal for your saw as well:


After nearly five years of use, I am very happy with the modifications I made to my saw and the base is perfect for my limited space basement shop.
I may try some of your upgrades. For now.. The bandsaw came without the upper tensioning knob, so I need to either order a replacement from Record, or finally set up my 3D printer and print one. I haven't taken the time yet to make sure the cast iron worktop is square to the blade, haven't dialed in the side guides or rear stop, etc. It will be some time before the bandsaw is usable. I did watch the video of how to do all this and it seems very straightforward, but storage is the priority right now.

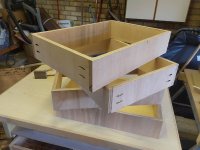
Last night, I cut and sanded the sides for the other 4 drawers, so they should be ready for drillng pocket holes, and assembly, once I go out to the greenhouse to pick up a few more 1/4" plywood bottoms and cut them. I have a line on a set of 10 muted gold drawer handles for the false fronts. I think I may just go ahead with the plan to use the birch plywood stained black for false fronts, and trim out the rest of the front of the 2x4 frame with unstained birch plywood. Or maybe just keep everything the same and use clear poly?

Hoping to have all six bare drawers in this evening. I figured out a solution where I clamp an appropriately sized height of 18mm plywood with a tacked on 1/4" plywood "runner", sitting on top on the next lower rail clamped to each side of the cabinet carcass, to support each drawer at the right height. Felt squirrelly the first time I tried it because the drawers went in so tight. Drawer slid smoothly as soon as I removed the supports.
 
Didn't feel like getting dirty tonight, so decided to just assemble the 4 drawer sides, and will try to cut thebottoms and attach them tomorrow.
 

Attachments

  • 20260916_180139.jpg
    20260916_180139.jpg
    150.2 KB · Views: 2
Back
Top