Phil
Old Oak
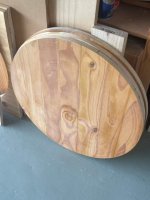
3 Round tabletops
Son asked if I could make 3 new tabletops to replace the MDF which was starting to look shabby. They are used at their church.
He did offer to pay for the materials, told him he just could not afford it! Pine was the suggested material.
Table

Stand
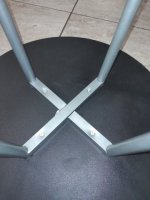
MDF top
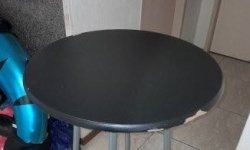
The tops are 600mm wide and 20mm thick.
Laminated pine board was available in 610mm wide and 20mm thick. Three by 600mm gave me 1800mm before allowing for trim and waste.
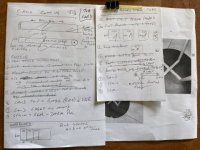
Available sizes are 1800mm, 2400mm, 3000mm, so 2400 looks the best and started compiling the Job Card using 2400. Cost ZAR549.00
Job card
In the meantime a resident was relocating and offered me some scrap timber, see thread https://www.thewoodhaven2.co.uk/threads/nice-haul.11831/ and a laminated board 2400mm long, 600mm wide and 20mm thick.
Scrooge looked at this and it was a no brainer, cost nothing, if a C-Up no great loss.
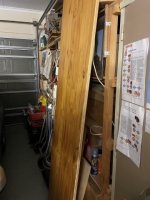
There were scratches, dings and 2 large white marks/patches where the feet had been attached. The board had been sealed with ‘whatever’ and I tried the hot air gun. No go started leaving burn marks and a nice big blister on my palm (careless).
Then came the Makita half-sheet sander with 100 grit.
Sanding both sides.
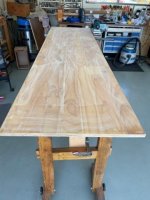
The board was divided into 3 sections for the tops taking into account the white patches.

The one edge was skew and needed to be cut off.

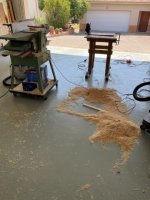
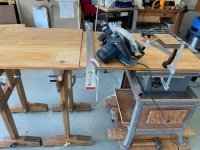
Next up sawing the board. Easiest to rest it on the table saw and use the 2 trestles for support. Circular saw to be used and the fence (long spirit level) clamped.

Cutting the board
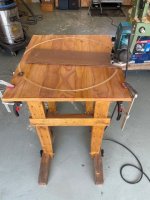
Middle point determined looking at the defects. A 2mm hole would be drilled for a long panel pin. A highly complicated and expensive jig was made to draw the circle.
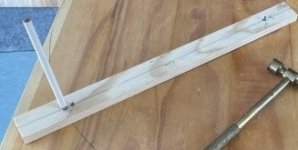
Some scrap pine. A hole for the pin and then 300mm a hole for a pencil, and circle drawn.

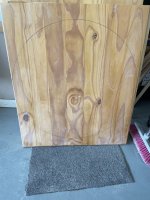
Boards marked ready for circle cutting.
Circle cutting covered in this thread https://www.thewoodhaven2.co.uk/threads/woodworking-and-ai.12017/
To make the jig to hold the router I needed some 15mm thick board. Nothing in stock, so improvise.
There was a sheet of hardboard 600mm wide and 1220mm long. Three pieces 600 long and 150 wide, 3mm thick, glued together would provide a very nice sturdy jig.
Easy to do on the table saw.
https://www.thewoodhaven2.co.uk/threads/do-we-learn-from-past-mistakes.11984/

The HB was glued and clamped
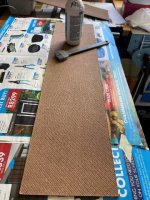
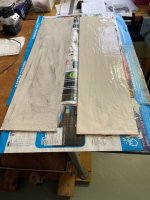
I did get a bit carried away with the glue and found some squeeze out when clamping.
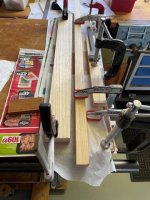
Next was using an old Makita base to get the screw holes drilled and counter sunk.
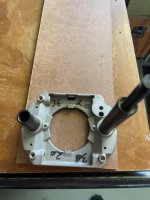
Holes drilled and countersunk
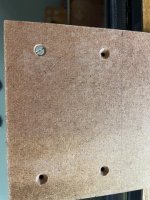
Mount the Makita and rout down using a 2mm flute bit to get a hole for measuring.
De-mount Makita, fit a 6mm flute bit which will be used to cut the circles. Again rout all the way down to check if bit will cut all the way through.

This router does not have a small button to hold the switch in. Not convenient when using it in the router table. So, improvise with some wire, half a washing peg and fitted with pliers.
To be continued …………………
Son asked if I could make 3 new tabletops to replace the MDF which was starting to look shabby. They are used at their church.
He did offer to pay for the materials, told him he just could not afford it! Pine was the suggested material.
Table
Stand
MDF top
The tops are 600mm wide and 20mm thick.
Laminated pine board was available in 610mm wide and 20mm thick. Three by 600mm gave me 1800mm before allowing for trim and waste.
Available sizes are 1800mm, 2400mm, 3000mm, so 2400 looks the best and started compiling the Job Card using 2400. Cost ZAR549.00
Job card
In the meantime a resident was relocating and offered me some scrap timber, see thread https://www.thewoodhaven2.co.uk/threads/nice-haul.11831/ and a laminated board 2400mm long, 600mm wide and 20mm thick.
Scrooge looked at this and it was a no brainer, cost nothing, if a C-Up no great loss.
There were scratches, dings and 2 large white marks/patches where the feet had been attached. The board had been sealed with ‘whatever’ and I tried the hot air gun. No go started leaving burn marks and a nice big blister on my palm (careless).
Then came the Makita half-sheet sander with 100 grit.
Sanding both sides.
The board was divided into 3 sections for the tops taking into account the white patches.
The one edge was skew and needed to be cut off.
Next up sawing the board. Easiest to rest it on the table saw and use the 2 trestles for support. Circular saw to be used and the fence (long spirit level) clamped.
Cutting the board
Middle point determined looking at the defects. A 2mm hole would be drilled for a long panel pin. A highly complicated and expensive jig was made to draw the circle.
Some scrap pine. A hole for the pin and then 300mm a hole for a pencil, and circle drawn.
Boards marked ready for circle cutting.
Circle cutting covered in this thread https://www.thewoodhaven2.co.uk/threads/woodworking-and-ai.12017/
To make the jig to hold the router I needed some 15mm thick board. Nothing in stock, so improvise.
There was a sheet of hardboard 600mm wide and 1220mm long. Three pieces 600 long and 150 wide, 3mm thick, glued together would provide a very nice sturdy jig.
Easy to do on the table saw.
https://www.thewoodhaven2.co.uk/threads/do-we-learn-from-past-mistakes.11984/
The HB was glued and clamped
I did get a bit carried away with the glue and found some squeeze out when clamping.
Next was using an old Makita base to get the screw holes drilled and counter sunk.
Holes drilled and countersunk
Mount the Makita and rout down using a 2mm flute bit to get a hole for measuring.
De-mount Makita, fit a 6mm flute bit which will be used to cut the circles. Again rout all the way down to check if bit will cut all the way through.
This router does not have a small button to hold the switch in. Not convenient when using it in the router table. So, improvise with some wire, half a washing peg and fitted with pliers.
To be continued …………………
Last edited: