
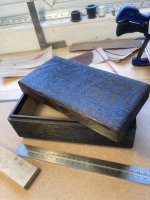
This box has been something like 6 years in the making for various reasons.
I fancied having a go at that Japanese Shuey McFee where you attack wood with a blow torch as I quite like the finish it gives. I had some bits of oak in the offcut box so I thought I’d give it a go!
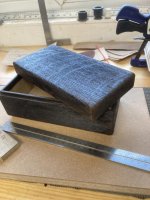
It’s incredibly simple construction just mitred with the top rebated in. That was the easy bit.
Out with the napalm (well, a plumbers small blowtorch actually) and applied copious amounts of heat all over. Immediate disappointment as the joints opened wide and it looked awful. I shouldn’t have been surprised really with such heat application there was bound to be differential movement.
For some reason instead of binning it I threw it on a shelf and forgot about it.
A few weeks ago when having something of a clear out (or a move stuff around session to be more accurate!) I discovered it. The initial temptation was to throw it in the burning bin but a closer inspection revealed that all the joints had closed up as I suppose some form of equilibrium had been achieved.
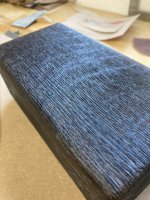
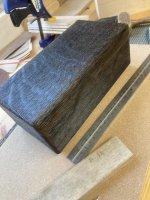
I decided to attempt a conclusion but reapplication of heat was a non starter. The colour was unequal (not the deep black I was looking for) and it was very ‘charcoaly’ . It was therefore attacked with a wire brush but this didn’t make a lot of difference. I upped the stakes and used one of those wire brush wheels in the battery drill and managed to remove quite a lot of the charring but this in turn removed the colour even further. It did however provide what I felt was a really nice texture.
Something else I’d be wanting to try was ebonising so I whipped out some vinegar and threw in some nails and wire wool and waited. Nothing happened!
It transpires the nails and wire wool need to be rusty to produce anything usable for darkening oak. Anyhow, it worked eventually but I suspect that as the oak had been heated and hanging around for such a long time the tannin level was low so the level of ‘blackness’ isn’t as deep as I’d like.
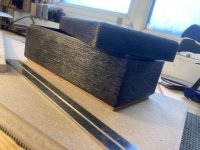
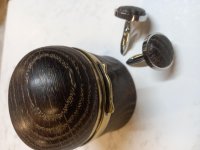
A small oak plinth added to provide a bit of contrast.
After all that I still gave very serious consideration to throwing it in the log burner but was persuaded to at least apply some finish. A few coats of shellac and some wax have darkened it some more but I still don’t know if I’ll keep it.
Never have so many treatments been applied to one small box. Here endeth the saga.

I fancied having a go at that Japanese Shuey McFee where you attack wood with a blow torch as I quite like the finish it gives. I had some bits of oak in the offcut box so I thought I’d give it a go!
It’s incredibly simple construction just mitred with the top rebated in. That was the easy bit.
Out with the napalm (well, a plumbers small blowtorch actually) and applied copious amounts of heat all over. Immediate disappointment as the joints opened wide and it looked awful. I shouldn’t have been surprised really with such heat application there was bound to be differential movement.
For some reason instead of binning it I threw it on a shelf and forgot about it.
A few weeks ago when having something of a clear out (or a move stuff around session to be more accurate!) I discovered it. The initial temptation was to throw it in the burning bin but a closer inspection revealed that all the joints had closed up as I suppose some form of equilibrium had been achieved.
I decided to attempt a conclusion but reapplication of heat was a non starter. The colour was unequal (not the deep black I was looking for) and it was very ‘charcoaly’ . It was therefore attacked with a wire brush but this didn’t make a lot of difference. I upped the stakes and used one of those wire brush wheels in the battery drill and managed to remove quite a lot of the charring but this in turn removed the colour even further. It did however provide what I felt was a really nice texture.
Something else I’d be wanting to try was ebonising so I whipped out some vinegar and threw in some nails and wire wool and waited. Nothing happened!
It transpires the nails and wire wool need to be rusty to produce anything usable for darkening oak. Anyhow, it worked eventually but I suspect that as the oak had been heated and hanging around for such a long time the tannin level was low so the level of ‘blackness’ isn’t as deep as I’d like.
A small oak plinth added to provide a bit of contrast.
After all that I still gave very serious consideration to throwing it in the log burner but was persuaded to at least apply some finish. A few coats of shellac and some wax have darkened it some more but I still don’t know if I’ll keep it.
Never have so many treatments been applied to one small box. Here endeth the saga.


 bscene-drinkingcheers:



 on WH2 - Rob