• Hi all and welcome to TheWoodHaven2 brought into the 21st Century, kicking and screaming! We all have Alasdair to thank for the vast bulk of the heavy lifting to get us here, no more so than me because he's taken away a huge burden of responsibility from my shoulders and brought us to this new shiny home, with all your previous content (hopefully) still intact! Please peruse and feed back. There is still plenty to do, like changing the colour scheme, adding the banner graphic, tweaking the odd setting here and there so I have added a new thread in the 'Technical Issues, Bugs and Feature Requests' forum for you to add any issues you find, any missing settings or just anything you'd like to see added/removed from the feature set that Xenforo offers. We will get to everything over the coming weeks so please be patient, but add anything at all to the thread I mention above and we promise to get to them over the next few days/weeks/months. In the meantime, please enjoy!

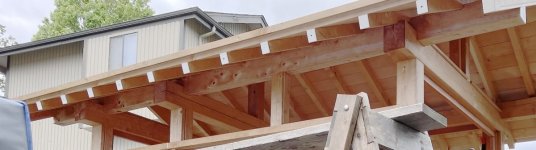
A Japanese style garden shed

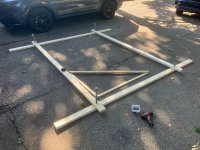
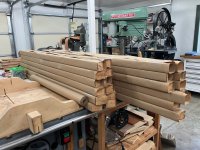
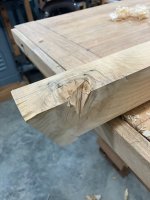
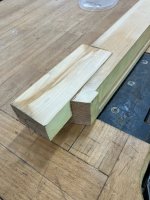
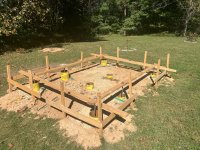
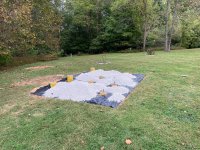
I'm finally getting back to the shed and this thread. I have a spot for the foundation picked out at the new home, shown elsewhere. Now I'm hand planing off the dirt and sticker stains from the exposed beams and posts. I've also decided to wrap the cleaned up parts with kraft paper. This is sometimes done in Japan to avoid getting fingerprints and dirt on the unfinished wood surface. I didn't do this the first time around since I thought it was too fussy for a garden shed and I was sorry I didn't. Those hand and fingerprints don't wash off and don't fade. They can be sanded off of course but that ruins the hand planed surface. With openings cut for the joinery the shed can still be assembled and then the paper removed when it is safe to do so.
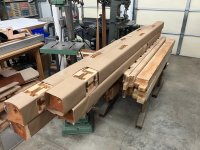
6B8078E1-C974-46F0-907B-33AE4B45C7A0.JPG
 
This is awesome. I have been wanting to try something like this and feel I could do the cuts, but i’m not sure where to learn how to layout the marks and measurements. Where dod you learn that part?
 
In respect of weather. Will you need to change / adapt anything for its new location.
Alex.
That's a very good question. Oregon had mild wet winters and warm arid summers. Indiana has mid-continent extremes of cold sometimes snowy winters and hot very humid summers. About like the weather in Tokyo, as I understand it to be.

I built the roof for a worst case Oregon snow load. The shed is likely to see a greater snow load here at least once in awhile but I'm pretty sure the roof can handle it.

I am going to use a lime plaster exterior over a rainscreen gap. I think it will be weather resistant enough for either climate.

Termites may be more of an issue here than in Oregon. The wood I'm using is reportedly insect resistant and I'll be treating with a borate salts wash as I did in Oregon so I'm not too worried.

So overall I guess no changes to the design. Except I will have to do some regrading. The original site sloped back to front a few inches and I adjusted the length of the posts to accommodate that. Here the site slopes front to back but I can't now change the post lengths. I have an excavator coming soon to do work on our septic field so I'm going to ask him to push some dirt over the shed site to help me out there.
 
This is awesome. I have been wanting to try something like this and feel I could do the cuts, but i’m not sure where to learn how to layout the marks and measurements. Where dod you learn that part?
I was in exactly the same place when I started: a furniture making background but no carpentry or timber framing experience. I'm learning with a combination of books, youtube videos, and a few contacts I've made with Japanese contractors.

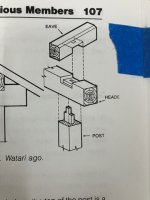
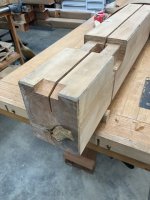
The best book in English I've found to start with is "The Complete Japanese Joinery" by Sato and Nakahara. It may be out of print. This is a actually a compressed version of two different books with chapters missing from both originals which leaves some odd gaps and duplications but still the best source out there. For detailed joinery layout/setout/markout I like this book in Japanese by Shinzo Togashi, roughly translated as Traditional Carpentry Joints. ISBN 978-4-274-06971-0. I think I bought it from Amazon Japan. Even though the text is Japanese it is mostly detailed drawings set out in fractions scaled to the size of your posts and readable for English speakers. For example a mortice width will be 1/4 the post width.


695C1D71-DD74-4587-B495-3326203856FE_4_5005_c.jpeg04EC2E54-2174-4854-95D1-C9E1197B9839_4_5005_c.jpeg

All Japanese joints are set out from centre lines. A Japanese framing square (sashigane) makes setting out relatively simple. A story pole/stick to transfer markings is extremely helpful.
 
I was in exactly the same place when I started: a furniture making background but no carpentry or timber framing experience. I'm learning with a combination of books, youtube videos, and a few contacts I've made with Japanese contractors.

The best book in English I've found to start with is "The Complete Japanese Joinery" by Sato and Nakahara. It may be out of print. This is a actually a compressed version of two different books with chapters missing from both originals which leaves some odd gaps and duplications but still the best source out there. For detailed joinery layout/setout/markout I like this book in Japanese by Shinzo Togashi, roughly translated as Traditional Carpentry Joints. ISBN 978-4-274-06971-0. I think I bought it from Amazon Japan. Even though the text is Japanese it is mostly detailed drawings set out in fractions scaled to the size of your posts and readable for English speakers. For example a mortice width will be 1/4 the post width.


View attachment 57711View attachment 57714

All Japanese joints are set out from centre lines. A Japanese framing square (sashigane) makes setting out relatively simple. A story pole/stick to transfer markings is extremely helpful.
Excellent, thank you! This is very helpful.
 
Steve, if you can get up to the Bay area in October you might be interested in attending the Kezouro-kai meeting.
Yeah its definitely on my list. There is also the school up in Port Townsend Washington I believe that sometimes has some Japanese woodworking courses there? I know there are a few craftsmen up in the area that specialize in Japanese style of building like this one https://www.mokuchiwoodworking.com/visit
I did road trip up through Oregon a couple months ago but we had a tight timeline.
 
Gary, only just came across this thread. I have one word...

WOW! Stunning house, layout, the Japanese shed is fantastic and is the first thing I have seen in a long, long time to rekindle any interest in 'proper' woodworking. I must not show it to my wife
 
Yes, Port Townsend School of Woodoworking offers Japanese carpentry classes. In fact they had a Japanese woodworking festival last Saturday. One of the instructors there, Dale Brotherton in Seattle, has helped me with my shed design. Another instructor, Yann Giguere in Ashland, Oregon, is another good resource. Karl Bareis at Santa Cruz Timber Frames also does excellent work. I don't know whether he teaches apart from his work with Kezouro-kai.
 
Yes, Port Townsend School of Woodoworking offers Japanese carpentry classes. In fact they had a Japanese woodworking festival last Saturday. One of the instructors there, Dale Brotherton in Seattle, has helped me with my shed design. Another instructor, Yann Giguere in Ashland, Oregon, is another good resource. Karl Bareis at Santa Cruz Timber Frames also does excellent work. I don't know whether he teaches apart from his work with Kezouro-kai.
I have heard of Dale Brotherton. I think he actually wrote THE book on sharpening japanese planes etc.
 
Remember this build very well, I was one of the “take it with you crew” and here we are again for the rebuild. Don’t suppose it’s possible to swop the legs around re the ground sloping the wrong way?
Ian
 
What a great project... 👍 and one I'm going to have to find the time to go back to the beginning of. Started on p1 but, being now on p11, skipped a couple and wanted to get to why it had started again... Give me time and I'll get there. Fantastic from what I've seen so far.

Your latest comments indicate a *move* and relocation so I really must get up to speed and go back over the thread.

Frank
 
What a great project... 👍 and one I'm going to have to find the time to go back to the beginning of. Started on p1 but, being now on p11, skipped a couple and wanted to get to why it had started again... Give me time and I'll get there. Fantastic from what I've seen so far.

Your latest comments indicate a *move* and relocation so I really must get up to speed and go back over the thread.

Frank
Long story short: Last summer we moved from Corvallis, Oregon to Bloomington, Indiana. We disassembled the nearly completed shed and brought it with us. The first house we moved into didn't work out and we moved again last month to a better one in the same town. The shed parts have been in storage during the moves. I hope to re-raise the frame in October.
 
Don’t suppose it’s possible to swop the legs around re the ground sloping the wrong way?
Ian
No, the posts are asymmetrically shaped. Only one way to put them together. The plan is to recreate the slope by adjusting the heights of the concrete piers and then adjust the grade to fit. The difference I need is about 6 inches from back to front over a distance of 6 ft.
 
Long story short: Last summer we moved from Corvallis, Oregon to Bloomington, Indiana. We disassembled the nearly completed shed and brought it with us. The first house we moved into didn't work out and we moved again last month to a better one in the same town. The shed parts have been in storage during the moves. I hope to re-raise the frame in October.
Appreciate you bringing me up to speed Gary 😊. I'll still take a look back but will look forward to your following posts on this 👍
 
Back
Top