• Hi all and welcome to TheWoodHaven2 brought into the 21st Century, kicking and screaming! We all have Alasdair to thank for the vast bulk of the heavy lifting to get us here, no more so than me because he's taken away a huge burden of responsibility from my shoulders and brought us to this new shiny home, with all your previous content (hopefully) still intact! Please peruse and feed back. There is still plenty to do, like changing the colour scheme, adding the banner graphic, tweaking the odd setting here and there so I have added a new thread in the 'Technical Issues, Bugs and Feature Requests' forum for you to add any issues you find, any missing settings or just anything you'd like to see added/removed from the feature set that Xenforo offers. We will get to everything over the coming weeks so please be patient, but add anything at all to the thread I mention above and we promise to get to them over the next few days/weeks/months. In the meantime, please enjoy!

Am I expecting too much from Domino?

9fingers

Moderator
Staff member
Joined
Jul 21, 2014
Messages
10,414
Reaction score
165
Location
Romsey Hampshire between Southampton and the New F
I'm working with mitred joints in 22mm square oak to form a 135 degree joint. 67.5 degree cut on each piece
I'm using a 5mm cutter on the tightest setting. If open it up to the middle setting, the domino slot breaks out the side of the timber.
I'm using the guide plate which is set tightly and centrally accross the 22mm dimension ie 11mm each side.
The timber is also excatly central with respect to the engraved lines on the base of the tool.
I am seeing that the slot cut is offset by around 0.4 mm. When the joint is assembled, the error is doubled so the joint has a chuffing great step in it.

the joint:
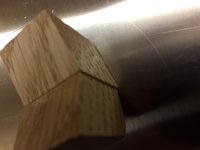
IMG_2958.JPG

I can bodge the problem by shaving a bit off the domino for each and every joint or deliberately offset the fences on the guide plate but for a machine at this price point, I don't expect to have to do this.

Anyone else noticed this?
Is there an adjustment (inside?) to correct this?
Am I expecting too much?
The machine is secondhand ( but is in good visual condition) so I can't throw it back at festool.

Bob
 
Hi Bob

Have you tried calibrating and then using the centre guideline with knife mark? This process of calibrating the centre line is explained in the supplementary manual

Sent from my SM-G973F using Tapatalk
 
I’m not clear Bob if you’re saying the step is to the side of the joint or on the top/bottom face?

If it’s to the side then I’d agree it might need calibrating.
 
By "guide plate" are you referring to the clear plastic window just above the cutter hole? It can be adjusted as Sammy indicates above. Some of what you say makes me wonder if you're using the centring attachment / accessory which can be a fiddle to get bang on for something such as this.
 
Thanks Sammy

I’ll try and find that manual online and give it a read.
However I have proved that the centre of the slot cut is not in line with the engraved centre line on the base.
I can’t see a way of adjusting the motor body with respect to that line.

Bob
 
Nelsun":3q4jsmgx said:
By "guide plate" are you referring to the clear plastic window just above the cutter hole? It can be adjusted as Sammy indicates above. Some of what you say makes me wonder if you're using the centring attachment / accessory which can be a fiddle to get bang on for something such as this.

I don’t know it’s proper name but the plate I’m taking about is the device that clips on with a pair of adjustable fences fitted.
Bob
 
TrimTheKing":2jgmdpf0 said:
I’m not clear Bob if you’re saying the step is to the side of the joint or on the top/bottom face?

If it’s to the side then I’d agree it might need calibrating.
It is side to side error mark.
But as there is no adjustment of the base I feel that calibration can only mean noting the magnitude of the error.
Bob
 
OK I've read the book of words and the only calibration is to offest the plastic scale which I will do tomorrow but as I feared this will just mean the engraved lines on the bottom will still be in error and so can't be used.
I'll see if I can stick something over it with the correct alignment top and bottom.

Thanks for trying to help guys.
N.B.
The device I called a guide plate above is a "Trim Stop" in domino-speak
see here https://www.axminstertools.com/festool- ... top-493487

Bob
 
If you're using the catchily named Trim Stop then I think you're looking to push its boundaries. It's a faff to set up especially for something like this. Lots of trials and lots of errors are ahead of you...

IIRC, an American engineered a self centring fence accessory, but I don't think it's made any more and was "a bit pricey"!
 
Nelsun":364wxhku said:
If your using the catchily named Trim Stop then I think your looking to push its boundaries.its a faff to set up especially for something like this. Lots of trials and lots of errors are ahead of you...

IIRC, an American engineered a self centring fence accessory, but I don't think it's made any more and was "a bit pricey"!

I agree with Nelsun. I've got one and stopped using it.

Nelsun...re the self-centring fence...are you thinking about those elegant turned aluminium jobbies with the magnets ? I've got a set and wouldn't be without them. Brilliant.
 
Nelsun":2vbyxhau said:
If your using the catchily named Trim Stop then I think your looking to push its boundaries.its a faff to set up especially for something like this. Lots of trials and lots of errors are ahead of you...

I think you could be right Neil. This is my first project using the Domino and I've found one of it's weak spots. I might give some thought to making some revised fences for that trim stop so that they can be clamped to the timber width with fag paper as clearance first then the pair and timber moved as one to set the cutting postion.

Bob
 
A few points here.

1. The engraved line on the "sole" of the Domino is factory set and, in every case that I've encountered, is accurate to a very high level of precision.

2. The centre line on the perspex window is not guaranteed to be accurate and must be set by the user. Having said that, in my experience the earlier 500 Dominos were very inaccurate, frequently out by 0.5mm or more. However every 700 Domino I've seen has a factory set perspex window that's very accurate. Furthermore I recently traded in my old 500 Domino for a replacement, and the new one also had a very accurate perspex window. The bottom line seems to be that even though Festool say this is a user set operation for both the 500 and 700 Dominos, it looks like over time they've improved their factory setting procedures.

3. I'm not that far from you (western end of the Solent), if you want to borrow either of the RTS Engineering jigs for your Domino that's no problem.

4. To be honest though mitres aren't the Domino's strongest suite. For really precise mitres I tend to knock together a jig from MDF that references from the Domino's sole. Alternatively, if the job doesn't warrant that amount of effort, then I can loan you a Dowelmax jig or a Lamello biscuit jointer, both of which do a pretty accurate job on mitres.

Good luck!
 
Thats a very generous offer Custard. Thank you.
For the small number of joints needed on this project I can get by. I'm mainly using the domino to get experience with it and trying to learn to love it.
I'll experiment with doing the set set but referenced to the base engraved line. Yesterday's experimenting was with a hastily resharpened 5mm cutter which still labours compared to my new 6mm one. I have a new 5mm on order from FFX and should be here tomorrow. It is possible that my errors could be down to the cutter being blunt.

Bob
 
Custard":3lgsqkcw said:
...earlier 500 Dominos were very inaccurate, frequently out by 0.5mm or more...

I've got an early MK1 Dom and I've just checked the registration of the acrylic plate and the engraved line on the sole and yup, it was about 0.5mm out of kilter. That said, it's the work of a few seconds to undue the two little Torx bolts holding the plate and shimmy it across until it's one on one with the sole, checking for plumb with an adjustable square - Rob
 
Woodbloke":3o6hpbkt said:
Custard":3o6hpbkt said:
...earlier 500 Dominos were very inaccurate, frequently out by 0.5mm or more...

I've got an early MK1 Dom and I've just checked the registration of the acrylic plate and the engraved line on the sole and yup, it was about 0.5mm out of kilter. That said, it's the work of a few seconds to undue the two little Torx bolts holding the plate and shimmy it across until it's one on one with the sole, checking for plumb with an adjustable square - Rob

So was your fixed engraved line spot on Rob?

Bob
 
9fingers":1gu684ro said:
Woodbloke":1gu684ro said:
Custard":1gu684ro said:
...earlier 500 Dominos were very inaccurate, frequently out by 0.5mm or more...

I've got an early MK1 Dom and I've just checked the registration of the acrylic plate and the engraved line on the sole and yup, it was about 0.5mm out of kilter. That said, it's the work of a few seconds to undue the two little Torx bolts holding the plate and shimmy it across until it's one on one with the sole, checking for plumb with an adjustable square - Rob

So was your fixed engraved line spot on Rob?

Bob
It wasn't but it is now Bob. I put a Starrett adjustable square on the sole of the Dom, then dropped the blade down till it met the acrylic plate. Slacken off the two bolts and then shimmy it across until the centre line on the plate, the blade of the square and the line on the sole are plumb with each other. Easy enough to check using the Mk1 eyeball. To hold the plate secure whilst I re-tightend the little Torx bolts, I used a couple of bits of masking tape - Rob

Edit - sorry Bob, misunderstood the question. Yup, the fixed engraved line on the sole of the Dom is spot on, dead centre, give or take a negligible gnat's :D
 
Woodbloke":1t8r916a said:
It wasn't but it is now Bob. I put a Starrett adjustable square on the sole of the Dom, then dropped the blade down till it met the acrylic plate. Slacken off the two bolts and then shimmy it across until the centre line on the plate, the blade of the square and the line on the sole are plumb with each other. Easy enough to check using the Mk1 eyeball. To hold the plate secure whilst I re-tightend the little Torx bolts, I used a couple of bits of masking tape - Rob

Have you missed my point Rob? the engraved line is not adjustable so in a perfect world the mechanical motion needs to be centered on this. I fully understand you can align the plastic scale to match the base but are now both wrong when you come to use it for a joint?

Bob
 
9fingers":o0rao6v8 said:
Woodbloke":o0rao6v8 said:
It wasn't but it is now Bob. I put a Starrett adjustable square on the sole of the Dom, then dropped the blade down till it met the acrylic plate. Slacken off the two bolts and then shimmy it across until the centre line on the plate, the blade of the square and the line on the sole are plumb with each other. Easy enough to check using the Mk1 eyeball. To hold the plate secure whilst I re-tightend the little Torx bolts, I used a couple of bits of masking tape - Rob

Have you missed my point Rob? the engraved line is not adjustable so in a perfect world the mechanical motion needs to be centered on this. I fully understand you can align the plastic scale to match the base but are now both wrong when you come to use it for a joint?

Bob
See my edit above Bob; the engraved centre line is centre of the Dom sole - Rob
 
9fingers":rwbriv1p said:
Yes but is the line on the base in the centre of the oscillating motion. That the critical bit.

I'll check mine again just in case it is down to a dull cutter,

Bob
A little out, say around 0.25mm or so and those are knife lines, none of yer machinist's HB pencil :lol: :

IMG_5461.jpg

Even allowing for parallax error, it's as close as makes no odds and that's also a very old cutter :oops: (as you can tell from the ragged edges of the 'ole) - Rob
 
Having read Custard's comments, I've just been and checked mine. Both engraved and acrylic lines are dead on, and the cutter slot is dead on symmetrical either side of the centre line and dead square too. This one is a couple of years old I think. I take good care of it. A friend of mine moans about accuracy with his, but very often he does not bother to use extraction whereas I always do and he also has a blunt bits issue. I think this is a precision machine that requires plenty of extraction and cutters in good nick. That said, I very rarely use it for mitres.
 
Thats deffo out even to my naked eye.

The test is to make a joint as per the manual but instead of using the plastic scale, to use the line on the base.
I should have my new cutter tomorrow and will compare with a test I've just run on my blunt cutter and post tomorrow.
Bob
 
9fingers":3v66p64r said:
Thats deffo out even to my naked eye.

The test is to make a joint as per the manual but instead of using the plastic scale, to use the line on the base.
I should have my new cutter tomorrow and will compare with a test I've just run on my blunt cutter and post tomorrow.
Bob
Does it really matter though if it's out a gnats, taking into account the parallax error and my unquestionably superb photographic skills? At the end of the jour, we're all doing woodwork, not building RR Merlins. It's good enough for me and I'm capable of churning out fairly 'respectable' work, mostly :eusa-whistle:

The next thing we'll be discussing is the flatness/tolerance of plane soles. Ye Gods!

Edit - forgot Bob...you don't use them :lol: :lol: - Rob
 
The line on the base of my 500 was out, I was having a constant mis alignment issue. In the end it went back to festool and the the lower plate was replaced. Problem solved. I do echo its not the best on mitres. If you are using the adjustable fence I find theat it can have a tendancy to drop slightly on the side without the height setting block if you put pressure on it whilst clamping it up.
 
Woodbloke":1lyl17m6 said:
.....
The next thing we'll be discussing is the flatness/tolerance of plane soles. Ye Gods!
...


No...no...no. Rounded bevels, that's what we should concen :D trating on.
 
Back
Top