• Hi all and welcome to TheWoodHaven2 brought into the 21st Century, kicking and screaming! We all have Alasdair to thank for the vast bulk of the heavy lifting to get us here, no more so than me because he's taken away a huge burden of responsibility from my shoulders and brought us to this new shiny home, with all your previous content (hopefully) still intact! Please peruse and feed back. There is still plenty to do, like changing the colour scheme, adding the banner graphic, tweaking the odd setting here and there so I have added a new thread in the 'Technical Issues, Bugs and Feature Requests' forum for you to add any issues you find, any missing settings or just anything you'd like to see added/removed from the feature set that Xenforo offers. We will get to everything over the coming weeks so please be patient, but add anything at all to the thread I mention above and we promise to get to them over the next few days/weeks/months. In the meantime, please enjoy!

Ash bed WIP - Finished!

AndyT

Old Oak
Joined
Nov 23, 2020
Messages
4,141
Reaction score
2,123
Location
Bristol
Name
Andy
Apparently it's time for some actual woodworking.

I've been meaning to get round to making a new bed for some time, which has had the visible benefit that several smaller, easier projects have been started and finished before I even sketched out a design.

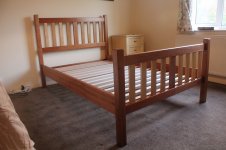
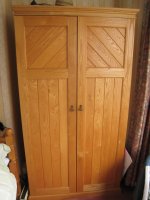
We do already have a bed, which takes some of the urgency away. It's an unlovely thing in varnished pine, from the 1980s. It works, but it doesn't look very good next to the 1890s ash wardrobe, 1900s sweet chestnut chest of drawers, and home made ash bookcase.

I've decided on a design, which is fairly simple, but should show off some decent wood a bit. It's based on a design by Derek Cohen, who I expect will be familiar to most of you. As far as I can see there's no detailed account of the build available online - just one photo in the section of his website headed "A few images of past furniture builds". I'm sure he won't mind me linking to his photo of it:
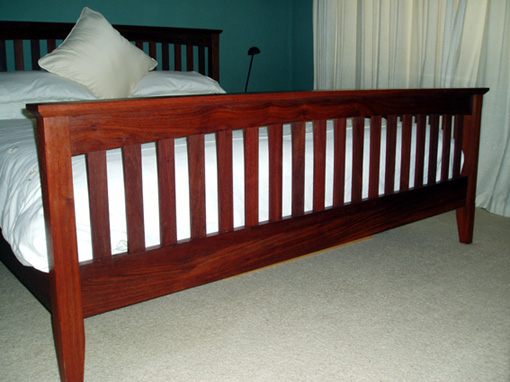
Furniture_html_3bad9030.jpg


His is king size, in jarrah. This one will be a standard double, as determined by our mattress and the space available. It certainly won't be in jarrah. I just like the unfussy construction, with the slight curve on the cross rail, the capping rail with its chamfers underneath and the tapered feet.

I plan to re-use some parts of the existing bed - the pine side rails can become the supports for the slats, which will also be retained - but the visible head and foot assemblies will go.

In the past, I've had a pleasant experience buying timber at the Wentwood Timber Centre, near Chepstow, in South Wales and less than an hour's drive from Bristol. They buy and convert native species from the immediate area only. This policy is designed to help sustainable forestry, but in the current times it has the rather nice side effect that their costs (and therefore their reasonable selling prices) are not affected by the international timber market. Their prices have not doubled or trebled in the last few years - they have stayed the same.

Much of their market is to bulk users, for fencing and flooring, but they also sell boards for woodworkers, planed one side, sorted by thickness and marked with the price. A recent well-timetabled short break in Wales found us calling in at Wentwood on the way back.

I was slightly disappointed that the space for hardwood boards seems to have shrunk a bit since my last visit. It's now in a single large shed, which is much easier to get in and out of than the previous set-up, in a suite of old Forestry Commission offices.
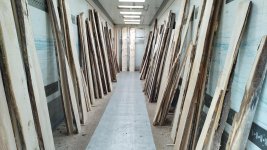
IMG_20211008_132701468.jpg

The obvious problem is that there aren't very many boards there. I would have liked to get sweet chestnut, but they had very little, so I went for ash instead and I think I bought most of the 32mm thick ash that they had; anyone visiting after me would need to wait until they had re-stocked. And some of what I bought was probably the last boards after the good ones had been sold. However, I thought I had found enough and it just about fitted into the car and onto the roof rack.

One of the boards - for the legs - was sawn at 75mm thick and about 11" wide and 9 foot long. I couldn't have put it on the roof even if I had been able to lift it up there, so I had to take the uncomfortable decision about where to cut it into two more manageable lengths to get it home. At least there is absolutely no rush or pressure; you can take as long as you like to scribble over your cutting list and try to work out which boards will yield which components.

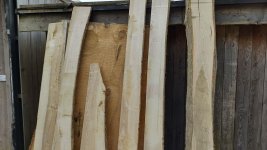
Here's what I bought:
IMG_20211008_123858987_HDR.jpg

I didn't buy the rather magnificent piece of cedar of Lebanon that they are leaning on, but someone with a trailer or a van could have done by now and made something rather nice out of it. Here's a clearer photo:

IMG_20211008_132742969_HDR.jpg

About 4' x 7' and 3" thick; £290 inc VAT. They had two like that.

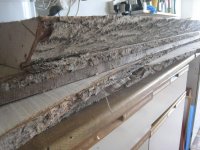
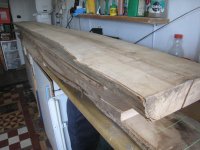
Anyhow, after a pleasant drive and some more heaving and handling, here's my stash, piled up in the utility room while I think about it some more.
IMG_7658.JPG

IMG_7659.JPG

I can certainly confirm that if anyone else has been mostly making tiny things from titchy bits of wood you can pick up in one hand, swapping to something like this is a whole different experience. That won't be news to those of you who casually build roofs and floors and bike sheds and boats and so on, but it feels very different to me!

Since getting the wood home, I have gone over the cutting list in a bit more detail, looking more carefully at avoiding any knots and splits etc, and I think I will probably need to go and buy a bit more wood. Maybe that's my excuse to visit Yandles for the first time.

Meanwhile, I have made a bit of a start on getting the legs out of the thick board.

I must stress that although I shall write up the whole project in my usual level of detail, I really have very little experience of working with big lumps of tree like this and find it quite difficult to know which parts to use and which to discard. So if you spot me doing something wrong, please don't hesitate to say so; I won't take offence.

Because I don't have room at the ends of my bench, cutting to length gets done on a Workmate. First, I trimmed off the rather large split at the end:

IMG_7662.JPG

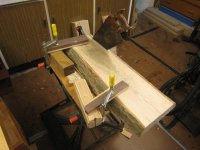
I then needed to trim off the triangle with the bark on. I did most of the long rip cuts on my very basic tablesaw, working right at the limit of what it can handle, but I wanted a straight edge to work to. There's no spare depth of cut, so I couldn't mount the ash on a bit of straight plywood or something, so I made the first cut by hand.
IMG_7664.JPG

It took about fifteen minutes in all, some of which was messing about taking photos or adjusting the clamps. I wasn't rushing and it didn't make me feel exhausted. About the same effort as a brisk walk around the block.

To support the offcut when working on my own, and knowing that it would be fairly heavy, I clamped it in place when I got near the end. This worked nicely. Is this something everyone does but nobody mentions?

IMG_7665.JPG

With a straightish edge to work to, I did the next two cuts on the tablesaw, but forgot to set up any carefully posed photos; I'll put that right next time, as there will be quite a lot more work getting a kit of parts out of these lumps of wood, before I can do any fancy joints and stuff.

I've not got any particular deadline for finishing this job and I know there will be some interruptions when there will be no visible progress, but I shall update this thread as soon as there is any more action to see.

Meanwhile, feel free to chip in with any thoughts about working with ash or making beds - there don't seem to be that many bed building threads but some of you must have done this before. I did make a double bed back in the 1980s, but that was all from prepared, salvaged timber and the design was derived from the materials I had. I no longer have the bed or any pictures - you'll just have to believe me - but I can remember so little about it that this feels like starting afresh anyway.
 
This looks like it's going to be a very interesting build. I hate the bed design, but that's because I'm tall and I hate ALL beds with foot-boards (if ever I'm staying away in a B&B or self-catering cottage or whatever I have to ring ahead and make sure there's a bed without a foot board as otherwise the only way I'll be sleeping is on the floor). I'm sure it'll still be a very nice bed for those who don't suffer from my altitude issues!

I haven't yet made it to Wentworth timber, but it sounds like it might be wise to leave it a while before heading over there (not that I've got any space for wood at the moment anyway!).

Looking forward to reading more.
 
Good start Andy; I remember we discussed this project. Ash is great to work with but remember it doesn't like an oiled finish as it tends to go a 'familiar' :eusa-whistle: shade of yellow after exposure to UV. As you've got such large slabs of timber to deal with, you're more than welcome to lob it in the Volvo and bring it round here for initial machining, which would take all the 'grunt' out of the prep work - Rob
 
AndyT":36munfyq said:
........To support the offcut when working on my own, and knowing that it would be fairly heavy, I clamped it in place when I got near the end. This worked nicely. Is this something everyone does but nobody mentions?


I think that's a product of you working on a Workmate. On saw horses, you just shift the far saw horse under the cut, and everything stays balanced. It's probably also a product of you using 2 hands on the rip saw, because if you were just using one you'd simply reach over with your spare hand and support the piece as you neared the end of the cut.

Meanwhile, feel free to chip in with any thoughts about working with ash .......

Grand project, Andy.

Coupla things........ash is lovely to work with, but difficult to finish nicely. Start thinking about your finish even now. If you haven't experimented with a water-based varnish, then I'd certainly advocate that. Most oil based finishes with go yellow/ orange at the same time as the ash does, and the net result isn't to most people's taste.

At the stage of big lumps of wood, a pack of chalk is a great asset. I spend so much time scratching my head and trying to make stuff fit.....different coloured chalks make that a whole lot easier,

Anyway, I'm following along with interest, and wish you good luck.
 
Thanks guys.

Picking up a few points...Al, I'm clearly not as tall as you! If there was no footboard, with the headboard concealed by pillows, all the wood would disappear and it might as well be MDF. I want it to look like something, though I know most of it will be invisible, which is a bit frustrating but inevitable.

Rob, it's kind of you to offer machining help, but in a perverse sort of way, overcoming the challenges is part of the point of a project like this. I've done other projects where I have bought the wood planed to size, but as you know, I do have a few planes and sitting here on the sofa, I'm looking forward to using them. But we'll see how I feel as the weeks go by!

Mike, I don't have any sawhorses. The reason why isn't just that I don't have room for them, though I don't, it's that the workshop floor isn't flat. Apparently Victorian servants didn't mind if the builders joined up the different levels in a sort of gentle wave... so although I can wedge a Workmate level, getting a pair to coincide would just be too frustrating.
(I've got used to the floor being lower at one end of the bench than the other.)

Also, Mike, I think your previous line of work must have left you with much stronger wrists than mine! These lumps are heavy!

And as for the colour and finish of ash, I'm glad this has come up early. It's something I have read about but not seen. I'll dig out some other photos and come back with some supplementary questions on that point if I may.

And Nick, you're dead right - that saw stops as soon as it touches flesh! :)

It also stops for breath, for tea, and to pose for a photo!
 
I've made all our lounge furniture (apart from seating) from ash.
Finish is medium oak stain (Rustins) and satin finish variant of Sam Maloof mixture based on Rustins PU.
The result obviously is oak coloured but with the extra grain interest provided by the ash
Almost a 100% contrast to your project, a paint brush was possibly the only hand tool used throughout.

Bob
 
I’m sure you have your design all sorted out Andy, but I just wanted to mention a way of constructing the bed so that there won’t be any creaks to disturb your beauty sleep.
I have made quite a few beds this way and they have all been successful. I glue 14 inch long pieces of wood into the end frames, through which I screw into the side rails of the bed. I normally make these stub tenons not quite as wide as the side rails to accommodate the slats.
This obviously makes moving the bed possible whilst at the same time having really good joints into the head and foot of the bed. Ian
 
Looking forward to the WIP for your new bed Andy. A few years ago I made myself one not dissimilar to Derek Cohen's design but without the curves. It was a very enjoyable project and didn't take long.
Good luck.
John

4 foot bed 001.JPG
 
I made a couple of double beds for the kids a few years back - they bear no resemblance to what you'll be making Andy, cls screwed and bolted and Ikea slat sets, and as little as possible visible once the mattresses were on. But they work fine.

Agree completely about the Wentwood ethos, and a lovely place to visit. I last went there a couple of years ago while the display was still in the offices and stocks were low then - at the time, they were supplying Axminster in Cardiff with wood, and that branch was shipping it out to the other Axi branches around the country. I've no idea if they're still doing that but last time I looked (recently), Axi had a fair stock of wood in.
Is your Ash air dried? My understanding is Wentwood's is air dried normally, just bigger orders are kilned.

Looking forward to see your bed develop!
 
I share Dr Al's view of footboards, and I'm only average height.

I plan one day to make an ash dining table to go with the ash chairs I'm slowly amassing. So I look forward to seeing how you cope with a heavier job mostly by hand tools - no gym sessions needed for a while !

This issue of ash turning yellow with oil though - now I know linseed tends to turn stuff yellow, but the ash I've used Rustins Danish oil on did not yellow; initially it stayed fairly pale but slowly turned to the colour of a rich tea biscuit, which I like (the colour, that is, not the biscuit). Water based finishes may stay whiter longer, but the things I've used a water based finish on have gone tacky over time with repeated handling to the point of needing stripping and re-doing with something else.
 
Chris152":1swsh9i0 said:
Is your Ash air dried? My understanding is Wentwood's is air dried normally, just bigger orders are kilned.

I meant to ask about the MC of the Ash, has it been air dried? If so it may not be dry enough yet. Beware also of the truly foul, über kilned American Ash if you go to Yandles. It's relatively inexpensive but my counsel would be to seek out some air dried English which they may or may not have in the woodshed - Rob
 
This is really helpful, everyone; there's a lot to discuss and think about. I'll need several replies I think. Let's take the colour question first.

I'd really like to see some examples of ash that's gone too yellow, as my own experience is much more like Tony's. Here are some pictures of other bits of furniture - they are relevant, as they are in the same room.

You may remember the wardrobe from this thread back in April viewtopic.php?f=19&t=5717

Here's the whole thing:

file.php


It's ash, plus a century or so of aging, and was probably stripped and slathered in Briwax before I bought it.

And here's a smaller version of it that I made back in the 90s, from ash, finished with Danish oil.

IMG_3541.jpg

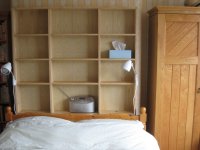
And here's a bookcase, behind the bed, when it was new, ten years ago. PAR ash with very pale ash veneered ply on the back, now almost entirely hidden.

IMG_4475.JPG

It was also finished in Danish oil. I can't remember which brand, but probably Rustins. It has darkened a bit since, and is closer to the colour of the wardrobe beside it, which is perhaps a bit less vibrant.

Now, I know that colour is a subjective thing, and that there are lots of complications around time of day, digital photos, and the various different screens that you will be looking at, but to me, and to my wife, these are all shades of brown, not yellow and not objectionable at all. I'd be quite happy if the new bed ends up a similar colour. "Rich tea biscuit" is about right.

You can also see a bit of the knotty pine bed that's getting replaced. It's not the colour that's the problem, it's those horrible crude curves and turning designed purely to be easy for an automatic lathe to make.

Now, I'm also aware that the current fashions in furniture are for really pale, bleached, driftwood-like shades. I've got some very nice water based polyurethane varnish which doesn't change the colour of the wood at all when you put it on, and I could use that on this bed, but I quite like to see the character of the grain and the variations in it, so would prefer something that shows them up a bit.

Bob, I saw your comment about using an oak stain first, and found this thread showing some of the furniture you made like that: viewtopic.php?f=26&t=3065&p=46276

I think that's a really nice effect. I may well have some Rustin's oak stain at the back of the cupboard.

I think I shall have a good think about this but I will also use some of my many offcuts to try out different finishes on this wood before I ruin anything.
 
AndyT":3snol2z0 said:
Bob, I saw your comment about using an oak stain first, and found this thread showing some of the furniture you made like that: viewtopic.php?f=26&t=3065&p=46276

I think that's a really nice effect. I may well have some Rustin's oak stain at the back of the cupboard.

I think I shall have a good think about this but I will also use some of my many offcuts to try out different finishes on this wood before I ruin anything.

Thanks for digging out that link - I'd forgotten I'd posted a summary photo rich topic as well as boring everyone rigid on the construction of the barrister bookcases.

Seeing your other ash photos, maybe add some Rustins light oak stain to your trials for a closer colour match?

Bob
 
Picking up on some of the other comments and previous projects, thanks again for all of these.

Ian, that's an interesting solution to making a sturdy bed. I guess 14" at right angles is still easy to get through ordinary doors, up and down stairs etc. I don't want it to sound like the old bed is perfect, but it's joined together with cross dowels and M6 screws and they have been absolutely fine so far, so I think I want to keep things simple and use the same approach. At the moment, the screw heads are visible on the surface; I'm imagining swapping them for socket head screws in counterbored holes, concealed under a decorative wooden stud. I need to draw these details and share them!

Mark and John - thanks for sharing your builds.

John - one thing I need to decide is whether to have a mattress-depth gap at the top, like you have, or add another cross-rail, or bring the slats all the way down. Now that you have used yours for a while, how do you find it? Is the gap useful for bed making or do you wish it had been filled in a bit?

Mark - I was interested to see that you bought 10 cu ft of timber. I know I need a bit more but I bought only half that amount, and mine was not even sawn square edge like yours. Did you have a lot left over? Maybe you planed away a lot more? (I think there's a side-effect of not having big machinery - I plan to take off the very minimum to get things straight and smooth.) (And while I can see the reasons behind the wacky angles and uneven slats, I shan't be copying them!)

And so we reach the question of dimensions. I really don't like a lot of the really chunky furniture that's on offer in the shops. I'd rather exploit the strength of the materials and not make something that need the floors to be reinforced.

So I am thinking that my long rails will only be about 1" / 25mm thick and the legs will be 2 5/8" / 67mm square. I need to check again how deep I can make the rails. The pine bed has rails only 3½" / 90mm deep and ash is stiffer so I could stay the same size, but I would prefer to go up to 4" / 100mm if I can.

And as for the wood I have, I think it's air dried as that's the norm at Wentwood, but I ought to have checked. I think I'll give them a ring and ask. As to the actual moisture content, it could be that as you suggest Rob, it needs some more time to dry a bit more - it's certainly heavy. So far all I have done is cut the pieces for the legs, but they are all over-size, so if they dry further and shrink a bit I should still be able to get them square. I think I shall go and weigh each one and record the weights. And I note what you say about kiln dried!

Lastly, I know that you will all be following the thread about the new "woodworking bake-off".

I'll have to watch it, as I just read that the "Big Build" feature in the first episode is a double bed. Will I be able to finish mine in time for the next advert break? Watch this space! ;)
 
To be fair, I think that Ash on the wardrobes has aged to a rather pleasant shade of 'rich tea biscuit', so it now makes me wonder which oil finishes turn ash 'yellow'?

The only stuff I've got in the 'shop is Liberon 'Finishing Oil' and a gallon or so of raw Linseed, plus a small jar of satin Osmo-PolyX - Rob
 
Rob,

I'd suggest more Digestive than Rich Tea to be honest.

And as for your dislike of KD American ash, I've use loads of the stuff with no issues - lovely stuff!
Maybe I just know how to work it :lol:

Feel free to send it over in the direction of the "man that can" :lol:

Bob
 
Hi Andy

Yeah I bought 10cu but I bought extra so no I didn’t use all of it. In fact I still have two lengths plus offcuts in stock.


Sent from my iPhone using Tapatalk Pro
 
9fingers":2c16b0qm said:
Rob,


And as for your dislike of KD American ash, I've use loads of the stuff with no issues - lovely stuff!
Maybe I just know how to work it :lol:

Feel free to send it over in the direction of the "man that can" :lol:

Bob
Yebut you don't do hand cut joinery in the stuff where you need to push a chisel across the end grain! - Rob
 
Woodbloke":1njewcws said:
9fingers":1njewcws said:
Rob,


And as for your dislike of KD American ash, I've use loads of the stuff with no issues - lovely stuff!
Maybe I just know how to work it :lol:

Feel free to send it over in the direction of the "man that can" :lol:

Bob
Yebut you don't do hand cut joinery in the stuff where you need to push a chisel across the end grain! - Rob
Indeed I’ve learned how to use it lol. You won’t catch me doing hand cut joinery in any timber in a month of Sundays !
Bob
 
Woodbloke":vz2l345r said:
To be fair, I think that Ash on the wardrobes has aged to a rather pleasant shade of 'rich tea biscuit', so it now makes me wonder which oil finishes turn ash 'yellow'?

Linseed. You should see the colour of linseed on boxwood. A friend carved a boxwood spoon and used linseed on it, it went really bright yellow.

My experience - ash and walnut chair, freshly finished with 3 coats Rustins Danish, then homemade wax (beeswax, turpentine and linseed)
Feb 2017:
20170227_084405.jpg
Oct 2021:
20211017_213745.jpg

I would say mellow, not yellow.
 
Thanks for that ST; looks like linseed is the one to stay clear of for Ash. Might be worth while doing a couple of experimental panels to see how the various oils I've got in the 'shop fare with Ash. I've got a knife block to make soon for some Japanese knives and was considering using some oddments of ash - Rob
 
I shall follow this bed making with great interest.....

I have to make 2 x kings and 4 single beds for our lux holiday rental (of that design) plus a couple of table n chair sets.....
wood not decided yet but will have to import.....prob 1/2 a truck load.....

Is there any one on here in the Balkans or Turkey....I beleive they have some decent hardwoods......
and fairly close to my holiday home....

that style of bed seems very popular.....
I was gonna make one the same but in Oak for our old French house....plenty of Oak there.....
when we were told of an English couple going back......
Their bed was just that style and solid Oak.....nobody wanted it....the French have diff sizes of mattres...
So we got it as new for €59 euro's....

as for cutting up those sizes of tree trunks Andy I think I would have bought or rented one of those huge Makita circ framing saws.....I have Arthritus in the elbows just cant do that much hand sawing anymore...

I like ur style of buying local, well almost....is that wood dry or still green......

I'd like to see what u use for hand tools...do u have a shaper, planer or am I swearing.....
I will enjoy ur project....thanks
 
clogs":3etnwngi said:
I have to make 2 x kings and 4 single beds for our lux holiday rental (of that design)

I know I'm at risk of banging on about this, but bear in mind that if you make them in that design (i.e. with foot boards) for a holiday rental, your rental won't be suitable for tall people. Make sure you put photos of the beds on the listing site so tall people know not to stay there (it really winds me up when listings don't show whether the beds have footboards and you have to contact the owners to check).
 
Tony, thanks for the pics of your lovely chair - a really good example of how short-lived the white colour can be. The "after" picture is much more natural looking, in my opinion. But just picking up on boxwood+linseed, it's a long established and much loved combination. For example, on this nice old infill plane I think it looks glorious:

IMG_6144.JPG

The extra ingredient, of course, is rather a lot of time. :)
Bill Carter gets similar results more immediately with nitric acid, but I might be drifting away from the question of what is a practical finish on a domestic bed here... I'll come back to that in a moment.

Clogs, I'll not be renting any big power saws. I don't plan even to ask my next door neighbour to lend me his Festool tracksaw. For me, making stuff isn't about the shortest, easiest way to the finish, it's far more about enjoying the journey. And just as a country walk is more enjoyable if it includes a bit of a scramble uphill or over rocks, some of this build will need more physical effort than my other recent projects. I'm not sure about what a "shaper" is - is it American for a spindle moulder? - but I don't think I will be using one. I do have this very basic table saw and meant to include this photo in an earlier post:

IMG_7666.JPG

It can just cut 70mm deep so was right at its limits here, but I did use it once I had got a straight line established. I just didn't take any action shots half way through a cut. :(

And I do have a planer - that plugs in - an old Bosch from back in the 90s when I thought power tools were what everyone needed to have. If I need to plane a huge amount off anything, I might get it out of its box again and use it; I'll see how the planing work goes.

And so, while still prevaricating about the exact design and how to get all the bits out of the timber, back to the question of the finish.

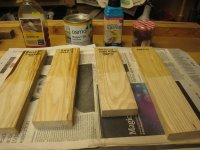
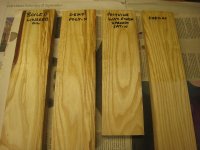
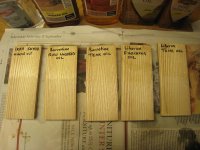
I trimmed up and planed an offcut from the legs and put samples of four finishes onto half of each piece. All the photos are taken indoors under artificial light, which isn't ideal but will mean that they are as consistent as I can make them. Here's the first line-up of what I have to hand:

IMG_7668.JPG

and here they are a bit closer:

IMG_7669.JPG

I'm not really sure what that proves at the moment, except that none of them makes very much difference to the colour. The polyurethane varnish is the flattest, most invisible finish of them all and might win just for the convenience factor, as it dries quickly and is low odour, but it does need careful brushing to look good.

The shellac is mixed from flakes which were just ordinary flakes, not a selected extra pale grade.

I'll give them all another coat when they are ready and see how they look then.
 
You need about 6 or 8 weeks to see the differences emerge, Andy. Longer, perhaps. I predict that the oils will both start looking naff at about the same rate. I made some seriously pricey bits of furniture for Liberty of London in the 90s.......oiled ash. I had to visit a few months later to do a repair to one, and it was embarrassing. A stale urine colour......browny orange.
 
Ah, ok, slowing down a bit is something I can probably manage...
 
Mike G":1pd1zosm said:
You need about 6 or 8 weeks to see the differences emerge, Andy. Longer, perhaps. I predict that the oils will both start looking naff at about the same rate. I made some seriously pricey bits of furniture for Liberty of London in the 90s.......oiled ash. I had to visit a few months later to do a repair to one, and it was embarrassing. A stale urine colour......browny orange.
And sunlight of course, out of interest put two bits of tape on each sample to show the original colours prior to sunlight exposure, it won’t take many days for the colour to start to change. Ian
 
That's a good idea about tape, Ian. I've found some more finishes to try and will prepare some more samples today.
Then I will put them all in a window.
 
Here we are then. Instead of any hand cut joinery, I have delved into the back of the cupboard and found some more pale finishes that people might want to use on ash. In the hope that this will be of use to some, I prepped another offcut and produced these samples.

The raw linseed oil was noticeably yellow as it came out of the bottle but it's hard to see a difference in the photo at the moment. The others all seem pretty pale and inoffensive to me at the moment.

IMG_7670.JPG

and closer up

IMG_7671.JPG

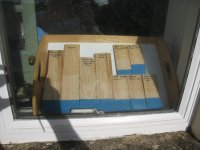
I've taped over parts of these and also the four from yesterday and put them in a south facing window:

IMG_7673.JPG

Tomorrow I shall give them all a second coat. Then I'll wait until there's a visible difference and update this thread.

Meanwhile, I need to get on with drawing and deciding on the exact details of construction and dimensions. It's something I don't really enjoy doing but I do understand how it's much easier to rub out a pencil line and draw it again than it is to stretch a piece of wood to make it longer or wider.
 
AndyT":3bqiyyr5 said:
Meanwhile, I need to get on with drawing and deciding on the exact details of construction and dimensions. It's something I don't really enjoy doing but I do understand how it's much easier to rub out a pencil line and draw it again than it is to stretch a piece of wood to make it longer or wider.

You can get Rubber wood...

Pete
 
About 12 years ago I made some ash shelves for my living room. I heeded the warnings from others about it yellowing with some oil finishes and just used a sanding sealer (can't remember which one) to finish them. They have gone a nice light brown, just darker than a rich tea biscuit. I think since I put them up they have had a little furniture polish or wax (without colour). Is this darkening the effect of UV on the timber?
 
pitch pine":1tv2lr50 said:
About 12 years ago I made some ash shelves for my living room. I heeded the warnings from others about it yellowing with some oil finishes and just used a sanding sealer (can't remember which one) to finish them. They have gone a nice light brown, just darker than a rich tea biscuit. I think since I put them up they have had a little furniture polish or wax (without colour). Is this darkening the effect of UV on the timber?

I think it is. I don't think you can stop it and I don't want to. If anyone has any photos of ash that has gone a horrible colour I'd be interested to see them.

I forgot about sanding sealer though. Time for one more sample perhaps!
 
Andy, I think you need some colour references for the photographs. Different lighting, camera settings all make it a bit subjective. So we need references for Rich tea, Digestive, etc ... ;)
 
Ooh, I'm going to like this. I like the design and will probably nick it myself in the fullness of time.

In a previous life I made an entire lounge suite out of English Ash (breakfront bookcase,Queen Anne bookcase, fire surround, Hi-Fi cabinet, coffee table standard lamp, library steps - I could go on) and the early pieces were finished in Danish Oil. Ghastly urine colour very quickly. It didn't help using an old cartoon printed T-sirt to apply it. The result can only be described as Top Cat Pee. Use white cotton with whatever finish you end up with.
 
Cabinetman":31x6eca1 said:
Andy, might be illustrative to put a bit of tape on the treated bits as well?

Good point. I'll give them all a second coat tomorrow and do that then.

And Steve, I'm sure you could knock up one easily with all your machinery and jigs.

The shaping is all very plain, it's just a case of plenty of planing and then cutting rather a lot of mortise and tenon joints. :)
 
AndyT":1c816saq said:
Steve, I'm sure you could knock up one easily with all your machinery and jigs.

Having seen your Doll's House of a workshop, I'm gobsmacked that you are even attempting this! :)

I'm at the foothills of considering downsizing, and I think I could learn a lot from you.
S
 
Back
Top