
-
Hi all and welcome to TheWoodHaven2 brought into the 21st Century, kicking and screaming! We all have Alasdair to thank for the vast bulk of the heavy lifting to get us here, no more so than me because he's taken away a huge burden of responsibility from my shoulders and brought us to this new shiny home, with all your previous content (hopefully) still intact! Please peruse and feed back. There is still plenty to do, like changing the colour scheme, adding the banner graphic, tweaking the odd setting here and there so I have added a new thread in the 'Technical Issues, Bugs and Feature Requests' forum for you to add any issues you find, any missing settings or just anything you'd like to see added/removed from the feature set that Xenforo offers. We will get to everything over the coming weeks so please be patient, but add anything at all to the thread I mention above and we promise to get to them over the next few days/weeks/months. In the meantime, please enjoy!
You are using an out of date browser. It may not display this or other websites correctly.
You should upgrade or use an alternative browser.
You should upgrade or use an alternative browser.
Ash bed WIP - Finished!
- Thread starter AndyT
- Start date

Steve Maskery
Old Oak
Mike G":1mhmtd1u said:I
As for the finish choice: anything but Osmo for me. I can't find a good word to say for it.
What's you aversion to it, Mike? I'm no expert on wood finishing, not at all, but I've always been quite happy with it. But there may well be far better options out there these days. But why not Osmo?
Andy - good thinking on numbering the mortices! You'd never catch making a rookie error like that... :eusa-liar:
S

Sheffield Tony
Nordic Pine
AndyT":15ku9efc said:For the chamfering, it was the same sort of routine. I was holding the slats against a couple of pegs in the bench, positioning the plane the same way, and taking just two shavings from each arris.
But doesn't that mean the Nurse chamfer plane, or a block plane would have done if you are counting shavings rather than relying on the depth stop ? It would have robbed us of the photos of nice old tools though


Thanks all. I do like Osmo Poly-x and I've used it on several other projects. It's been especially useful when reviving tired old unknown finish on veneer (eg on some 1970s speaker cabinets). It blended in invisibly with the existing finish and didn't raise the grain. Once properly cured, which takes a couple of weeks, it's tough enough for hot mugs of tea or leaky wineglasses. Just a bit too slow and smelly for this project.
Steve, it's funny you should mention numbering the mortises. I'm pretty sure it's something I learned on here. Can't remember who posted it though...
And Tony, well, you're right of course, but look at like this. I'm doing a public service here.
The Spartan minimalists can count the "excess" tools and feel good as they mentally confiscate five different planes and replace them with one Stanley knife.
But other folk, those with an eye for the pleasures of good old tools, well, they can get some ideas for their shopping trips or birthday present lists.
Everybody wins!
Steve, it's funny you should mention numbering the mortises. I'm pretty sure it's something I learned on here. Can't remember who posted it though...
And Tony, well, you're right of course, but look at like this. I'm doing a public service here.
The Spartan minimalists can count the "excess" tools and feel good as they mentally confiscate five different planes and replace them with one Stanley knife.
But other folk, those with an eye for the pleasures of good old tools, well, they can get some ideas for their shopping trips or birthday present lists.
Everybody wins!
While this thread has gone a bit quiet, I have still been plugging away at prepping and varnishing the components for the two ends, so that they will all be varnished before assembly. I can't remember doing this before, but it certainly seems to make sense for a project like this. It's so much easier to work on separate pieces than it would be to try and get a brush in around corners. So thanks all, for encouraging me to do it this way!
I've not taken lots of very similar photos, but you can probably imagine sanding and varnishing, with just enough tidying up to lay a set of bits out on the bench.
I've now got two coats on all the vertical slats and the horizontal rails that they fit into. I've trimmed the legs to size and got one coat on them. I've yet to tackle the horizontal capping pieces that will go over the top ends of the legs and across the top edges of the upper rails. I think I know how I can attach them but the sizing will be a bit experimental once I have the head and foot assemblies done.
I've been thinking about how to put the ends together. Way back ages ago I showed a dry run, with slats, rails and (untrimmed) legs:
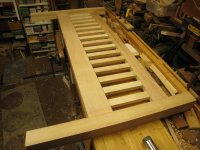
That all fitted together reasonably well, but I want to get everything as tight as I can. So, I think what I will do is to assemble the inner parts without the legs, pulled up tight with cramps, checked for square. That way I get a better chance that more of the custom trimmed shoulders will touch properly. The next day, I can glue the legs on and cramp up in the opposite direction to pull those joints up tight.
If it means that the big tenons on the ends of the horizontal rails need a bit of trimming to make them go into their mortises in the legs, or if I need to slightly raise or lower the mortises by shimming or trimming, then that's fine by me. I've got half inch shoulders which will hide any slight adjustments.
But please, if you can see a reason why that's a stupid plan, do please say so now!
Here are a few photos to prove that I have been getting on with this. If I seem to have slowed down, I can mention time away from the workshop etc. Also, it's been quite hot! - an unprecedented 26.5 degrees in my well-sheltered basement. I'm only too well aware of the heat given off by the fluorescent tubes near my head, and having the vacuum cleaner on at the same time only makes it worse.
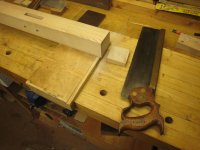
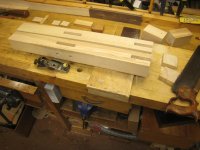
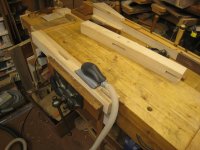
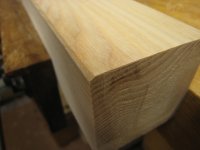
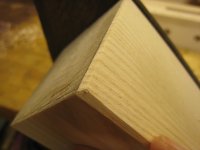
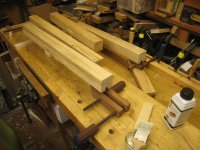
I've not taken lots of very similar photos, but you can probably imagine sanding and varnishing, with just enough tidying up to lay a set of bits out on the bench.
I've now got two coats on all the vertical slats and the horizontal rails that they fit into. I've trimmed the legs to size and got one coat on them. I've yet to tackle the horizontal capping pieces that will go over the top ends of the legs and across the top edges of the upper rails. I think I know how I can attach them but the sizing will be a bit experimental once I have the head and foot assemblies done.
I've been thinking about how to put the ends together. Way back ages ago I showed a dry run, with slats, rails and (untrimmed) legs:
That all fitted together reasonably well, but I want to get everything as tight as I can. So, I think what I will do is to assemble the inner parts without the legs, pulled up tight with cramps, checked for square. That way I get a better chance that more of the custom trimmed shoulders will touch properly. The next day, I can glue the legs on and cramp up in the opposite direction to pull those joints up tight.
If it means that the big tenons on the ends of the horizontal rails need a bit of trimming to make them go into their mortises in the legs, or if I need to slightly raise or lower the mortises by shimming or trimming, then that's fine by me. I've got half inch shoulders which will hide any slight adjustments.
But please, if you can see a reason why that's a stupid plan, do please say so now!
Here are a few photos to prove that I have been getting on with this. If I seem to have slowed down, I can mention time away from the workshop etc. Also, it's been quite hot! - an unprecedented 26.5 degrees in my well-sheltered basement. I'm only too well aware of the heat given off by the fluorescent tubes near my head, and having the vacuum cleaner on at the same time only makes it worse.

Mike G
Petrified Pine
Your glue-up proposal seems sensible to me, Andy. The alternative is to slightly lower the bottom edge of the upper mortice in the legs, to give you certainty that it won't be pushing your joints open. Or indeed, shave a little off the bottom edge of the corresponding tenon. You could then glue the whole assembly in one hit. But unless time is suddenly an issue, there wouldn't seem to be much to gain from that approach.
I've never chamfered to a line in my life. Accurate chamfers seem to be the flavour of the week around here.
I've never chamfered to a line in my life. Accurate chamfers seem to be the flavour of the week around here.
Following the previous exciting news about chamfers, sanding and varnishing, I am pleased to announce that I have managed to do a bit more chamfering, sanding and varnishing .
But rather than go over all that old familiar ground here, I'll stick to the breaking news that I have actually started gluing some of this stuff together at last.
Here's a preliminary view, with all the pieces laid out in the right order and the right way round, plus some cramps ready for use.
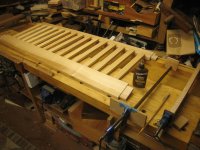
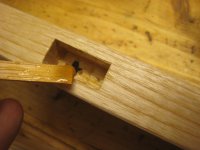
Here's an exciting action shot of some glue being spread around mortise number 4, using a little sliver of scrap wood, cut by an old spill plane. (Many spill planes make a thin oblique shaving that spirals round itself, but a few split a thicker sliver off, about half the thickness of a lolly stick. These are very useful in the workshop.)
A bit more glue gets wiped round the tenon.
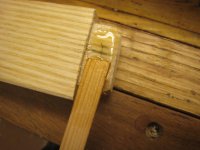
and then each slat can be slid into its own place. I'm glad I took the trouble to ease up these joints a little; in the end they all went together with just hand pressure, without me needing to use a mallet.
I was relaxed enough to take this in-progress photo, which also shows the very reassuring visible numbers on the ends of the other tenons, all round the right way and in the right order! A handscrew holds the cross-rail on its edge so nothing falls over.
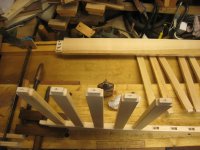
A few minutes and all 15 are in place in the arched rail.
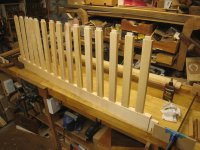
I'm glad I did a dry run on this stage. That's when I realised that it would be much much harder to assemble if I had put these slats in the straight cross-rail first. Having assembled the curved rail meant that I could lay everything flat on the bench ready for the next stage. You don't get action shots of this as it was the fiddliest step, where I had to hurry up a bit. I glued all the remaining mortises and applied an extra dollop of glue to the top faces only of the tenons. I then eased the three tenons at one side into place, and held them lightly with a cramp. I then worked my way along, aligning each successive tenon with its mortise and moving that single cramp along so nothing came out again.
I then applied two Record metal cramps underneath and two sets of heads on wooden bars above. With everything in place I could check for squareness across the rail shoulders, close everything up and take another photo
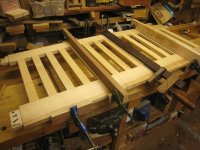
I shifted the cramps around a bit, tightening them up and watching a little glue ooze out of each joint.
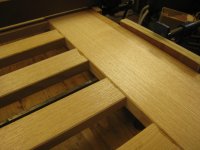
Liquid hide glue is always easy to clean up but when the surfaces are already varnished it's even easier, just a wipe with a damp rag.
So that's it for now, until this has all set, when I can add some legs and repeat for the other end.
From the timestamps on the photos, I can see that this little glue-up took 31 minutes. Tidying up and finding all the necessary clamps, supports and padding strips took twice that time. But at least I can find the spare bags for the workshop vac easily
.But rather than go over all that old familiar ground here, I'll stick to the breaking news that I have actually started gluing some of this stuff together at last.
Here's a preliminary view, with all the pieces laid out in the right order and the right way round, plus some cramps ready for use.
Here's an exciting action shot of some glue being spread around mortise number 4, using a little sliver of scrap wood, cut by an old spill plane. (Many spill planes make a thin oblique shaving that spirals round itself, but a few split a thicker sliver off, about half the thickness of a lolly stick. These are very useful in the workshop.)
A bit more glue gets wiped round the tenon.
and then each slat can be slid into its own place. I'm glad I took the trouble to ease up these joints a little; in the end they all went together with just hand pressure, without me needing to use a mallet.
I was relaxed enough to take this in-progress photo, which also shows the very reassuring visible numbers on the ends of the other tenons, all round the right way and in the right order! A handscrew holds the cross-rail on its edge so nothing falls over.
A few minutes and all 15 are in place in the arched rail.
I'm glad I did a dry run on this stage. That's when I realised that it would be much much harder to assemble if I had put these slats in the straight cross-rail first. Having assembled the curved rail meant that I could lay everything flat on the bench ready for the next stage. You don't get action shots of this as it was the fiddliest step, where I had to hurry up a bit. I glued all the remaining mortises and applied an extra dollop of glue to the top faces only of the tenons. I then eased the three tenons at one side into place, and held them lightly with a cramp. I then worked my way along, aligning each successive tenon with its mortise and moving that single cramp along so nothing came out again.
I then applied two Record metal cramps underneath and two sets of heads on wooden bars above. With everything in place I could check for squareness across the rail shoulders, close everything up and take another photo
I shifted the cramps around a bit, tightening them up and watching a little glue ooze out of each joint.
Liquid hide glue is always easy to clean up but when the surfaces are already varnished it's even easier, just a wipe with a damp rag.
So that's it for now, until this has all set, when I can add some legs and repeat for the other end.
From the timestamps on the photos, I can see that this little glue-up took 31 minutes. Tidying up and finding all the necessary clamps, supports and padding strips took twice that time. But at least I can find the spare bags for the workshop vac easily

Dr.Al
Old Oak
Really enjoying the write-up, thanks Andy. I'd never heard of a spill plane before and had to look up what it was.
The good news is that the joints pulled up nicely and the glue all cleaned off easily. The next step was to attach the legs.
I don't suppose anyone will be too surprised to learn that I tried them dry first. I was pleased to see that the tenons still lined up ok. The only tweak needed was to trim a couple of slivers off so that the haunches don't stop the shoulders from pulling up properly.
Then it was everything on the bench again, knock the legs into place with a soft faced mallet, apply the cramps and tighten up.
I don't seem to have taken an overall view, but here's the left hand end
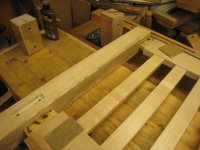
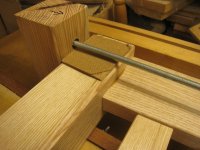
Now, one challenge was that I don't actually have any cramps long enough to span the width of this bed. What I do have is a system I first used 30 something years ago when my wife and I built a shelf unit for the kitchen, like the top half of an old dresser. "System" may be overstating it - it's just some lengths of M8 studding and some bits of wood with holes in. I honestly can't remember if I thought of it myself or read about it in a magazine. (Robert Wearing does show something similar in The Resourceful Woodworker, so I may have seen an article by him. His is a bit more complicated than mine though.)
Here's what I used for this - the mock-up leg from somewhere near the beginning of this project provided one pair of ends and a lump of fence post offcut provided the others. (And yes, I did drill all the holes with a brace and bit - there's no point owning this stuff if I don't use it sometimes!)
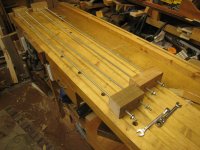
It's very simple to use, provided that you have long enough arms to tighten both ends at once, or a willing assistant. I find that it provides plenty enough tension to bring joints together for that last millimetre. It's also very cheap to buy and compact to store.
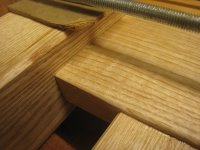
Here's a sample joint pulled up tight
and cleaned off
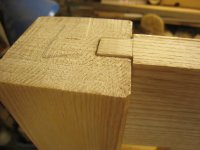
Once the glue was dry there was a little bit of cleaning up to do on the top, to make it level for the not-yet-prepared capping rail which will cover it. This dry-fit photo shows the mismatch and the sawn end of the leg
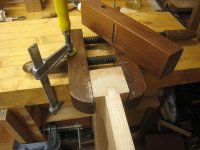
Planing this sort of thing brings fresh work-holding challenges. My very basic answer was to stand the thing on the floor and hold it in a handscrew, clamped onto the benchtop. Then I could plane it even.
This Hong Kong style plane is ideal - there's a much longer toe than is usual on western planes, making it very easy to register. Apparently they are normally pushed, but I was mostly pulling it this time and it didn't seem to mind.
Once that lot was done I could move things around and get the inner parts of the other end assembled in much the same way, going from this
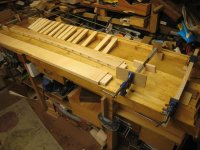
to this
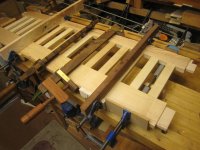
as if in an instant, but in reality there was quite a bit of time moving things out of the way and putting tools back in their proper places. I'm spending quite a lot of time waiting for glue or varnish to dry at the moment.
The next step, when I've got the other pair of legs glued on, will be to prepare and attach the horizontal capping rails.
This picture (from a mock-up of scraps back in November last year) shows what I am talking about, though the exact dimensions may be a bit different.
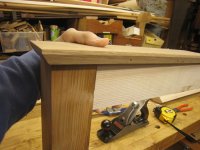
My thoughts on how to attach these are to use some dowels into the ends of the legs and just glue the butt joint along the top. Does anyone have any other suggestions? Should I leave the dowels out so that if the legs twist they can do so freely without disturbing anything else? How many dowels? I'm thinking of two in each leg, in the outside corners. They would help with alignment, provided I can get them in the proper places so they don't make it worse. (I don't think it's worth buying a Domino just for these... :lol: )
At present, the top boards are not fully planed and are not perfectly flat, but I think that they would glue down flat quite ok. And I could plane them a bit more.
I don't suppose anyone will be too surprised to learn that I tried them dry first.
I was pleased to see that the tenons still lined up ok. The only tweak needed was to trim a couple of slivers off so that the haunches don't stop the shoulders from pulling up properly. Then it was everything on the bench again, knock the legs into place with a soft faced mallet, apply the cramps and tighten up.
I don't seem to have taken an overall view, but here's the left hand end
Now, one challenge was that I don't actually have any cramps long enough to span the width of this bed. What I do have is a system I first used 30 something years ago when my wife and I built a shelf unit for the kitchen, like the top half of an old dresser. "System" may be overstating it - it's just some lengths of M8 studding and some bits of wood with holes in. I honestly can't remember if I thought of it myself or read about it in a magazine. (Robert Wearing does show something similar in The Resourceful Woodworker, so I may have seen an article by him. His is a bit more complicated than mine though.)
Here's what I used for this - the mock-up leg from somewhere near the beginning of this project provided one pair of ends and a lump of fence post offcut provided the others. (And yes, I did drill all the holes with a brace and bit - there's no point owning this stuff if I don't use it sometimes!)
It's very simple to use, provided that you have long enough arms to tighten both ends at once, or a willing assistant. I find that it provides plenty enough tension to bring joints together for that last millimetre. It's also very cheap to buy and compact to store.
Here's a sample joint pulled up tight
and cleaned off
Once the glue was dry there was a little bit of cleaning up to do on the top, to make it level for the not-yet-prepared capping rail which will cover it. This dry-fit photo shows the mismatch and the sawn end of the leg
Planing this sort of thing brings fresh work-holding challenges. My very basic answer was to stand the thing on the floor and hold it in a handscrew, clamped onto the benchtop. Then I could plane it even.
This Hong Kong style plane is ideal - there's a much longer toe than is usual on western planes, making it very easy to register. Apparently they are normally pushed, but I was mostly pulling it this time and it didn't seem to mind.
Once that lot was done I could move things around and get the inner parts of the other end assembled in much the same way, going from this
to this
as if in an instant, but in reality there was quite a bit of time moving things out of the way and putting tools back in their proper places. I'm spending quite a lot of time waiting for glue or varnish to dry at the moment.
The next step, when I've got the other pair of legs glued on, will be to prepare and attach the horizontal capping rails.
This picture (from a mock-up of scraps back in November last year) shows what I am talking about, though the exact dimensions may be a bit different.
My thoughts on how to attach these are to use some dowels into the ends of the legs and just glue the butt joint along the top. Does anyone have any other suggestions? Should I leave the dowels out so that if the legs twist they can do so freely without disturbing anything else? How many dowels? I'm thinking of two in each leg, in the outside corners. They would help with alignment, provided I can get them in the proper places so they don't make it worse. (I don't think it's worth buying a Domino just for these... :lol: )
At present, the top boards are not fully planed and are not perfectly flat, but I think that they would glue down flat quite ok. And I could plane them a bit more.

- Joined
- Jul 21, 2014
- Messages
- 10,414
- Reaction score
- 165
Dowels sound ideal. Do you have some of those marking out points? They make perfect alignment a doddle
If you don’t have any I can loan you ones for 6,8 or 10mm dowels
Bob
If you don’t have any I can loan you ones for 6,8 or 10mm dowels
Bob
9fingers":59rzyevd said:Dowels sound ideal. Do you have some of those marking out points? They make perfect alignment a doddle
If you don’t have any I can loan you ones for 6,8 or 10mm dowels
Bob
That's reassuring and generous! I do have some, and I think I am more comfortable using them than any other method, so that's a useful vote in their favour. Thanks Bob.
- Joined
- Jul 21, 2014
- Messages
- 10,414
- Reaction score
- 165
AndyT":zsi0udjh said:9fingers":zsi0udjh said:Dowels sound ideal. Do you have some of those marking out points? They make perfect alignment a doddle
If you don’t have any I can loan you ones for 6,8 or 10mm dowels
Bob
That's reassuring and generous! I do have some, and I think I am more comfortable using them than any other method, so that's a useful vote in their favour. Thanks Bob.
Eek! I’m now concerned that I might have confessed to having a “hand tool”. Shock horror :lol:
They are at least home made though
Bob
- Joined
- Jul 21, 2014
- Messages
- 10,414
- Reaction score
- 165
AndyT":2a4s04dd said:Your secret's safe with me!
But you could just think of them as a specialist accessory for an electric drill...
PHEW!

Woodbloke
Sequoia
This Hong Kong style plane is ideal - there's a much longer toe than is usual on western planes, making it very easy to register. Apparently they are normally pushed, but I was mostly pulling it this time and it didn't seem to mind.
You probably realise Andy, that you can also pull a Western style plane; I frequently pull my low angle jack if it's more convenient than pushing. Those HK planes are in stock again at WH - Rob (who's just ordered three :eusa-dance: )
Cabinetman
Sequoia
- Joined
- Oct 11, 2020
- Messages
- 5,837
- Reaction score
- 1,476
- Location
- Lincolnshire Wolds + Massachusetts
- Name
- Ian
Very nice precise work as always Andy, not at all sure that the top piece needs attaching to the leg tops anyway , I’m sure with your work there won’t be a gap when you have glued it to the top rail, doubt there would be much movement across the width of the top of the legs, but dowels might just hinder any that there was.

Pete Maddex
Old Oak
Andy how about some small square bog oak pins left slightly proud with the tops chamfered to hold on the to pieces?
Pete
Pete
Pete Maddex":2yynq3nm said:Andy how about some small square bog oak pins left slightly proud with the tops chamfered to hold on the to pieces?
Pete
That's an interesting idea Pete. I plan to do some sort of square ended plugs to cover up the bolts holding the sides on. I'd not thought of making them of bog oak but I do have some.
I'll see if I can do some experiments and judge how it looks.
Thanks.
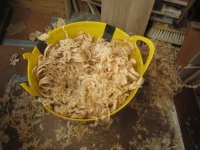
Over the last few days, I have mostly been making more of these:
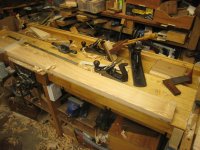
I had done very little to the two boards that I had set aside for the capping rails at the head and foot of the bed. I'd cut them a bit oversize since I was unsure what size I would want them to be and because I knew they might move a bit as they dried further.
Deciding the exact size was a matter of mocking up some scraps, holding them in place and looking at them from various angles. I needed to trim about 3/4" off the width of both boards.
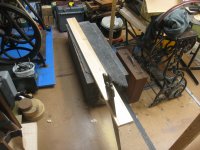
This gave me a choice. I could use the table saw, but only if I tidied up the entire workshop, including all the big bits of bed. That would take too long. I could cut them by hand, which would be relatively quick. I couldn't hold the boards in the vice - they are too long. The most suitable space was between the metalworking lathe and the treadle fretsaw. I have an old, utilitarian tool chest which just tall enough to use to saw on. I'd been using it to store the bits of bed that I wasn't working on, which is why there's an off-cut of carpet on it. That's also good for my knees.
Here you can see the saw posed in place making the cut.
Now I've had comments before about these "ghost" photos where the tools do the job unaided. People say I'm cheating and don't do the work myself! To quash such slanders, I asked my photographic assistant to come and take a proper view, showing exactly how I do this sort of cut:
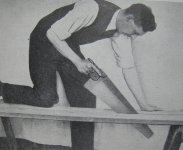
I hope that will satisfy the moaners who think I am camera-shy, and let me get back to the tools. :lol:
I don't do this sort of long rip by hand very often, but it isn't as bad as you might think. The first one took 13 minutes, the second one 11. I'd gauged the size and then run a pencil along the gauge mark and sawn as close as I dared, leaving just enough to plane off smooth.
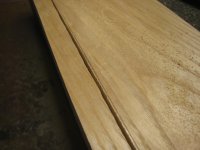
There was then a reasonably lengthy session or two getting one side of each board flat, followed by gauging to thickness and flattening the other side. Not many photos of this but this gives the idea - I was mostly taking thin shavings only, wanting to leave a finished surface after removing the least wood possible.
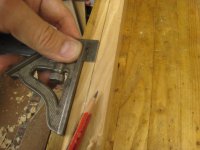
With that done and the boards cut to 60 3/8", it was time to cut the chamfers. I kept this fairly simple. I pencilled in lines, 3/8" down from the top and 1/4" in from the edge. I marked these with a pencil and a try-square. I could have just held the pencil in my fingers but I was aiming at consistency across the two pieces.
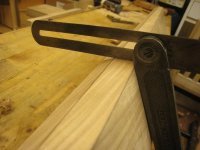
I set up a bevel gauge to whatever angle the lines gave and marked across the ends.
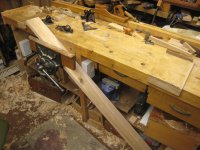
The planing started on the end grain first. Here's a board with one end accessible
Chamfering the ends was done with a block plane, trying to keep the finishing lines in sight and cut consistently. That was made much easier by the quality of this air-dried ash - I wouldn't have been able to cut the kiln-dried boards I used for the sides like this.
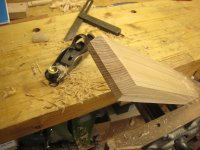
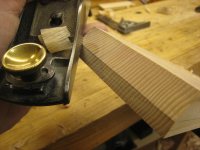
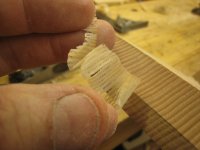
That second picture was posed of course - I needed both hands on the plane - but the drop of sweat on the end grain was not staged!
The long chamfers were done with a mixture of planes - a jack at first, then a no 4, then a block plane to finish. Getting the angle right was a mixture of tilting the plane or moving it across the work so only one side is planed, like you do when aiming for exactly 90 degrees when edge jointing.
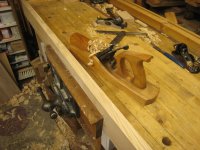
Some of the edges have an entertaining mixture of reversing grain, so I needed to switch to taking very fine shavings before too long. Here you can see that I have managed to get the angle right; from that point it's just a matter of carrying on planing until both lines disappear.
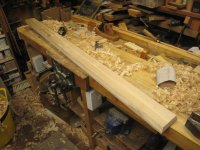
And after some time, here's a completed piece on the bench
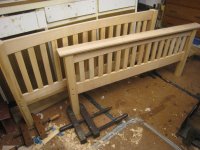
and posing, stood on top of the bed foot.
What doesn't show up in the photos is just how much I have been enjoying this project, especially in the last few days. It's just possible, in the space that I have. I have the tools that I need and they do what I want them to. It may be slow and a bit fussy, but that just means I can carry on playing for longer.
The end is still a few weeks off, but I shall miss having this project on the go once I have finished.
I had done very little to the two boards that I had set aside for the capping rails at the head and foot of the bed. I'd cut them a bit oversize since I was unsure what size I would want them to be and because I knew they might move a bit as they dried further.
Deciding the exact size was a matter of mocking up some scraps, holding them in place and looking at them from various angles. I needed to trim about 3/4" off the width of both boards.
This gave me a choice. I could use the table saw, but only if I tidied up the entire workshop, including all the big bits of bed. That would take too long. I could cut them by hand, which would be relatively quick. I couldn't hold the boards in the vice - they are too long. The most suitable space was between the metalworking lathe and the treadle fretsaw. I have an old, utilitarian tool chest which just tall enough to use to saw on. I'd been using it to store the bits of bed that I wasn't working on, which is why there's an off-cut of carpet on it. That's also good for my knees.
Here you can see the saw posed in place making the cut.
Now I've had comments before about these "ghost" photos where the tools do the job unaided. People say I'm cheating and don't do the work myself! To quash such slanders, I asked my photographic assistant to come and take a proper view, showing exactly how I do this sort of cut:
I hope that will satisfy the moaners who think I am camera-shy, and let me get back to the tools. :lol:
I don't do this sort of long rip by hand very often, but it isn't as bad as you might think. The first one took 13 minutes, the second one 11. I'd gauged the size and then run a pencil along the gauge mark and sawn as close as I dared, leaving just enough to plane off smooth.
There was then a reasonably lengthy session or two getting one side of each board flat, followed by gauging to thickness and flattening the other side. Not many photos of this but this gives the idea - I was mostly taking thin shavings only, wanting to leave a finished surface after removing the least wood possible.
With that done and the boards cut to 60 3/8", it was time to cut the chamfers. I kept this fairly simple. I pencilled in lines, 3/8" down from the top and 1/4" in from the edge. I marked these with a pencil and a try-square. I could have just held the pencil in my fingers but I was aiming at consistency across the two pieces.
I set up a bevel gauge to whatever angle the lines gave and marked across the ends.
The planing started on the end grain first. Here's a board with one end accessible
Chamfering the ends was done with a block plane, trying to keep the finishing lines in sight and cut consistently. That was made much easier by the quality of this air-dried ash - I wouldn't have been able to cut the kiln-dried boards I used for the sides like this.
That second picture was posed of course - I needed both hands on the plane - but the drop of sweat on the end grain was not staged!
The long chamfers were done with a mixture of planes - a jack at first, then a no 4, then a block plane to finish. Getting the angle right was a mixture of tilting the plane or moving it across the work so only one side is planed, like you do when aiming for exactly 90 degrees when edge jointing.
Some of the edges have an entertaining mixture of reversing grain, so I needed to switch to taking very fine shavings before too long. Here you can see that I have managed to get the angle right; from that point it's just a matter of carrying on planing until both lines disappear.
And after some time, here's a completed piece on the bench
and posing, stood on top of the bed foot.
What doesn't show up in the photos is just how much I have been enjoying this project, especially in the last few days. It's just possible, in the space that I have. I have the tools that I need and they do what I want them to. It may be slow and a bit fussy, but that just means I can carry on playing for longer.
The end is still a few weeks off, but I shall miss having this project on the go once I have finished.
Dr.Al
Old Oak
AndyT":2u5k3a2s said:What doesn't show up in the photos is just how much I have been enjoying this project
Me too! Keep it coming!

Dr.Al":1bibijw2 said:AndyT":1bibijw2 said:What doesn't show up in the photos is just how much I have been enjoying this project
Me too! Keep it coming!
Me three. But boy you need a bigger workshop.
Woodbloke
Sequoia
Andyp":361xdsyc said:Me three. But boy you need a bigger workshop.
Fourthed! Having spent time in Andy's workshop just prior to the festive season last year, I concur :lol: - Rob
Mike G
Petrified Pine
I'm really enjoying this, Andy. Almost as much as you evidently are. I'm catching up on quite a lot in this thread, as I've not had much time on the forum lately.
I keep a collection of scraps like this. As you say, they're incredibly useful. Mine are normally left over from rebate making. Used ones don't get thrown out, but simply "re-sharpened" with a chisel.
AndyT":32ke2e3j said:........using a little sliver of scrap wood, cut by an old spill plane. (Many spill planes make a thin oblique shaving that spirals round itself, but a few split a thicker sliver off, about half the thickness of a lolly stick. These are very useful in the workshop.).....
I keep a collection of scraps like this. As you say, they're incredibly useful. Mine are normally left over from rebate making. Used ones don't get thrown out, but simply "re-sharpened" with a chisel.
Before I did anything else to the head and foot, I decided that this pesky joint would not do.
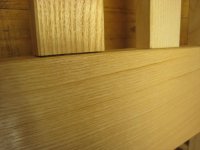
It's the worst one, but it will be on the most visible foot end. It needed disguising. The gap was about 31 thou wide (0.78mm)
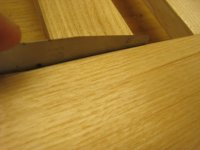
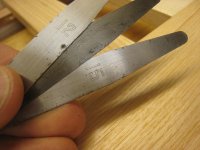
I tried to find the rest of the same piece of wood, with no success, so picked one fairly close and sawed off an end grain sliver
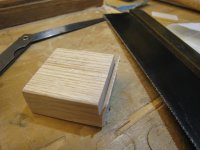
After a couple of goes, I had something close enough to glue and hammer into place
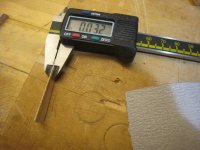
With a piece the other side and a couple of chiselled slivers installed, I left it for the glue to dry.
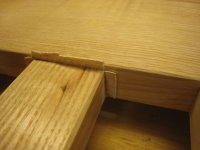
The following day I trimmed it back
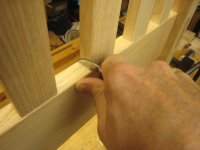
but then spoiled it all by trying to chop the other side with a chisel
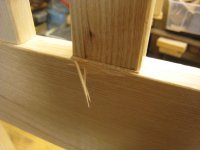
which did NOT make me happy :evil: My mistake was trying to make the cut in a position where I couldn't constrain how far the chisel moved. I had the bed end propped up vertical on the bench, which was good for fitting the patches, but I should have laid it down flat for the trimming job.
But, one of the many benefits of life in the 21st century is ready access to superglue, which is tremendously good at refixing stray wood fibres. After a little pressing down and sanding, it looked like this:
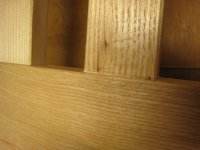
With finish on, it disappears well enough to escape notice, and is at least better than a dark gap would have been. (Seeing it close-up on the PC screen, I think I will continue that brown line over the patch - I have some touch-up pens that should do the trick.)
Onward to the next step!
I've been thinking a lot about how to fix the horizontal capping rails on and get them correctly positioned. I wondered - and was advised about on here - whether to use dowels to align them and maybe help them stay connected. I also considered a trick I have only read about, which is to knock a few small pins in, nip the heads off, then press the pieces together in the right positions, so the pins bite and stop slipping.
But in the end I went for a simpler approach.
What I did first was to nail some bits of scrap together like this:
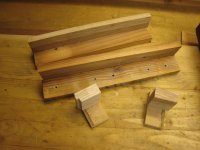
They give me an easy way to measure (and feel) whether the capping rail is straight and symmetrical. The set-back is the same all round, 1 3/8". I can hold these in place as I tighten the clamps up and check everywhere.
So, after another lengthy session of tidying up, cutting little pads of softish wood and finding which clamps are long enough and also narrow enough, I could get everything laid out ready.
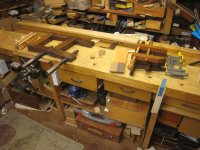
I also put some masking tape round the top of the head assembly, to make cleaning up any squeezed out glue easier.
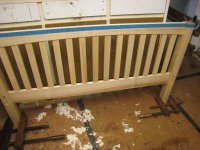
Looking at that photo reminds me that when I got my largest old wooden handscrews, I was doubtful if I would ever need them, but on this job I have used them all and been glad to have them.
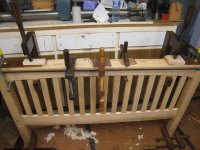
You can also see that I used an assortment of old and new to hold the capping rail in place.
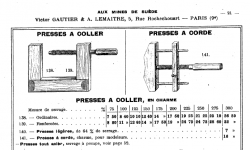
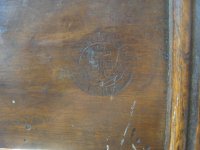
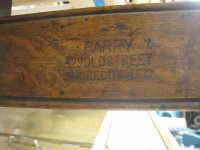
Those two big old C-clamps also earned their keep here. They are French, from the company Aux Mines de Suede, sold here by Parry and Co of London. If they are the same ones as are listed in the 1929 catalogue, they are "charme" - ie hornbeam - though they look rather dark brown for that. These are the middle size, 200mm between the jaws, and just the "ordinaire" model without a reinforcing rod. Still good to have though - and note how the chamfered tip lets them tilt over, just as required by the angle of the arched rail.
It's the worst one, but it will be on the most visible foot end. It needed disguising. The gap was about 31 thou wide (0.78mm)
I tried to find the rest of the same piece of wood, with no success, so picked one fairly close and sawed off an end grain sliver
After a couple of goes, I had something close enough to glue and hammer into place
With a piece the other side and a couple of chiselled slivers installed, I left it for the glue to dry.
The following day I trimmed it back
but then spoiled it all by trying to chop the other side with a chisel
which did NOT make me happy :evil: My mistake was trying to make the cut in a position where I couldn't constrain how far the chisel moved. I had the bed end propped up vertical on the bench, which was good for fitting the patches, but I should have laid it down flat for the trimming job.
But, one of the many benefits of life in the 21st century is ready access to superglue, which is tremendously good at refixing stray wood fibres. After a little pressing down and sanding, it looked like this:
With finish on, it disappears well enough to escape notice, and is at least better than a dark gap would have been. (Seeing it close-up on the PC screen, I think I will continue that brown line over the patch - I have some touch-up pens that should do the trick.)
Onward to the next step!
I've been thinking a lot about how to fix the horizontal capping rails on and get them correctly positioned. I wondered - and was advised about on here - whether to use dowels to align them and maybe help them stay connected. I also considered a trick I have only read about, which is to knock a few small pins in, nip the heads off, then press the pieces together in the right positions, so the pins bite and stop slipping.
But in the end I went for a simpler approach.
What I did first was to nail some bits of scrap together like this:
They give me an easy way to measure (and feel) whether the capping rail is straight and symmetrical. The set-back is the same all round, 1 3/8". I can hold these in place as I tighten the clamps up and check everywhere.
So, after another lengthy session of tidying up, cutting little pads of softish wood and finding which clamps are long enough and also narrow enough, I could get everything laid out ready.
I also put some masking tape round the top of the head assembly, to make cleaning up any squeezed out glue easier.
Looking at that photo reminds me that when I got my largest old wooden handscrews, I was doubtful if I would ever need them, but on this job I have used them all and been glad to have them.
You can also see that I used an assortment of old and new to hold the capping rail in place.
Those two big old C-clamps also earned their keep here. They are French, from the company Aux Mines de Suede, sold here by Parry and Co of London. If they are the same ones as are listed in the 1929 catalogue, they are "charme" - ie hornbeam - though they look rather dark brown for that. These are the middle size, 200mm between the jaws, and just the "ordinaire" model without a reinforcing rod. Still good to have though - and note how the chamfered tip lets them tilt over, just as required by the angle of the arched rail.
Woodbloke
Sequoia
Nice save! :eusa-dance: - Rob

DaveL
Old Oak
+1Woodbloke":xud3hvs8 said:Nice save! :eusa-dance: - Rob
Well, gluing the capping rails on worked just fine, so I have been spending quite a lot of time patiently removing any remaining traces of squeezed out glue and applying an extra coat of varnish. Those aren't the most interesting steps to photograph, so instead I offer you today's diversion into dowelling.
We've now dismantled the old bed. Here's one of its side rails, resting on one of the new ash rails.
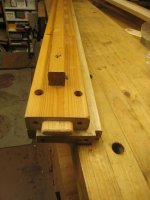
The length between shoulders is the same but the new ones should be stiffer, as they are ash, not pine. They are also an inch deeper. I'll need to put something on the inside faces to rest the mattress slats on. Rather than a skinny little strip, I think I may as well use the whole flat part of the old rail, cleaned up and trimmed down a bit, then glued and screwed on.
Having decided that, it seems silly not to let the extra thickness take some of the weight as well. I could just use the existing tenons. But because I have built the head and foot assemblies, I really don't fancy bashing them about while I cut mortises. Instead, I'll cut the tenons off flush and drill holes for a couple of stout dowels. I have ordinary 8mm beech dowels but I may as well go for something a bit stronger. I think some ash would do, at about ½" diameter.
I happen to have some offcuts of ash and a rather nice old tool suitable for making dowels, so it's an easy decision really.
Here's a bit of ash in the vice with a target circle for guidance.
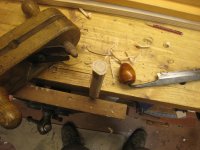
I've trimmed the corners off with a drawknife, ready for the rounding plane/witchet/stail engine - it goes by many names. This one is adjustable, which is a big help. It means you can take a succession of cuts until you reach the diameter you want. This was a first, fairly aggressive cut:
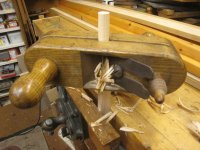
In use, you just fix the wood and spin the tool around, like a giant pencil sharpener. The blade is cambered and set at a slight angle in the central hole, which is tapered, so you get an open side as the tool advances, and a closer set side as the wood emerges from it. In this picture, as I was working on the whole length of my scrap, I was taking a light cut:
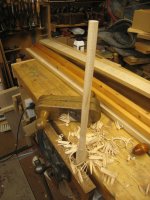
and after that I took lighter cuts still so that I could shape the whole length. I did that just holding the wood in one hand and the plane in the other.
When it was nearly down to the size I wanted, I used this spoke pointer to taper the end.
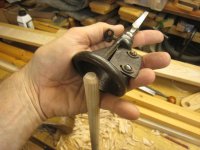
As you can see, these are designed to be used in a brace, but to do this I just twiddled it by hand.
Then it was ready to bash through my dowel plate
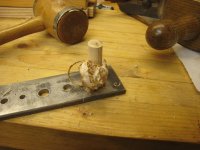
And so a little while later, here's the result, ready to be cut to lengths.
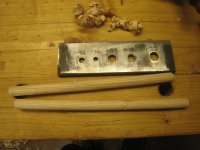
I got the exact dowels that I wanted and a nice old tool had its turn at being useful. That'll do me!
We've now dismantled the old bed. Here's one of its side rails, resting on one of the new ash rails.
The length between shoulders is the same but the new ones should be stiffer, as they are ash, not pine. They are also an inch deeper. I'll need to put something on the inside faces to rest the mattress slats on. Rather than a skinny little strip, I think I may as well use the whole flat part of the old rail, cleaned up and trimmed down a bit, then glued and screwed on.
Having decided that, it seems silly not to let the extra thickness take some of the weight as well. I could just use the existing tenons. But because I have built the head and foot assemblies, I really don't fancy bashing them about while I cut mortises. Instead, I'll cut the tenons off flush and drill holes for a couple of stout dowels. I have ordinary 8mm beech dowels but I may as well go for something a bit stronger. I think some ash would do, at about ½" diameter.
I happen to have some offcuts of ash and a rather nice old tool suitable for making dowels, so it's an easy decision really.
Here's a bit of ash in the vice with a target circle for guidance.
I've trimmed the corners off with a drawknife, ready for the rounding plane/witchet/stail engine - it goes by many names. This one is adjustable, which is a big help. It means you can take a succession of cuts until you reach the diameter you want. This was a first, fairly aggressive cut:
In use, you just fix the wood and spin the tool around, like a giant pencil sharpener. The blade is cambered and set at a slight angle in the central hole, which is tapered, so you get an open side as the tool advances, and a closer set side as the wood emerges from it. In this picture, as I was working on the whole length of my scrap, I was taking a light cut:
and after that I took lighter cuts still so that I could shape the whole length. I did that just holding the wood in one hand and the plane in the other.
When it was nearly down to the size I wanted, I used this spoke pointer to taper the end.
As you can see, these are designed to be used in a brace, but to do this I just twiddled it by hand.
Then it was ready to bash through my dowel plate
And so a little while later, here's the result, ready to be cut to lengths.
I got the exact dowels that I wanted and a nice old tool had its turn at being useful. That'll do me!
Cabinetman
Sequoia
- Joined
- Oct 11, 2020
- Messages
- 5,837
- Reaction score
- 1,476
- Location
- Lincolnshire Wolds + Massachusetts
- Name
- Ian
You have a wonderful assortment of tools Andy, love the "dowel plane", the last time I used something similar was 50 years ago at school turning the spells for the back of a Windsor chair, cheated though and ran it up the bit of wood spinning in the lathe on a slow speed.
Cabinetman":2jpemsg6 said:You have a wonderful assortment of tools Andy, love the "dowel plane", the last time I used something similar was 50 years ago at school turning the spells for the back of a Windsor chair, cheated though and ran it up the bit of wood spinning in the lathe on a slow speed.
There's definitely a close relationship between owning a variety of tools and finding ways to use them in projects. That makes sense to me though - how can you appreciate tools if you don't try them out?

A bit more progress has been made. I got the extra strips off the sides of the old bed and cleaned them up.
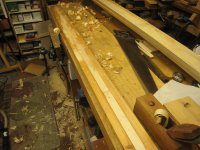
The width was awkward. I needed to remove about 10mm. I really didn't want to clear the room for the tablesaw and was feeling lazy about ripping by hand. Maybe a proper old school worker would have reached for a hatchet but it's not the right time to risk that. I turned to the same little scrub plane I used on here however many pages and months ago it was. It's impressively quick on edges, since it was taking shavings over 2mm thick.
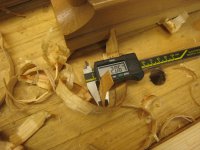
I soon had these bits brought to size, then screwed and glued onto the ash sides.
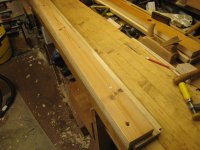
For fitting the dowels into the ends, I needed holes in the sides that would closely correspond to matching holes in the legs. There are several ways to do this - square lines round, measuring accurately; use a commercial clamp-on dowelling jig; make some sort of ad-hoc jig; drill holes in one side and use dowel points to transfer the marks. But I decided to try a technique I had read about but never needed to use.
This was to put pins in one piece, not hammered all the way in, nip the heads off, then dry assemble so the pins make marks.
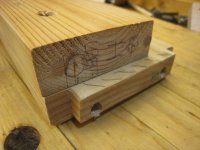
Here you can see an end, marked out for the holes, then marked again in more suitable positions , with the heads cut off with some end nippers.
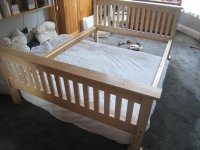
The next step was to test-assemble the bed. The only clear spot big enough was in the bedroom, where the mattress on the floor also provided some useful extra support for the bits. My wife and I were able to get all four corners bolted together like this:
What doesn't show in that picture is the not inconsiderable time I spent slightly adjusting some of the holes so that the bolts all went in easily, finding their way into the barrel nuts and pulling the joints together. Nevertheless, that was time well spent.
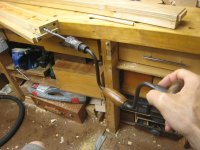
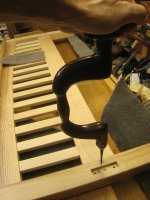
With the bits dismantled again, back in the workshop, I could pull out the pins and bore holes for the dowels in the ends of the sides. The extra length of an auger bit makes it easy to line up level and straight, even when posing one-handed with the camera in the other hand.
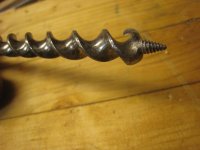
Many auger bits don't perform well in end grain, but a Gedge/Cook pattern bit is excellent - the cutting edges are curved like gouges so don't skate off like a Jennings pattern would.
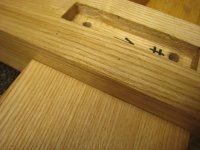
Here are the marks made by the cut-off pins in one of the legs - nice and clear.
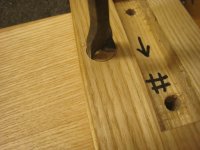
To make the cross-grain holes here, a centre bit is ideal. These are only ½" holes, so a lightweight wooden brace is a good choice.
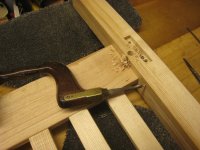
The centre bit has a nice long nicker which completely severs the grain before cutting down at all, so you get a nice neat hole.
With the dowels all glued into the rails, it was time to move outside the workshop and check the fit somewhere with a bit more headroom.
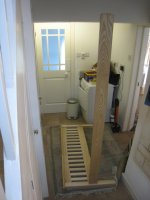
Success! On this corner at least, adding the dowels hadn't stopped the joint from fitting together.
More soon.
The width was awkward. I needed to remove about 10mm. I really didn't want to clear the room for the tablesaw and was feeling lazy about ripping by hand. Maybe a proper old school worker would have reached for a hatchet but it's not the right time to risk that. I turned to the same little scrub plane I used on here however many pages and months ago it was. It's impressively quick on edges, since it was taking shavings over 2mm thick.
I soon had these bits brought to size, then screwed and glued onto the ash sides.
For fitting the dowels into the ends, I needed holes in the sides that would closely correspond to matching holes in the legs. There are several ways to do this - square lines round, measuring accurately; use a commercial clamp-on dowelling jig; make some sort of ad-hoc jig; drill holes in one side and use dowel points to transfer the marks. But I decided to try a technique I had read about but never needed to use.
This was to put pins in one piece, not hammered all the way in, nip the heads off, then dry assemble so the pins make marks.
Here you can see an end, marked out for the holes, then marked again in more suitable positions
, with the heads cut off with some end nippers.The next step was to test-assemble the bed. The only clear spot big enough was in the bedroom, where the mattress on the floor also provided some useful extra support for the bits. My wife and I were able to get all four corners bolted together like this:
What doesn't show in that picture is the not inconsiderable time I spent slightly adjusting some of the holes so that the bolts all went in easily, finding their way into the barrel nuts and pulling the joints together. Nevertheless, that was time well spent.
With the bits dismantled again, back in the workshop, I could pull out the pins and bore holes for the dowels in the ends of the sides. The extra length of an auger bit makes it easy to line up level and straight, even when posing one-handed with the camera in the other hand.
Many auger bits don't perform well in end grain, but a Gedge/Cook pattern bit is excellent - the cutting edges are curved like gouges so don't skate off like a Jennings pattern would.
Here are the marks made by the cut-off pins in one of the legs - nice and clear.
To make the cross-grain holes here, a centre bit is ideal. These are only ½" holes, so a lightweight wooden brace is a good choice.
The centre bit has a nice long nicker which completely severs the grain before cutting down at all, so you get a nice neat hole.
With the dowels all glued into the rails, it was time to move outside the workshop and check the fit somewhere with a bit more headroom.
Success! On this corner at least, adding the dowels hadn't stopped the joint from fitting together.
More soon.
Cabinetman
Sequoia
- Joined
- Oct 11, 2020
- Messages
- 5,837
- Reaction score
- 1,476
- Location
- Lincolnshire Wolds + Massachusetts
- Name
- Ian
I think it was me that did a thing about cut off pins on the "other place" a while ago, glad it worked for you. The bed looked really good all together like that.
Cabinetman":2tp74kvz said:I think it was me that did a thing about cut off pins on the "other place" a while ago, glad it worked for you. The bed looked really good all together like that.
Thanks, that's probably where I learned about it.
And thanks for your kind words and encouragement.
For the last few days of this project, I've felt as if I was eating a box of chocolates. I'm down at the bottom of the second tray now and there aren't very many left. I can chew the last few slowly but I can't resist having the last one...
The old bed had a central rib to help support the slats and I decided to copy that idea. Instead of a skimpy bit of softwood, I had one last long piece of ash that was suitable. It had various splits, knots and pockets of pith in it. I planed it down here and there, without making it any thinner than I had to. I scraped out the pith and ran some superglue in where it had been. I've no idea if that matters or not but it won't have done any harm.
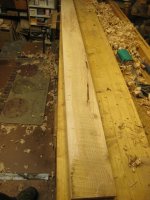
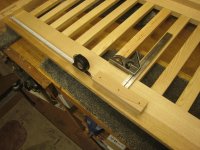
I didn't cut this to its final length until I had assembled the outer parts of the bed, when I could measure the actual gap rather than trusting my design sketches to predict how long it should be. But before that, I needed something to support the ends. This was all very simple stuff - just blocks glued and screwed in place, after much measuring and checking to get the position right. I also needed to scrape the varnish off so that the glue would work. I marked the positions with masking tape and scraped with a chisel.
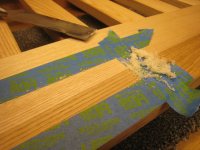
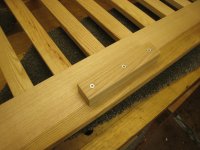
Scraping off the finish reassured me of how tough the Polyvine varnish is. I've not attempted to show this in photos, but in between the interesting construction steps, all the bits have had two or three coats of satin finish followed by one or two coats of the flat matt. I really like it. It's very easy to apply without brush marks, it dries quickly and it's odour free. Not claims you could make for an oil finish, whether traditional or modern.
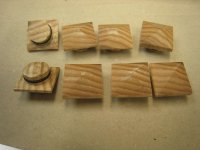
An extra little detail was that I needed something to cover up the heads of the bolts at the corners. My original sketches showed little square plugs, and so, not having thought of anything else, I experimented a bit to find a way of making them.
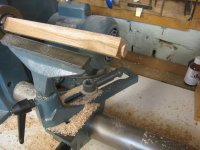
Here's an offcut of ash, in a chuck on the lathe. I've cut a cylinder at the end, about 15mm diameter and 6mm long. There's a little groove around it, started with the skew chisel and enlarged with a small round file.
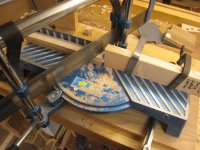
The piece then comes over to the mitre saw. The tip butts up against a stop and a set of four cuts are made, all at the same angle, which is one of the pre-sets, probably for an octagon.
The end soon looks like this
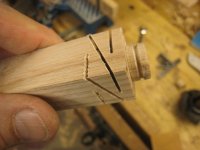
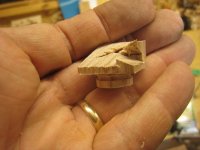
The partially cut bits that aren't needed can just be snapped off, leaving the end ready for planing. To hold the little plugs, I bored a clearance hole in the end of a bit of scrap and sawed a slot. Add a clamp and it grips nicely.
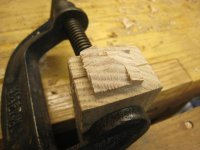
All that's needed then is a bit of planing with my favourite old block plane.
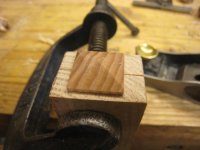
and a test fit on one of the ends
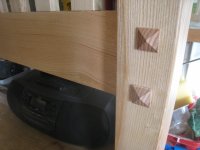
The grooves are for little O-rings. Filing the groove a bit more gives me a way of sneaking up on a snug fit and I hope the grip from the rubber will reduce the risk of these getting permanently stuck in place. The best ones can go at the visible end, the others can face the wall.
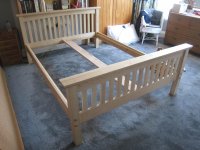
With those done, it was assembly time at last. Here you can see the outer parts bolted together and the central strut screwed onto its supporting blocks.
Then the slats were screwed down. I also added a free-standing central leg (from an off cut of 4x4 softwood that had been waiting to come in useful) which isn't visible in the photo.
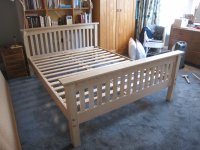
Please do look at the head end - as I predicted on page 1 of this epic, it's going to be almost all invisible when the mattress and the bedding are in place.
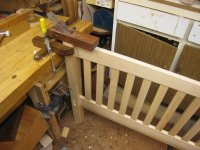
As you can see here, proving that this long story is finished at last:
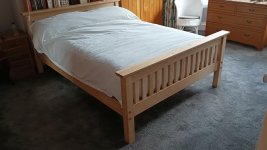
So thanks everyone for your encouragement, suggestions and apparent enthusiasm for looking at hundreds of photos of tiny details. I've really enjoyed building this. I've no idea how many hours went into it, but they were all enjoyable, even if I was just shifting stuff round to make room. I have learned not to be put off by making something with a lot of planing and a lot of repetition in it.
However, I expect my next project will be something smaller - I now have some offcuts of nice ash that need to be used up!
The old bed had a central rib to help support the slats and I decided to copy that idea. Instead of a skimpy bit of softwood, I had one last long piece of ash that was suitable. It had various splits, knots and pockets of pith in it. I planed it down here and there, without making it any thinner than I had to. I scraped out the pith and ran some superglue in where it had been. I've no idea if that matters or not but it won't have done any harm.
I didn't cut this to its final length until I had assembled the outer parts of the bed, when I could measure the actual gap rather than trusting my design sketches to predict how long it should be. But before that, I needed something to support the ends. This was all very simple stuff - just blocks glued and screwed in place, after much measuring and checking to get the position right. I also needed to scrape the varnish off so that the glue would work. I marked the positions with masking tape and scraped with a chisel.
Scraping off the finish reassured me of how tough the Polyvine varnish is. I've not attempted to show this in photos, but in between the interesting construction steps, all the bits have had two or three coats of satin finish followed by one or two coats of the flat matt. I really like it. It's very easy to apply without brush marks, it dries quickly and it's odour free. Not claims you could make for an oil finish, whether traditional or modern.
An extra little detail was that I needed something to cover up the heads of the bolts at the corners. My original sketches showed little square plugs, and so, not having thought of anything else, I experimented a bit to find a way of making them.
Here's an offcut of ash, in a chuck on the lathe. I've cut a cylinder at the end, about 15mm diameter and 6mm long. There's a little groove around it, started with the skew chisel and enlarged with a small round file.
The piece then comes over to the mitre saw. The tip butts up against a stop and a set of four cuts are made, all at the same angle, which is one of the pre-sets, probably for an octagon.
The end soon looks like this
The partially cut bits that aren't needed can just be snapped off, leaving the end ready for planing. To hold the little plugs, I bored a clearance hole in the end of a bit of scrap and sawed a slot. Add a clamp and it grips nicely.
All that's needed then is a bit of planing with my favourite old block plane.
and a test fit on one of the ends
The grooves are for little O-rings. Filing the groove a bit more gives me a way of sneaking up on a snug fit and I hope the grip from the rubber will reduce the risk of these getting permanently stuck in place. The best ones can go at the visible end, the others can face the wall.
With those done, it was assembly time at last. Here you can see the outer parts bolted together and the central strut screwed onto its supporting blocks.
Then the slats were screwed down. I also added a free-standing central leg (from an off cut of 4x4 softwood that had been waiting to come in useful) which isn't visible in the photo.
Please do look at the head end - as I predicted on page 1 of this epic, it's going to be almost all invisible when the mattress and the bedding are in place.
As you can see here, proving that this long story is finished at last:
So thanks everyone for your encouragement, suggestions and apparent enthusiasm for looking at hundreds of photos of tiny details. I've really enjoyed building this. I've no idea how many hours went into it, but they were all enjoyable, even if I was just shifting stuff round to make room. I have learned not to be put off by making something with a lot of planing and a lot of repetition in it.
However, I expect my next project will be something smaller - I now have some offcuts of nice ash that need to be used up!
Pete Maddex
Old Oak
Very nice job and WIP as usual.
Sleep tight.
Pete
Sleep tight.
Pete
Woodbloke
Sequoia
Nice job Andy! How about a single bed in Ash for a small bedroom? - Rob....swiftly exiting :lol:AndyT":2itkznc0 said:However, I expect my next project will be something smaller - I now have some offcuts of nice ash that need to be used up!
- Joined
- Jul 21, 2014
- Messages
- 10,414
- Reaction score
- 165
Quote Andy "this long story is finished at last:"
In my best Victor Meldrew impression " I cannot believe it!"
Marathon does not seem adequate somehow. You have earned a good nights sleep in this Andy!
Bob
In my best Victor Meldrew impression " I cannot believe it!"
Marathon does not seem adequate somehow. You have earned a good nights sleep in this Andy!
Bob

Doug
Old Oak
Looks very nice Andy :eusa-clap: