• Hi all and welcome to TheWoodHaven2 brought into the 21st Century, kicking and screaming! We all have Alasdair to thank for the vast bulk of the heavy lifting to get us here, no more so than me because he's taken away a huge burden of responsibility from my shoulders and brought us to this new shiny home, with all your previous content (hopefully) still intact! Please peruse and feed back. There is still plenty to do, like changing the colour scheme, adding the banner graphic, tweaking the odd setting here and there so I have added a new thread in the 'Technical Issues, Bugs and Feature Requests' forum for you to add any issues you find, any missing settings or just anything you'd like to see added/removed from the feature set that Xenforo offers. We will get to everything over the coming weeks so please be patient, but add anything at all to the thread I mention above and we promise to get to them over the next few days/weeks/months. In the meantime, please enjoy!

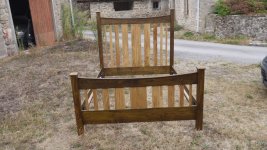
Bed - Finished and sleepable inable!

Ooh, that's a nice jig. I have seen it before, but I had forgotten all about it. Thank you for the reminder.
You can easily make one and Ola is the original designer, you could also buy the Woodpeckers version that is based on this original but with a more elaborate height adjustment for £1000, they call it the mortice match. For that price making one is a no brainer and you can easily accomodate height adjustment by recessing the domino into the base and then using perspex shims to raise it for other thicknesses of work material. You also want the later design of the stop that uses the movable rod as it is much easier to just flip it over.

 
Well, I do realise that I have to spend my vast fortune before My Last Day (otherwise M. Macron will take 60% of it), but there is no way I am going to spend £1000 on a jig, no matter how good it is!
S
 
The Veritas Domino Joinery Table is a bit cheaper than the Woodpeckers version, but still a lot of money.

As I wrote in #62 it is really easy to build yourself. Ola has made all information you need available. See


and


for an introduction.

In some situations, it really is a very helpful jig to have at hand.
 
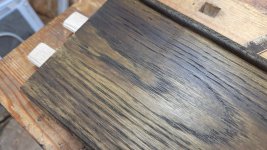
I don't know where yesterday went, but this morning I have stained all the frame and legs. I'm using a French water-based stain for the first time. The colour is good,, but it is raising the grain rather more than I expected. Also, it has shown up all the defects in the surface, including a couple of place where I still have machining marks,

machine marks 2.jpg

so I shall have to deal with that once the stain is dry.

I still have the leg caps to make.
S
 
I've been working my way through this thread after a layoff doing other things for several months whilst patiently waiting for my new p/t. I LOVE that chest of 9 drawers with the elliptical inlay in the drawer fronts. It also has a very disturbing optical effect on screen as you scroll past it that "does my head in" to use the current vernacular!
 
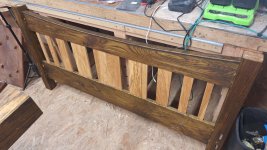
I've spent a few days finishing. Not as well as I had intended, TBH. I really regret staing the frame black. It was too dark and blotchy, so I washed off the excess (which also improved the blotchiness, actually), but there is a rather unpleasant greenish tinge to the wood now, the grain was very raised and a lot more sanding was needed. Applying the oil also showed up several more places where I still had planer marks and sanding issues. But too late. I'm relying on the fact that no-one else will ever see it until after I'm gone, the room is dark, even in the day (one small window), when I'm in there, I can't see much anyway. So who cares? :)

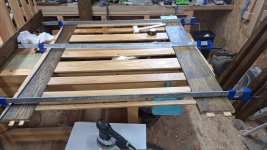
Today I started to glue up. All the slats went into the top curved rail and adjusted so that there was the same gap, 61.5mm, between them (I set my digital calipers to that value and locked it down - it worked pretty well).

headboard first slats glued.jpg

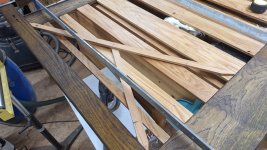
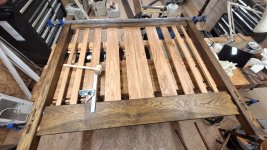
Then, after half an hour or so, I added the bottom rail. It was tricky, getting all those tenons in altogether, but I did it.

headboard clamped up.jpg

And not forgetting to check for square

headboard thales.jpg

Tomorrow I plan to finish the footboard and glue on the legs.
S
 
Steve, if you'd not written that but just showed the pictures we'd all be saying how good the finish looks!

But as you say, you'll soon have a sturdy, comfortable bed you can be proud of.

And knowing a bit of what you've been through in the last few years, seeing you tackling a large scale project like this is really good news.
 
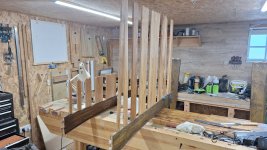
Both head- and footboards are now glued up. They get heavier with every passing operation!

About 15 or 20 years ago, after I'd made the beds I showed at the top of tis thread, I decided that I needed something better for clamping across a bed than a couple of lashed-up sash cramps, so I bought two pairs of Record T-bars, 6'. Very good quality and a price to match. I never got to use them.
When life went pear-shaped, all my stuff went into a barn and a lot of it got stolen, including all my sash cramps, those four and all my others, some of which had been my dad's. So if you bought 4 brand new Record sash cramps, nicely wrapped in anti-rust paper, cheap at a car boot or some-such, probably in the East Midlands, about 12 years ago, or thereabouts...

This is where I'm at.

footboard glued up.jpg

headboard clamped to legs.jpg

The combination square is to make sure that the rails are all at the same height from the bottom of the leg.

The two-tone look is growing on me.
S
 
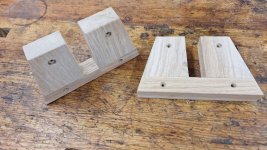
I've pretty much finished now, all bar the shouting. I've made a couple of brackets to support a centre support rail (because the slat base is 2 x 700mm, rather than 1 x 1400). They will be attached with brass screws.

brackets.jpg

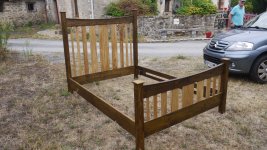
I gave everything another coat of oil and that has improved it considerably. The tin says "satin-matt" and it is very much at the matt end of that spectrum. I've done a test assembly and all is well.

finished bed 1.JPG

finished bed 2.JPG

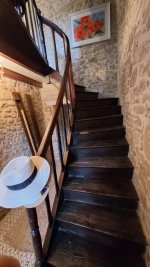
All I have to do now is make space in my bedroom to work and get it up the stairs. Easier said than done.
S
 
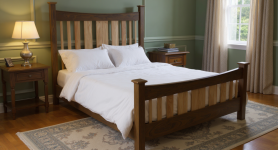
That image was extraordinarily easy to generate. I simply uploaded the photo from above, the one with the car in it, which was a simple drag and drop, and told it what I wanted it to do:

"Take this image of my bed and change the background to make it look like it is in a stately home. Green and silver tones. Crisp white bed linen, classy. 16:9 aspect ratio."

It took just a few seconds to come up with that image. Scarily fast.

I'd previously tried the same excercise with Copilot, but that was useless. It changed the rails to convex, it changed the spacings of the slats and the colours, too. Even when I'd told it to keep them as in the original it still kept changing them. The interiors themselves were good, but my bed was destroyed.

I don't know how many free goes you get before it says I have to pay, but so far I'm not had to hand over my email address, let alone a credit card.
S
 
Self confessed IT dinosaur……did think it was a little strange seeing sliding sashes in France…. I run a small window and door company so I’m always interested in how different cultures use different windows.
 
Andy that’s interesting thanks, quick google shows many companies making them. I lived in France for a couple of years and apart from main st Disney never saw them used
 
Back
Top