• Hi all and welcome to TheWoodHaven2 brought into the 21st Century, kicking and screaming! We all have Alasdair to thank for the vast bulk of the heavy lifting to get us here, no more so than me because he's taken away a huge burden of responsibility from my shoulders and brought us to this new shiny home, with all your previous content (hopefully) still intact! Please peruse and feed back. There is still plenty to do, like changing the colour scheme, adding the banner graphic, tweaking the odd setting here and there so I have added a new thread in the 'Technical Issues, Bugs and Feature Requests' forum for you to add any issues you find, any missing settings or just anything you'd like to see added/removed from the feature set that Xenforo offers. We will get to everything over the coming weeks so please be patient, but add anything at all to the thread I mention above and we promise to get to them over the next few days/weeks/months. In the meantime, please enjoy!

Beehive Construction - Done!!

Phil

Old Oak
Joined
Jul 23, 2014
Messages
4,182
Reaction score
400
Location
Southern Africa 0054
Beehive Construction

Part 1 of another exciting wood project, something very different this time, and no rocket science (says he full of confidence).

A very old friend of mine lives on a farm close by and has a couple of hives.
We visited recently and he asked if I could make a hive. He will let me have an old hive as a sample.

A requirement of the new hive was to have a slightly longer landing strip, not for heavily laden bees to land but for a holding cage. Will deal with that one later on.

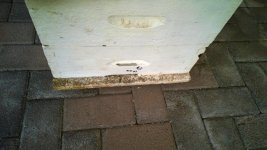
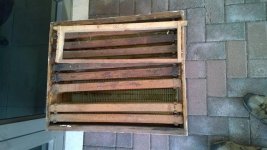
The sample box arrived one Friday and went onto the patio, certainly no place in the garage!
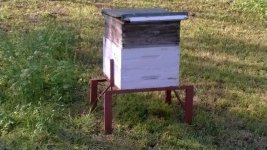

OldHiveOnSite.jpg

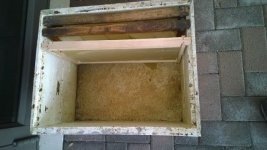
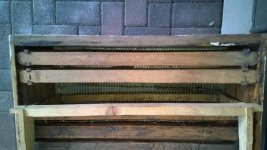
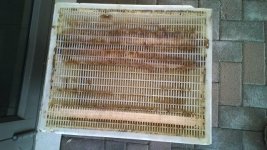
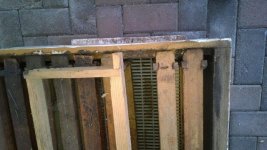
Sample Box -

Sample1.jpg
Sample2.jpg
Sample3.jpg
Sample4.jpg
Sample5.jpg
Sample6.jpg
Sample7.jpg

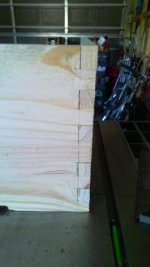
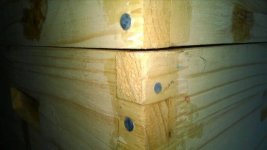
SampleBoxCorner.jpg

First up was measuring the internal dimensions of the brood box (queen bee breeding) and super (honey) box as these are important for hanging the frames. The outside measurements would be adjusted accordingly.

Before putting pencil to paper I did some WWW searching. This is a 10 frame Langstroth hive.
The Reverend Lorenzo Langstroth patented the design in in 1852.

Some reading:

https://en.wikipedia.org/wiki/Langstroth_hive

https://en.wikipedia.org/wiki/L._L._Langstroth

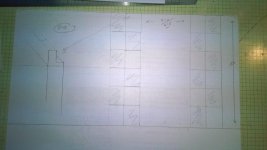
It was then down to measuring existing boxes and drawing to scale to get a feeling and plan of action.
Also to plan the works order process to eliminate cock-ups – aka F-Up-F.
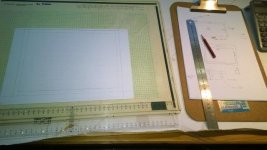
DrawingToScale.jpg

As this is a “test” run I decided to use good ‘ol SA Pine with all its defects.
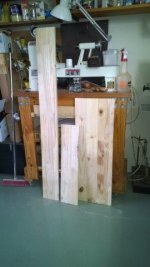
The M-Cad-BOM calculated I need 2 lengths of 20 x 305 x 3000mm. With very careful nesting and cutting I should be ok (famous last words! The F-Up-Fairy paid a visit or two ……… )

20mm thick? Will deal with this later on.

The width of the boards required were 150mm for top and 255mm bottom. The 305mm width is a good choice.
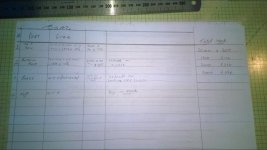
BOM.jpg

Visited first Mica (4.5km from home) stock not what I want. Next onto Chamberlains (5.5km from home).

Ok, a large number of boards on the shelf.
Start unpacking the shelf looking for straightest, no warp, as few knots as possible, no wavey bends, clean boards.
Fortunately, Chamberlains employs young chaps to do this work, I struggle a bit with the long boards.
Once I had paid he even loaded it onto the back of the LDV. (Declined a tip).

Back home, the wife was away visiting kids for 2 days, more space in the garage. Machines were moved so that I could rip cut, crosscut, and use the router table.
So, I could now offload and did the first cuts on the RAS.
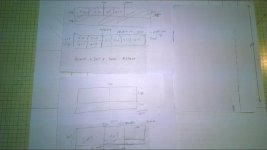
CuttingList.jpg

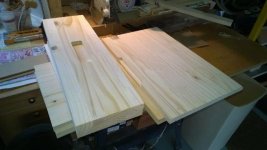
Measure and cut trying to avoid having the knots on a joint.
The first board (#1) was cut at 1040mm long. This is the 4 top panels.
Then to the table saw to do the ripping into 150mm widths. These boards went back to the RAS for cutting – 2 x 510mm and 2 x 415mm
Top box cut, mark with chalk and place carefully in a safe place ready for further machining.
Board #1 left over was than trimmed on the table saw to a width of 255mm.
Then back to the RAS to cut 2 x 510mm and 2 x 415mm
Bottom box cut, mark with chalk and place carefully in a safe place ready for further machining.

Board #2 would provide the base and top.
The base being 415mm wide and 700mm long required 2 boards to be joined.
Lots of glue and a couple of #20 biscuits. Clamped down, there was a slight ridge where the 2 boards are joined (not sure of cause, but will look at it when out of clamps)
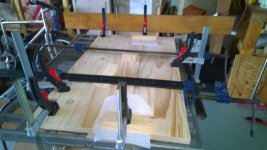
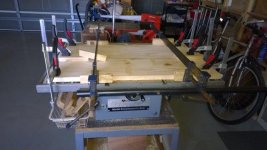
FirstBaseGlueUp.jpg

BaseJoined_2.jpg

While this was curing, time to plan the handholds for the boxes.

Handholds

Each box and side gets a handhold for picking them up.
This is what the sample box looks like
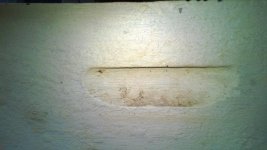
OldHandHole.jpg

The easiest way is on the router table using a straight fluting bit.
As this is a blind-upside-down rout, a paper template is drawn for the narrow and wider boards.
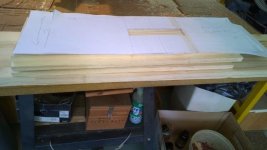
HandHoleTemplate.jpg

The router table is prepared, the bit raised to the right height, the fence set back from the bit.
The template is then used to clamp down some scraps on the sides and front.
Ear protection on, vacuum switches on with the router, first board placed down.
Move board around side ways and back to front. Lift off – looks good.
Same process for all the other boards, just moving the scraps for the longer boards.
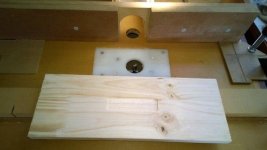
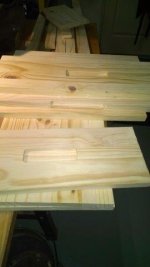
HandHoleRouting.jpg

AllCutRoutedHandHoles.jpg

HandHoldsCut.jpg

Hand holds cut and front entrance routed

Right, a design error. The bottom side of the hand hold needs to be sloped down so as not to accumulate water.
I only realised this after assembly and it was too late to do anything about it. The boxes had already been undercoated for painting.


Rebate for frames
The width side of the box has a rebate at the top where the frames are placed.
The measurement is taken from the sample box (this will come back and bite later on)
Easy job.
Set the fluting bit in the router. Mark a board.
Push the 4 boards over, adjust the height until rebate correct size.
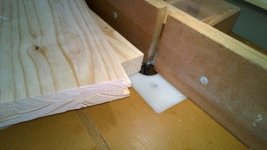
RoutingRebates.jpg

Adjusting the height is a bit of a schlep – The table top lifts up and has a stay to keep it there and a slide over the join. (the slide was fitted afterwards - after I was in a hurry one day, bumped the stay, just could not get my hand out fast enough. The middle finger was caught and fractured. The table top weight is very heavy, the top is 20mm MDF, the large Ryobi router and then the heavy fence) There was lots of blue air.
Had to wear a splint, it leant a whole new meaning to flipping the bird :lol: :lol:

Thank you for reading
Phil
 
Looks like fun, not sure you'll be able to get it, but there's a program here "river cottage", he was building a "natural" beehive which was essentially a hollow log on end, about 2m off the ground, allegedly makes for a happier bee.
 
greeno":w8t7p7lm said:
Looks like fun, not sure you'll be able to get it, but there's a program here "river cottage", he was building a "natural" beehive which was essentially a hollow log on end, about 2m off the ground, allegedly makes for a happier bee.

Interesting, how does he harvest the honey?
 
It's the problem with more "natural" types of hives - it's difficult to harvest the honey without a lot of damage. Bees apparently use 7lb of honey to produce 1lb of beeswax, so anything that helps preserve the beeswax is good - decent comb is repaired and thus recycled. I kept bees until a sting nearly killed me, and got a third prize for comb at Royal Cornwall Show (the fifth biggest honey show in the Country) at my first attempt at showing before I had to stop.
 
greeno":26lzvge1 said:
Not sure i can answer that question, but this is the guy who supplied it:
https://beekindhives.uk/

Thanks, interesting site.

Phil Pascoe":26lzvge1 said:
It's the problem with more "natural" types of hives - it's difficult to harvest the honey without a lot of damage. Bees apparently use 7lb of honey to produce 1lb of beeswax, so anything that helps preserve the beeswax is good - decent comb is repaired and thus recycled. I kept bees until a sting nearly killed me, and got a third prize for comb at Royal Cornwall Show (the fifth biggest honey show in the Country) at my first attempt at showing before I had to stop.

I will not be doing any harvesting 8-) 8-)
 
Beehive Construction - continued

Next up the joints ………………..

Joints
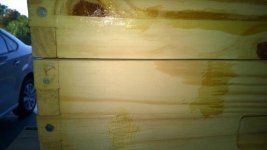
Looking at the supplied example boxes and some internet research, box joints were the way to go. Lots of glue surface and some nice long sturdy galvanised nails.

The joint for the 150mm wide boards – 6 @ 25mm each.
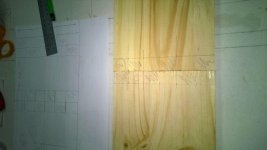
This was drawn to scale and will then be transferred to the boards.
Important to remember that the top cut-out will be on the short side.

DrawingBoxJoints.jpg

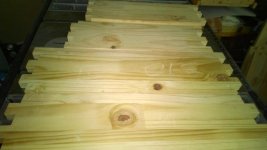
The boards were numbered and marked, keeping them side by side to ensure the correct cut outs.

BoxJointLayout.jpg

I then used the Polycut Hegner to do the cutting.

3 BoxJoints_Cut.jpg

AllSidesCut.jpg

BoxJoints_1.jpg

BoxJointsTestFit1.jpg

BoxJointsTestFit2.jpg

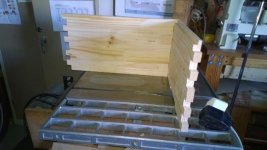
The boards were then mated.

F----$#%$^)(()%$--K The mating not that great.

{BoxJointGaps} 8 BoxJointGaps.jpg

Some were a good fit.

Others required some tweaking with a rasp and chisel.

Before losing my temper and destroying the work, make some coffee, sit on the work bench and think.
Ok first check the cut out sizes, fractional differences not serious. Next out with the vernier and check the board thickness.

When they sell the boards as 20mm, it is not specified that it is a nominal 20mm, and can vary between 18mm and 21mm - GRRRRRRRRRRRRRRRrrrrrrrrrrrrrrrrrrr.
That now explains the ridge on the join of the base. And also the box join variations.
Too late to do anything about it, apart from creating lots of firewood which will not happen.

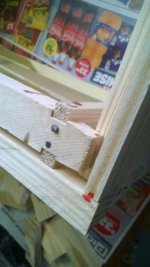
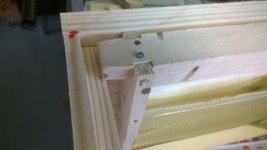
Each join gets copious amount of glue and also a galvanised nail.
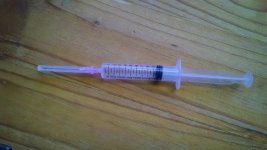
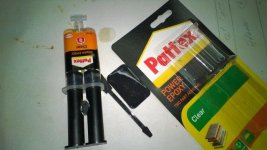
I also have a small glue injector ……..

GlueInjector.jpg

The nail hole is pre-drilled only through the straight grain. It will go into end grain.
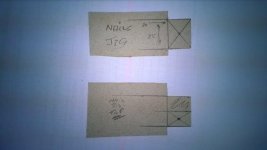
A small complicated and expensive template made for drilling the holes.

TemplatesFor DrillingNailHoles.jpg
(Some thin cardboard.)

One for the top join and one for all the others. The top join is where the rebate is routed.

After wasting a lot of time fiddling with the joint fit it was time to glue up.
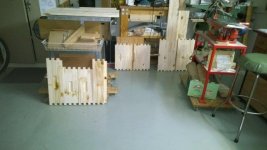
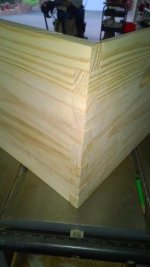
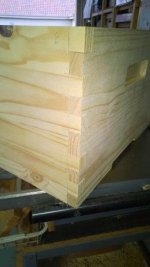
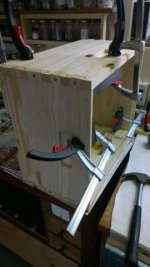
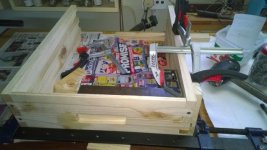
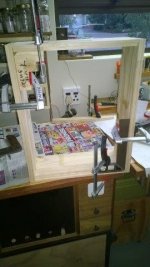
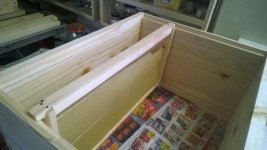
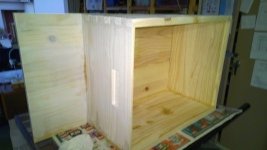
The Super box on the left assembled and the brood box in front.

BroodBoxFrame.jpg

AssemblyBroodBox.jpg

JoiningHoneyBox.jpg

JoiningHoneyBoxFrame2.jpg

Frames – honey & breeding

The frames are different widths, the honey frame narrower.
They rest on the rebates that were cut out.

Honey frame in super box – good fit. I had added an extra 1.5mm depth ‘wiggle room’.

HoneyBoxFrame.jpg

Brood frame is a lot wider, hence the box a lot deeper.
Something does not look right ………..

The top of the frame is too high and will interfere with the queen-excluder.

CheckingFrameFit.jpg

Where did I go wrong? Back out to the sample box and measure.
The rebate is nearly 3mm deeper. The design twit only measured the top box and routed both boxes same depth. More blue air.

FUF.jpg

FUF_Visit_rebatetooshallow.jpg

To rectify this FUP, I tried using the Stanley plough plane. No good.

Back to the router table. Set the flute bit to the right height. Move fence, place box down, tighten everything.
Now rout very carefully – couple of small oopses ……….
Rebate now correct depth. Good recovery.

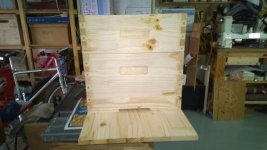
A test fit of the boxes and roof.

FirstTestFit.jpg

Thank you for reading
Standby for another action packed instalment.
Phil
 
Nicely done there Phil. So good to see that you did not allow the bees to get under the bonnet...

Though, as you stated: 20mm wood SA style can be anything from 18mm to 21 mm...
And if you query it: Ja-well that's just the way we get from the supplier.. GRRRR * 10
 
Never knew there was so much involved in a bee hive. Skimmed through that wiki link. Seems bees like certain dimensions and don't build into smaller spaces like the gap between frame and case sides.

So you must be researching as well as copying a sample. Tempted to make another one for yourself?
 
A practical tip.

One of the big disadvantages of the Langstroth design, especially for older female beekeepers, is the impractical hand hold design. These boxes are a good deal bigger than nationals and a super full of honey, or a brood box that is full, is seriously heavy.

Don't bother cutting the finger lifts - they are hopeless. Screw on metal handholds instead (available from Thorne bee supplies or Amazon). These are MUCH better.

My bee mentor is Judy, like many bee keepers she is getting on, and she has 15 Langstroth hives and has already harvested 240kg of honey this year with about half that still to harvest and 25kg of honey per hive left for winter feed. She cannot lift a super with a finger slot.

I am in the process of switching from National to Langstroth as the latter supports larger bee colonies much better than Nationals and the boxes are dead easy to make.

Box thickness is irrelevant as long as your queen excluder fits without gaps and the crown boards etc fit well. Queen excluders bought commercially are a standard size and assume a 20mm thickness but are easily altered to make a bit bigger if necessary. The internal dimensions for frames, and of course the bee space, are more critical. If the bee space above frames is too big the bees will fill it with comb in about 3 days.

Nice job on the boxes. Keeping bees is fun but challenging. We collected a late open swarm yesterday morning into a poly nuc, and they had all b*ggered off by 8pm (we left the nuc open to collect the flying bees before relocating to our garden).
 
Malc2098":1sij2uvf said:
Nice job.

Thank you, Malcolm.


mjdewet":1sij2uvf said:
Nicely done there Phil. So good to see that you did not allow the bees to get under the bonnet...
Though, as you stated: 20mm wood SA style can be anything from 18mm to 21 mm...
And if you query it: Ja-well that's just the way we get from the supplier.. GRRRR * 10


Thanks Thys, I steer clear of the bees :lol:
I now take an old tape with me and start measuring the boards.
I go to Chamberlains, they have a better selection than Mica, and no attitude about unpacking the shelf, yet.

I visited Silverton Houthandelaars on Friday looking at their timber stock and quality for when I start the next hive from scratch. You have Rare Woods in Epping who have an offcut warehouse. Years ago I used to visit a factory around the corner, go through the offcut bins, get a nice pile together, take it back to the factory where they wrapped it in cardboard and strapped it. Then on the Friday afternoon flew back home and booked the bundle in as luggage. Not the least bit of hassle, the local BA franchise. “Mr du Preez we have upgraded you to business class, hope you don’t mind.” Hell no, the lounge is great, the meals great and better booze. :D :D


Robert":1sij2uvf said:
Never knew there was so much involved in a bee hive. Skimmed through that wiki link. Seems bees like certain dimensions and don't build into smaller spaces like the gap between frame and case sides.
So you must be researching as well as copying a sample. Tempted to make another one for yourself?


Robert, there is a bucket full of info on the web, including plans. I downloaded and used it as a reference as well as the sample box.
I have threatened the old fogies that I will make one and install it in the wild area left for the buck and other animals. The bunny huggers are not impressed.
 
AJB Temple":11xg204r said:
A practical tip.

One of the big disadvantages of the Langstroth design, especially for older female beekeepers, is the impractical hand hold design. These boxes are a good deal bigger than nationals and a super full of honey, or a brood box that is full, is seriously heavy.

Don't bother cutting the finger lifts - they are hopeless. Screw on metal handholds instead (available from Thorne bee supplies or Amazon). These are MUCH better.

My bee mentor is Judy, like many bee keepers she is getting on, and she has 15 Langstroth hives and has already harvested 240kg of honey this year with about half that still to harvest and 25kg of honey per hive left for winter feed. She cannot lift a super with a finger slot.

I am in the process of switching from National to Langstroth as the latter supports larger bee colonies much better than Nationals and the boxes are dead easy to make.

Box thickness is irrelevant as long as your queen excluder fits without gaps and the crown boards etc fit well. Queen excluders bought commercially are a standard size and assume a 20mm thickness but are easily altered to make a bit bigger if necessary. The internal dimensions for frames, and of course the bee space, are more critical. If the bee space above frames is too big the bees will fill it with comb in about 3 days.

Nice job on the boxes. Keeping bees is fun but challenging. We collected a late open swarm yesterday morning into a poly nuc, and they had all b*ggered off by 8pm (we left the nuc open to collect the flying bees before relocating to our garden).


Adrian, thank you very much for that tip. I will look and see what is available locally. Makes good sense. I will also run it past my friend, who is the bee keeper and harvester.

What does Judy do in winter for bee food? Our winters are very dry and unless you plant flowers for feed there is not much going.

The Langstroth is easy to make, just need to source the right timber. Box joints are the way to go.
I kept one of each frames for clearance. The excluder, metal, is the same size as the boxes, 510mm x 415mm (give or take 2mm) and less than 5mm thick.

The timber merchant I visited on Friday has some very nice clear Pine. Raw size 25 x 152 x 3000mm. the 152 might be a bit narrow once edged.
Their industrial pine comes in wider widths, did not look at any.
She recommends the Pine as everyone uses it for hives.
They also have some nice Meranti, not sure how that will stand up to the weather.
They also have Cedar but not recommended for outside use.

My friend bought a Langstroth 5 frame nuc. Also looks quite easy to make. It is made from ply, and if local certainly not the greatest quality.

These hives are all getting pitched rooves, if you are interested I can scan the measurements. I am busy on the roof for the old hive, new hive roof finished.
 
Hi Phil

Judy leaves at least 40 lbs of honeycomb in each hive for winter and if necessary (rare) feeds 2:1 syrup by weight. You can buy 20kg of invert enhanced syrup delivered for £35. Much less if people club together and buy by the pallet.

Just for interest, at this time of year, Thorne's have an end of season sale. I bought two cedar 2nds (more knotty) langstroth hives with brood box, 2 supers, queen excluder (metal with wood frame, bottom mesh, bee entrance and lid with galvanised cover, and all frames and foundation for the boxes for £85 and £135 respectively, free delivery. Flat pack but assembly is easy. Frankly I can't buy all of the materials (decent cedar, galv and mesh, foundation etc) to make them for that. They had base stands with landing boards for £20 each but they are so basic I make those as any old wood will do. I will fit metal handles and so will you when you have lifted a full super or brood box!
 
Adrian, looks like a good purchase. Cant comment on the price.
If I convert to local it is about ZAR4k whereas the one I saw in the shop was ZAR1100

I have not costed up a new hive from scratch using some decent timber yet. Will be doing so in the near future.

I have surfed handles and they are available locally.
 
Beehive Construction - continued


Assembly – Brood Box to base

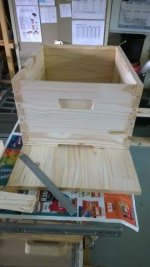
Test fit of the brood box on the base.

%$$)(*^ SH1T, the base width is 5mm narrower than the box. I obviously got a bit over enthusiastic when trimming the edges on the router table.

Base_5mm_OUT.jpg

Onto the table saw, cut off next to first join (40mm away for biscuits).
Then cut new piece.
Feed both pieces through the TP set to 19mm.

Boards for fixing the base.

StockFixBase.jpg

Rout for biscuits, glue up and join. Much better!

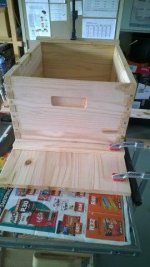
Before the feet are screwed on, the brood box is fitted and marked for drilling holes. The screws will be fitted from the bottom.
All holes counter sunk.
A test fit, showing the entrance (130mm long and 12mm high) and the extended landing strip.

Entrance_Extended_LandingStrip.jpg

DrillingScrewingBroodBox_Floor.jpg

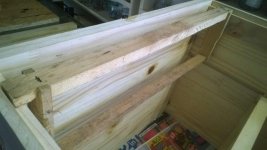
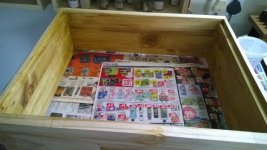
The inside of the brood box before Waksol.

InsideBroodBox}.jpg


Next the feet are cut to length, holes drilled and counter sunk.
There are 3 feet. Back, under front of brood box and end of landing strip.
Lots of glue, 7 screws. All screws used are chipboard screws.

GluingScrewingFeet.jpg

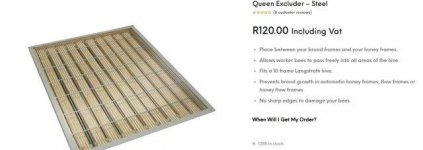
In-between the super and brood boxes is the queen bee excluder. The sample box has a plastic one which becomes brittle and breaks when removing the boxes to take out the honey.
A decision was taken to purchase a metal one. twice the price of the plastic, but with an unlimited lifetime.

ExcluderSteel.JPG

When fitting the two boxes there were minor gaps on opposite sides. This was rectified with a bit of rasping until a nice flush fit.

MinorGap.jpg

MinorGap1.jpg

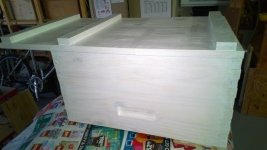
The roof was an 18mm ply offcut that I had in stock and needed only a minor trim to size.
Here is the final test fitting and tweaking.

TestFitFinalTweaks.jpg

Finishing
All knots were covered with epoxy, inside and outside, to ensure no movement.

EpoxyKnots.jpg

The internal joins were all covered with glue to ensure no gaps.

Finish of the boxes will be:

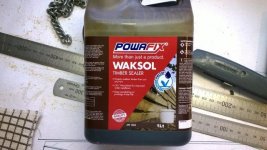
Inside – Waksol

Waksol.jpg

Outside – universal undercoat
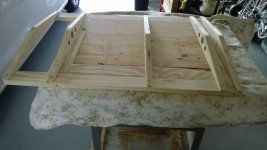
Outdoor enamel (Colour broken white was in stock)

Waksol_Inside_HoneyBox.jpg

The Waksol takes a long time to dry.

FirstUnderCoat.jpg

UndercoatDryingOutside}.jpg

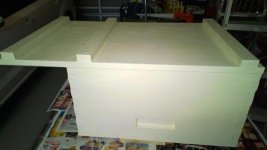
FirstEnamelCoat.jpg

Both boxes are on an outside table under the awning letting the sun bake them and get rid of the paint smell

Next job will be the roof, and then the holding cage.

Thank you for reading
Standby for another action packed instalment. :lol: :lol: :lol:

Phil
 
Nice work Phil

Over here we always use metal rails for the frames to drop on to. Makes them easier to unstick, especially this time of year when the bees are producing propolis like it's going out of fashion.

Interesting that your wax frames are cross wired. I only really see them with V shaped wiring so you can catch the wires in the frames on assembly. I made up another 20 frames yesterday. Today was just getting a hive ready to move and was stung six times on each hand, through gloves. I never get stung - lo and behold the queen had been replaced, so just marked her as well as she is nice and dark and laying well.
 
Malc2098":3h9edhch said:
Nice job!

Thanks Malc 8-)


AJB Temple":3h9edhch said:
Nice work Phil

Over here we always use metal rails for the frames to drop on to. Makes them easier to unstick, especially this time of year when the bees are producing propolis like it's going out of fashion.

Interesting that your wax frames are cross wired. I only really see them with V shaped wiring so you can catch the wires in the frames on assembly. I made up another 20 frames yesterday. Today was just getting a hive ready to move and was stung six times on each hand, through gloves. I never get stung - lo and behold the queen had been replaced, so just marked her as well as she is nice and dark and laying well.


Thanks Adrian 8-)

The metal rails sound a good idea. I suppose those aluminium corner strips used with tiles would work.
The closest I get to bees are in our garden :D
 
Beehive Construction - continued

Roof
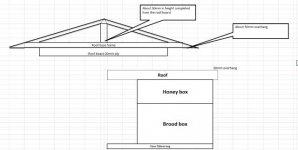
Customer wants a pitched roof (there are examples on the internet.)
Back to the Excel-Cad ……………

Proposed roof.jpg

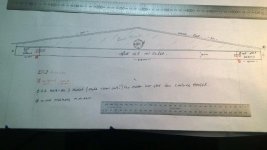
Then to the large white paper to do a full scale drawing.

DrawingRoofTrusses.jpg

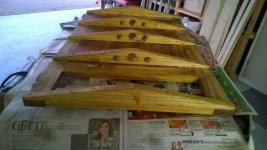
The middle of the pitch is 50mm high
The length of the truss will be 516mm
Each end 7mm high
There will be 5 trusses
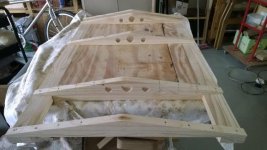
The 2 end trusses will be ‘blank’ and the 3 middle ones will each have 3 holes drilled. This to allow for air circulation.

The drawing was used to cut a template for marking the wood which would be cut on the RAS.
Will need to make a better template if I will be doing a couple of roofs.

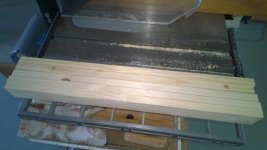
RoofTrussesStockCut.jpg

RoofTrusses_Cut.jpg

RoofTrusses_Cut2.jpg

The holes were drilled using Forstners.

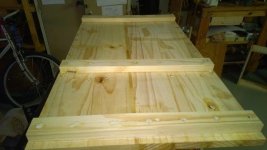
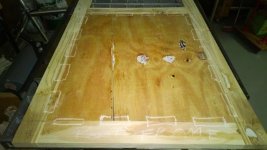
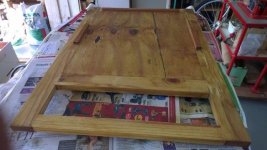
The roof consists of the 18mm ply, a 50mm frame around the sides with the front extending another 170mm over the landing strip. The frame will be joined to the ply with #20 biscuits.

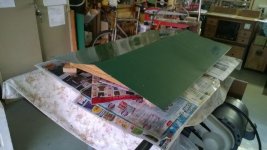
The roof covering is tin plate, specially cut to size and supplied by the customer, which will extend past the trusses by 50mm front and back.

The overhang is about 25mm.

The frame long sides needed to be longer, so I joined an extra piece.

{Roofframeextension} 6 Not sure where the pic is!!!!!!!!!!!

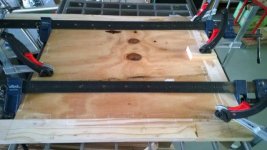
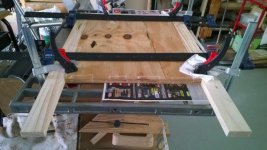
Gluing the frames to the ply
All pieces laid out and marked for the biscuits

RoofFrameBiscuits.jpg

Roof FrameGlueUpBack.jpg

RoofFrameGlueUpSides.jpg

FrameGetsLongNail-Dowel.jpg

RoofReadyForTrusses.jpg

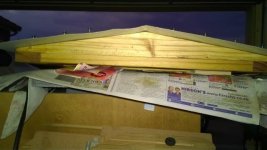
The bottom of the roof gets 3 strips of wood for centring on top of the box.

BottomOfRoofCenteringStops.jpg

TrussesScrewedOn.jpg

The roof, top & bottom, then received 2 coats of Waksol, left standing for a couple of days, before fitting the tin.

RoofWithWaksol.jpg

The roof was now ready for the tin.

TestFit.jpg

First a paper template of the truss marking where the screws are.
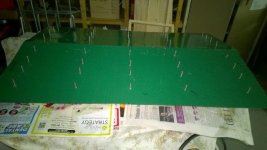
The holes for the roof screws are then marked.
Then another template the length of the tin marking where the trusses are.
A permanent marker pen, the paper templates, and the marks made for drilling.
Stainless steel screws will be used as well as silicone onto the truss and then on top before the screw goes in.

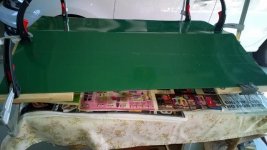
Some scrap wood was clamped to centre the tin on the frame.

ScrapClamped.jpg

The centre of the roof was clamped down and the first hole drilled on the top right, screw driven part way.
Same on left.
Clamp length of roof down to get a snug fit.
Then back to right and drill and screw the other 3
Then alternate sides until all screws are part way in.

TinOnTruss_End.jpg

Looks ok.

AllScrewedDown.jpg

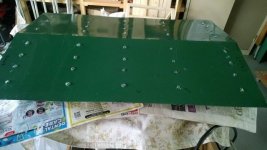
Take all the screws out, lift tin, glob of silicone on truss hole, tin back, glob of silicone on hole, screw the screws back in, in the same order previously screwed.

I will need to tweak my template as the bottom screw on the roof is too close to the truss-roof screw. (Cant blame the FUF for that one)

To be continued ………………..


{Edit - correct some spelling ........}
 
Well done.

You don't need to worry too much about small gaps in the box joints as the bees will go round and gum everything up anyway.

Very important to have no gaps between the boxes though, as wasps and wax moths will try to get in. And mice if they get chance.
 
I'm wondering how the hive is ventilated?

In Europe, the hive base is usually wire mesh (too small for bees to get through) and beneath this is a slide in board that can be used for reducing ventilation in winter and also as a varroa mite collection board. We usually ventilate the roof a bit as well.
 
AJB Temple":qrayd8w5 said:
Well done.

You don't need to worry too much about small gaps in the box joints as the bees will go round and gum everything up anyway.

Very important to have no gaps between the boxes though, as wasps and wax moths will try to get in. And mice if they get chance.

Thanks Adrian.
The boxes seal ok after some rasp and sandpaper tweaking. No worse than the sample box.
 
AJB Temple":1hbvflju said:
I'm wondering how the hive is ventilated?

In Europe, the hive base is usually wire mesh (too small for bees to get through) and beneath this is a slide in board that can be used for reducing ventilation in winter and also as a varroa mite collection board. We usually ventilate the roof a bit as well.

Good question on ventilation :(

All the hives that I have seen here are non-ventilated, does not seem to be an issue.
On the roof I drilled 3 holes in the middle trusses and then there is a 7mm gap between the roof and tin. to provide some ventilation on the top. A sheet of polystyrene can also be added to the inside of the roof.

I have just finished the roof for the re-furb box, went a lot easier (at least I learn from my mistakes .......... :lol: :lol: :oops: :oops: )
 
If there is a 7mm ventilation gap between roof and tin, what stops robber bees and wasps getting in? That is a lot for the colony to defend.

Of do you use mesh?

I'm surprised that there is no ventilation. Usually bees regulate temperature by fanning if it is too hot, but they are assisted by air flow usually. Clearly hives are operated differently in your part of the world.

Maybe varroa mite isn't a problem there. It is in Europe, hence the sliding trays that are easy to monitor and clean. I am just doing varroa treatment in my three hives currently.
 
AJB Temple":zx0iqg7w said:
If there is a 7mm ventilation gap between roof and tin, what stops robber bees and wasps getting in? That is a lot for the colony to defend.
Of do you use mesh?
I'm surprised that there is no ventilation. Usually bees regulate temperature by fanning if it is too hot, but they are assisted by air flow usually. Clearly hives are operated differently in your part of the world.
Maybe varroa mite isn't a problem there. It is in Europe, hence the sliding trays that are easy to monitor and clean. I am just doing varroa treatment in my three hives currently.

Adrian the roof is solid end to end and sits snugly on the super box.
The only way into the hive is through the entrance at the bottom.
The roof is 18mm ply (heavy) plus the 50mm frame.
Without the frame the ply fits like a normal roof before fitting the metal on it.

BottomOfRoofCenteringStops.jpg
 
Phil Pascoe":rq16vj5u said:
Why the need for so many screws through the roof? Did you think someone was going to steal it?

Phil the tin is 1mm thick.
To harvest the honey, you need to take off the roof.
The roof is lifted off by holding the edges of the tin which needs to be securely screwed down.
The combined weight of the ply + frame + tin is quite heavy. Also do not want it blowing off with strong wind.
If it is too light in weight I can always add some catches.

The harvesting is done at night when all the bees are in bed. You don't want to struggle in the dark trying to get the roof off.

The idea behind the larger roof is to try and keep as much water off the hive as possible.
 
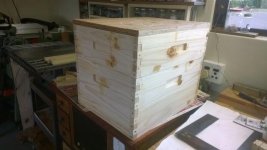
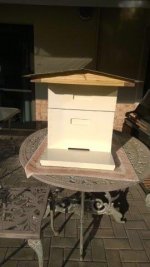
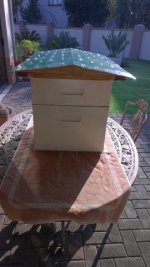
Beehive Construction - completed


RoofCompleted.jpg

Not too shabby

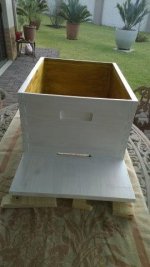
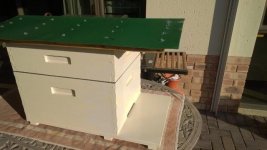
Now onto final assembly, back to the table on the patio.

Old towel protects the table and hive.

First the brood box –
Then the excluder – slight variation in box size
Then the honey box –
Then the roof –

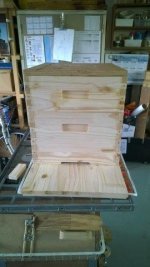
Done! Ready for delivery.

Completed 1.jpg

Completed 2.jpg

Completed 3.jpg

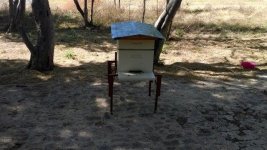
Delivered to the farm.

On site in use.

OnSite_InUse.jpg

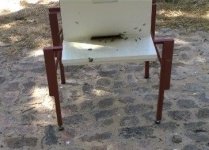
A very busy entrance. The larger landing strip gives them more room to drag out dead bodies for disposal.

Busy Entrance.jpg

This was installed some while back.
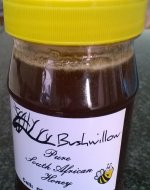
We received a bottle of some excellent honey, slightly darker as it is the first batch after winter.

Honey.jpg

Next project – a holding cage for the bees when honey is harvested. Somewhere soon there will also be a thread on a hive re-furbish (the old sample box)

Holding Cage

I will do a separate thread.


Thank you for your patience reading my waffling :D :D

Phil
 
Well done. Interesting thread as bee keeping system is a bit different.
 
It looks good. Thanks for taking the time to write this up.

My wife has a couple of hives in the garden. Ordinarily the bees are very docile, but they've been a bit "aggro" recently. We aren't sure if there is a specific reason, but suspect it's a combination of their honey being taken (it has been a good haul this year!), varroa treatment, and a lot of wasps/hornets bothering them. I wasn't very impressed when I got stung on the eyelid whilst mowing the lawn a couple of weeks ago!
 
Nick, my local bee mentor says the bees are always tetchy when the pollen flow stops. They are busy getting the hive ready for winter, and of course we interfere with varroa treatments and probably adding syrup if we have harvested honey. Two of my hives superseded the Queens this autumn as well, which always creates turmoil. Our bees are still very lively with a lot of flying bees when the sun is out.
 
AJB Temple":2ep9wsjh said:
Well done. Interesting thread as bee keeping system is a bit different.

Thanks Adrian. I suspect it has to do with your colder winters.


NickM":2ep9wsjh said:
It looks good. Thanks for taking the time to write this up.

My wife has a couple of hives in the garden. Ordinarily the bees are very docile, but they've been a bit "aggro" recently. We aren't sure if there is a specific reason, but suspect it's a combination of their honey being taken (it has been a good haul this year!), varroa treatment, and a lot of wasps/hornets bothering them. I wasn't very impressed when I got stung on the eyelid whilst mowing the lawn a couple of weeks ago!

Thanks Nick. I am not on the harvesting side and try not to get too close to the hives. They do however send out the troops to have a sniff :D

Andyp":2ep9wsjh said:
Enjoyed watching and learning Phil.

Andy, it has been a different type of project, enjoyable.
I need to start getting smarter and a streamlined production.
A box joint jig is on the production line. AJB made one, maybe hen post some pics or WIP.
 
Sadly I don't do WIPS. I probably will when the forum software is updated to photo drag and drop.

The jig works well. I like that you can do matched pairs.
 
I had 25 + hives going at one time....plus a lot of nuc's.....
just started to breed my own queens...loved it....
now super sensitive to venom.....had to quit...so bad it's a hospital job now......
all my hives were home made, modified nationals...I used resin bonded ply......
the lids were cut up hot water cylinders, copper....
had a go at the frames but just bought em in the end...
I do miss the free honey and the general well being whilst working them....
without looking at the books, we hovered around 2 tons of honey per year....

in France some of our hives ended up with Africanised queens hence the need to breed my own....
a great hobby if u have time.....it's also interesting to see how it's done in other parts of the world....
 
Back
Top