

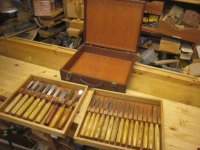
This isn't a fully detailed w-i-p with a dozen close-ups of each tool but it might be of interest or use to someone. Some years ago a close friend died and his widow kindly gave me some of his tools, including a reasonable collection of newish Pfeil gouges. To my shame, I have never sorted out proper storage for these, or for the motley selection of other carving tools I have picked up elsewhere. Some of these even have a few spots of rust, I think from when they were left in an old fabric tool roll.
But now, inspired by some similar trays I saw listed in an online auction, I wanted to make some shallow trays which would work for long term storage but also to spread out on the bench for easy access.
In common with other recent lock-down projects, I used offcuts and salvaged materials throughout, with no shopping required.
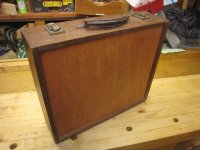
I don't need to make a big piece of furniture to hold these trays. Back in the 1980s I made this wooden box.
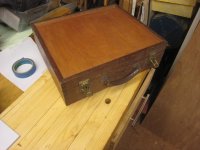
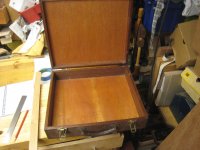
I used it as my work briefcase for several years - it was designed to be big enough to take a pack of sandwiches and a flask or a stack of LPs - but I no longer need it for either of those purposes and it has just been kicking around in the workshop gathering dust.
I decided to make two trays to fit in this box and two more to fit into another similar one, currently holding my old and unloved Black and Decker drill and attachments.
Because this is such a basic build I shall let the pictures tell the story and leave you to fill in some gaps.
Here are some abandoned bits of oak from drawers, boxes etc.
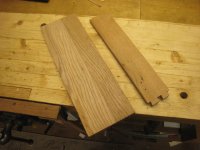
I ripped these to size on my little 3-wheel bandsaw, then planed them to match each other.
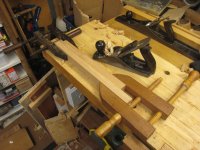
I then dovetailed them together to make a frame, but nobody wants an essay on how to cut dovetails so I just breezed through that in a relaxed way without stopping to pose. The camera didn't come out until this stage, where I was using a Woden Pushpin and a nineteenth century Kentish pattern strapped hammer to nail on some nasty 4mm ply (the sort veneered with paper-thin wisps of nameless far eastern wood)
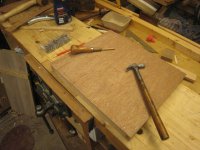
At least it's easy to trim back with a plane and some sandpaper - which you can also imagine, if you don't mind - and then it was time to cover it all in shellac and make it look beautiful.

To support the gouges, I added a strip of wood across the tray, with shallow, angled notches. The wood was from the same old piano which supplied the wood for my centre bits box. It's quite light and soft. I marked the positions by lining up the tools and drawing round them. The easiest way to cut the notches was to use a mitre saw, in this case a cheap but surprisingly un-nasty purchase from the DIY phase of my tool-buying history, possibly made in E Germany before everything had to be made in China. It has little stops on the vertical bars so you can limit how far down the saw will cut and of course the angles are easy.
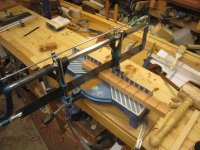
This was followed by some chiselling

and some routing
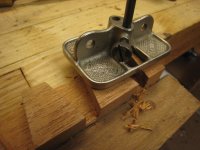
and then, after a bit more planing and sanding and drilling, the supporting strip can pose in place inside the tray.

It's simply held by screws from the back and into the ends. The slots are deep enough for the handles to rest on the bottom and although fairly tightly sized for these specific gouges they don't all have to go in the same slot every time.
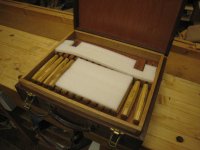
It fits down into the box with a satisfying piston effect but can be lifted out as required.
There's a little bit of space where a strip of firm packaging foam can fit. The space above it will be filled by a second, similar tray so the tools won't fall out of position when the box is moved.

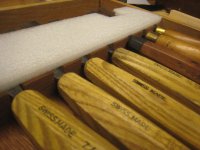
Apart from the obvious question of how long it will take me to get round to making the other trays, the other big question is this.
Once I have all the tools in good order and easily accessible, I ought to have a go at carving, but what should it be? I'm open to suggestions. Maybe a Tudor Rose or two? Or perhaps a staircase? :lol:
:lol:
But now, inspired by some similar trays I saw listed in an online auction, I wanted to make some shallow trays which would work for long term storage but also to spread out on the bench for easy access.
In common with other recent lock-down projects, I used offcuts and salvaged materials throughout, with no shopping required.
I don't need to make a big piece of furniture to hold these trays. Back in the 1980s I made this wooden box.
I used it as my work briefcase for several years - it was designed to be big enough to take a pack of sandwiches and a flask or a stack of LPs - but I no longer need it for either of those purposes and it has just been kicking around in the workshop gathering dust.
I decided to make two trays to fit in this box and two more to fit into another similar one, currently holding my old and unloved Black and Decker drill and attachments.
Because this is such a basic build I shall let the pictures tell the story and leave you to fill in some gaps.
Here are some abandoned bits of oak from drawers, boxes etc.
I ripped these to size on my little 3-wheel bandsaw, then planed them to match each other.
I then dovetailed them together to make a frame, but nobody wants an essay on how to cut dovetails so I just breezed through that in a relaxed way without stopping to pose. The camera didn't come out until this stage, where I was using a Woden Pushpin and a nineteenth century Kentish pattern strapped hammer to nail on some nasty 4mm ply (the sort veneered with paper-thin wisps of nameless far eastern wood)
At least it's easy to trim back with a plane and some sandpaper - which you can also imagine, if you don't mind - and then it was time to cover it all in shellac and make it look beautiful.
To support the gouges, I added a strip of wood across the tray, with shallow, angled notches. The wood was from the same old piano which supplied the wood for my centre bits box. It's quite light and soft. I marked the positions by lining up the tools and drawing round them. The easiest way to cut the notches was to use a mitre saw, in this case a cheap but surprisingly un-nasty purchase from the DIY phase of my tool-buying history, possibly made in E Germany before everything had to be made in China. It has little stops on the vertical bars so you can limit how far down the saw will cut and of course the angles are easy.
This was followed by some chiselling
and some routing
and then, after a bit more planing and sanding and drilling, the supporting strip can pose in place inside the tray.
It's simply held by screws from the back and into the ends. The slots are deep enough for the handles to rest on the bottom and although fairly tightly sized for these specific gouges they don't all have to go in the same slot every time.
It fits down into the box with a satisfying piston effect but can be lifted out as required.
There's a little bit of space where a strip of firm packaging foam can fit. The space above it will be filled by a second, similar tray so the tools won't fall out of position when the box is moved.
Apart from the obvious question of how long it will take me to get round to making the other trays, the other big question is this.
Once I have all the tools in good order and easily accessible, I ought to have a go at carving, but what should it be? I'm open to suggestions. Maybe a Tudor Rose or two? Or perhaps a staircase?
:lol:



 - Rob
- Rob