

Woodbloke
Sequoia
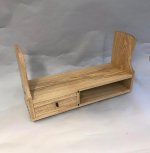
For the last couple of weeks or so, I've been mostly making a bookshelf out of a plank of kiln dried American Ash, left over from my bar stools project last year.

Big, BIG mistake :evil: This kiln dried Ash had all the life sucked out of it and whilst it was reasonable to plane, the 'late' wood had been cooked to the point where it was like trying to chisel through cast iron. No siree, not recommended under any circumstances :twisted: :twisted:
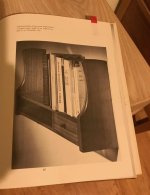
This happens to be a Jim Krenov design and as I'm a big fan of JK, I make no apologies for the 'lift'; you can actually see the original in juniper wood on p37 of 'A Cabinetmaker's Notebook'. I've added one or three 'blokeish' refinements which I thought would be in keeping.
Jim's design incorporates 'cut away' ends with 'scollops' carved into the curvy bit:
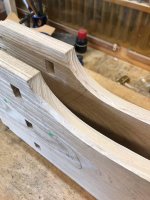
With the best will in the world and brand new Pfeil gouges, these were a nightmare to carve!
The through dovetails have equal sized pins but the tails gradually get wider towards the centre. They're also left 3mm proud (as have the wedged through tenons) so that they can be sculpted later on. As this was a comparatively complex glue up, I used 'old skool' standard Araldite which gave me hours and hours to faff around and get it spot on. I do recommend this stuff for difficult jobs as it gives you oodles of time: clean up with meths afterwards.
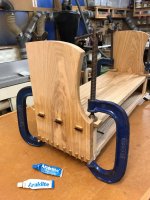
The drawer was fairly straight forward being a Rob Ingham jobbie with centre muntin; 6mm quarter sawn oak sides, drawer slips and a planted front screwed in place. The drawer pull is in Rosewood and is a copy of the one on the original piece;

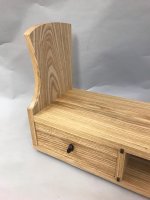
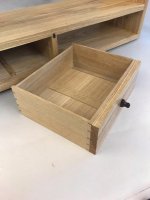
You'll note also the two little rosewood infills. This was the second BIG mistake as the routed grooves broke through on the front edge but were fixed in the very best traditions of the late, great Alan Peters who said that if you make a ghastly error, turn it into a feature...which is what I dun :lol:
The other end...

...and the final job:
SWIMBO decided to take a pic of it being installed:

If you're very observant, you'll notice the Korean chest of drawers made a couple of years ago as well as Ninja-Zig which we all had a few laughs over last summer! Also in the pic is a model of an absolutely lethal Roman ballista :shock: of which more later. I'm just awaiting some synthetic sinew instead of that fairly 'iffy' white string stuff, which will then provide some proper torsion.
Once on the wall, it was loaded up with a few tomes...

...including all of JK's book and the latest biography, 'James Krenov; Leave Fingerprints' - Rob
Big, BIG mistake :evil: This kiln dried Ash had all the life sucked out of it and whilst it was reasonable to plane, the 'late' wood had been cooked to the point where it was like trying to chisel through cast iron. No siree, not recommended under any circumstances :twisted: :twisted:
This happens to be a Jim Krenov design and as I'm a big fan of JK, I make no apologies for the 'lift'; you can actually see the original in juniper wood on p37 of 'A Cabinetmaker's Notebook'. I've added one or three 'blokeish' refinements which I thought would be in keeping.
Jim's design incorporates 'cut away' ends with 'scollops' carved into the curvy bit:
With the best will in the world and brand new Pfeil gouges, these were a nightmare to carve!
The through dovetails have equal sized pins but the tails gradually get wider towards the centre. They're also left 3mm proud (as have the wedged through tenons) so that they can be sculpted later on. As this was a comparatively complex glue up, I used 'old skool' standard Araldite which gave me hours and hours to faff around and get it spot on. I do recommend this stuff for difficult jobs as it gives you oodles of time: clean up with meths afterwards.
The drawer was fairly straight forward being a Rob Ingham jobbie with centre muntin; 6mm quarter sawn oak sides, drawer slips and a planted front screwed in place. The drawer pull is in Rosewood and is a copy of the one on the original piece;
You'll note also the two little rosewood infills. This was the second BIG mistake as the routed grooves broke through on the front edge
but were fixed in the very best traditions of the late, great Alan Peters who said that if you make a ghastly error, turn it into a feature...which is what I dun :lol:The other end...
...and the final job:
SWIMBO decided to take a pic of it being installed:
If you're very observant, you'll notice the Korean chest of drawers made a couple of years ago as well as Ninja-Zig which we all had a few laughs over last summer! Also in the pic is a model of an absolutely lethal Roman ballista :shock: of which more later. I'm just awaiting some synthetic sinew instead of that fairly 'iffy' white string stuff, which will then provide some proper torsion.
Once on the wall, it was loaded up with a few tomes...
...including all of JK's book and the latest biography, 'James Krenov; Leave Fingerprints' - Rob



 bscene-drinkingcheers: