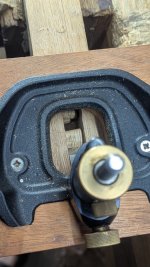
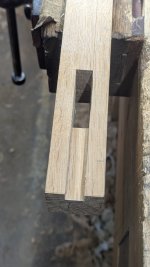
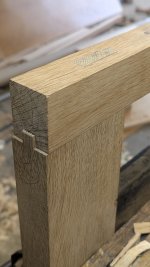
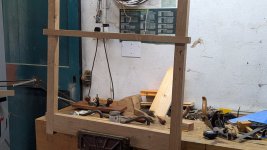
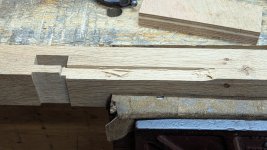
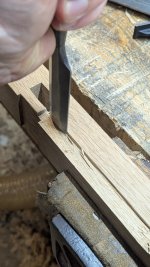
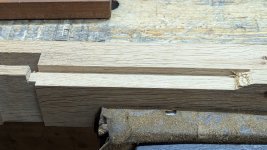
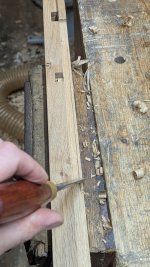
• Hi all and welcome to TheWoodHaven2 brought into the 21st Century, kicking and screaming! We all have Alasdair to thank for the vast bulk of the heavy lifting to get us here, no more so than me because he's taken away a huge burden of responsibility from my shoulders and brought us to this new shiny home, with all your previous content (hopefully) still intact! Please peruse and feed back. There is still plenty to do, like changing the colour scheme, adding the banner graphic, tweaking the odd setting here and there so I have added a new thread in the 'Technical Issues, Bugs and Feature Requests' forum for you to add any issues you find, any missing settings or just anything you'd like to see added/removed from the feature set that Xenforo offers. We will get to everything over the coming weeks so please be patient, but add anything at all to the thread I mention above and we promise to get to them over the next few days/weeks/months. In the meantime, please enjoy!

Cased frame sliding sashes with hand tools

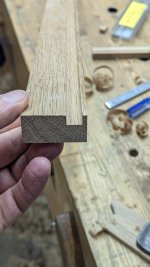
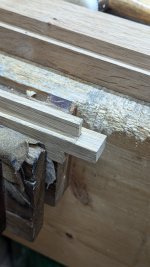
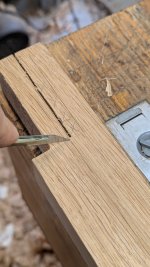
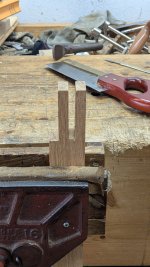
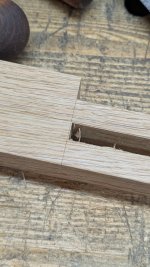
Having cut out the mortices on the stiles the tenons are cut on lower and meeting rails. The meeting rail first (picture heavy so the bottom rail in an additional post).

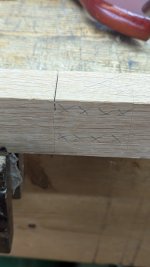
3 scored lines aren't enough for me not to make a mistake so I draw all over the piece to mark out the waste. Visible line when finished so as usual cut just away from the line (to be finished with the chisel)

PXL_20260925_131640555.jpg

Think about knife marks and what will be seen. The extreme end of the knife wall to the right may just be visible (probably to those searching) if on the underside of the meeting rail. I think it would disappear during tapering if on the top side.

PXL_20260925_132426157.jpg

Rip right to the finished width of the tenon (I didn't above which wasn't the smartest). In reality the middle section will probably need pared away to fit nicely and it's difficult to do. The tenon face to the left on the picture below is finished with the router plane but the other faces can't be reached obviously

PXL_20260925_132856530.jpg

Finish the inner tenon. Easy with a sharp chisel. Note knife wall not right across a visible surface

PXL_20260925_133131052.jpg

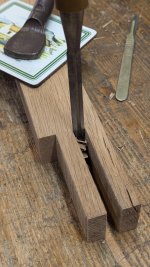
Slightly trickier middle section between tenons. The gap between these is 3/8" so I start with 1/4" chisel to remove most of the waste

PXL_20260925_133309821.jpg

Get it to something like this

PXL_20260925_133808183.jpg

Then finish on the line with 3/8" while sighting down the side for vertical. Starting with the 3/8" would be a bit tight and possibly damage the tenon walls

PXL_20260925_133515619.jpg

PXL_20260925_134726407.jpg

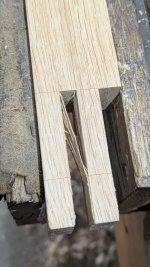
Tidy up and hopefully fits

PXL_20260925_141140606.jpg

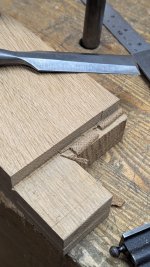
This one demonstrates my bad stile marking mentioned during a layout post and also an errant knife wall on the underside. The wall on the meeting part of the rail will disappear

PXL_20260925_141145727.jpg

Softening the ends of the tenons that will be cut anyway, aids fitting

PXL_20260925_141158000.jpg

PXL_20260925_141230889.jpg

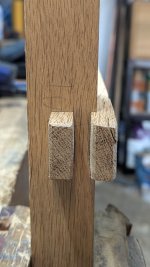
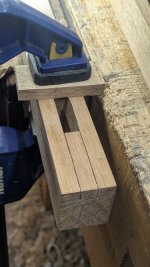
Probably the most important part in this joint is the space between the tenons. If this isn't sufficiently sized there is the potential to split open the meeting rail when fitting together. These joints are a nice snug fit but not overly tight. There'll be more material remove from the protrusion of the meeting rail when bevelled so make sure things are good at this point.

PXL_20260925_155135620.jpg
 
Last edited:
You've got yourself a very discerning customer there!
 
Lower rail piece. Haunched tenon. This may deviate from some designs where the haunch is on the stile. The latter allows the rebate to be run to the end of the stile whereas I will stop mine. The latter design would suit running mouldings with a plane or machines whereas I intend using stopped chamfers as a design feature. Many routes to the same destination

There's a line along the grain on the face but hard to see. Top edge is my reference

PXL_20260925_173621119.jpg

I used the bandsaw for this part (the WIP is "mostly" handtools!)

1. rip tenon cheeks right to the line and right up to the shoulder
2. Saw out the little square section

PXL_20260925_174506630.jpg

Now handsaw to the knife wall

PXL_20260925_174851153.jpg

Chisel to the line. I like to have certainly less than 0.5 mm waste so that the chisel goes where it supposed to

PXL_20260925_180136214.jpg

PXL_20260925_175517966.jpg

Finish cheeks with the router taking the depth from the mortise gauge marks

PXL_20260925_180515170.jpg

PXL_20260925_181138231.jpg

Test fit the tenon part

PXL_20260925_190024069.jpg

Cut out the space for haunching. Plough might struggle to get to the end before striking the far end of the mortise. A tenon saw is more controllable and takes out the walls easily and quickly. The clamped scrap is to prevent the end of the saw hitting the finished mortise wall which would be seen. Looks like I hit the scrap

PXL_20260926_081228215.jpg

Chisel out waste in a flash

PXL_20260926_081421580.jpg

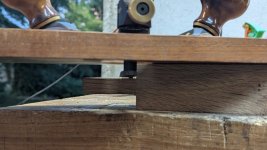
Finish with router (has to be one of the best tools)

PXL_20260926_081629722.jpg

PXL_20260926_081730090.jpg

This stile is the correct length but I think I pointed out earlier that I should have left it a bit longer so as to aid knocking apart and when setting the piece on the floor (same with the rail tenon: there must've been some reason that it was cut to length too early). The lower rail is oversized and will finish to 4" wide on the outside but will look about 3" on the inside (it will be bevelled to fit the sill piece)

PXL_20260926_081936303.jpg

This is the other side with appropriate additional length in rail and stile
PXL_20260926_083135613.jpg

PXL_20260926_083510331.jpg

This is the exterior face with rough pencil lines marking glazing rebate. Note the 90 degree turn at stile to rail join. If you continue the rebate down the stile (as is perhaps usual) then you can see why the haunch would then be on the stile and the recess on the rail. I have another 2 or 3 windows to make so I might vary this just for the craic.

PXL_20260926_092033944.jpg
 
Upper sash basic joinery done on rails and stiles.

Just a quick post as the process is quite similar BUT with one important change for the upper sash when laying out. Reference face is from the exterior: doesn't have to be but I find it easier. As the meeting rail protrusion is now towards the inside (contrast with the lower sash where the protrusion is towards the outside), you can use 2 of your 3 marking gauges as already set (for the lower sash) for the mortice and tenons on both rails and stiles and for the little 1/8" housing the the meeting rail as the exterior face of the upper sash is all in the same plane. The only gauge you'll need to change is that for the glazing rebate as it will now be closer to the reference face. The picture below hopefully helps clarify that with the exterior to the left, the interior right.

PXL_20260927_172014263.jpg

Glazing bars, glazing rebates, stopped chamfers and then glass to order. Also need to think more about weathering seals. Then back to casings to finish, cut in pulleys and get some weights
 
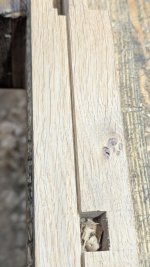
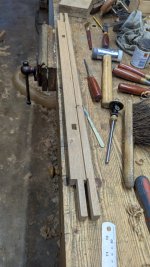
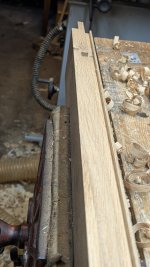
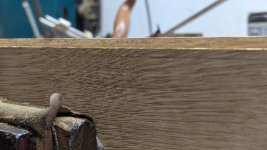
Rebates and grooves in the main pieces of the sashes. The meeting rail is easy. The glass is 3 to 4 mm thick so a slightly more than 6 mm (1/4") width groove (working in imperial and metric) lines up on the exterior side of the mortises and ends up between the tenon and slot tenons.

The piece slightly overhangs the bench edge and fore and aft stopped with offcuts with a little square cut out just enough so as not to foul the fence of the plough/combi plane (what is it combining?). The piece can be simply lifted or set in but is quite secure otherwise. I find this the quickest way to secure such a piece that is too thin to be held in the bench vise (the even thinner glazing bars will need a sticking board for their rebates)

All the mortices will be ideally cut at this stage otherwise part of the wall will be removed and the mortice more difficult to cut as the chisel might wander a bit.

PXL_20260930_150158870.jpg

PXL_20260930_151256474.jpg

Edge of mortise now gone. The groove is a little off the guage mark but that doesn't matter.

PXL_20260930_151628464.jpg

As a chisel sorts that out

PXL_20260930_151931371.jpg

PXL_20260930_174720530.jpg

Next is the bottom rail. However the cutter is now changed to a 3/8" as I want to make a 1/2" rebate. The previous 1/4" cutter wouldn't allow me to tilt in a bench plane as the blade wouldn't quite cut the waste out.

PXL_20260930_181359702.jpg

PXL_20260930_181541574.jpg

Nearly at the gauge line
PXL_20260930_181936835.jpg

Remove with a bullnose or whatever you have. Chisel works too.

PXL_20260930_182241848.jpg

Now this bit will be differ to usual. I don't run my rebates right through to the end. If I was going to do that then I'd need my haunch on the stiles but they are on the ends of the rail above. So these next rebates will be stopped. So knock together and get the stop marks established

PXL_20260930_182718921.jpg
PXL_20260930_183038352.jpg
 
The stiles cannot be rebated in the same way before adding in extra steps as the plane doesn't have a clear run. So this bit takes a bit extra time. The front and rear portions need removed so that the plough can take out the middle section. The rear part needing removed must be at least the length of the plane body, the front section at least the length of the distance from the cutter to the front of the plane. I do this will a deeper knife wall into the gauge line (extremely carefully done as along the grain) and then gentle chopping and judicious paring. Once it's down enough then the router plane gets close to the line (best to establish the final line for the entire section in one go.

Mark off the plane length with pencil
PXL_20261001_192934757.jpg

Pare, chop etc
PXL_20261001_193650840.jpgPXL_20261001_194332512.jpg

Go easy when chopping here. Chopping is not the correct word but just don't split!

PXL_20261001_194353887.jpg


Finish with router

PXL_20261001_195558716.jpg

When the other end is similarly done then the plough, chisel and router finish the job. Make sure you clamp a scrap to protect the front as the plane will mar the wood otherwise. Momentary lapse near top of picture. This will luckily be covered with a bit of putty and otherwise entirely hidden. The last little 1/8" width is quickly removed
PXL_20261001_201714863.jpg
PXL_20261001_201943121.jpg
PXL_20261001_202044971.jpg
That's what the join looks like. The irritating grain run out and split will be covered with putty
PXL_20260930_195059024.jpg
PXL_20260930_195103938.jpg

Bars next

PXL_20261001_202325902.jpg
 

Attachments

  • PXL_20261001_201536465.jpg
    PXL_20261001_201536465.jpg
    199.8 KB · Views: 0
  • PXL_20261001_192537611.jpg
    PXL_20261001_192537611.jpg
    184.7 KB · Views: 0
Some notes on glazing bars. These are for the lower sash, the left most one a horizontal and left complete for strength), the other 2 verticals and will each be cut in 2 eventually. All get a glazing rebate gauged into them. The horizontal has its mortices cut already. It's much easy to get the mortice sorted now as the mortise marks are there to work from. When the piece is rebated then it's a little more awkward but not impossible to deal with.

PXL_20261002_132429891.jpg

The verticals can be gauged on the inside face. These will all be stop chamfered so these marks are important. The horizontal has some pencil marks on only to act as a guide when chopping the mortices
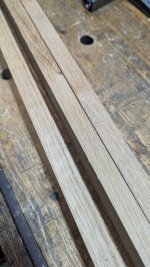
PXL_20261002_132458823.jpg

This shows a vertical bar the pencil mark will mostly disappear when the edge closest to the camera gets rebated for glass. I put the line in now as it's easy to do and a small portion will remain when it needs cut. Choose a saw that leaves a nice fat kerf for wiggle room: however this cut is made later. The gauge lines away from the camera form the small tenons that will fit into the top and bottom of the trough mortice in the horizontal bar. The corresponding side of the tenons at the rebate side has a shoulder that is closer to the pencil line. The resulting tenons in the these crossing bars are a minimum of under 1/8" long at the rebate side but this is still plenty to do their job.
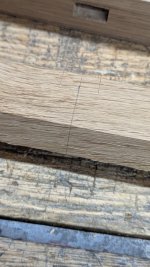
PXL_20261002_133224595.jpg

The bars are 3/4" thickness which is enough to hold between a couple of pieces of wood (I had thought perhaps I'd need a sticking board). Hold fasts are great also need teamed up with a clamp at either side. This is rock solid but still allows the piece to be lifted and set in without realising anything

PXL_20261002_161203440.jpg

Plough a groove to start the rebate

PXL_20261002_135709150.jpg

The little wall remaining allowa the piece to be flipped onto this face to do the same with the other side. Forming a complete rebate at this stage might mean the piece could tip on its side when the opposite face is being worked on. When both sides are done, this is formed

PXL_20261002_140051816.jpg

This can be placed back on the bench and the little wall mostly chiselled off or the piece can be carefully clamped in the vise taking care not to pressure the wall. When the little wall is removed then the piece can be better and more safely positioned in the vise
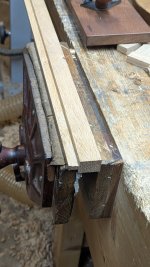
PXL_20261002_141434420.jpg

Finish with the router. Note the little pencil line mentioned earlier
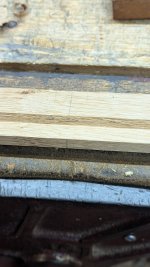
PXL_20261002_142034633.jpg

Cut in the shoulders on the room side to be chiselled to the gauge later
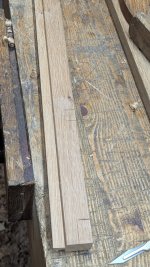
PXL_20261002_142720581.jpg

As mentioned the room side (right) has the tenon shoulder cut to the gauge. The rebate shoulder is deliberately cut long to allow a close-ish fit. That gap on the right is then just taken off the left side
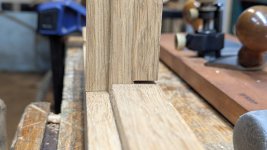
PXL_20261002_180518357.jpg

It is extremely important to make sure that the bar sits exactly square to its mating piece along the edge shown and in the adjacent plane as well, when taking this measurement

PXL_20261002_180903702.jpg

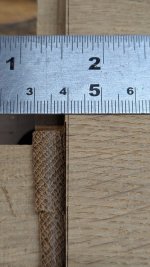
The ruler is held on the square so I can read the short marks that don't reach the edge of the square. In reality this is just a ballpark figure and I deliberately overshoot a tad as it's much easier to take a sliver of wood off than to put one back!
PXL_20261002_180959458.jpg

Transfer to the piece

PXL_20261002_181124890.jpg

PXL_20261002_181250158.jpg

When fitting the bars and any piece the marks on the wood help locate paring that needs completed for a good fit. There will always be a side of the mortice and tenon that I don't touch at this stage. For example the squares formed by the vertical and horizontal bars have a 5" side: i.e. 5" from the stile. That measurement cannot be altered so if I have to widen the mortise a little to fit the tenon, I'll take the sliver away from the side furthest from that 5" gauge side of the mortise.

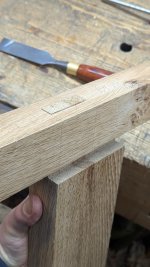
Here's a little unnecessary detail but I like this nonetheless. This is the underside of the meeting rail on the bench with a vertical bar (the sash would be upside down). These bars have the room and exterior sides of the tenon shoulders exactly the same. These can be cut across like a regular tenon. However, I think it's nice to cut a little notch to fit the groove. If the tenon was cut normally there would be a little gap in the groove but this would be of no consequence and filled with putty anyway.
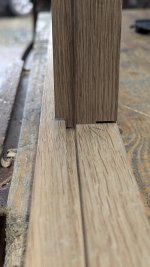
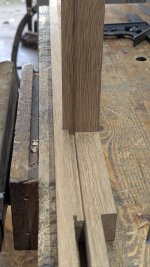
PXL_20261003_112131720.jpg

PXL_20261003_112300931.jpg
 

Attachments

  • PXL_20261003_083638338.jpg
    PXL_20261003_083638338.jpg
    109.8 KB · Views: 0
  • PXL_20261003_102654943.jpg
    PXL_20261003_102654943.jpg
    233.1 KB · Views: 0
  • PXL_20261002_135340519.jpg
    PXL_20261002_135340519.jpg
    181.8 KB · Views: 0
Back
Top