• Hi all and welcome to TheWoodHaven2 brought into the 21st Century, kicking and screaming! We all have Alasdair to thank for the vast bulk of the heavy lifting to get us here, no more so than me because he's taken away a huge burden of responsibility from my shoulders and brought us to this new shiny home, with all your previous content (hopefully) still intact! Please peruse and feed back. There is still plenty to do, like changing the colour scheme, adding the banner graphic, tweaking the odd setting here and there so I have added a new thread in the 'Technical Issues, Bugs and Feature Requests' forum for you to add any issues you find, any missing settings or just anything you'd like to see added/removed from the feature set that Xenforo offers. We will get to everything over the coming weeks so please be patient, but add anything at all to the thread I mention above and we promise to get to them over the next few days/weeks/months. In the meantime, please enjoy!

Dreadnought SS Guitar (Demo Time)

Today I machined a bridge. it took 8 toolpaths and three separate cutters. At the end of the video, you can compare mine with that from a luthier supplier. (Videos are at 8 x normal speed.)

[youtubessl]286aG3ml7Hc[/youtubessl]
 
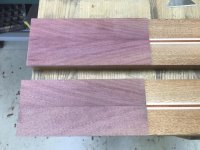
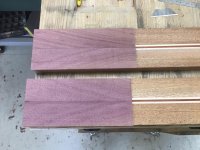
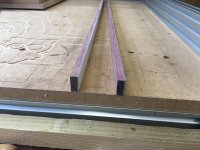
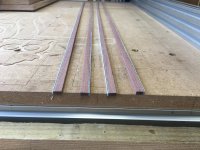
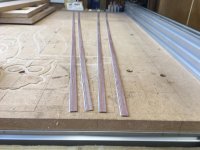
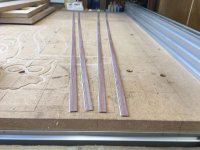
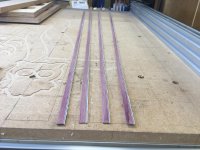
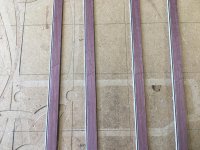
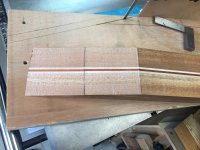
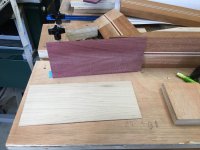
Trying out the various combinations of Purpleheart veneer made from the Yandles offcuts.

86CFA9FE-CBD8-4BF8-BDB4-5B0072CA7498_1_201_a.jpeg

6C70463E-FF8F-478E-B5FE-0B253DCFAC85_1_201_a.jpeg

25272BD9-5AE6-49C7-B665-5E987923BDBE_1_201_a.jpeg

F99963C2-FC54-4F2D-B8FC-EDD25267CD36_1_201_a.jpeg

It hasn't come out in the images, but like often in bookmatching, one side shimmers noticeably more than the other.
 
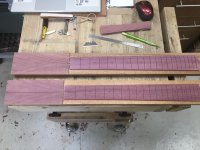
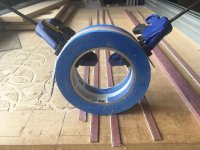
Testing the principle of making my own binding and purfling combination from a purpleheart offcut from Yandles and black and white tulipwood veneers.

B87722A1-2833-42EA-93DB-6286A41D0E6E_1_201_a.jpeg

If I can get it right, I could make two lengths of stock by clamping two sides together, maybe with some clingfilm or parchment between them to avoid sticking together.

41CB708B-FD8F-427A-AA56-E4851160B498.jpeg

And then if I then cut these into 1.5mm strips, I'd probably have enough for the two instruments with some leftover, maybe.

Whether I can get them to bend in the side bending machine is a whole other story. But let's see how far I can get.
 
Well if you know approximately where the bend will be wanted why not glue the bits together as a straight bit with a laminated curve? Then you’re halfway there. Unless I’ve missed something of course.
Ian
 
Cabinetman":3jaa0ms7 said:
Well if you know approximately where the bend will be wanted why not glue the bits together as a straight bit with a laminated curve? Then you’re halfway there. Unless I’ve missed something of course.
Ian

Once I've cut the 1.5mm slices, I know the PH would bend on its own, but the veneer is in the opposite orientation and glued, so I don't know if it would respond OK in the bending machine. So I'm setting this up as a test.
 
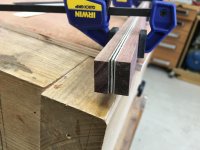
Unclamped and cleaned up.

A99430D0-CE7A-487E-A242-5A09B510028E.jpeg

Sliced on the bandsaw.

BA2E78F2-3CFC-40C9-B8BC-2B68F2C47F82.jpeg

Thicknessed to ~1.5 mm on the drum sander.

B51FAE9E-BB9A-4DF9-9F91-CE0B611CFFD3.jpeg

The purple has disappeared again, so I'll leave them out overnight and tomorrow and see if it returns.

So far I think the principle is proved. I'll have to try a bending run to see if it will bend without delaminating. I also need to select a sound piece of Purpleheart stock. I've noticed a couple of shake lines which will probably snap when bending on this offcut.
 
Andyp":oah97wjz said:
Is steam bending out of the question Malc?


Steam, yes, Andy.

I used Titebond O for these and the steam would loosen the glue too much, I think.

If I used PU, the glue would have held and the laminates might have broken.

So I will use dry heat and see what happens.
 
Daft suggestion perhaps,
How about bending before gluing, or even while gluing? Cold forming in other words?
 
Andyp":n85hzze9 said:
Daft suggestion perhaps,
How about bending before gluing, or even while gluing? Cold forming in other words?

Cold forming would definitely break the Purpleheart, or probably any binding wood. The purfling might go OK.

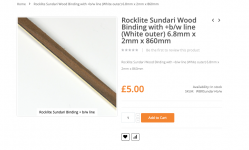
All the other bindings I have bought in the past have been plastic and are flexible. I'm trying to use all wood for these instruments and even if I bought the wood binding/purfling combination from a supplier, I would still have to bend it to shape before gluing it to the body.
Screenshot 2023-08-14 at 10.07.59.png
And I would need four of those per instrument. And there is not much choice from UK suppliers. There is more choice from foreign suppliers.

So I'm having a go at making my own so that I can match/compliment/nod to other parts of the instrument.

And it keeps the little ole grey cells active. ;)
 
Exotic timbers in Tonbridge sell all wood bindings - not a huge choice though.

For a dreadnought shape you can usually get away with wet purfling (cold water soaked) and steam for the tightest bits.
 
AJB Temple":em28bob0 said:
Exotic timbers in Tonbridge sell all wood bindings - not a huge choice though.

For a dreadnought shape you can usually get away with wet purfling (cold water soaked) and steam for the tightest bits.

I know. I've seen their prices. This is my hobby.

I may try a cold wet wet bend. Hadn't thought of that. Thanks.
 
They've got their colour back.

Before (after sanding)

B51FAE9E-BB9A-4DF9-9F91-CE0B611CFFD3.jpeg

After - left outside for 24h.

CD1816F8-4861-4CC9-976B-805526B5163D.jpeg

I'm not sure the camera imagery shows much of a colour change, but it is distinctly purpler.

But there is a shake in this piece which is why I chose it for trialling, and it might break on bending.

EE0913F8-7E75-4171-8749-821010EB3581.jpeg

Still, so far, so good.
 
I'm up early(ish) usually and kill some time watching random YouTube stuff. The other day I watched hockey sticks being made in Pakistan. They chucked a load of 2" x 1/2" by 18" wood into an oil drum and boiled it.

Then they stacked 3 or 4 together and bent the lot into a U shape. it looked like they bent easily.

You could try boiling a bit of your test strips to see if the glue stays together and if they then bend easy...
 
Robert":3b4upmut said:
I'm up early(ish) usually and kill some time watching random YouTube stuff. The other day I watched hockey sticks being made in Pakistan. They chucked a load of 2" x 1/2" by 18" wood into an oil drum and boiled it.

Then they stacked 3 or 4 together and bent the lot into a U shape. it looked like they bent easily.

You could try boiling a bit of your test strips to see if the glue stays together and if they then bend easy...

You know, Robert, that modern sticks are made of composites, glass fibre, carbon fibre and kevlar, but a few are made from mulberry, hickory, bamboo or maple.

But, I take your point. My options are, Adrian's suggestion of cold soaking and bending in the form, hot dry bending in the bending machine, or wet/hot bending manually around the hot iron. That heat is over boiling point. I suspect that heat/wet will loosen Titebond enough to delaminate. I'm hoping the dry heat will just soften the glue enough to continue the bend.

I've also got to go back and calculate how wide and thick I need the strips for the router cutter/bearing collection I have.

Watch this space.
 
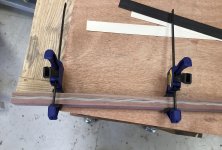
Cold wet bending trial result.

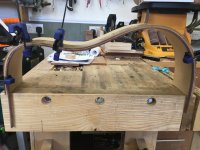
5AE84C47-74B5-41D8-A52A-E9CA5912890B.jpeg

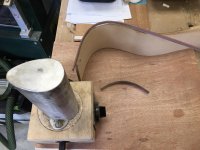
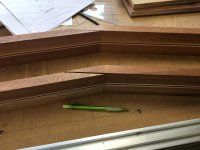
Well it does seem to bend a tightish radius but offers quite a bit of resistance The purfling, 3 x veneer, has not delaminated. But, it breaks the binding, Purpleheart, at any weakness, as you can see just below the left clamp. I think it would also break the Purpleheart for the tighter bends round the cutaway.

Also, it does not seem to want to stay in that shape. I think it's heat that encourages the wood fibres to relax, stretch and retain their bent shape.

994DD90C-63DA-49E4-AA6C-4721E690A315.jpeg
 
Hmm. It's been a while since I did this, but my method was to get the binding soaking wet and take it round a plywood former of the same shape as the instrument body. Taped on as went. As a matter of fact I was doing it for Les Paul shaped solid body guitars mainly. Cutaway curve is quite tight. I use a steam gun, also known as a kettle, to add impetus to the inner curve. The binding always loosened off teh curve a bit, but stayed in shape well enough to be glued to the instrument. I always just taped it on - lots of tape.

However, there were some key differences. I was using animal hide glue melted from pellets to glue the binding strips, not titebond. The main glues I was using for everything at that time were hide glues for things like neck joins, and cascamite (pre formula screw up) for everything else. I doubt titebond will release at all once cured. And I was using maple and brazilian rosewood strips in alternate layers to construct the binding - not purple heart (which I have never used in this way).

I wonder if you were to make bindings using animal glue or fish glue, then bending around your heat formers with a bit of added steam (eg from small karcher steam cleaner or similar think that produces steam jets) might work very well as long as you crack on and don't heat the glue too much?

Back when I was doing it a lot of the commercial bindings you could buy, were layers of black and white plastic. Sometimes coloured to look like an Ivory colour. Bent really easily but always looked like plastic to me even under the finish.
 
could you not make a DIY bending iron? I've seen them made from a metal tube and incandescent bulb and it gets really hot, and it shouldn't be too hard to make.
 
Thanks, Adrian. As you know, traditionally hide glue was used on the neck joint for providing ease of removal when the neck needed a refit in the instrument's life, so the luthier could loosen the glue with heat.

Modern construction techniques do away with glue on the neck joint altogether. The heel is bolted to the body through the neck block and the fretboard overhang is retained by inserts in the underside of the overhang and screws into the inserts from inside the body. This dramatically reduces the removal and replacement time a luthier would do in a neck reset.

Modern materials like carbon fibre, even reduce the necessity in some cases of ever having to reset a neck, and even if a truss rod is necessary.

My next bending trial will be with dry heat around the bending iron.

This is much more fun than buying commercial bindings and purflings. ;)
 
Agreed Malc. The very high end stuff is still often / usually glued. But most guitars are mass produced pretty much. In the electric arena Fender were doing bolt ons right from the early 1950's and they have sold a lot of gear.

I think carbon fibre composites are still in their infancy for musical instruments, but have huge potential. A friend of mine, Richard Dain (now in his nineties) pioneered carbon fibre (veneered with top quality spruce) for high end concert piano soundboards and one of the Tier 1 makers adopted this as an option. Huge advantages in stability, crown retention, and resistance to humidity changes. But actual musicians are a conservative bunch by and large. :D

Good luck with the bending!
 
I think, Adrian, you may be mistaking the Fender type screw on neck into a pocket with the modern construction practise of an acoustic instrument mortise and tenon which can utilise one bolt in a ukulele and two bolts in a guitar where the bolt screws into either barrel nuts or threaded inserts within the tenon. I know these are used by high end luthiers that are not mass producing.

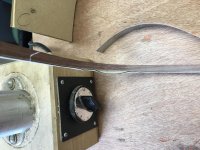
Anyway, I think dry heat is working using the bending iron.

BEC306CC-A795-4802-9B50-7EF306F0D885.jpeg

Mind you, you need asbestos fingers and a lot of patience.

13994C70-F9CA-487C-8F50-36D2F3CDD2E0.jpeg

I reckon that is good enough to glue into a rebate around the body, and the veneers didn't delaminate. Yay!

6CBD269D-BB0A-4D2F-AD3F-ACF2D7C2CA01.jpeg

So that's four of them needed per instrument, but some blooming tight curves for the cutaway model.

I shall now fabricate four more strips, a little thicker to match the router rebate cutter/bearing combination that I have, and see if with thicker material it will still bend with dry heat without breaking or delaminating.
 
Nope. Not mistaking. 8-)

Trim is going well. :text-bravo:

Oddly enough was watching a R Cosman vid today that popped into my feed. Purpleheart was in his 10 least favourite woods (along with red oak, alder, and others I forget). Only skimmed it though.
 
Incidentally, have you seen the Riversong system? It's quite revolutionary IMO and provides neck relief and action adjustment on the fly with full size acoustics. Takes seconds and has no conventional neck joint as such. Been around for maybe 8 years or so. Exceptionally handy if you want to change the action height for a switch from fingerpicking to heavy strumming or percussive style, or wish to make a significant change in string gauge.

Doesn't suffer from the Taylor (and others) problem with bolt or shim and bolt necks that they are prone to shifting after a few years or moving if you rack the tension up with heavy gauge. I'm pretty sure my Taylor was one of the glued dovetail necks (quite early 914 CE in rosewood before they introduced the button electrics).

Friend of mine who still does pro studio work has a Riversong. Aesthetics are a bit questionable to my taste, but it is undeniably a very robust system and plays beautifully. His also has tuning system built into the side body mount electronics, which is nice and discreet. Especially handy for players who switch back and forth from standard, open and drop D I suppose.
 
Yes, I have seen it. But I am still a hobby maker and haven't got access to the timbers he has. I am enjoying building to my style, and, once comfortable with it, might experiment on the bracing he employs. But for now, I'm trying out the SS bracing in these models.
 
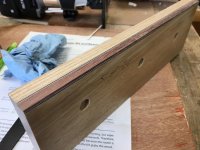
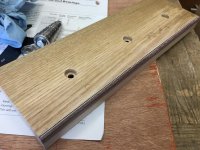
Well, I worked out roughly what dimensions I needed for the binding and purfling rebates, then selected the two bearings that gave the closest with the cutter. Using a piece of scrap oak, I cut two rebates, the deeper one for the bindling and a shallower one for the purfling. I thickness sanded to oversize and offered the combined binding and purfling for the deeper rebate and three leaves of white and black veneer for the shallower rebate.

1770557C-F6D6-4C47-B519-54853F55E9D3.jpeg

Then the mucky part of the process, gluing it all in place. the clamping method used on an instrument is tape, so I employed the same here.

45E40B19-685E-434C-8192-F8F33D23FA45_1_201_a.jpeg

Removal of clamping, showing my disgraceful trimming of the veneer leaves. :oops:

BD8BC807-D56A-4A8F-A9D6-AB7398966DAD_1_201_a.jpeg

Finally, cleaned up with a plane and scraper.

3B8F384C-4676-4A68-BF68-76C9FD9B431D.jpeg

518E29A5-D295-4699-A6F0-45CD5D60E3A0.jpeg

I think I've proved to myself the principle of making my own veneer is OK, but the execution needs to be better, and Purpleheart doesn't like to be planed or scraped.
 
Now to see if I can bend the thicker binding. This binding is 2.5mm. The previous successful bend was about 1.5mm.

This is using dry heat from the bending iron.

C26FADE1-EF89-42DE-ABF3-D394BBC085CE_1_201_a.jpeg

First delamination. That could be because the glue was thinner at this point. I don't know, but this was the tightest bend of all of them, so the area had more heat applied than most of the others.

2CA44180-A318-49C7-88AE-D16C3804E67A_1_201_a.jpeg

But I carried on to see if any other delaminations would occur.

D41AC602-C472-4A98-9E27-9ACB1F900635_1_201_a.jpeg

I managed to bend the rest without full delamination. There were one or two spots where one of the veneers started coming away. I was able to press them back in place using the heat from the iron.

2282B17F-B59B-4419-A52C-56ECA8100B81_1_201_a.jpeg

There was still enough flexibility to fit it to either the outside or the inside of the form. But you will see the continued application of heat to form the bend has darkened the purple resins.

558B227D-554D-47C2-9695-4C8A5856F3F0_1_201_a.jpeg

And by comparing with the 1.5mm thick binding/purfling combination, you can see that bending thick is going to be a challenge. I shall maybe try dry heat with the bending machine, which has a heat mat along the whole length and so may require heat for a much shorter time to achieve the bend.

BTW, I am in no way experienced in using a bending iron. I was shown and practised on one while on my course. I bent the last two ukulele sides and their bindings earlier this year, and that's it. So there is till room for much improvement in my use of it.
 
This time, I'll try the 2.5mm combination in the bending machine. First of all I taped the ends of two lengths, flat with purflings inwards to each other. Then I wrapped them dry in kitchen foil and fitted them in the machine, in the shim/heating mat sandwich.
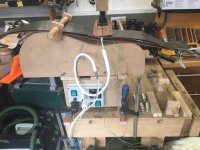
51280809-EA35-45AD-B755-66CEBC36A18F.jpeg

Heat up to 130 degrees. I could have gone hotter, but erred on the side of caution.

Slowly lower the press on to the waist, then fix all the sprung cauls around the shape.
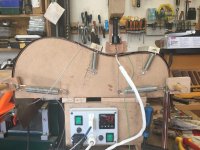
B1F64D03-8A81-4AB6-BFD9-65E3CABE57E7.jpeg

Then went and had lunch to let it cool down.

3FDA5894-87A4-4CBD-8FC2-CF1B826013F3.jpeg

And slowly release everything.

C8214F81-B099-419E-9CC6-81C55E0AE20B.jpeg

Not entirely successful, but not entirely a failure, either.
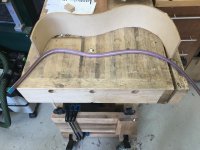
0194BE69-64F4-4009-A370-56F2863D47C9.jpeg

I think, if I had wet the strips first, then in that heat, the glue would have loosened. The success is that there was no delaminations on the outer sides. The strips bent, but being dry retained a lot of spring back.

Both strips broke at the shake in the Purpleheart, which was to be expected, but didn't break anywhere else.

Both strips clamped the spring-back back onto the form without breaking.
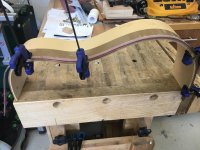
45D88AB3-8D67-4D3C-9497-72B98861BCEC.jpeg

Inside as well as outside.

BF0BB63C-73C9-49A5-BC0C-BC31D593E954.jpeg

I spotted a tiny bit of delamination on the inner side of one of the strips.

C0B6E65F-00DF-488B-A53C-47C36411F656_1_201_a.jpeg

But it wasn't visible on the outer, or show, side.
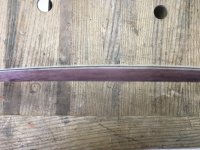
993859DD-68E3-4BFD-895D-2DCB0B4F7193_1_201_a.jpeg

So, all in all, I think this trial has shown me I can make thin (1.5mm) binding/purfling combinations with Purpleheart without delaminating and using the bending iron to shape them. I can also make thicker (2.5mm) strips and bend them reasonably successfully with the bending machine but have to be prepared for spring back which will require significant effort to clamp them in place in the instrument's rebates.

Maybe, I don't know, if I had set the regulo hotter, and maybe left them in the heat for longer, then there may not have been so much springback.

I may now go back to my stash of bearings for the rebate cutter and see if I can find something between the two thicknesses I've got here.
 
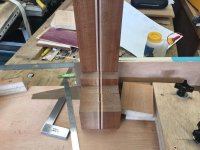
Earlier in this thread, I posted me making the neck, heel and headstock jig to achieve the 15 degree angle of the headstock.

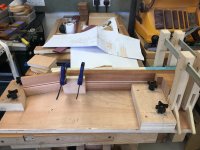
The jig fitted in the mitre gauge slot of the BS and the stock fixed into the jig as I push it through the bandsaw.
700504A0-B977-453B-BD07-4F66F1ED85DB.jpeg

The resulting cut.
CED62ED0-5775-4B52-B234-73F27D81E957.jpeg

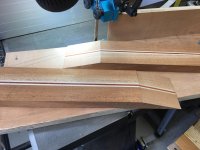
When the scarf joint is offered up, because the cut piece is flipped over, the difference is noticeable in the dark and light strips of Mahogany in the stock.
3B2E9377-60DA-4CA4-83BF-22FF74CC2A6E.jpeg

Mind you, I'm chuffed I got the reinforcements bang in the middle. That will show dividends later.
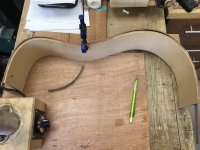
D07E65AC-D0D5-4CE4-B42C-60724058E29E.jpeg

So, to deal with the light and dark issue, I cut the second neck stock the other way round and swapped the cut off pieces.
272F331B-2BFF-4568-ADF5-8B5E76D94856.jpeg

Except I've placed them the wrong way round in the photo. The cut off piece should be on top of the neck. As I reduce the headstock thickness by about half, if they stay where they are, that reduces the gluing area. With the headstock on top, however thin I reduce the headstock, the gluing area remain the same size.

Time to glue the headstock veneer sandwich of bookmatched Purpleheart and Maple.
CA9ACE2E-D429-4485-9AEB-6931C855DBAD.jpeg

And clamped.
002173B6-0489-4A1E-8F81-266987406ED3.jpeg

Dry fitting the neck, headstock and heel pieces in the jig.
7EEDD521-1F8B-4B71-BA3D-77BA2C8BFD84.jpeg

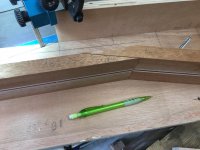
The reinforcements line up perfectly.
21669052-BC36-4E2D-B704-A5A3F5874C40.jpeg

Well nearly perfectly.
541B533D-5A24-4F78-B691-0BC4673010D3.jpeg

I reckon I can line that come gluing time tomorrow.
0E9ACD33-7E2F-4E39-B3A5-0C845381711F.jpeg
 
DaveL":2u7ansv3 said:
That neck is going to look really nice [emoji106]

Thanks, Dave. The construction is the same as the last two ukuleles I made, but scaled up.
 
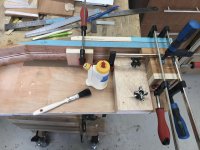
Gluing the headstock scarf joint.

36AB8945-1A71-4917-A3C3-3D4181F31C51.jpeg

Those shims of veneer are allowing the headstock to be slid up a mm or so so that it can be planed back level with the neck.

I'll build the heel up later or even tomorrow. ;)
 
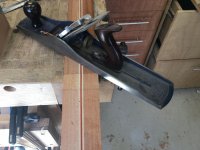
Scarf planed back level to the neck.

C1A73465-EF96-4FB1-82EF-6305DB24DCEF.jpeg

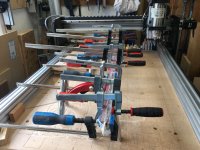
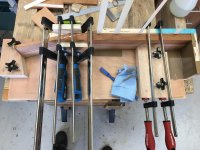
Heel stack glued and clamped.

C6CC1B87-C8F1-49C8-A766-FFF9FC430D91_1_201_a.jpeg

Next, I've got to repeat all that with the second neck.
 
That first heel stack turned out OK with the strips all lining up.

The second didn't.

A459C485-D48B-4EA0-BF99-FE4D1957B0B8.jpeg

I've got no excuse. I probably didn't take as much care as I could.

Only one thing for it; bandsaw through the glue lines.

535872B8-A388-4768-BA6E-8D0A1B10462A.jpeg

I left a sliver of glue and timber on the neck to take it back down to original thickness by plane, scraper and flat sanding dish.

Then I tried several different orientations in the jig until I could clamp them all without slipping out of line. Then I went for the glue up.

1F2E8CF9-6758-4F2C-B52D-26B65FF2F0DF_1_201_a.jpeg

Phew!

D2AF6AC1-CC40-44BD-B856-7D94A45FC29B.jpeg

All being well, that should look really nice when I carve the heel.
 
To stop pieces like that sliding when gluing there is a little trick you can do using panel pins between the pieces, you knock a pin into one piece a little bit, then snip it off as close as you can which leaves a tiny sharp spike, align the two pieces correctly then squeeze and the spike digs into the second piece, you can now put them back together with glue and they will stay where you want them. I would suggest two pins per joint.
Ian
 
Thanks, Gents.

Ian, that's the process I use before gluing the fretboard to the neck, because by then, the only reference is the centre line.

But this was in the jig, and the corner of the jig is exactly 90 degrees in each axis, and so they should have clamped square, with the strips all lining up, because this is still referencing from face side and edge. So, I can only think that I hadn't accurately thicknessed or widthed. It only takes a tad of a degree to be gnat's knadger out of alignment, as you can see from the photo, fractions of a millimetre, but stands out a mile.
 
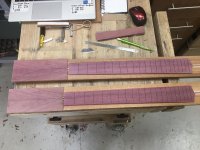
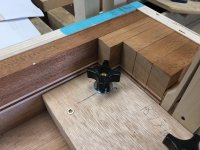
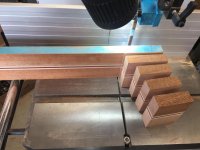
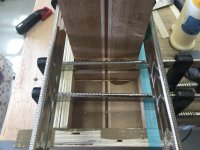
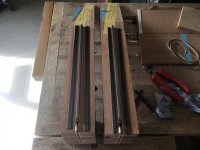
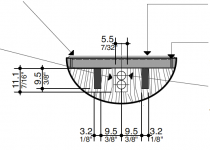
Two neck blanks ready to receive routing channels for two carbon fibre reinforcements and a dual action adjustable truss rod.

380E76A6-79C7-48F8-B650-9F7EE0D6E29E_1_201_a.jpeg

The carbon fibre rods will be inserted thin side up to resist the forces of the strings, and the truss rod provides the player with a bit of relief (curve) in the neck giving the strings space to vibrate. That can then be adjusted to the player's needs, and if the carbon fibre fails to resist the pull of the strings. (I don't think so, but players are a conservative lot!)

Screenshot 2023-09-09 at 13.31.26.png
 
Good save on the heel.

Re neck - how do you bond the CF to the wood? Epoxy? I know some luthiers advocate carbon fibre / graphite rods and others don't. Never tried it myself but always wondered if truss rod adjustment compromises the carbon to wood joint.
 
AJB Temple":3mmobqjw said:
Good save on the heel.

Re neck - how do you bond the CF to the wood? Epoxy? I know some luthiers advocate carbon fibre / graphite rods and others don't. Never tried it myself but always wondered if truss rod adjustment compromises the carbon to wood joint.

Thank you.

Yes, the plans propose epoxy for the bond. There is talk that once CF is the reinforcement, then Truss Rod adjustment may not be necessary. But you know how conservative players are, and how they like traditional. That's why modern luthiers are using both.
 
Back
Top