• Hi all and welcome to TheWoodHaven2 brought into the 21st Century, kicking and screaming! We all have Alasdair to thank for the vast bulk of the heavy lifting to get us here, no more so than me because he's taken away a huge burden of responsibility from my shoulders and brought us to this new shiny home, with all your previous content (hopefully) still intact! Please peruse and feed back. There is still plenty to do, like changing the colour scheme, adding the banner graphic, tweaking the odd setting here and there so I have added a new thread in the 'Technical Issues, Bugs and Feature Requests' forum for you to add any issues you find, any missing settings or just anything you'd like to see added/removed from the feature set that Xenforo offers. We will get to everything over the coming weeks so please be patient, but add anything at all to the thread I mention above and we promise to get to them over the next few days/weeks/months. In the meantime, please enjoy!

Drills & dovetails

Dr.Al

Old Oak
Joined
Dec 31, 2020
Messages
3,747
Reaction score
2,579
Location
Dursley, Gloucestershire
Name
Al
No, not that sort of drill...

no_drills.png

I'm after some advice from some of you please!

Every now and then, I go out to the garage, grab a couple of offcuts of some wood or other and have a go at cutting some dovetails. This was my last attempt, in what I think is ash:
dovetail_practice.jpg

It's definitely the best I've ever done, but there are still gaps and I spent a very, very long time tweaking it with a file before I managed to get it to go together. Although I tried to look for marks on the wood from tight spots (and even used a pencil to make them clearer), I still struggled to be sure of where I should be filing as everything seemed too tight. But I digress..

What I've realised is that practising dovetails isn't the right thing for me at the moment. I'm not sure how long it takes me to do a joint like the one above (sometime between ½ hour and an hour at a guess) as I don't tend to look at a clock, but the point is that it takes a long time and if I do something wrong, I don't realise until I've finished and then I can't easily figure out what I did wrong and hence what I need to work on.

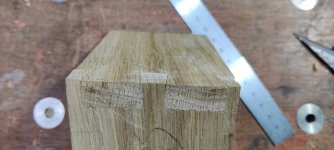
Therefore, I decided I needed to do some drills, practicing techniques rather than trying to make joints. I started with one that seemed fairly obvious: sawing in a straight line and square. I marked up three sides of the end of a bit of oak and spent some time sawing down the line like this:

sawing_practice_setup.jpg

As I'm very new to all this wood-bothering stuff, I'm still on the proverbial fence as to what sort of saw to use (pull or push), so I thought that it would be an interesting exercise to try a few cuts with each (dozuki and 20tpi rip saw). The front view (the side I could see while cutting):

sawing_practice_front_with_saws.jpg

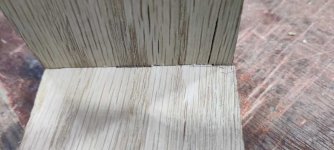
Back view (the side I couldn't see):

sawing_practice_rear_with_saws.jpg

Close-ups (with "W" and "J" to highlight which half were done with the western saw and which with the Japanese one). Front:

sawing_practice_closeup_front.jpg

Back:

sawing_practice_closeup_rear.jpg

I was quite pleased with those lines (especially the J ones I think, although I'll have another look when I'm back in the garage). There aren't many places where the pencil line is still visible (I was aiming to go down the middle of the pencil line rather than along side it). I'm sure it's far from perfect, but it was a lot better than I expected given my dovetail ineptitude.

I'm going to go and do a whole lot more of these cuts (and also some ones where I try to stay one side of the line) and see how things improve. I'll probably stick with the Dozuki for now although I might try the western saw again later: I found the Dozuki cut noticeably more easily and the result seems better. Given that I'm absolutely dreading the idea of sharpening a 20 tpi rip saw and I've got a spare cheap blade for the Dozuki, it seems the easier option for now. If my results with the Western saw had been better than the Dozuki then I'd be thinking about practicing sharpening next!

Anyway, thank you for still reading my rambling notes if you've got this far. What I'd like (and the point of this post!) is to have some suggestions for drills like this that I can do. Stuff that gives immediate (ish) feedback as to whether I'm doing it well or badly (so I stand a chance of improving) and that will help me finally manage to cut a proper dovetail that goes together without 20 minutes of hand filing.

Any thoughts from the hand tool experts out there?
 
For what it's worth, I've also ordered a "dead-tree" copy of this book, so that will hopefully give me some pointers of drills that will help sort my (lack of) technique out.
 
First, I know nothing about cutting dovetails and have minimal experience, so my thoughts are really aimed at experts looking in.
I can’t really get my head around why a fine kerf (thus high tpi) is needed so long as you cut to a line and the kerf is on the waste side.
I have a lovely high tpi saw with a thin blade but the results would be more likely to wander in my hands. However using a thicker very old 10 tpi backsaw I can cut a pretty good (straight) rip line.
 
Just for starters, accuracy in sawing depends to a large extent on your stance. Don't stand 'square on' to the bench but sideways to it; ie your tootsies should be at 90deg (or so). This means that your sawing arm will swing back past your carcass so that most of the blade can be used. Try and position your eyes directly over the top of blade and of course the line(s) that you're attempting to saw down should be dead vertical - Rob
 
Lurker":1qfu817h said:
First, I know nothing about cutting dovetails and have minimal experience, so my thoughts are really aimed at experts looking in.
I can’t really get my head around why a fine kerf (thus high tpi) is needed so long as you cut to a line and the kerf is on the waste side.
I have a lovely high tpi saw with a thin blade but the results would be more likely to wander in my hands. However using a thicker very old 10 tpi backsaw I can cut a pretty good (straight) rip line.

My two pennies worth with just a very little experience. Fine kerf = less wood removed, less effort, less chance of forcing the saw through the wood.
 
Having got the T shirt on this many years ago:

Agree with advice re stance
Probably you are not holding the saw level (some cuts too deep, some too shallow) - be super careful not to rush the end cuts
You are getting off line at the end of cuts. Twisting or forcing the saw probably, and probably rushing. Relax consciously.

I wonder actually if you are holding the work a bit too high for your size. It tends to create tension and impair vision and engender fatigue. I am quite all and I like to have the work quite low set for this kind of thing, so I am almost standing over it.

I am a pianist by main hobby and tension is the enemy of accuracy both in piano playing and sawing. Relax. Keep reminding yourself. As difficulty goes up, so does tension usually.
 
Practice, Practice, Practice. Keep the blade square to the wood when cutting the tails and cut tight to the waste side of the knife line when cutting the pins. Oh, and did I mention ''Practice''.

John''
 
I've got two things to add — WYLIWYG ;)

(If you say it often enough you stop giggling)

Actually I designed a highway feature called this that has saved bikers' lives (and got an international Road Safety Award for it, and it's used all over the world now.)

But what it means is Where You Look Is Where You Go! So if you are looking down your line, you will follow that path. If you aren't, then you won't.

The other thing is what my old woodwork teacher taught me back in the 60s. Keep the saw, your handgrip, your wrist, your elbow and your shoulder all in line, and the cut will be straight down.
 
Dr.Al":3uvxaqt3 said:
It's definitely the best I've ever done, but there are still gaps and I spent a very, very long time tweaking it with a file before I managed to get it to go together.

Wrong tool. Ideally the mating surfaces want to be flat. They will still look tight if they are a bit concave. If they are a bit convex - easy to accomplish with a file - the gaps will be apparent.

Saw right first time is the goal. Cut close and pare using a chisel if you can't.

I don't' think the super thin kerf is all that helpful with dovetails. I disliked my veritas dovetail saw; the plate is thin and the set is minimal so any error in direction of cut in the first few strokes can't be corrected - once it is on a trajectory it can't be turned at all - and the ugly, fat, composite spine is in the way of your view if you put your head centrally over the cut - with a decent thin brass or steel back, the separation of your eyes allows you see BOTH sides of the saw plate at once when you have your head in the right place.
 
First off, you are doing the right thing by setting yourself on lots of repetitions. Keep on doing that, and leave all the variations out of it.
Variations include
- type of saw
- species of wood
- thickness of wood
- height of wood in vice.

I'd suggest that you start making some whole dovetails.

For me, I'd say that a western saw suits my normal way of marking out and although I did buy a little Japanese saw back in the 90s I rarely use it now.

The thing I found that gave me the most improvement was to start the cut by looking at the end of the work, and with the handle of the saw raised, so that the cut starts on the far side. You can line it up before you cut down much at all.

When you have the first mm or two ok across the width of the end, lower the handle down so the cut goes down the vertical line that you can see.

When you are near the bottom of the cut, straighten up so the last strokes are horizontal.

And remember that dovetails don't all have to look perfect to be useful - just like the rest of us!
 
Wow, I just got back in from the garage to all those replies, thank you everyone. I'll give a quick update on how I've got on and then try to respond to everyone's comments.

I've cut about 60 more slits since I started this thread. This was the last board end I did (front view, I started with the one on the right):

2022-01-04-last-board-front.jpg

Rear view (started with the one on the left, obviously):

2022-01-04-last-board-rear.jpg

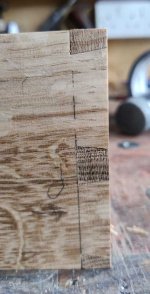
Close up of the last three cuts (the pencil mark you can see shows how far I cut with the saw; the mark below that is the knife mark I was trying to stay to the right of). Front:

2022-01-04-last-cuts-front.jpg

Rear (trying to stay to the left of the line, obviously):

2022-01-04-last-cuts-rear.jpg

Not perfect, but nay bad I think (especially considering that these cuts are WAY deeper than I'll ever go when cutting a real dovetail, unless I'm dovetailing 60 mm thick boards!).

That felt like a good point to call it a night. I'll do some more of the same tomorrow. I've been trying lots of different things out (sorry AndyT!) to try to figure out what feels right to me, but I was gradually settling down towards the end of the last board. Tomorrow I'll keep doing it the same and see if I can keep cutting straight.

What I settled on from about half-way across the board above - which differs a bit from the comments (which I only read after doing all the cuts this afternoon) - was:

  • Dozuki
  • Wood raised up about 200 mm higher than before - my back was sending extremely angry messages after doing a few boards worth of slits and raising the boards up higher was much more comfortable
  • Standing facing the wood but a reasonable distance away. I'd started with a split stance: left foot pointing towards the wood and right foot at right angles and the saw going past my right-hand side. I changed this to standing facing the wood and in line with it such that I was pulling (two handed) the dozuki towards my stomach and my head was inline with everything. That seemed to produce far better results.

Replies to comments to follow in another post...
 
Lurker":9d7u1z07 said:
First, I know nothing about cutting dovetails and have minimal experience, so my thoughts are really aimed at experts looking in.
I can’t really get my head around why a fine kerf (thus high tpi) is needed so long as you cut to a line and the kerf is on the waste side.
I have a lovely high tpi saw with a thin blade but the results would be more likely to wander in my hands. However using a thicker very old 10 tpi backsaw I can cut a pretty good (straight) rip line.

It's an interesting thought. I'd always assumed the high TPI saws were used in order to get a smoother finish on the joint, but I have no basis for that and have just been using dovetail saws because it seemed sensible to use dovetail saws for dovetails! I don't claim to know what I'm doing!

Woodbloke":9d7u1z07 said:
Just for starters, accuracy in sawing depends to a large extent on your stance. Don't stand 'square on' to the bench but sideways to it; ie your tootsies should be at 90deg (or so). This means that your sawing arm will swing back past your carcass so that most of the blade can be used. Try and position your eyes directly over the top of blade and of course the line(s) that you're attempting to saw down should be dead vertical - Rob

That's really interesting to hear and I'll definitely give it another try tomorrow. When I was practising this afternoon, I found it much easier standing straight on to the workpiece. I'm still using all of the blade and my eyes are directly over the top of the blade. I wonder if this is a Japanese/Western difference; what type of saw do you use Rob? I'll report back tomorrow once I've tried again.

AJB Temple":9d7u1z07 said:
Having got the T shirt on this many years ago:

Agree with advice re stance
Probably you are not holding the saw level (some cuts too deep, some too shallow) - be super careful not to rush the end cuts
You are getting off line at the end of cuts. Twisting or forcing the saw probably, and probably rushing. Relax consciously.

I wonder actually if you are holding the work a bit too high for your size. It tends to create tension and impair vision and engender fatigue. I am quite all and I like to have the work quite low set for this kind of thing, so I am almost standing over it.

I am a pianist by main hobby and tension is the enemy of accuracy both in piano playing and sawing. Relax. Keep reminding yourself. As difficulty goes up, so does tension usually.

I've got to disagree with the work being too high (as explained above: my back was really getting upset). The Japanese saw feels quite comfortable dropping the handle down, particularly at the start of the cut. That helps line it up nicely, but was causing me to get my back into all sorts of awkward positions, regardless of stance. Most of my back problems come from being 1.98 m tall (6'6") and spending far too much of my life bent over for low desks, benches, kitchen worktops, wash basins / sinks etc. My back was telling me in no uncertain terms than bending over the saw was a very bad idea.

The tension is definitely a good point though. I think I probably relaxed a bit in those last few cuts as I got to the end of what I'd decided to do today. I'll try to remind myself repeatedly when I do the sawing practice tomorrow.

Regarding the depth by the way, I wasn't worrying about depth: I figured that was a problem for another day. The depth mark with the pencil was done afterwards out of curiosity.

johnward":9d7u1z07 said:
Practice, Practice, Practice. Keep the blade square to the wood when cutting the tails and cut tight to the waste side of the knife line when cutting the pins. Oh, and did I mention ''Practice''.

John''

I must admit, I mostly disagree with this advice. I'm a very firm believer in "practice makes permanent". Practice something wrong over and over again and you'll keep doing it wrong forever (look at most car drivers for a good example!) The problem with practicing dovetails is I don't know what I'm doing wrong (until it looks rubbish at the end), so if I keep practicing it'll keep being wrong and I'll end up with muscle memory making me make a mess of every dovetail.

The most recent dovetail I did is the best I've done, but it was one of the worst I'd done before I spent ages filing all the faces down. The main point of my original post is that I'd like some exercises that give useful feedback on techniques (like the sawing practice I've been doing) so I can figure out what to change and ensure that the practice is making perfect, not making errors permanent.

Malc2098":9d7u1z07 said:
I've got two things to add — WYLIWYG ;)

(If you say it often enough you stop giggling)

Actually I designed a highway feature called this that has saved bikers' lives (and got an international Road Safety Award for it, and it's used all over the world now.)

But what it means is Where You Look Is Where You Go! So if you are looking down your line, you will follow that path. If you aren't, then you won't.

The other thing is what my old woodwork teacher taught me back in the 60s. Keep the saw, your handgrip, your wrist, your elbow and your shoulder all in line, and the cut will be straight down.

The WYLIWYG is definitely good advice and I probably should have thought of it myself :oops: I'm a IAM national motorcycle observer and spend a lot of time preaching that you have to look where you want to go. It never occurred to me that it's a good thing to apply to woodwork too! I think my eyes wander all over the place when I'm sawing as I try to check everything at the same time! Thanks!

Sheffield Tony":9d7u1z07 said:
Dr.Al":9d7u1z07 said:
It's definitely the best I've ever done, but there are still gaps and I spent a very, very long time tweaking it with a file before I managed to get it to go together.

Wrong tool. Ideally the mating surfaces want to be flat. They will still look tight if they are a bit concave. If they are a bit convex - easy to accomplish with a file - the gaps will be apparent.

Saw right first time is the goal. Cut close and pare using a chisel if you can't.

That's interesting to hear. I think I need a bit more practice with underlying techniques before I do another full dovetail, but I'll try the chisel approach next time. I think that's what I was doing originally but saw a youtube video (Sellers maybe?) where a file was used so I've tried that the last few times. It hasn't helped my dovetails look any better than they did before, but that's not surprising as it's hard to see what I'm doing wrong as I've said several times already...

AndyT":9d7u1z07 said:
First off, you are doing the right thing by setting yourself on lots of repetitions. Keep on doing that, and leave all the variations out of it.
Variations include
- type of saw
- species of wood
- thickness of wood
- height of wood in vice.

That makes a lot of sense. I needed to do a bit of variation at first to work out what felt vaguely right. I've found the dozuki better so far than the western one, so I've stuck with that for the last 60 practice cuts. The wood has all been oak but the thickness has varied purely as a result of what bits of offcut I have. Most of the pile I've got left is 12 mm thick, so tomorrows practice will be more consistent. The height of the wood in the vice is a lot higher than when I started due to the aforementioned back pain. My portable workbench has been a godsend for saving my back on many occasions and I'll keep using that tomorrow so I can keep the work up high.

AndyT":9d7u1z07 said:
I'd suggest that you start making some whole dovetails.

I've said this a few times already, but I'm really struggling to see that as a good idea after my experience so far.

AndyT":9d7u1z07 said:
For me, I'd say that a western saw suits my normal way of marking out and although I did buy a little Japanese saw back in the 90s I rarely use it now.

The thing I found that gave me the most improvement was to start the cut by looking at the end of the work, and with the handle of the saw raised, so that the cut starts on the far side. You can line it up before you cut down much at all.

When you have the first mm or two ok across the width of the end, lower the handle down so the cut goes down the vertical line that you can see.

When you are near the bottom of the cut, straighten up so the last strokes are horizontal.

Thanks for that. I'll have another read through that and try to follow it as best I can when I get started on the saw drills tomorrow.

AndyT":9d7u1z07 said:
And remember that dovetails don't all have to look perfect to be useful - just like the rest of us!

Thanks: always a good reminder. I realise there will probably always be gaps in my dovetails; however, I would like to get to the point that I don't spend ages filing (or whatever) to get them to fit and then find that the board edges don't line up anymore (because I've filed too much off the wrong bit)!

I realise I've disagreed with a few bits of advice above and I hope that doesn't come across as ungrateful. I really, really appreciate all the feedback and I'm certainly going to try everything suggested out as much as I can, even if I end up settling on something different. I'm itching to get back to practising real dovetails (as suggested by some of you), I just want to be sure I've sorted out some of the underlying techniques which I'm clearly lacking at the moment.
 
Following the stance comments, I did a bit of googling to see what other Japanese saw users do and the conclusion from looking at photos was "it varies"!

My straight-on stance thing is obviously not just me thought: I found this video which seems to show the way I've been standing far better than I managed to describe it: https://youtu.be/9eLdh5IAhXA?t=335 I haven't watched it all yet, just scanned through to find a bit where he was sawing (the link goes to that part of the video)

I usually find his videos a bit sales-y so don't tend to watch them, but I might go back and watch the rest of that one and see if there's anything else of interest in it.
 
Agree 100% re practice. (And 100% re target fixation - I used to examine IAM observers on bikes....)

My amazing Russian piano coach said to me 15 years ago "do not practice your mistakes".

It was so profound and I wished I had been told this obvious thing when I was 7. If you don't identify mistakes at the outset (or don't care) then you keep practicing them until you can do it wrong perfectly. That lady transformed my playing and many other things. I now do a bit of piano teaching and see students preparing for advanced exams who continually repeat errors, apparently hoping that mere repetition will achieve perfection. It makes people worse not better.

So well done you for getting focussed on solution right at the start.

PS 6' 6" is damn tall. Too big for buses. I understand your posture issues now.
 
I’m just starting out, but the primary thing that improved my sawing was cutting along the horizontal and the vertical lines at the same time, or to put it another way starting the cut on the corner with my head in a position that I can see the two orthogonal faces and their lines at the same time. Also using the reflection of the wood in the blade to ensure that everything is square I find quite useful. I’m using Japanese saws on soft wood and try to exert as close to zero downward pressure as possible.
 
Dr.Al":3ij56gg8 said:
This was my last attempt, in what I think is ash:

Can't help you with the DTs but that is oak, not ash.
But more power to your elbow. You can count on one hand the number of projects on which I've cut DTs by hand. I was competent at it, once upon a time.

But the last time I tried it, thinking "I know how to cut dovetails", I had to scrap it and I got the BJ out... :oops:
 
AJB Temple":29zo2zv9 said:
PS 6' 6" is damn tall. Too big for buses.

Too big for most things... off-the-shelf trousers, shirts, motorcycle kit including helmets (ear pockets in the wrong place), lab coats, tents (even the biggest tents have small bedroom areas), sleeping bags, buses, aeroplanes (unless you can afford business class), quite a lot of cars, etc etc etc ad infinitum

Windows":29zo2zv9 said:
I’m just starting out, but the primary thing that improved my sawing was cutting along the horizontal and the vertical lines at the same time, or to put it another way starting the cut on the corner with my head in a position that I can see the two orthogonal faces and their lines at the same time. Also using the reflection of the wood in the blade to ensure that everything is square I find quite useful. I’m using Japanese saws on soft wood and try to exert as close to zero downward pressure as possible.

That makes a lot of sense. I've been using the reflection thing a lot (although I need to be careful about watching that too much following the WYLIWYG comment above). I think I start on the nearest corner at the mo, but I need to watch myself a bit as I do it.

Steve Maskery":29zo2zv9 said:
Dr.Al":29zo2zv9 said:
This was my last attempt, in what I think is ash:

Can't help you with the DTs but that is oak, not ash.

I'll take some more pictures tomorrow. I thought it was ash when I cut the dovetail a week or two ago, but it was an unlabelled offcut. It's lighter than the oak I've been using for the saw practice and I remembered it smelling lovely when I planed it, which is more of an ash thing than an oak thing I think.
 
I have used, and still do, every kind of dovetail saw out there: Western, Eastern, thick plates (0.025”), average plates (0.020”), and thin plates (0.015 - 0.018”). Thinner plates can deliver less effort as they cut less wood, but this also depends on the number, size and rake of the teeth. Not that simple. For reference, the Veritas, LN, and most similar dovetail saws all have a 0.020” plate. So does the Japanese Z-saw.

The Veritas dovetail saws come in 14 tpi and 20 tpi. LN comes in 15 tpi, and this is probably the most common configuration. As a rule of thumb, around 15 tpi for hard woods and 20 tpi for soft woods. Alternately, 15 tpi for 1/2” thick and greater, and 20 tpi for 1/2” thick and under.

But that is not the full story. There is the matter of rake.

Of Western saws, the Veritas saws are the best for those starting out because the teeth are files at a relaxed 14 degrees. This refers to 14 degrees from vertical. A saw with zero rake would be one where the face of the tooth is vertical/90 degrees. I recall that my LN came this way about 15 or so years ago. It is not a saw for beginners, as the vertical rake makes the saw “grabby” to start the cut (which teaches you to lighten the grip on the handle, and saw with a light hand - one of the most important tips of all). My preference is around 5-7 degrees of rake for a compromise for my local Australian hardwoods. One does not want too little rake, although the advantage of a more vertical tooth is that it cuts more aggressively. As the rake relaxes, so its aggressiveness does too.

Then there is the set of the teeth. Set creates space for the teeth to cut and release waste. Too much space and the saw plate will wander in the cut. Too little set and the teeth will bind and stick. Often when you think the saw is dull, it may simply need the teeth re-set.

Lastly, there is the handle angle, which is referred to as hang. Most Western saws run somewhere around 50 degrees. This creates a good balance between pushing forward and down. Recognise that there is a relationship between this and the height at which you saw. Too low down, and the efficiency is lost, and too high up and your arm becomes cramped. Japanese pull saws are straight to maintain a coplaner relationship between the saw plate (cutting in tension) and the handle. Avoid those saws where the handle curves or is angled.

Sawing at the right height is where a Moxon vise comes in. These go on top of the bench to raise the sawing height. Setting them into the face of a bench sort of defeats the purpose. My first Moxon vise …

http://www.inthewoodshop.com/ShopMadeTo ... lVise.html

When it comes to practicing sawing for dovetails (something I never do), note that the average maximum depth is only 3/4”. These long, deep practice cuts to 2” mean little. I always cut two adjacent lines simultaneously (top and face). This tends to ensure cutting straight.

I always cut to the line. A “go-for-it” attitude is needed for successful dovetailing.

A little reading - pictorial on dovetailing on my website …

Through dovetails: http://www.inthewoodshop.com/Furniture/ ... ails3.html

Half-blind dovetails: http://www.inthewoodshop.com/Furniture/ ... eTape.html

Mitred through dovetails: http://www.inthewoodshop.com/Furniture/ ... able2.html

And a recent article on making and filing a dovetail saw: http://www.inthewoodshop.com/ShopMadeTo ... ilSaw.html

That will keep you busy for a while! :)

Below - rounded mitred through dovetails for the case, and compound angle “London” dovetails (on a curve) for the drawers …

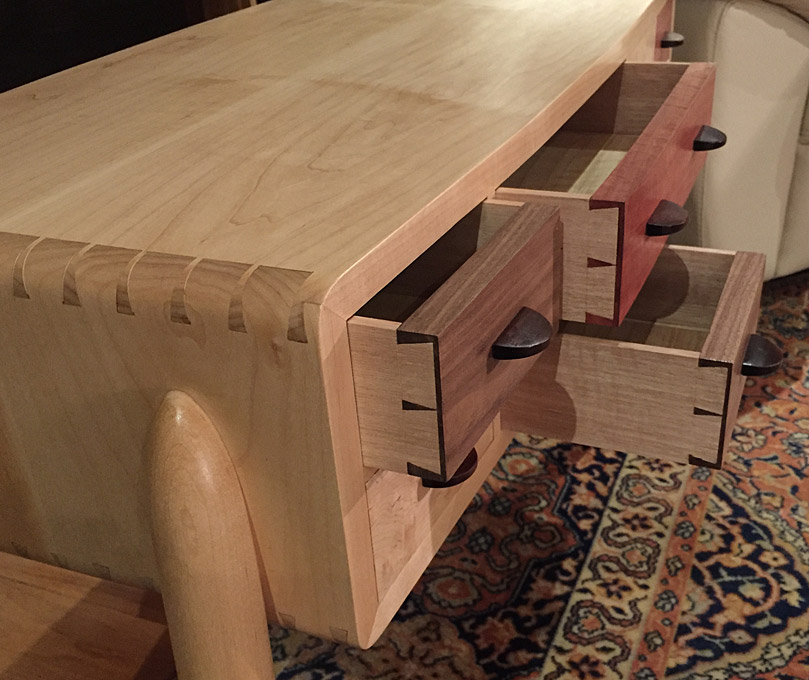
Final8.jpg


Regards from Perth

Derek
 
Steve Maskery":3ehwal1l said:
The medullary rays are very clear in those photos.

You say "photos", but I only posted one photo of the ash I used for dovetail practice a couple of weeks ago, this one:

file.php


I can't see medullary rays in that photo.

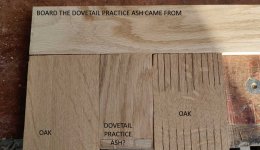
Here's another photo of it, sandwiched between two bits of oak and with the board it was cut from above it:

IMG_20220402_081348.jpg

I'm not certain it's ash (although I can't think of anything else it could be given the relatively few types of wood I've ever bought), but it smells lovely when you plane it and it looks very different to the oak to me.
 
derekcohen":nobh1pbe said:
That will keep you busy for a while! :)

Regards from Perth

Derek

Thanks Derek. That's a lot to take in for someone I my level, but I'll definitely read the links all through slowly over a cup of tea later.
 
I went out planning to do more sawing practice, but didn't get that far. Yesterday I'd found that I was just getting into the rhythm of things by the end of each end of each board, and then I'd have to stop and mark up the other end of the board before I could start sawing again.

This morning I put some music on and bored myself senseless marking 110 lines on the end of some bits of oak. Marked round with a knife (down both sides and around the end) and then chased it roughly with a pencil to make it a bit clearer:

IMG_20220402_123603.jpg

That will hopefully keep me sawing for a while after lunch.
 
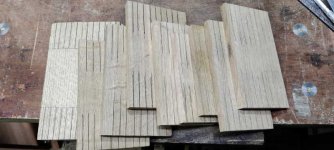
Well, it didn't take me long at all to saw 110 slots and I was wishing I had marked up more of them...

all_sawn.jpg

ends_sawn.jpg

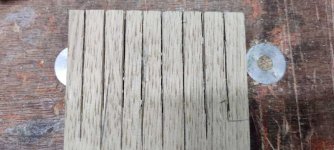
I'm definitely getting a bit more consistent now (which side of the line I cut on was a random choice on each cut).

getting_more_consistent.jpg

I figured that if I could be somewhere near the line 45 mm down, then it shouldn't be too hard to cut a 12 mm dovetail.

After running out of marked up oak boards for saw practice, I couldn't resist another go with that bit of (what I think is) ash...

practice_dovetail_again.jpg

Far and away the best one I've done so far. I had to do a little bit of paring with the chisel after sawing but it didn't take long. There's a gap on the inside edge and the edges don't line up very well, but I still call it progress. The photo above shows what looks like a notch in the right-hand side pin but I've checked and it's just the combination of the offset of the two edges and the glare from the ruler.

Here's the inside:

inside_dovetail.jpg

One thing I do need to work on is sawing to a knife wall. I'm not sure what I'm doing wrong, but I'm currently more accurate sawing to a knife line by eye than I am making a knife wall with a chisel and putting the saw into that knife wall. I'd expect the knife wall to give a really good registration, but I find that the saw moves slightly into the wall when I start cutting.
 
If you can cut to a line without fiddling about with knife walls, excellent, it is going to be quicker.

I guess it may be a combination of a bit steep a slope on the waste side, and a saw with a fair amount of set on it having a tendency to undercut the "wall" maybe ?
 
Sheffield Tony":36g6kc5k said:
If you can cut to a line without fiddling about with knife walls, excellent, it is going to be quicker.

I guess it may be a combination of a bit steep a slope on the waste side, and a saw with a fair amount of set on it having a tendency to undercut the "wall" maybe ?

That makes sense. I'll do some experimentation when I next get some workshop time.
 
Nice results!

With your exterior photo, presumably that's just pushed together? If so, you should try adding some glue, then planing down after the glue has dried, then adding some finish. I reckon that the tiny gaps will disappear entirely as the water in the glue slightly swells the fibres.
 
AndyT":2nrspg3r said:
Nice results!

With your exterior photo, presumably that's just pushed together? If so, you should try adding some glue, then planing down after the glue has dried, then adding some finish. I reckon that the tiny gaps will disappear entirely as the water in the glue slightly swells the fibres.

That's definitely worth a try, thanks! I'll have a go at gluing it if I get any time tomorrow and will post another picture.
 
I haven't posted anything on this thread for while, but I thought I'd just add a note to say I'm still practising!

I've done quite a few more over the past few weeks. I didn't take photos of most of them, but this was my latest one. I slightly cheated on this one and used a magnetic jig thing (3D printed) to help get me saw in a straight line. I was mostly doing it to see what the jig was like to use and it was by far the fastest dovetail I've cut so far, both the initial sawing time (less time checking and double-checking I was sawing in the right place) and also requiring minimal clean-up to get it to fit (just one tap with a chisel to shave the side of one dovetail).

IMG_20220506_145519 - Copy.jpg

I obviously wasn't concentrating when I marked it up as I ended up with a small offset between the two planks:

IMG_20220506_145537 - Copy.jpg

Nevertheless, it was quite satisfying to get a good fit so quickly. On all the ones I've done so far without the jig (regardless of how good they ended up looking), I've spent ages trying to work out which pin face needed a bit more taken off. This time it was obvious, maybe because it was just the one where previously the answer was "all of them"!
 
NickM":2hxvgtd4 said:
3D printed guide is a good idea. Would it be cheeky to ask for a copy of the file…?

Of course not. I'll send it tomorrow if that's okay. I've made some tweaks and am printing another one - I'll check it's okay and send it then.

P.S. You'll need some 8×3 mm magnets (although it would be very easy for me to tweak the design for a different size magnet if you've got some already that aren't that size)
 
I felt like it was going well, so I decided to have another go. Out of curiosity I timed this one (not that I really care how long it takes as this is just a hobby, but it's interesting to know). It was pretty much bang on half an hour from plane to plane (shooting the boards square to picking up the block plane to clean the ends of the tails & pins).

This time it went together first time with no tweaking & the edges lined up much better, although there's a very slight gap down the side of one tail:

IMG_20220506_170514 - Copy.jpg

IMG_20220506_170531 - Copy.jpg

I'm pretty happy with the two I've done today :obscene-drinkingbuddies:
 
Dr.Al":3u03qz51 said:
NickM":3u03qz51 said:
3D printed guide is a good idea. Would it be cheeky to ask for a copy of the file…?

Of course not. I'll send it tomorrow if that's okay. I've made some tweaks and am printing another one - I'll check it's okay and send it then.

P.S. You'll need some 8×3 mm magnets (although it would be very easy for me to tweak the design for a different size magnet if you've got some already that aren't that size)

That would be great. Thanks!
 
I decided to have another go at dovetails yesterday, but to make it a bit harder for myself, I decided to cut four joints at the same time and see whether the result ended up square!

Again using the 3D printed saw guide, which looks a bit like this (hastily framed shot to demonstrate the jig in use!):

jig.jpg

I've actually printed quite a few of them with different angles and I can't remember which one I used for this set of tails, but hopefully you get the idea. Here it is being used to cut the pins:

jig_pins.jpg

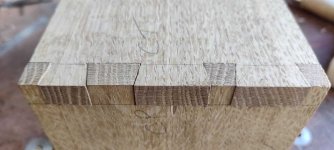
Anyway the result of all of that (and a couple of hours of marking up, sawing, chiselling etc) were these four joints:

dovetail_a.jpg

dovetail_b.jpg

dovetail_c.jpg

dovetail_d.jpg

I feel like I'm getting somewhere with the consistency now (even if the jig is arguably cheating). All of those dovetails went together with no adjustment at all, which I was very, very pleased about.

As I'd made four sides of a box, I decided to turn it into a box. I used my Stanley 45 to cut some grooves in the top and bottom of each board. Cutting the "stopped" grooves in the pin board (with some drilled holes at either end) was quite an unpleasant experience, but I managed to get some very shallow grooves cut. If I did it again I think I'd try using a router plane with lots of fences all the way round. One of the pin boards had a bit break off, but I managed to glue it back on and it's not too obvious.

As it's the first thing I've made with dovetails, I thought I'd try to make the dovetails a feature. I've had a Kilner jar of white vinegar with some steel wool soaking in it for a few months and never got round to testing it, so I figured what the heck.

I "painted" the pin boards with the vinegary ebonising stuff and left them to dry. They went very black - I was impressed. When I came back to them a few hours later, that black had turned to a bright blue, which wasn't quite what I'd imagined but c'est la vie.

Anyway, I cut a little bit of beech in half (in the direction that I think is referred to as "resawing"), planed the two halves flat and used the #45 again to cut a rebate all the way round both pieces. The lid piece had a bit of a chip in it, so I sanded a slightly rounded shape into the edges to hide it.

After figuring out which board attached to which (not a straightforward exercise as the labels I'd written on the inside were invisible on the ebonised boards), I added a bit of glue and the result looked like this:

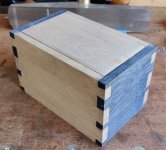
dovetail_box_glued.jpg

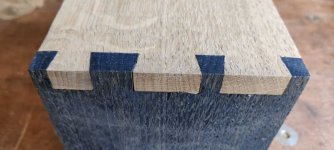
Here are those dovetails again:

dovetail_1.jpg

dovetail_2.jpg

dovetail_3.jpg

dovetail_4.jpg

The next bit was a bit scary:

sawing_box_in_half.jpg

(the masking tape is just there as I couldn't see the pencil line on the ebonised boards)

That left me with two halves of a box. I flattened the saw joint with a #4 followed by a bit of rubbing on a piece of sandpaper on the bench.

box_separated.jpg

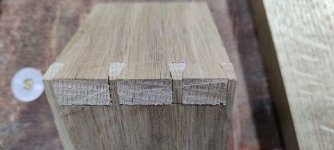
What hadn't occurred to me until this point was that any chipping or non-level cutting in the gap between the pins suddenly becomes visible when you cut it in half:

gaps_in_the_pin_area.jpg

Oh well, live and learn.

I haven't decided what to do next. It's a fairly thick-walled box (12 mm) so I'm thinking it might be better to have a hinge (another thing I've never done before apart from some practises on a previous box that ended up not having a hinge) rather than a loose lid that sits over a liner.

I'm also pondering some sort of veneer (?) over the sawn edge of the two halves. It would cover up the gaps in the pin area and would also deal with the fact that the sawn edge of the ebonised board isn't ebonised any more (and would be very hard to re-ebonise without staining the tail board).

I haven't decided what to line the box with either.

I'd welcome any and all thoughts...

P.S. Nick: I haven't forgotten about sharing the jig models, I just haven't got round to it yet! I'll try to do it later today
 
Nice.

There is no cheating with a jig. It means you can consistently repeat the process to the accuracy of the jig.
 
Indeed!

Well known professionals such as David Barron agree -

http://www.davidbarronfurniture.co.uk/d ... _tools.asp

Al, it's good to see you learning about all this stuff by making things.

On the subject of stopped grooves, for instance, I think discussions about the ways around them will now be more interesting than before.

Options include

Cutting through grooves then filling in the little hole with a grain matched fragment

Making a mitre on the last bit, where the groove goes

Using separate slips to hold the top and bottom, which can be mitred together

And I think there's a trick where the last dovetail is shorter than the thickness of the side it joins, but I may be remembering that wrong.

Interesting blue stain btw. I've no idea what happened there!
 
Not surprised about the blue, the best I have achieved with that method is a dark navy. But your dovetails are now very good! It’s all very well having at it by eye and no jig but not so easy to get the layout and spacing right without planning, depends on the use for the piece afterwards.
 
Thanks for all the comments - much appreciated.

@AndyT - I'll have to do some more investigation into grooves & dovetails. Mitred ones sound properly scary!

Anyway, rather than fretting against what the right answer to the various questions was, I decided to go with "whatever I've never tried before" and not worry too much about the end result. On that basis, I thought I'd try applying a thin veneer (leftover from when I used a thicknesser to make some bookmarks) to the exposed edges to hide the holes and then I thought I'd have a go at fitting my first hinge.

I realised after cutting slots for the hinges that I don't have any screws that are small enough, so they're now on order. In the meantime, through the magic of double sided sticky tape & a handy bit of wood to act as a prop:

open_box.jpg

Lots and lots of things I can see wrong with it, but it's all good experience, innit?

closed_box.jpg
 
NickM":32gf695i said:
Dr.Al":32gf695i said:
NickM":32gf695i said:
3D printed guide is a good idea. Would it be cheeky to ask for a copy of the file…?

Of course not. I'll send it tomorrow if that's okay. I've made some tweaks and am printing another one - I'll check it's okay and send it then.

P.S. You'll need some 8×3 mm magnets (although it would be very easy for me to tweak the design for a different size magnet if you've got some already that aren't that size)

That would be great. Thanks!

@NickM: as promised, the STL files (and STEP files in case you want to tweak anything) are here:

https://www.printables.com/model/199398 ... -dovetails
 
Back
Top