• Hi all and welcome to TheWoodHaven2 brought into the 21st Century, kicking and screaming! We all have Alasdair to thank for the vast bulk of the heavy lifting to get us here, no more so than me because he's taken away a huge burden of responsibility from my shoulders and brought us to this new shiny home, with all your previous content (hopefully) still intact! Please peruse and feed back. There is still plenty to do, like changing the colour scheme, adding the banner graphic, tweaking the odd setting here and there so I have added a new thread in the 'Technical Issues, Bugs and Feature Requests' forum for you to add any issues you find, any missing settings or just anything you'd like to see added/removed from the feature set that Xenforo offers. We will get to everything over the coming weeks so please be patient, but add anything at all to the thread I mention above and we promise to get to them over the next few days/weeks/months. In the meantime, please enjoy!

Edward Barnsley Workshop

NickM

Old Oak
Joined
Dec 8, 2020
Messages
1,537
Reaction score
843
Location
Near Basingstoke
I haven't been posting on here much recently, but have still been woodworking.

I've actually been doing a pupillage at Edward Barnsley for the past couple of months or so, which has been great fun and extremely educational.

I've been woodworking for around 3 years now. I'm entirely self taught (discounting 2 years of "CDT" at school when I was 12/13!); mainly through YouTube. I felt I got to a reasonable level, but was keen to take things further. I retired last April so that gave me the opportunity to get some more formal training.

I thought about doing courses, but I was attracted to being in a more commercial environment where people would be working on different projects and doing some really challenging stuff. On a course, I guess we'd all be doing the same things. I'm learning a lot by watching what others are doing as well as working on my own projects.

It took some persistence on my part to persuade them to let me do it, but I think everyone is happy how it is working out. I certainly am! In the end, I went in and did the tests they use of selecting would-be apprentices. I'm not going to post too much about that, but they were basically joinery exercises and I did OK (well enough at least that they were happy I wouldn't be completely wasting my money!).

Since then, I've been doing 3 days a week and have basically been working through their apprentice programme. It's all hand tools at the moment (which is what I wanted).

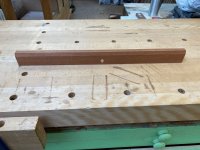
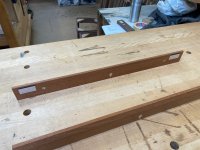
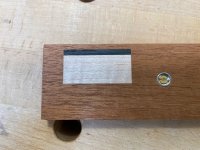
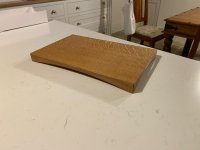
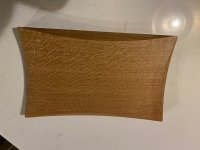
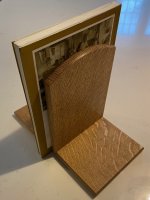
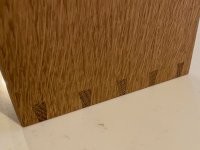
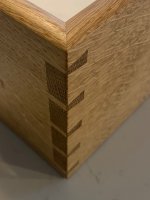
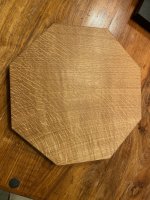
So far I have made, an octagonal breadboard, a pair of winding sticks with inlays, a rectangular breadboard, some simple dovetailed boxes (they're just for practicing the dovetails and have a ply bottom glued on - they'll be useful storage in my workshop) and a pair of mitred dovetailed bookends. I'm now making a stool which has angles, curves and wedged through tenons. They're all classic Edward Barnsley apprentice pieces.
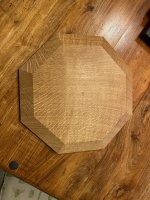
IMG_1673.jpeg

IMG_1674.jpeg

IMG_1678.jpeg

IMG_1679.jpeg

IMG_1680.jpeg

IMG_1685.jpeg

IMG_1686.jpeg

IMG_1758.jpeg

IMG_1759.jpeg

IMG_1761.jpeg

I think the single biggest thing I've learnt is an appreciation for how small errors in one process can become magnified later on - e.g. references faces and edges need to be REALLY flat and square. I knew that, but didn't really fully appreciate why it's important.

I'm also learning how to check things as I go along. For example, in the dozens of YouTube videos I've watched on dovetailing, I've never seen anyone check that tails are cut properly before marking out pins. I know tails need to be cut square across the end of a component to avoid a gap, but it never occurred to me that can be checked and, if necessary, corrected before moving on.

I'm learning more of course, but those are two overarching points which will stand me in good stead.
 
Good stuff and if I'm not mistaken, that's the rather excellent book about Ernest Gimson between the bookends - Rob
 
Well that all sounds like fun. That octagonal planing exercise is something I've tried at home for fun. It's easy to be nearly right.........but going from nearly right to exactly right is a bit more of a test.
 
Woodbloke":3i05g3nl said:
Good stuff and if I'm not mistaken, that's the rather excellent book about Ernest Gimson between the bookends - Rob

The book is "Edward Barnsley and his Workshop" by Annette Carruthers. (I've borrowed it from the workshop so I can learn a bit of the history of the place.)
 
Mike G":3eetcue7 said:
Well that all sounds like fun. That octagonal planing exercise is something I've tried at home for fun. It's easy to be nearly right.........but going from nearly right to exactly right is a bit more of a test.

It is fun. I'm not sure how long I'll be there. Sadly, I can't afford to do it forever!

A perfect square is the requisite starting point for the octagon. Easier said than done though!
 
That's brilliant. I'd love to do something like that; as you've said, it seems a really good way to properly learn things as opposed to a brief course.
 
I'm sure the skills will be invaluable for the rest of your life, the attention to detail is amazing.
 
Andyp":16eavi4q said:
Do they supply that gorgeous wood too?
I can see why those pieces may be challenging by hand.

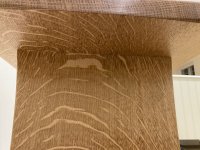
Yes, they supplied that lovely oak. I believe the tree was in the Scottish Borders area and was especially quarter sawn for the workshop. There’s a process to go through when deciding how to get components out of a board. It includes using a box scraper to take the surface off to look for defects, but there are so few defects that someone there described these boards as being like MDF!
 
I went to the Barnsley workshop a few years ago on one of their many open days and saw one of the young makers with a very acceptable small table that had a perfectly and do mean perfectly fitted drawer with which he was, quite rightly, mightily chuffed.

However, it was too perfect (if there is such a thing) and only fitted like that in the workshop on that particular day, with that level of humidity. I nearly pointed out to him (but didn't) that had that piece been exported to say Singapore or the Caribbean, it would have seized solid after 24 hrs. I saw such a drawer in Peter Sefton's annual exhibition as well in Malvern. A beautiful piece had one drawer sliding smoothly and the other was completely and utterly jammed solid.

I asked about drawer fitting when I was making for Linners and Dom, who now owns this workshop (https://www.wardourworkshops.com/) just said...''make 'em baggy Rob, make the bloody things baggy" - Rob
 
I wonder how much clearance constitutes "baggy"? One mm maybe? I know it depends on the overall scale, but wood movement and humidity prediction are both difficult.

Even basic stuff can go annoyingly wrong. For example, I made and fitted a lot of drawers, all on Blum movento runners. Over a drawer width of 1200mm In a few cases I had the runners out of alignment very slightly front to back (eg left was 1mm further forward). This shows when the drawer fronts are fitted but is very hard to spot when the runners go into the cabinet. I've since fully embraced lasers for this reason.

Similarly I aimed for a gap of 1.5mm all round (insets). You would think this would be easy enough to do, but in a large cabinet say 5m long it is quite easy to end up out of square by 2mm, especially with oak that still thinks it's alive.

Really good precision work is not at all easy.
 
My b.i.l was a ship's joiner and got a commissioning trip from Devonport to Scapa Flow on a nuclear sub. The ship flexes and drawers and doors that fitted perfectly in dock suddenly don't when at sea - they either fly open or seize closed. :D
 
AJB Temple":359c2djz said:
I wonder how much clearance constitutes "baggy"? One mm maybe? I know it depends on the overall scale, but wood movement and humidity prediction are both difficult.

Really good precision work is not at all easy.
There's a very, very fine line between a drawer that fits perfectly under one set of atmospheric conditions and one that fits and slides smoothly under all (or most) conditions. In my view, the latter is far more difficult to make that the former.

With our heating on minimum and the upstairs of the house barely heated (cold bedrooms), drawers in some of my pieces upstairs have recently had to be relieved to make them slide easier and on some jobs I've done this little task more than once. Eventually, you find a 'happy medium' where the things work well but still fit and slide properly - Rob

Edit - it's well known that Edward Barnsley used to visit his very well heeled customers in the 50's to do exactly the same job, having a nicely sharpened block plane in the pocket of his sports jacket.
 
Phil Pascoe":3500mtbg said:
My b.i.l was a ship's joiner and got a commissioning trip from Devonport to Scapa Flow on a nuclear sub. The ship flexes and drawers and doors that fitted perfectly in dock suddenly don't when at sea - they either fly open or seize closed. :D
It’s interesting seeing what they got you started on, training whilst testing your capabilities I suppose, looks very good btw.
I was asked to make some 6” long turned cotton bobbin shaped things in any hardwood once, packaging for electronic coils on a N sub, they specified a 4 thousandth fit into a tin container. Turned it down even though the coil company was desperate as fairly obviously in humid conditions they wouldn’t get the thing out of the tin, and I didn’t want to be responsible for a broken down sub. There was no arguing even though the specifier obviously didn’t know much about wood.
 
Blackswanwood":3t30fnhk said:
Great idea Nick. How long do you commit to with the EB Workshop?

Cheers

Robert

There isn’t a fixed period. I’ll probably get to the end of a project and make a decision.
 
Fantastic opportunity and I saw that the workshop is run as a charity as well - cool.

What is the purposes of the slotted screws in the winding sticks?
 
When I first read your post I was looking at it on a phone and thought it looked pretty good.
Now I have had a proper look on a decent sized monitor, I can see that it's actually amazingly good. Beautiful quality.

What a great way to enjoy your retirement! :eusa-clap: :eusa-clap:
 
Fantastically crafted pieces but I thought you were supposed to be learning about metal working ;)

Mark
 
the bear":rul8pt21 said:
Fantastically crafted pieces but I thought you were supposed to be learning about metal working ;)

Mark

Ha! I’ve been doing a bit of tinkering with the lathe.

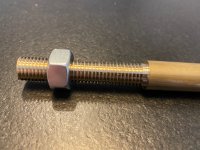
I cut a thread, for no other reason than I could:

E9DD6A8F-075C-49BE-930A-2F8036CEAFF3.jpeg

I’ve also used it “in anger” to modify a new toilet inlet valve to fit my rather ancient loo cistern. I’d say it’s already paid for itself!
 
Andyp":3vy5eiom said:
Can you tell us a little bit about how you shaped the underside of the oblong chopping board?

I made templates (male - i.e. convex) for the curve on MDF. That was done by marking three points and bending a steel rule to intersect all three points and striking a pencil line. I cut near the line with a coping saw and spokeshaved to the line. I made one template for the long sides and one for the short ends.

I used the templates to mark the curve on the edges and bottoms of the boards in pencil.

Most of the shaping was then done with spokeshaves. Most could be done with a flat bottomed spokeshave which I find much easier to use than a round bottomed shave (the latter can change angle easily). The last bits were done with scrapers and sand paper, feeling to detect and spots where the curve wasn’t “fair”.

It’s important to keep the pencil lines visible when shaping. If you go past the pencil lines you’ve gone too far. That’s kind of obvious, but it’s easy to plough on and find that the line has gone.

I hope that all makes sense.
 
Very interesting Nick, thank you. Much better than my attack with a belt sander approach. I just need to find some quater sawn oak now or improve my edge jointing.
 
FYI, Edward Barnsley have an open day this Saturday from 10am to 4pm (https://www.barnsley-furniture.co.uk/2023/02/20/open-saturday-11-march-2023-10-00am-4-00pm/). I'm told there will be cake! Unfortunately I can't be there for the whole day, but I'm going to pop in as my wife wants to see where I've been going for the past few months (cue everyone there to deny having ever met me...).

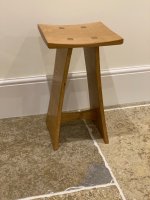
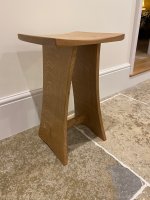
Here's the latest thing I've made there - the "Pagoda" stool. It's made with hand tools except that a kind soul ran the legs through the thicknesser (after I'd flattened one face) to get them close to (but not at) final thickness.

IMG_1901.jpeg

It's fairly challenging to make because of the angled legs and some unforgiving joinery. There is also some shaping involved which requires a bit of care.

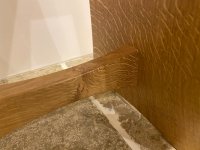
The legs go into housings under the seat. There are no shoulders on the faces of the legs so any gaps would be shown. Therefore, the thickness of the legs where they meet the seat has to be completely uniform. There is a 12mm shoulder on the edges of the legs.

IMG_1906.jpeg

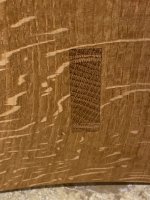
Each leg has two through tenons. They have wedges which helps avoid gaps in one direction, but there is nowhere to hide in the other direction!

IMG_1902.jpeg

The rail also has through tenons although it has a shoulder all around. Again, the tenons are wedged.

IMG_1905.jpeg

IMG_1903.jpeg

The shaping of the top was fun. The curves were marked on each edge. Most of the waste can then be hogged out using a context soled moulding plane going across the grain. The shape is then refined with a spokeshave going with the grain and, finally, sandpaper.

The underside of the seat is largely flat, but the corners are shaped to give it the impression of being curved. There are also diminishing rounds on the four edges of the top of the seat (more rounded in the centre and getting less rounded towards the corners). That also gives an impression of a curve in the other direction.

The curves on the edges and bottoms of the legs, and on the rail, were done with a frame saw/coping saw and spokeshave.

IMG_1904.jpeg

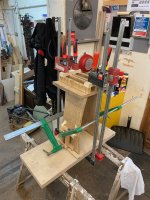
Glue up was done in one go (it's possible to wriggle all the parts together). It was clamped down to a base board (two thicknesses of ply glued together). Urea formaldehyde glue was used to give more working time as there is quite a lot to do to get it "square" and to get all of the wedges in.

IMG_1897.jpeg

Next up is a table lamp. I'm currently making two. Hopefully I'll end up with a matching pair, but I'd probably settle for getting one good one!
 
That really does sound like fun. I am very envious.
 
amazing work nick, I would love the chance to go there one day, look forward to seeing your table lamp, that stool is beautiful.
 
Sadly I've come to the end of my time at EB (although I might go back for more one day...).

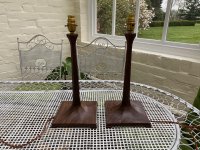
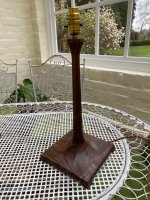
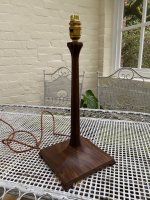
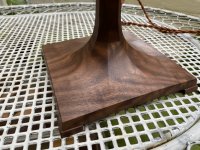
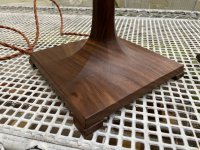
The final project was a pair of table lamps, made from American black walnut in my case.

These are one of the apprentice pieces. I made mine entirely by hand although I'm not sure that machines can save a lot of time on these. Perhaps band sawing the rough shapes could help a bit, but most of the shaping has to be done by hand.

The rough process was as follows.

Do a full size drawing on MDF. Use the drawing to make templates for the shape of the base and stem.

Square up the base and stem pieces.

Saw the stem down its length, plough a groove on both pieces (which makes a hole for the wire) and glue back together.

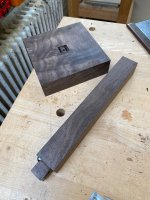
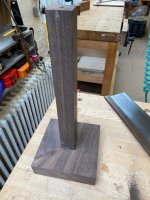
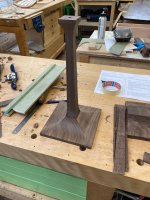
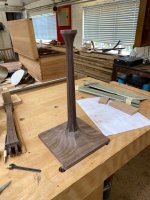
Make a twin mortise and tenon joint (with a haunch in the centre). This gets to this stage:

IMG_1914.jpeg

IMG_1915.jpeg

The hole was drilled first and is for the wire too go through and also to hold a simple jig for marking out later in the process.

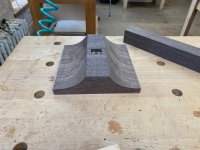
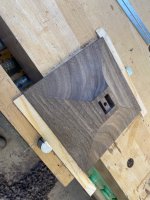
Next, two sides of the base are shaped. The outline can be marked on the ends. The bulk of the wood can be removed using convex moulding planes across the grain and the final shaping is with spokeshaves, scrapers and sandpaper. It's VERY hard on the thumbs and fingers.

IMG_1916.jpeg

Then the other two sides are shaped.

IMG_1919.jpeg

The stem is marked out and cut roughly to shape with a saw (coping saw or frame saw) to remove most of the waste. If the cuts are left incomplete, the sides can be left on to retain pencil marks for subsequent cuts.

More shaping (lots more spokeshaving and checking against the template) leaves a square sided base and stem:

IMG_1921.jpeg

The squares can then be turned into an octagon. Final blending of the transition from stem to base is left until after the stem is glued on:

IMG_1928.jpeg

The edges of the base get bevelled and small bevelled feet are made and glued on. There is also a small square piece which clamps the wire (some gouging is required to allow the wire to exit). A round hole is drilled in the top for a hollow threaded rod onto which the lamp fitting is attached.

Oil...

IMG_1968.jpeg

IMG_1969.jpeg

IMG_1972.jpeg

IMG_1970.jpeg

IMG_1971.jpeg
 
That's a whole lot of cross grain/ end grain shaping which would have been a whole bundle of fun. Walnut is about the perfect choice for that work, though, and you've got a really nice result.
 
Mike G":3gnvuk3z said:
That's a whole lot of cross grain/ end grain shaping which would have been a whole bundle of fun. Walnut is about the perfect choice for that work, though, and you've got a really nice result.

Agreed. It would have been brutal to make one in oak!

I made the mistake of sanding my fingers raw decorating our conservatory so the spokeshaving was tough (as in bleeding hands…).
 
I remember being impressed with a post from Custard about the Barnsley lamp.

I'm just as impressed by your one. The precision of that shaping, where you've got to hit the right spot but go no further, is really lovely.
 
+1 andy I remember asking custard a while back about his lamp, this is beautiful work, seeing the method in this much detail gives us enough of an idea of how to make one, so I just want to say I really appreciate it.
 
Back
Top