Phil
Old Oak
Just to show that I don’t spend all my time fixing tables  , here is a small project.
Flat Pack Trestle
This is what I call a grade 8 level project just within my capabilities. Cant do too much damage. :lol: :lol:
In the very far distant past I welded up 2 trestles to use with a loose board top, fold up and stacked away.
They were made from angle iron and then flat bar on the sides that were drilled with slots to hook onto a protruding bolt. They had 3 slots giving 3 different heights.
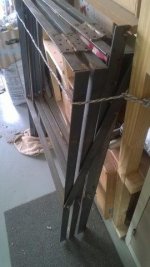
After many years of good use, they became a problem storing in the ‘new’ workshop/garage. They were also heavy and a problem picking them up.
So time to make something lighter and more ‘storable’.
It needs to be noted that these are not sawhorses. I have enough equipment to do that work.
After looking at what was on forums (think Mike) and surfing WWW, I saw some good designs.
Then arrived the Popular Woodworking e-zine with what looked like a very good idea. bscene-drinkingbuddies:
A ‘flat pack trestle’.
This is what it looks like
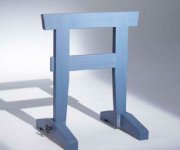

I downloaded the article which gave all dimensions in inches. Not a problem, set up an Excel spreadsheet converting the inches to mm. Rounded the measurements to nearest mm.
First find out what the standard stock sizes are for laminated pine shelving and prices. Mica or Chamberlains, both close by.
2400mm and 3000mm are standard lengths. A width of 305mm would be fine. Thickness of 20mm will work ok.
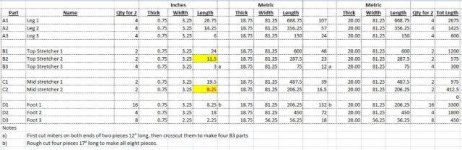
Then loaded up “PJ’s cutlist” program (create a quick Excel sheet).
Cut stock required is 80mm wide. The 305mm would yield 3 by 80mm lengths and 1 by 56mm.
Ripping on the Rockwell (we all know how to do that one)
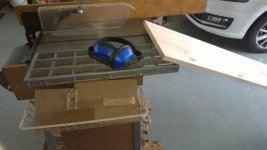
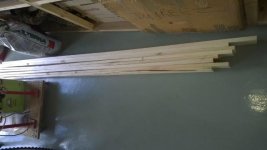
Stock ripped ready for cutting as per list
This is the cut list which had to be juggled eventually after the CUF visit and height of leg changed
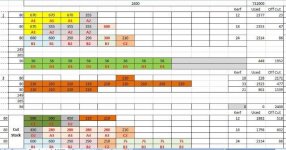
All colour coded
Next step is to optimise the length and divide the components into each length, shuffling around to minimise the offcuts.
The C-U-F (cock up fairy) paid a visit.
When transcribing the measurements for Mid-Stretcher 2, I entered 8.5” instead of 11.5” (A very basic stupid elementary mistake )
)
This resulted in part C2 being too short, Ok, so when I fit it I can add in two bits of offcuts.
Not a train smash.
All the cut stock was marked, pencil, as per the drawings.


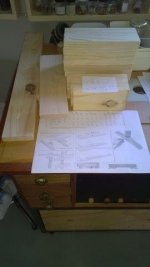
Surveying all the cut stock I took one of the legs A1, stood it upright, and decided that the trestle will be too low! 670mm
As a sawhorse the height would probably have been ok.
So, what would a good height be? 780mm
780mm it is, but ………….. all the stock has been cut to length.
That meant back to cutlist, looking at what had been cut, and what could be re-cut.
Now looking at running out of board.
Fortunately there was a piece of board that I could cut up.
Assembly
This is like painting by numbers.

View attachment 1

First cut off the angle bits on the top stretcher.
The plan shows all the stock glued together. As I was using good old soft-warpy SA pine I thought it prudent to glue & screw.
Screws 4.4x30mm would do the trick. Back to Mica for screws and a new bottle of Gorilla.
A quick screwing template to mark the holes for drilling.
Drill press to drill and cordless for the countersinks.

One upright completed
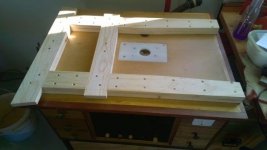
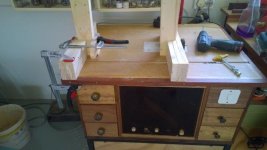
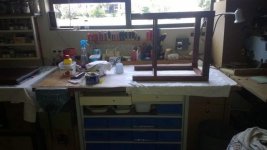
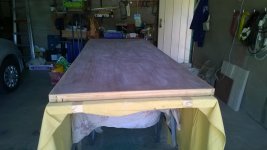
I was using the top of the router table for sanding, gluing and screwing and chucked an old cloth over, easier to catch the dust, glue and cleaning up afterwards.
On the feet, I cut off the top corners.
The screw template was laid out to cater for this.
First foot on RAS. Lower the blade slowly else it jams.
All going like a boeing.
Then a spark!
O, sh-t it Is the one screw too close to the cut off line.
Finish the cut, lots of sparks. Fish the screw out.
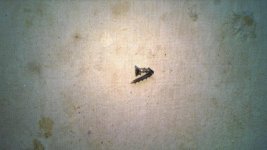
Removed that location screw from all the feet.
Finished trimming, they needed some sanding. So pulled out the belt sander, quick and easy.
However ……… I put the machine down before it had stopped turning. Sh111111tttttttttttt!!!!!!!!!!! :evil:
Bad move.
It gripped the cloth so tight nothing would budge. Took a good half hour of careful cutting, picking and pulling to get it out.
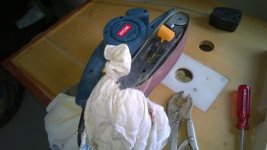
Maybe just finish off by hand, a lot safer.
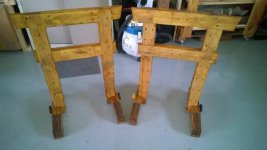
The feet are completed and look ok
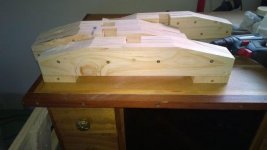
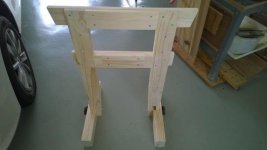
The uprights are fitted.
This is what it should look like ………….

Everything has to be clamped accurately together before drilling the bolt holes.
Refer to PopWood pic on how the feet and uprights are held together.
All parts are stamped with a ‘1’ or a ‘2’ (stand 1 and stand 2)
The legs and feet are stamped “L” or “R”
This is to ensure that the leg fits into the correct foot (slight size variations)
End of part one ...............
, here is a small project.Flat Pack Trestle
This is what I call a grade 8 level project just within my capabilities. Cant do too much damage. :lol: :lol:
In the very far distant past I welded up 2 trestles to use with a loose board top, fold up and stacked away.
They were made from angle iron and then flat bar on the sides that were drilled with slots to hook onto a protruding bolt. They had 3 slots giving 3 different heights.
After many years of good use, they became a problem storing in the ‘new’ workshop/garage. They were also heavy and a problem picking them up.
So time to make something lighter and more ‘storable’.
It needs to be noted that these are not sawhorses. I have enough equipment to do that work.
After looking at what was on forums (think Mike) and surfing WWW, I saw some good designs.
Then arrived the Popular Woodworking e-zine with what looked like a very good idea.
bscene-drinkingbuddies: A ‘flat pack trestle’.
This is what it looks like
I downloaded the article which gave all dimensions in inches. Not a problem, set up an Excel spreadsheet converting the inches to mm. Rounded the measurements to nearest mm.
First find out what the standard stock sizes are for laminated pine shelving and prices. Mica or Chamberlains, both close by.
2400mm and 3000mm are standard lengths. A width of 305mm would be fine. Thickness of 20mm will work ok.
Then loaded up “PJ’s cutlist” program (create a quick Excel sheet).
Cut stock required is 80mm wide. The 305mm would yield 3 by 80mm lengths and 1 by 56mm.
Ripping on the Rockwell (we all know how to do that one)
Stock ripped ready for cutting as per list
This is the cut list which had to be juggled eventually after the CUF visit and height of leg changed
All colour coded
Next step is to optimise the length and divide the components into each length, shuffling around to minimise the offcuts.
The C-U-F (cock up fairy) paid a visit.
When transcribing the measurements for Mid-Stretcher 2, I entered 8.5” instead of 11.5” (A very basic stupid elementary mistake
)This resulted in part C2 being too short, Ok, so when I fit it I can add in two bits of offcuts.
Not a train smash.
All the cut stock was marked, pencil, as per the drawings.
Surveying all the cut stock I took one of the legs A1, stood it upright, and decided that the trestle will be too low! 670mm
As a sawhorse the height would probably have been ok.
So, what would a good height be? 780mm
780mm it is, but ………….. all the stock has been cut to length.
That meant back to cutlist, looking at what had been cut, and what could be re-cut.
Now looking at running out of board.
Fortunately there was a piece of board that I could cut up.
Assembly
This is like painting by numbers.
View attachment 1
First cut off the angle bits on the top stretcher.
The plan shows all the stock glued together. As I was using good old soft-warpy SA pine I thought it prudent to glue & screw.
Screws 4.4x30mm would do the trick. Back to Mica for screws and a new bottle of Gorilla.
A quick screwing template to mark the holes for drilling.
Drill press to drill and cordless for the countersinks.
One upright completed
I was using the top of the router table for sanding, gluing and screwing and chucked an old cloth over, easier to catch the dust, glue and cleaning up afterwards.
On the feet, I cut off the top corners.
The screw template was laid out to cater for this.
First foot on RAS. Lower the blade slowly else it jams.
All going like a boeing.
Then a spark!
O, sh-t it Is the one screw too close to the cut off line.
Finish the cut, lots of sparks. Fish the screw out.
Removed that location screw from all the feet.
Finished trimming, they needed some sanding. So pulled out the belt sander, quick and easy.
However ……… I put the machine down before it had stopped turning. Sh111111tttttttttttt!!!!!!!!!!! :evil:
Bad move.
It gripped the cloth so tight nothing would budge. Took a good half hour of careful cutting, picking and pulling to get it out.
Maybe just finish off by hand, a lot safer.
The feet are completed and look ok
The uprights are fitted.
This is what it should look like ………….
Everything has to be clamped accurately together before drilling the bolt holes.
Refer to PopWood pic on how the feet and uprights are held together.
All parts are stamped with a ‘1’ or a ‘2’ (stand 1 and stand 2)
The legs and feet are stamped “L” or “R”
This is to ensure that the leg fits into the correct foot (slight size variations)
End of part one ...............