Dr.Al
Old Oak
If you're not at all interested in 3D printing, now might be a time to go and read a different thread. However, I thought some might be interested in how the transition between manufacturers goes for me.
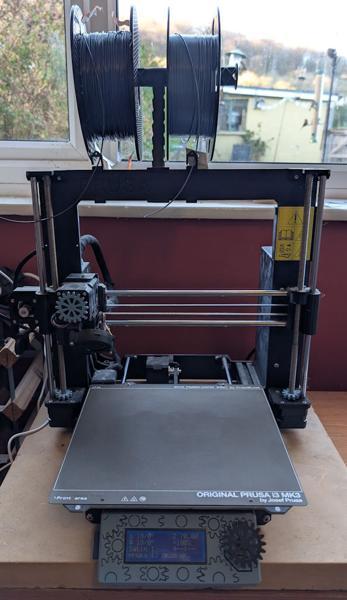
As anyone who has followed any of my build write-ups will have realised, I get a lot of use out of my 3D printer (5300 hours of printing time so far according to the statistics screen). It still astonishes me how many different things become just a little bit easier because I can quickly design and 3D-print a little widget / jig / wall mount / marking gauge or whatever. I've had the 3D printer for a few years now and I've been thinking for a while about upgrading to a newer / better one. I few months ago I mentioned this to my other half and she said "well, you can certainly justify it given how much you use it". I'm not sure I can really justify it, but not wanting to argue, I nevertheless decided to buy a new one when the Black Friday sales came round.
The essential things I was looking for in a new printer were (in rough order of priority):
A few nice-to-haves but non-essentials I was hoping for were:
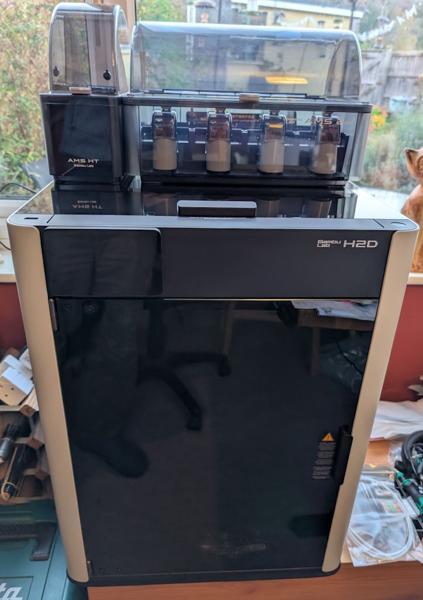
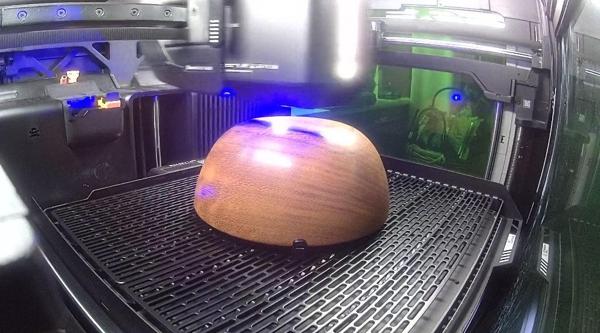
After a lot of wavering back and forth between the Prusa line-up and the Bambu one, I settled on this rather expensive beast:
I definitely had a strong leaning towards Prusa as I like the fact they're made in Europe, that their support is second-to-none (even long after warranties have expired) and that they provide upgrade paths to convert an older printer into a newer one. I came very close to opting for the Prusa Core One or Core L (either which would have been a lot cheaper than the H2D!) and if the overall size of the Prusa Core XL had been just a little bit smaller overall I think it would have won the battle. However, this machine is quite a bit more capable in a lot of ways than the Core One and (with the exception of the build area) the Core XL.
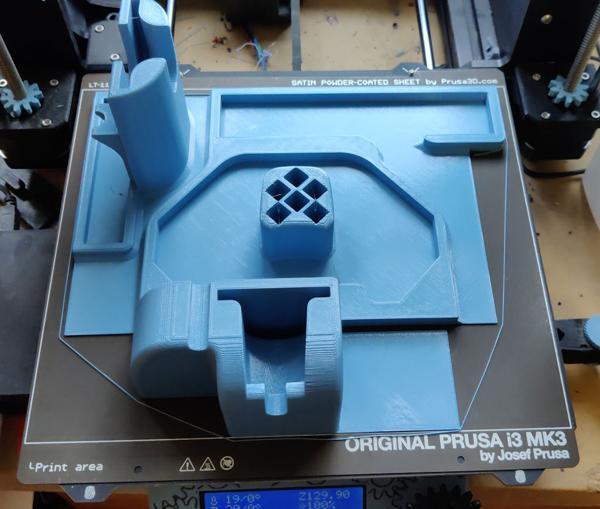
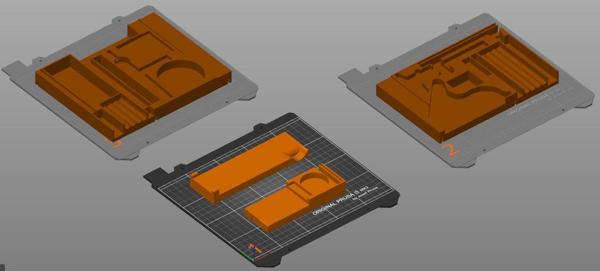
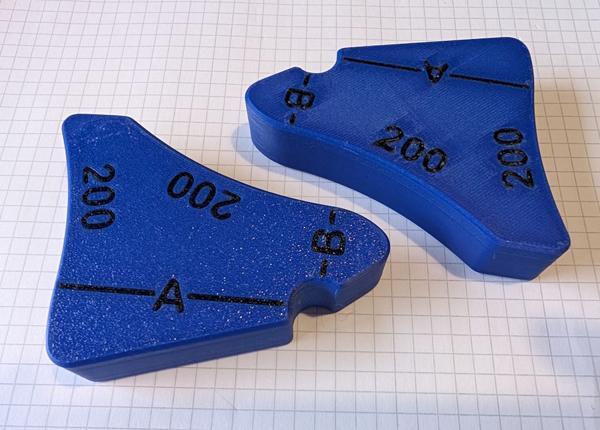
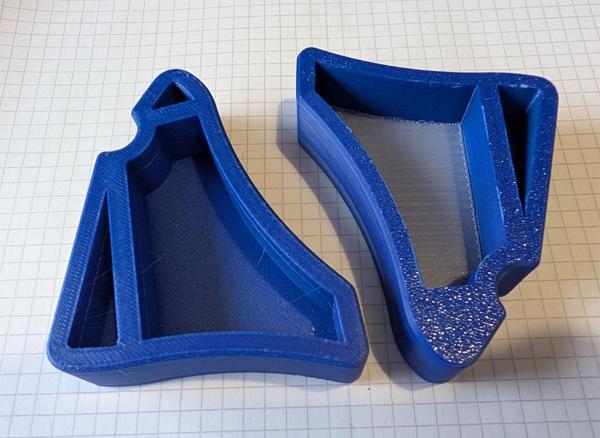
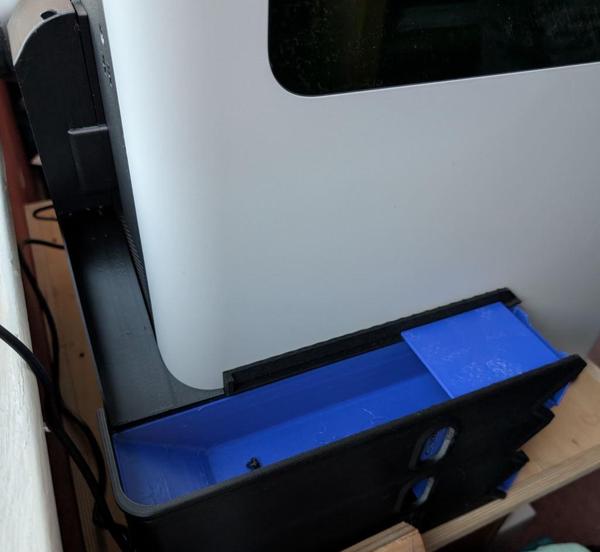
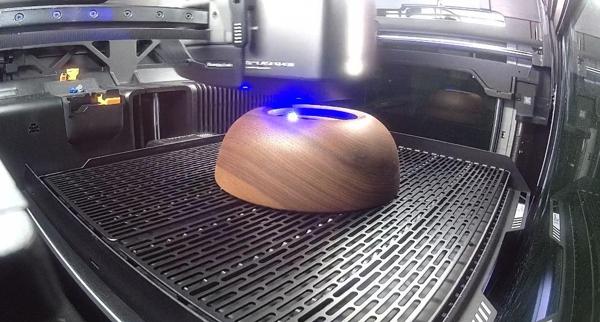
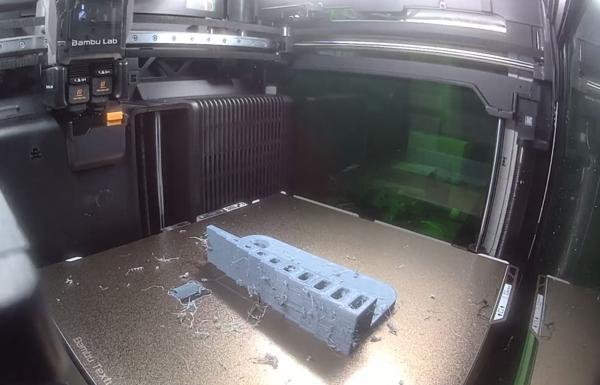
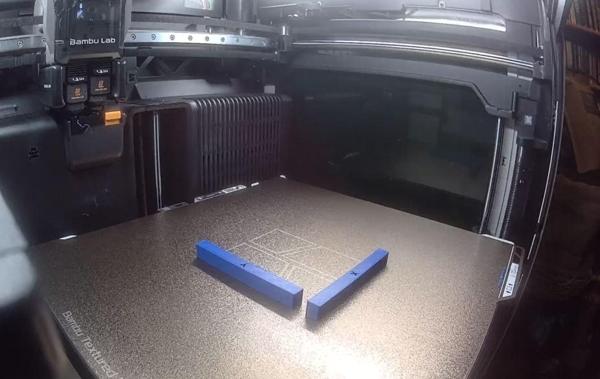
An example of the benefit to me of the bigger build area is the drawer liners for my travel tool chest. This is what a print would look like sliced for the Prusa (spread over three separate prints):
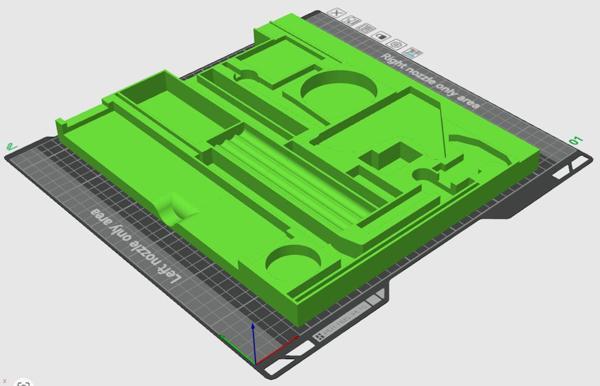
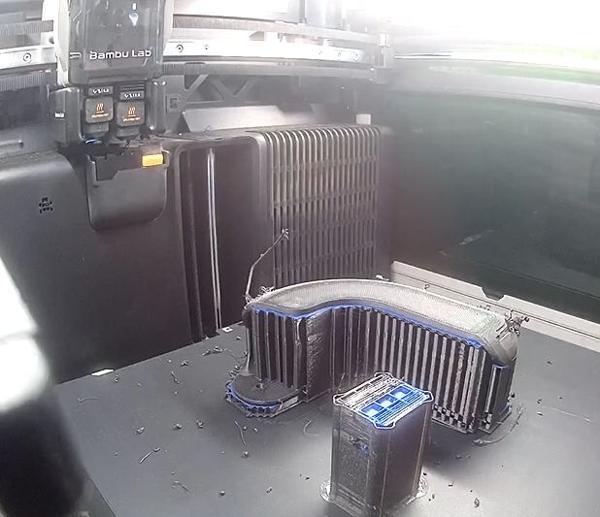
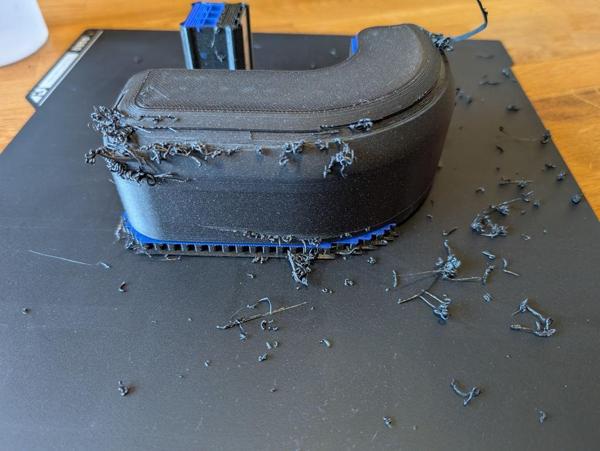
Here it is on the H2D:
Of those ten criteria above, the only one it doesn't really meet is the multiple extruders one, despite having multiple extruders! It has two extruders (which will be useful for support material or mixed TPU/PETG prints), but it doesn't support having different nozzle sizes on the two extruders. Hopefully that will be resolved with a firmware update at some point in the future, but there are no guarantees.
It's early days yet, but there are a few negatives I've found so far.
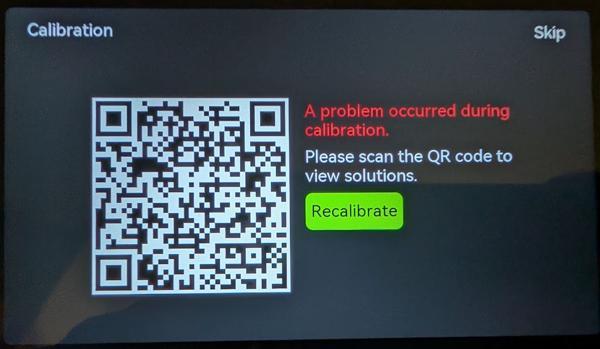
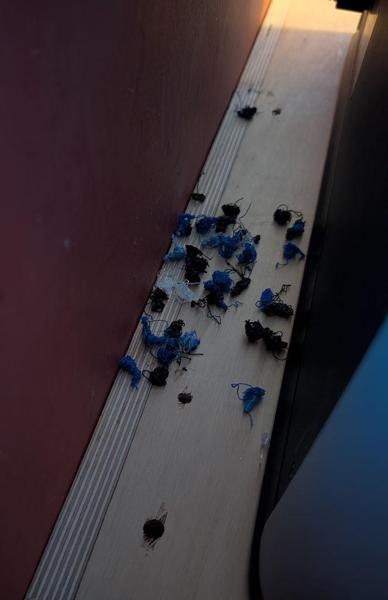
The first was a disappointing set-up "experience". I carefully followed the un-boxing instructions in the booklet that came with the printer, but neither it (nor the un-boxing video on their website) mentioned one little bit of foam tucked away at the back of the printer behind the nozzles. I didn't notice it (it was only visible from some angles) and it resulted in the initial calibration failing. The error message was just a generic "calibration failed" one with a QR code that took you to a generic web page with no information about that error. I tried contacting support but got a message saying the response would take 2-3 days so I tried deciphering the QR code and doing a web search for the error code embedded in the URL (the error code disappears when you follow the link as it forwards you to another page, but you can find it with a barcode scanner). That brought up a forum where someone was having nozzle problems, so I had a look around the nozzle area and found the foam.
When I had problems with the Prusa printer, I used the live chat on their website (which is available 24/7) and got help almost immediately.
More to follow...
As anyone who has followed any of my build write-ups will have realised, I get a lot of use out of my 3D printer (5300 hours of printing time so far according to the statistics screen). It still astonishes me how many different things become just a little bit easier because I can quickly design and 3D-print a little widget / jig / wall mount / marking gauge or whatever. I've had the 3D printer for a few years now and I've been thinking for a while about upgrading to a newer / better one. I few months ago I mentioned this to my other half and she said "well, you can certainly justify it given how much you use it". I'm not sure I can really justify it, but not wanting to argue, I nevertheless decided to buy a new one when the Black Friday sales came round.
The essential things I was looking for in a new printer were (in rough order of priority):
- Bigger print area. I'm deliberately saying "area" rather than "volume" as I regularly hit the XY size limit of the printer (and have to print parts in multiple pieces) whereas I don't think I've ever hit the Z size limit of the printer.
- Not too much bigger overall printer size. The printer lives in the dining room and there isn't that much room for a substantially bigger printer (in particular, the Prusa Core XL is far too deep for the space available).
- Faster print speed. Newer generation printers seem to run a lot quicker than the older ones (according to some CAD models I tried in Prusaslicer, the Core One is about twice the speed of my Mk3s+ - I generally trust the Prusaslicer time predictions so this seems a fair comparison).
- Automatic first layer calibration. First layer calibration isn't something that has to be done often: mainly when changing nozzles, but it's tedious and time consuming (to the point that I avoid changing nozzles unless absolutely necessary) and it would be great to never have to worry about it again. A lot of the newer printers do first layer calibration automatically, so I considered that an essential requirement.
- An enclosure and extractor fan to make it practical to print some more exotic materials like ABS/ASA. This could be retrofitted onto any printer (including my current one), but an integrated one tends to mean a smaller overall size. The enclosure shouldn't have any negative effect on printing PETG (i.e. I still want to be able to do this with the enclosure's door shut).
- The slicer must support STEP files (most do) as I really don't want to go back to the dark ages of STL files.
A few nice-to-haves but non-essentials I was hoping for were:
- Automatic filament changing. This provides two main features: multi-colour printing (mainly for labels on the top of a part) and also ideally for dealing with the end of a roll of filament (i.e. just switch to the next roll of the same filament when one runs out rather than waiting for me to come and manually swap). There have been a few times when I've left a print running overnight expecting it to be finished in the morning but when I've come downstairs I've found it still had several hours to go as it had run out of filament.
- The ability to print more easily removable supports of some sort (either PVA or some type of transition filament). I do my best to avoid supports whenever possible, but being able to use easily removable supports would offer some more design freedom.
- Built-in network support would be nice (to save the faff involved with setting up a Raspberry Pi with Octoprint). No big deal if not though as Octopi works well.
- Multiple extruders, especially if they can be used with different nozzles sizes (e.g. print most of the object with a 0.4 mm nozzle and then add a layer of embossed text with a 0.2 mm nozzle and a different colour filament).
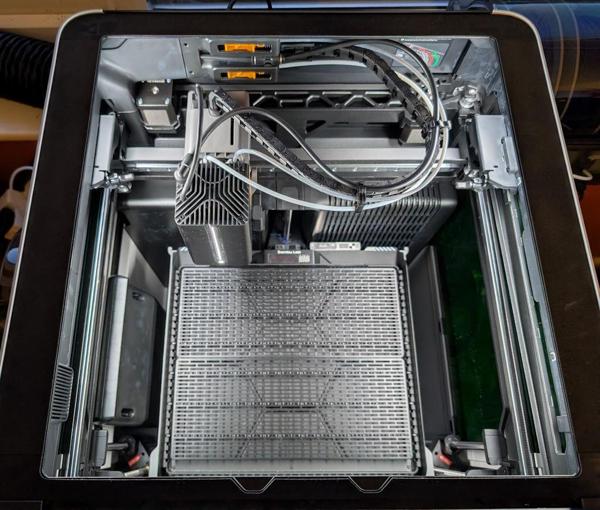
After a lot of wavering back and forth between the Prusa line-up and the Bambu one, I settled on this rather expensive beast:
I definitely had a strong leaning towards Prusa as I like the fact they're made in Europe, that their support is second-to-none (even long after warranties have expired) and that they provide upgrade paths to convert an older printer into a newer one. I came very close to opting for the Prusa Core One or Core L (either which would have been a lot cheaper than the H2D!) and if the overall size of the Prusa Core XL had been just a little bit smaller overall I think it would have won the battle. However, this machine is quite a bit more capable in a lot of ways than the Core One and (with the exception of the build area) the Core XL.
An example of the benefit to me of the bigger build area is the drawer liners for my travel tool chest. This is what a print would look like sliced for the Prusa (spread over three separate prints):
Here it is on the H2D:
Of those ten criteria above, the only one it doesn't really meet is the multiple extruders one, despite having multiple extruders! It has two extruders (which will be useful for support material or mixed TPU/PETG prints), but it doesn't support having different nozzle sizes on the two extruders. Hopefully that will be resolved with a firmware update at some point in the future, but there are no guarantees.
It's early days yet, but there are a few negatives I've found so far.
The first was a disappointing set-up "experience". I carefully followed the un-boxing instructions in the booklet that came with the printer, but neither it (nor the un-boxing video on their website) mentioned one little bit of foam tucked away at the back of the printer behind the nozzles. I didn't notice it (it was only visible from some angles) and it resulted in the initial calibration failing. The error message was just a generic "calibration failed" one with a QR code that took you to a generic web page with no information about that error. I tried contacting support but got a message saying the response would take 2-3 days so I tried deciphering the QR code and doing a web search for the error code embedded in the URL (the error code disappears when you follow the link as it forwards you to another page, but you can find it with a barcode scanner). That brought up a forum where someone was having nozzle problems, so I had a look around the nozzle area and found the foam.
When I had problems with the Prusa printer, I used the live chat on their website (which is available 24/7) and got help almost immediately.
More to follow...


") My wife didn't ask how much so I forgot to tell her....shush
My wife didn't ask how much so I forgot to tell her....shush 