• Hi all and welcome to TheWoodHaven2 brought into the 21st Century, kicking and screaming! We all have Alasdair to thank for the vast bulk of the heavy lifting to get us here, no more so than me because he's taken away a huge burden of responsibility from my shoulders and brought us to this new shiny home, with all your previous content (hopefully) still intact! Please peruse and feed back. There is still plenty to do, like changing the colour scheme, adding the banner graphic, tweaking the odd setting here and there so I have added a new thread in the 'Technical Issues, Bugs and Feature Requests' forum for you to add any issues you find, any missing settings or just anything you'd like to see added/removed from the feature set that Xenforo offers. We will get to everything over the coming weeks so please be patient, but add anything at all to the thread I mention above and we promise to get to them over the next few days/weeks/months. In the meantime, please enjoy!

Green Oak frame Orangerie Conservatory WIP (very pic heavy)

Alex

Seedling
Joined
Jan 9, 2015
Messages
44
Reaction score
1
This is on my own house. I started this project back in 2011, doing the foundation and floor slab. Same time I installed the piping for the underfloor heating. Other financial commitments got in the way until August 2013 when I was in position to continue. Should be noted that I've never build or design any green oak beam structure before so this whole build was a first. I designed and build this on my own, all down to loads of reading. So if parts seem unorthodox its down to my inexperience and I would love to hear different ways of doing it. So please feel free to share good or bad.
P.S I'm not particularly interested in building or planning permission debates though.
I'm going to post this as a WIP if no one minds as hoping to get feed back on method used.

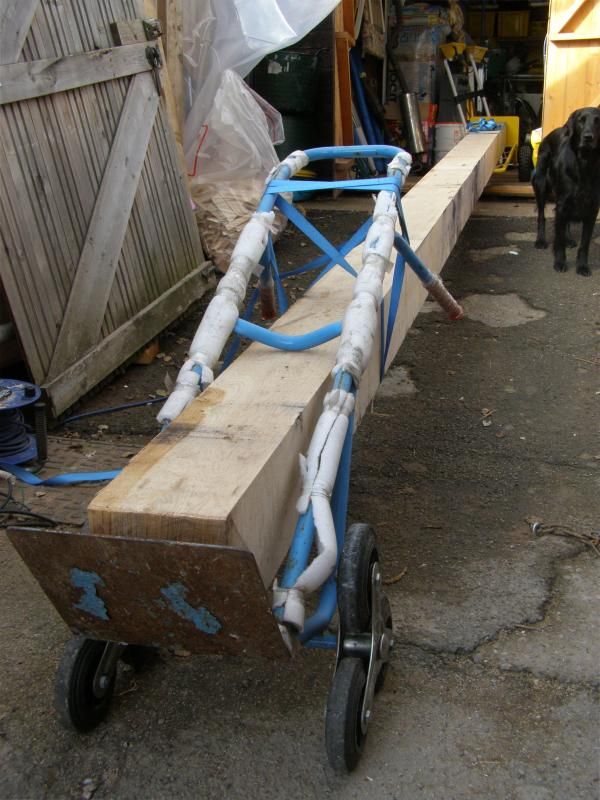
First picture is putting up a temporary covered structure to protect oak while I build.
002%202_zpsmsoknl0h.jpg


072%202_zpserm7rcg5.jpg


071%202_zpsubqwl57m.jpg


Access down side of house.
073%202_zpse73ohiph.jpg
 
Ah good pictures are showing.

First job was to fit some catnic lintels for outer skin brick work over window and sliding door. Needed to do this as wont have access once frame is up.
004%207_zps4znazqjo.jpg


L shaped steel catnic lintel.
007%206_zpsz1ioxhnm.jpg


Brickwork done. Note supporting wedges to support lintel while mortar sets. Not best practice using frame for this but old windows are coming out.
014%204_zpsgcmsekfd.jpg


Next was brick and blocking some solid dwarf walls. Needed to be solid as support oak sill. Note S/steel threaded bar between brick and block which was cast into foundation, to tie oak frame down.
012%204_zpsqi3xjx8g.jpg


Cast bit concrete on top of last block to give nice level bed for oak frame.
055_zpsuj1zvsoi.jpg


They're here!!! The green oak beams. I ordered my oak from a local saw mill, who get it from somewhere in France. It was delivered to me on a flat bed truck with just the driver and I to off load. No crane on truck! Nearly all the oak is 8”x8” sections so very heavy, 10' weighs in around 100kg mark. The 10' we hand balled of truck but 20' I made scaffold board ramps with tyres at bottom. We just rolled them off truck letting them fly down the scaffold boards with the tyres acting as buffer brakes at bottom. Worked surprisingly well, unloaded truck in 45min. Now the job getting round the back to enclosure.
007_zpsosdkouen.jpg
[/url]

010_zpslhjaklba.jpg


009_zpsogtyo0r7.jpg


005_zpsea8wlpfk.jpg


Now you some method to my temporary structure madness, I plan to use heavy 7x2” to hang my chain hoist to manouver these heavy oak beams alone.

071_zpsrc4dj5ca.jpg


Last few got caught out with afternoon rain shower.

075_zpsktqn6mrd.jpg
 
Thanks Guys. Been reading both your posts very interesting stuff. Doesnt seem five minutes ago that I was busy with my workshop build. Anyway I'll get on with posting.
Framing building time. After hand chopping my first 2”x8” mortice with mallet and chisel Id had enough with hand tool experience. Bought an old near new chain morticer on ebay, had to go down to Wales to fetch. Its an industrial Ryobi thing that flies through the oak. Think the chain is 16mm wide by about 50mm chomp in one plunge. Its got a lever with a set of stops to set length of mortice and windy handle to move bar across for width. Surprisingly easy to be accurate with it. Can highly recommend one.

103_zpsv36esvnc.jpg


104_zpse676dwby.jpg


102_zps3xnfggas.jpg


Chain morticer for mortices and festool ts55 plunge saw and rail used for tenons. Also some hand tools.
078%202_zpsqxum1pfs.jpg


074%202_zpst9yyvn75.jpg


082%202_zpsw9pwylfz.jpg


“No what just chilling.” Her name is Indiana.

112_zpsclevtg87.jpg


Hope not boring you lot.
 
That chain morticer looks the bussiness, glad to see it is well guarded.
Do the dogs like to watch you work? Iona our samoyed likes to be at the front to see what I am doing!
 
Thanks Bob. Good to find you here.

After getting base plate down I set two 6m beams on trestles to make long bench to mark and cut all post joinery. You can also 18mm ply I fixed to all walls to space out posts for plasterboard to tuck behind.
What i should have done was plastered all walls before frame raised.

079%202_zps9boagvrn.jpg


012_zpslgyuvcti.jpg


Time to make braces. Made template traced onto 8”x3” oak. Band saw to shape then used festool ts55 plunge saw again to do tenons.
001%203_zpsh53zp6fn.jpg


002%204_zpsqqnt6dtv.jpg


015_zpsuml8hqwn.jpg


Really getting into swing of making these when they where done. 10 Braces in total.

084_zpsqu9cryes.jpg


At this stage I was getting quite frustrated at how slow my progress was. Most of the books and info you read the guys speak of knocking frame together in a week. Took my brother reminding me this was my dream job/once in life time job and to take my time and enjoy it. Who knew he had brain. ;) Suppose that's a bit harsh. He's the rock star in family.

Onward. After cut mortice for braces I routed out housing for brace shoulder to sit in so if brace moves you don't see gap. The clamps set limits for router.

009%203_zpsv6ss6aop.jpg


003%205_zpsvkedbjka.jpg


002%205_zpsgjqqspiq.jpg


008%203_zpszehsolun.jpg
 
Thanks Mark and Dave.
I forgot to mention under sills and any timber junction with outside air I placed this expanding foam tape to keep out drafts.
 
Hope no one minds but I'm posting this on two different forums as there are contributors on both that I'd like to share this with. Hope your all enjoying, love to hear your thoughts on it so far.

Ring beam to Corner post joints these where fun. Not really a traditional oak frame with level ring beam atop posts. This ones for back corner posts.

004%208_zpsrqsfnjp0.jpg


006%203_zps53rcjsht.jpg


005%208_zpsq6zxokd6.jpg


Don't seem to have pics of half lap with mortice through it joint for front corners. Just going to have to wait for frame raising pics for that.

Frame cleaning time while parts are horizontal. I choose to belt sand removing black marks but leaving some mill.
003%205_zpsvkedbjka.jpg


006%205_zpssxxkm9ww.jpg


Clean parts stacking up.

004%205_zpszliyoolv.jpg


Had to cover up clean posts as temporary cover was raining condensation. Damn that not suppose to happen.

086_zpst9piyzvn.jpg
 
Yep loving this Alex. I bought a few books on oak framing with a plan to build my new workshop that way but changed my mind. Still want to do an oak framed 'something' though, just need to work out what! ;)

Cheers
Mark
 
Hi Alex - welcome to the forum n all that stuff. 8-)

I've popped in because I love a bit of green oak work! I've only done a little bit of it myself and if I was starting out again, it's certainly a route I would feel passionate in taking. It's such a fabulous structural craft and one of the oldest to mankind - absolutely wonderful. It looks like you're doing a cracking job there and I'm looking forward to seeing this WIP blossom to the final result.

:text-bravo:
 
Looking good , is that a homemade mft you have there ?

I used one of those chain mortisers years ago on a big job up town. I had a 100+ doors to fit locks to. "Boring" that was lol I always thought it was doing to smash the doors up as it was so rough but I cut them fine.

Chris
 
Thanks chaps. Its all good.
Yeah Chris it is mft hybrid. Its heart of my little shop, probably my most succesful jig. Hey I'm man enough to admit most dont live up to expectations. :oops: Don't know if my chain mortisers clamping goes down to door width. Know you can buy extenders to do bigger beams and wider chains.
Hey Pinch. Good to see you here. There was times when others question wether i wasn't building an ark, seeing size beams been delivered here.
 
Thee day has finally arrived. Wahoo. Frame raising time. Brothers round to help.

First job of the day was to get front 6m beam hoisted high enough to fit all front vertical posts in then lower it onto post tenons.

003%204_zps4geoouqn.jpg


005%204_zpsknsemvmn.jpg


010%203_zpswpkcb8gv.jpg


011%203_zpsfx0czdfd.jpg
 
That is really taking shape, I don't have any brothers but call on large son when extra help is needed.
 
Hi AndyP. Yes I did some rough scale drawrings and built a little model of the frame to see proportions.

Hi DaveL. Think we've met. Aren't you the clog guy I met at Steve Marsky event few years back, I bought a stanley no5 from you. It's still my best plane. Yeah my eldest is 15 so just getting helpful.
 
More pics. I love all your WIPS with pics so I'm loading loads. I'm slowly making my way through everyone's excellent posts.

016%202_zpseti3hwkp.jpg


1st peg going in. This is locking front beam to post.

022%202_zpsk9dtqbhe.jpg


015%203_zpsr6z3jead.jpg


Back wall 6m beam going up.

014%203_zpsn09s6coj.jpg


Now you get to see where that ring beam dovetail joint comes in. I coated all the joints in danish oil to slow drying and help everything go together.

019%202_zpsv9qlhma2.jpg


031_zps1dywh4kd.jpg


032_zpsskfgct6w.jpg


One of my favorite pics.In case anyones wondering frame went up in a day.

028%202_zps2xyawhob.jpg


026%202_zpsdtkykmjq.jpg
 
Alex":2zi4bw7n said:
Hi AndyP. Yes I did some rough scale drawrings and built a little model of the frame to see proportions.

Hi DaveL. Think we've met. Aren't you the clog guy I met at Steve Marsky event few years back, I bought a stanley no5 from you. It's still my best plane. Yeah my eldest is 15 so just getting helpful.
The clog guy describes me quite nicely. [emoji3] I did go to Steve bash. I don't think I sold a no5, I have still got my one.
Extra weetabix for large son is the way to go.
 
Alex said:
More pics. I love all your WIPS with pics so I'm loading loads. I'm slowly making my way through everyone's excellent posts.

016%202_zpseti3hwkp.jpg


I'm so glad you showed this joint!! I've always wondered how this corner joint is done.

Did you use any particular books for reference when researching? Or DVDs? Courses? Or just online?
 
Alex, I'm learning lots on this project post - Thanks.

One question, is there a reason for the two different joint on the upper horizontals - The dovetail arrangement at the house end and the more straightforward joint at the outer end.

This might be obvious but currently escapes me.

Cheers

Bob
 
Excellent thread :)

Given the size of these lumps of wood did you just measure these joints carefully to know they go together or have you been man handling them about to test fit every join?
 
Thanks chaps.

Mick and Bob. In the planning stages i searched high and low for an example of a level sort of ring beam design in traditional frame but came up empty handed. So my corner joint probably isn't best joint for this. I'm my own worst critique really, drives wife nuts as always redoing things. Traditionally dovetail joint is generally used to join floor joists to outer frame to hold structure from spreading as well. Seem to fit the bill to keep ringbeam together. In hindsight i think the dovetail joint was far better choice for both.
I've knocked up quick,please excuse bad sketch of they way I'd better that front post joint. Hope its clear what I mean, just ask if not. And Please I'd love to hear if there's a better way to do this. I live to learn.

IMG_20150127_124149_zpsgqck2ayd.jpg

IMG_20150127_124159_zpsar2ozvpo.jpg
 
Robert. I cut most of the tenons first then when two main beams horizontal i basically traced them on where mortices needed to go. Mortices where made a bit small then each tenon i shaved to a good fit and numbered the puzzle. On the big stuff it was case of only really finding out on frame raising day. I didn't leave beams to long after cutting before raising frame. Most joints went together with a gentle Persuasion from my 8lb sledge and block of wood.
 
Excellent stuff. Fancy, this little forum is soon going to have 2 substantial green oak WIPs going on at the same time. I was intrigued by the idea of putting Danish oil onto the cut faces of the joint. Having done lots of green oak work over the years, I'm not really sure what you are hoping to gain. Is this just to keep the joint the same size whilst the timbers are stacked prior to assembly?

The other thing I would comment on is housing out for the ends of the braces. This is a high-class detail, which I don't normally see even on high status houses, but I have seen a number of times on church woodwork. You might see it on a lych gate now and then.

The huge, huge deal with green oak work is obviously shrinkage. With a conservatory, this is likely to be quite extreme, as they can get very hot very quickly. How do you propose glazing this, in such a way as to remain weather-tight whatever the shrinkage?
 
Hi Mike. I've been working my way through your epic WIPS, your a legend mate. It's hard enough creating something from scratch but to work with old wrotting huge beams in situ can't wait to see how its done.

Yip you hit nail on head the oil mix was to slow drying on fresh cut joints while they wait frame raising day.

Ah now all will be revealed soon on how I planned for the extreme's but hey with green oak only time will tell.
 
Now the roof is what differentiates it between a normal conservatory and Orangerie. Or so I've heard.;-)

First up I need to deal with two extractor outlets, kitchen and bathroom. Thank goodness for a good cavity wall.

002%203_zpsii3lifbb.jpg


003%202_zps58xzszsa.jpg


Not clear on any of pics but I fitted 180mm strips of 18mm ply to top off ring beam and as up rights against wall. This was to space roof / ceiling joists up to tuck ceiling boards over top beam and not have plaster crack as beams dried.

For the roof lantern opening I construct structural ply box lintel, 100x400mm. Not got any construction pics unfortunately.

092_zpsuqafsv3c.jpg


090_zpsdnzd9mpj.jpg


013%202_zps2fqo7xma.jpg


Big part of my design choice was to try and make a conservatory that doesn't suffer big temperature swings As this is a west facing structure. To do this I've reduced total amount of sun and insulated. This includes having a large over hang, 600mm which gives good weather protection on outside for the oak. Internally it'll have a 600mm ceiling surrounding roof lantern.

097%202_zpsixyubdcc.jpg


Roof boarded with 12mm osb. I also fitted the tall fascia boards that boxed in the 3” Celotex insulation. 18mm ply cover over insulation and the Epdm rubber roof covering.

098%202_zpsa4c2weti.jpg


096%202_zpsnjm4rcb5.jpg


004%202_zpstfe1wotz.jpg
 
Alex":29m3v6xs said:
Roof boarded with 12mm osb. I also fitted the tall fascia boards that boxed in the 3” Celotex insulation. 18mm ply cover over insulation and the Epdm rubber roof covering.

Quick Alex, get the laying of the EPDM roof up in huge amounts of detail. On the brink of putting one down myself and can do with all the tips I can get! :eusa-pray:

Terry.
 
Wizard9999":28nfa6hu said:
Quick Alex, get the laying of the EPDM roof up in huge amounts of detail. On the brink of putting one down myself and can do with all the tips I can get! :eusa-pray:

Terry.

Don't get my father to help you is my top tip :twisted: I did an EPDM shed roof with contact adhesive - turned out he wasn't prepared for the 'contact' part of that, and I now have one side of my shed looking as wrinked as an elephants scrotum :shock:

Seriously, unless you have to use contact adhesive, go for the water based one. I used diy-epdm.co.uk to order mine - happy with the service and no affiliation. Was about the cheapest source I could identify online.

Steve
 
Alex, why the 4 holes in the beam above the brace in the corner ( the one above the stacked chairs )? Seeing the quality and precision you have achieved up to now I cant believe you put them in the wrong place.
 
Back
Top