• Hi all and welcome to TheWoodHaven2 brought into the 21st Century, kicking and screaming! We all have Alasdair to thank for the vast bulk of the heavy lifting to get us here, no more so than me because he's taken away a huge burden of responsibility from my shoulders and brought us to this new shiny home, with all your previous content (hopefully) still intact! Please peruse and feed back. There is still plenty to do, like changing the colour scheme, adding the banner graphic, tweaking the odd setting here and there so I have added a new thread in the 'Technical Issues, Bugs and Feature Requests' forum for you to add any issues you find, any missing settings or just anything you'd like to see added/removed from the feature set that Xenforo offers. We will get to everything over the coming weeks so please be patient, but add anything at all to the thread I mention above and we promise to get to them over the next few days/weeks/months. In the meantime, please enjoy!

Hinge fitting

Windows

Old Oak
Joined
Jan 25, 2022
Messages
1,074
Reaction score
177
Location
Cumbria & West Kent
I’ve fitted two butt hinges to a casement I’ve built. The casement is in landscape orientation with hinges on the left so inaccuracies & weaknesses are obvious because of the distance from the far side to the hinges. The bottom of the casement rubs & hits the liner when it shouldn’t.

There are several potential causes:
1. Axis of both hinges not vertical
2. Hinges too weak
3. Casement not square/twisting
4. Liner not square/twisting
I think there are contributions from all (corners of liner and casement are square, but there is some twist over the whole).

I’m going to replace the hinges with better ones which should address any weakness in the hinge. Twist from the liner should come out when installed in its final position (I’m currently working on liner & casement on the bench). I’m going to ignore the twist in the casement itself and assume that fixing the other three issues should be sufficient.

So the question is about installing two hinges reliably. I’ve watched many videos so I understand the essence of what to do. But between marking, chiselling, screwing etc. there’s room for small errors to add up to a small angle which consumes my small gap between casement & liner. (I do have some leeway to increase the gaps or “scribe” the casement, but would prefer not to).

What’s a good way of ensuring & checking that I have the hinges accurately placed before I drill the screw holes? Is it common to have to fill and redrill the holes for hinges during fitting or do you get a good fit first time every time?

There’s rather a dearth of videos showing the installation of two hinges to both sides of the object, so all advice welcome.
 
I'm not sure where to start but a few questions before we get any further
1. What is the size of the casement?
2. Is it glazed if so single, double, triple glazed.
3. When you say there is twist in both the frame and the casement, how much and is it in the same plane or opposite?
4. what hinges have you used and what are you replacing them with?
5. Have you fitted the casement with a nice even 2mm gap all around?
6. Are you using seals?
7. Is the opening that the frame is going in about to cause further issues. Does your frame fit when allowing for truing the frame up vertically (both directions) and horizontally?
It is not unusual for the initial hanging to bind but what you do about it is where a lot of experience comes in. So some photos will help.
 
Thanks for thinking about this.

1. Casement is about 1010 x 560 mm. (44mm)
2. Not yet glazed. Will be single glazed.
3. Having looked closer at this, almost all twist is in the frame. The bottom of the frame is twisting so that the rear right of that piece is higher than it should be. This tips the right vertical forward slightly.
4. Original hinges are random brass (or “brass”) butt hinges 75 x 50 mm. Not sure of thickness; less than 1.5mm. New hinges are 76 x 51 mm x 1.9 mm https://www.screwfix.com/p/smith-lo...-ball-bearing-hinges-76mm-x-51mm-2-pack/5486k
5. The gap is far from consistent with the first set of hinges attached - disappears at bottom right. It’s about 3mm without hinges.
6. No seals
7. Casement fits in frame even without taking out the twist. I’m expecting the opening to constrain the frame in such a way to remove (some of?) the twist. Expecting some wrestling, but seems doable with a couple of screws; frame is softwood. (This is secondary glazing going into deep recess in front of existing window. That recess is almost square).

Since sending my first message, I took another look. I tried whacking the hinge with a hammer, which improved things slightly and I noticed that one of my screws was not centred correctly so the top hinge was not seated far enough back in the mortice. I was unable to get the hinge into position with the screw hole where it was. Since I’m going to try the other hinges, I’ve filled all the screw holes with tiny pegs and glue and will have a go at fitting the new hinges tomorrow.
 
Regarding the hinges I find a decent quality traditional double washered butt hinge is generally easier to deal with than the bearing type, if you want black something like this


With the traditional style you can generally just cut them in the same depth as the leaf is thick (more or less) but I find the bearing type can be a bit random often needing setting quite a bit deeper than the thickness of the leaf to achieve a nice gap which doesn't look great.
 
Thanks Doug. I ordered the bearing hinge sight unseen yesterday and didn’t realise how thick the barrel was. The one you link is almost certainly more what I was after. On this one the gap between the leaves when parallel is probably ~2.5mm on both hinges so should be ok to install flush here.
 
Last edited:
One of the old books I've got suggests hinge adjustment requires filling screw holes with matches and shimming hinges with card from cigarette packets, so if you're not already a smoker I'm afraid you're going to have to start;)
 
One of the old books I've got suggests hinge adjustment requires filling screw holes with matches and shimming hinges with card from cigarette packets, so if you're not already a smoker I'm afraid you're going to have to start;)
I found Embassy fag packets behind most of the hinges in my house.
I never put all the screws a hinge when hanging a door one in each hinge will hold the door in place while you try the fit.

Pete
 
One of the old books I've got suggests hinge adjustment requires filling screw holes with matches and shimming hinges with card from cigarette packets, so if you're not already a smoker I'm afraid you're going to have to start;)
I find business cards perfect replacement for ciggie cards.
 
Old 150 grit sand paper or business cards are great for shims.
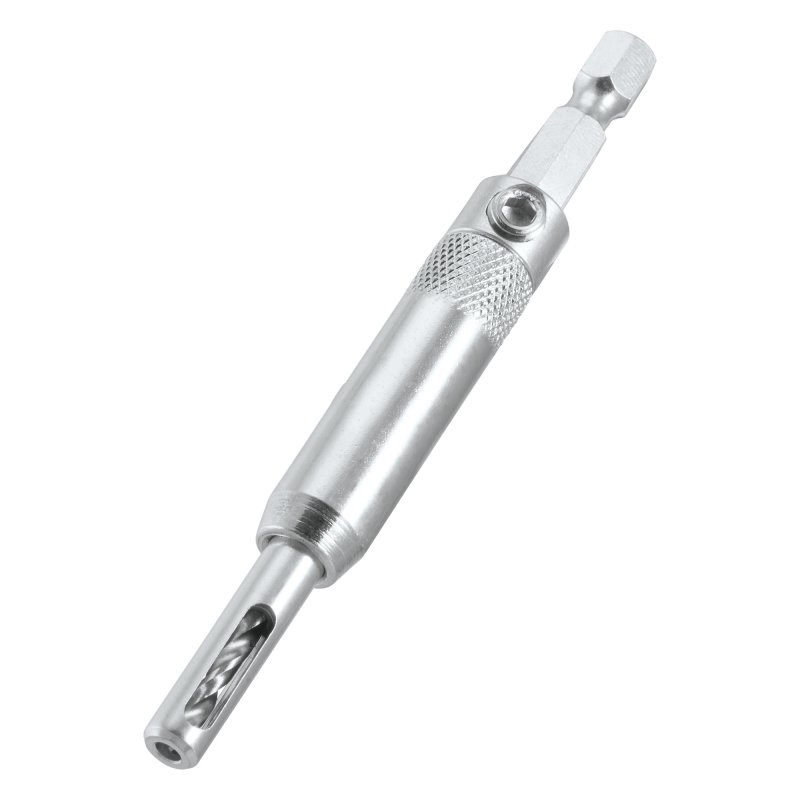
Self centering drill bits (trend snappy ) are great for drilling hinge holes.
 
Installed the new hinges and it’s all working fine (if I manually take the twist out of the liner). I took my time centering the screws and I did pack one of the hinges to get it level (using pieces of the box the hinge came in) also gave the casement a little shave with the track saw to get a tiny bit more room.

I did end up re-redoing one of the screw holes, so I think I’ll get some self centering drill bits to speed future projects along.

Next up I need to paint it, fit it square, then add the stops and other hardware. And get some glass.
 
As someone else has said it is best to put one screw in each leaf of the hinge until you have adjusted it correctly. The problem is one screw does not fully hold the hinge. Some joiners I know put one screw in to start with and then angle the other screws in the direction they want to adjust so if you want to push the hinge in and up slightly they would drill the hole in the direction and then the screw will move the hinge. It works to some extent but more final adjustment than getting the basics right.
 
If you do go for self centering drill bits, don't do what I did at first and buy the economical ones, they do not work!
 
If you do go for self centering drill bits, don't do what I did at first and buy the economical ones, they do not work!
Can attest to this, The economy ones were not even significantly cheaper, especially considering they clearly incorporated some clever "random radius generator" tech.... or were just really loose and had terrible tolerances. I also found that pausing for a short time after pulling the trigger before drilling (allowing it to stabilise once full speed was reached helped to ensure slightly better results. I'm sure it's likely a "muscle memory" failing on my part- in much the same way this technique helped stop getting jams/incorrect synchronisation using a plasterboard screw gun- too used to applying some pressure AS I pulled the trigger- not great on the Makita 750 gun...

TL;DR I agree with Jonathan after wasting money and getting varied results!

Sorry for the waffle!
 
I got a pack with three sizes of Trend guide bits for £20. Should arrive tomorrow. Hope that’s the good ones, not the bad ones.
 
I got a pack with three sizes of Trend guide bits for £20. Should arrive tomorrow. Hope that’s the good ones, not the bad ones.

At that price they will be the cheaper craft pro range, they may be okay I don't know but the Snappy ones are more expensive


I had some cheap ones once and the bit only came out far enough to just leave a very small mark on the timber, yes it marked the centre of the hole but they were not long enough to make any kind of pilot hole for the screw.
 
Ah. Yes. It’s CraftPro. I also got some Trend CraftPro countersinks at the same time. If anyone thinks these are too poor to bother with, I’ll return them.
 
I have the Trend snappy range, not the CraftPro, would of bought the Festool version but I only found a 5mm version.

I found the small cheep bits wouldn't clear the swarf so drill one hole and then stop to clean the bit.
 
Sorry don't remember where the first set came from, they have no maker mark on them, just remember I got 3 for the price of one Trend Snappy.
 
Yeah the Trend CraftPro centre bits aren’t all that. I’ve only tried the #10, but the bit wasn’t attached so I had to find a tiny hex bit to deal with the grub screw that’s supposed to hold the bit in place. Worse, the collar that’s supposed to spring back over the bit doesn’t. It didn’t before I used it, so it’s not sawdust clogging it.

The good news is that I did find it easy to drill the hole in the centre using the guide and I can pull the collar back into position so could be worse.
 
TBH the CraftPro aren"t all that good. Better than the cheap Chinese tat, but still not good. A number of former colleagues baulked at the price of the Trend Snappy models (and the price of Trend Snapy drill/countersinks, for that matter) and bought the cheaper CraftPro ones only to eventually "retire" them in favour of the Snappy versions. I initially did the same myself - in my case cheap Chinese ones because CraftPro weren't available back then - only to buy one Trend Snappy one and become a convert. Of similar quality are the Axminster trade self-centring bits

Frankly I don't like the price of the replacement pilot drill bits, which are specials, but I'll live withnit for the sake of convenience
 
Yeah the Trend CraftPro centre bits aren’t all that. I’ve only tried the #10, but the bit wasn’t attached so I had to find a tiny hex bit to deal with the grub screw that’s supposed to hold the bit in place. Worse, the collar that’s supposed to spring back over the bit doesn’t. It didn’t before I used it, so it’s not sawdust clogging it.

The good news is that I did find it easy to drill the hole in the centre using the guide and I can pull the collar back into position so could be worse.
Send it back as Not Fit For Purpose

I really never equate Trend with quality TBH. Bit like Rutlands and Dakota
 
Blum also make a self centering drill, not used one but guess they would be good.
 
Back
Top