
-
Hi all and welcome to TheWoodHaven2 brought into the 21st Century, kicking and screaming! We all have Alasdair to thank for the vast bulk of the heavy lifting to get us here, no more so than me because he's taken away a huge burden of responsibility from my shoulders and brought us to this new shiny home, with all your previous content (hopefully) still intact! Please peruse and feed back. There is still plenty to do, like changing the colour scheme, adding the banner graphic, tweaking the odd setting here and there so I have added a new thread in the 'Technical Issues, Bugs and Feature Requests' forum for you to add any issues you find, any missing settings or just anything you'd like to see added/removed from the feature set that Xenforo offers. We will get to everything over the coming weeks so please be patient, but add anything at all to the thread I mention above and we promise to get to them over the next few days/weeks/months. In the meantime, please enjoy!
You are using an out of date browser. It may not display this or other websites correctly.
You should upgrade or use an alternative browser.
You should upgrade or use an alternative browser.
Holiday Toolchest
- Thread starter Dr.Al
- Start date


- Joined
- Jul 21, 2014
- Messages
- 10,414
- Reaction score
- 165
Andyp":3i8ks0c7 said:I bought similar quantities of chestnut a few years back to bake a gate and an garden "picnic" table. Lovely stuff to work with.
Sorry to hear that you have a severely blocked doze :lol: :lol:
Bob
Cabinetman
Sequoia
- Joined
- Oct 11, 2020
- Messages
- 5,784
- Reaction score
- 1,441
- Location
- Lincolnshire Wolds + Massachusetts
- Name
- Ian
Going well Al, that thin stuff could be used for drawer dividers in your toolbox maybe, just a thought though, try picking up that pile of timber and then imagine it full of metal tools, it’s a bit late now but thinner stuff could have done the job just as well?
Then again you only have to move it in and out of the car I suppose, if that’s still the plan.
Then again you only have to move it in and out of the car I suppose, if that’s still the plan.

Dr.Al
Old Oak
Cabinetman":2us6f6ij said:Going well Al, that thin stuff could be used for drawer dividers in your toolbox maybe, just a thought though, try picking up that pile of timber and then imagine it full of metal tools, it’s a bit late now but thinner stuff could have done the job just as well?
Then again you only have to move it in and out of the car I suppose, if that’s still the plan.
I agree that it's probably excessively thick for a toolchest and I am worried that it'll look out of proportion with hugely chunky sides. The reason I went for thick is that I'm trying to make this work as a workbench as well as a toolchest (that may be a mistake, who knows?!) so I can clamp stuff to the top or the back and plane / saw stuff and even hammer & chisel out dovetails. I was nervous about making it too thin given that purpose; hence the choice of 20 mm slabs.
The CAD model reckons it'll weigh about 15 kg (based on 560 kg/m³ for sweet chestnut) without any tools in it, so it's definitely not going to be light. Hopefully I'll still be able to lug it into the car once it's loaded!
At the end of the day, I'm not too worried about it. I'm going to get a heck of a lot of practice in the process of making this tool chest. If it ends up being too chunky to be lift-able or too flimsy to be used as a work surface, I can always re-make it (possibly out of the remains of this one if I cut it down to size a bit!) and I'll have learnt a lot and hopefully enjoyed making it.
Cabinetman
Sequoia
- Joined
- Oct 11, 2020
- Messages
- 5,784
- Reaction score
- 1,441
- Location
- Lincolnshire Wolds + Massachusetts
- Name
- Ian
Haha yes I had forgotten about it being used as a workbench as well. I have humped 30kg around quite a bit, not too bad, but not for more than House to car ish distances. Looking forward to seeing it!
Just going back to see the design again. Ok done that, I know it was a preliminary, but two suggestions, replace the drawer handles with pull holes. + dowels or flat bits of wood dropped in through holes in the top to holes in the "doorstep" to stop the drawers flying open.
Thought about rope handles but it wouldn’t work easily. Ian
Just going back to see the design again. Ok done that, I know it was a preliminary, but two suggestions, replace the drawer handles with pull holes. + dowels or flat bits of wood dropped in through holes in the top to holes in the "doorstep" to stop the drawers flying open.
Thought about rope handles but it wouldn’t work easily. Ian
Dr.Al
Old Oak
Cabinetman":3hpjba43 said:Just going back to see the design again. Ok done that, I know it was a preliminary, but two suggestions, replace the drawer handles with pull holes
That's a good idea; I think that'll work much better than the handles. Thanks.
Cabinetman":3hpjba43 said:+ dowels or flat bits of wood dropped in through holes in the top to holes in the "doorstep" to stop the drawers flying open.
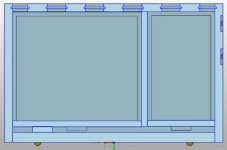
I don't think drawers flying open is going to be a problem particularly. The unit will have a front on it (which will double as a shooting board): this is an old picture (the model has changed a bit since then, but the principle's the same):
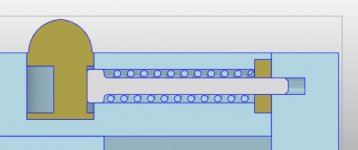
Those two brass bits rotate to lock the shooting board into the front of the chest and stop the drawers from sliding out.
I think the reason I'd put the handles on the drawers was to help stop them coming open, but that had left me nowhere to store the mitre bits for the shooting board, so having holes might be a better idea. It shouldn't be too hard to keep them from moving back and forth with a bit of thought and the hole pulls will give me more freedom to play around with the layout (and they'll be easier to make!)
Cross section in case what I said wasn't clear (there's a bit of an overlap where the shooting board fence is as the moment; that needs tweaking):
Cam detail cross section:
Dr.Al
Old Oak
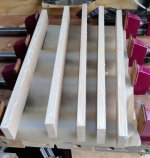
A few more sessions with the #5 have passed now and I've got myself a healthy stack of wood, all of which is (I think) square and flat on three sides and some of which is also square and flat on the fourth.
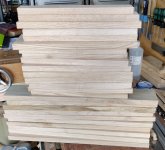
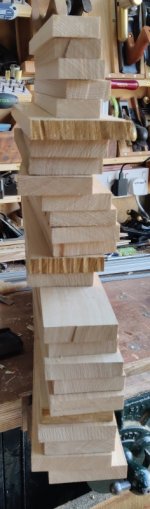
The bottom 10 pieces will become the top and bottom of the box; the middle 10 will be the sides and the top 5 narrower ones at the top of the pile will be the slats for the back.
They haven't been trimmed to length yet and obviously various bits will be cut out for joinery, but I thought it would be a good idea to weigh the stack. It came out as 8.6 kg. Once they're finished and ready to become the chest base, they will probably weigh quite a bit less than that, but there will be additional weight with the middle support piece, the thin lining pieces in the back and of course the drawers. Nevertheless, intuitively it feels like the 15 kg reported by the CAD model shouldn't be too much of an overestimate, which is nice. Out of interest I modified the model to use 16 mm thick sides rather than 20 mm ones and the overall weight reduced by 1.5 kg. Given the relatively small saving I think I'll stick with 20 mm.
While I had the scales out, I got a small sheet of plywood and piled up most of the tools that I think will end up in the tool chest. Subtracting the weight of the plywood that came out as 11 kg. I'm pretty sure there will be additions to that (for a start I only included two clamps), but hopefully 11–15 kg is a reasonable estimate for the tools so the whole package will hopefully stay under 30 kg. I might borrow some weights off my next door neighbour and mock up something with similar ergonomics and about the right weight to see what it feels like moving it around.
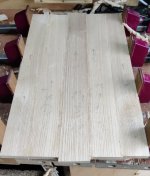
With the initial preparation done, I thought it would be interesting to lie out a few pieces to roughly the size of the top surface:
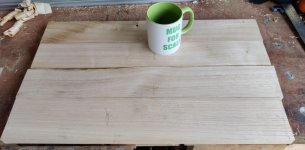
In the end it'll be made up out of 5 pieces, but the 4 untrimmed ones worked out as about the right depth.
The next couple of jobs involve some decisions.
The first decision is how tall to make the box. The length of the pieces for the sides and back were dictated by the material and they've all ended up about 360 mm long. The CAD model at the moment is designed around 300 mm height. I can either cut them down or make the chest a bit taller. I'm still undecided on that, so I might leave it until I've glued the pieces into panels.
The second decision is how to layout the pieces. Each of the side, top and bottom pieces is a minimum of 80 mm wide (some are quite a bit wider). The target depth from the model as designed is 350 mm. For the top surface, I think I'd like the joints to be away from the dog holes, so I had a play with the model and I'm currently leaning towards three pieces that are 75 mm wide and two pieces that are about 62 mm wide.
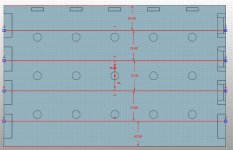
The actual depth of the chest doesn't have to be 350 mm of course, so those dimensions aren't critical.
Is there any good reason to offset the joints (i.e. to make the pieces that make up the sides a different thickness to the pieces that make up the top so that the glue joints are offset from one another)?
The final decision is what glue to use. For my limited woodworking experience, I've only ever used what I would probably call modern wood glue. I've never tried a protein based glue but I'm quite keen to do so on one upcoming project or another so I bought myself a couple of options (shown along side the modern stuff in the glubot thing:
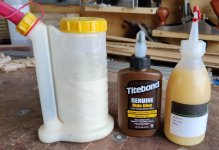
I think the protein glues would probably benefit from a higher ambient temperature (the titebond stuff recommends 10°C or greater), but I doubt I'll be getting much gluing done (with the possible exception of the edge jointing) much before April (and even there I'm possibly being optimistic), so the ambient temperature should sort itself out.
Perhaps the best thing to do is to have a pause and make a couple of boxes (or just some practice joints) with the protein glues to see how I get on with them.
Hmmm....
The bottom 10 pieces will become the top and bottom of the box; the middle 10 will be the sides and the top 5 narrower ones at the top of the pile will be the slats for the back.
They haven't been trimmed to length yet and obviously various bits will be cut out for joinery, but I thought it would be a good idea to weigh the stack. It came out as 8.6 kg. Once they're finished and ready to become the chest base, they will probably weigh quite a bit less than that, but there will be additional weight with the middle support piece, the thin lining pieces in the back and of course the drawers. Nevertheless, intuitively it feels like the 15 kg reported by the CAD model shouldn't be too much of an overestimate, which is nice. Out of interest I modified the model to use 16 mm thick sides rather than 20 mm ones and the overall weight reduced by 1.5 kg. Given the relatively small saving I think I'll stick with 20 mm.
While I had the scales out, I got a small sheet of plywood and piled up most of the tools that I think will end up in the tool chest. Subtracting the weight of the plywood that came out as 11 kg. I'm pretty sure there will be additions to that (for a start I only included two clamps), but hopefully 11–15 kg is a reasonable estimate for the tools so the whole package will hopefully stay under 30 kg. I might borrow some weights off my next door neighbour and mock up something with similar ergonomics and about the right weight to see what it feels like moving it around.
With the initial preparation done, I thought it would be interesting to lie out a few pieces to roughly the size of the top surface:
In the end it'll be made up out of 5 pieces, but the 4 untrimmed ones worked out as about the right depth.
The next couple of jobs involve some decisions.
The first decision is how tall to make the box. The length of the pieces for the sides and back were dictated by the material and they've all ended up about 360 mm long. The CAD model at the moment is designed around 300 mm height. I can either cut them down or make the chest a bit taller. I'm still undecided on that, so I might leave it until I've glued the pieces into panels.
The second decision is how to layout the pieces. Each of the side, top and bottom pieces is a minimum of 80 mm wide (some are quite a bit wider). The target depth from the model as designed is 350 mm. For the top surface, I think I'd like the joints to be away from the dog holes, so I had a play with the model and I'm currently leaning towards three pieces that are 75 mm wide and two pieces that are about 62 mm wide.
The actual depth of the chest doesn't have to be 350 mm of course, so those dimensions aren't critical.
Is there any good reason to offset the joints (i.e. to make the pieces that make up the sides a different thickness to the pieces that make up the top so that the glue joints are offset from one another)?
The final decision is what glue to use. For my limited woodworking experience, I've only ever used what I would probably call modern wood glue. I've never tried a protein based glue but I'm quite keen to do so on one upcoming project or another so I bought myself a couple of options (shown along side the modern stuff in the glubot thing:
I think the protein glues would probably benefit from a higher ambient temperature (the titebond stuff recommends 10°C or greater), but I doubt I'll be getting much gluing done (with the possible exception of the edge jointing) much before April (and even there I'm possibly being optimistic), so the ambient temperature should sort itself out.
Perhaps the best thing to do is to have a pause and make a couple of boxes (or just some practice joints) with the protein glues to see how I get on with them.
Hmmm....
Last edited:

AJB Temple
Sequoia
- Joined
- Apr 15, 2019
- Messages
- 7,830
- Reaction score
- 1,299
Just popped back into this thread. That chestnut haul looks lovely. Can look (as this does) very similar to oak. Some nice big planks there.

Yes, looking very good, with plenty of careful planing and planning.
I may be answering a different question, but with old toolchests I have seen, it was normal and sensible to arrange the ends and sides so that the edge joints between the boards don't just run round the ends. Any edge joint between two boards gets overlapped at the ends.
As for choice of glue, I really rate the liquid hide glue, for its ease of use and easy cleanup. I have found that my newest bottle needed a dip in a jug of hot water to make it thin enough to use, but that's no big deal.
I may be answering a different question, but with old toolchests I have seen, it was normal and sensible to arrange the ends and sides so that the edge joints between the boards don't just run round the ends. Any edge joint between two boards gets overlapped at the ends.
As for choice of glue, I really rate the liquid hide glue, for its ease of use and easy cleanup. I have found that my newest bottle needed a dip in a jug of hot water to make it thin enough to use, but that's no big deal.
Dr.Al
Old Oak
AndyT":1g1fttg6 said:I may be answering a different question, but with old toolchests I have seen, it was normal and sensible to arrange the ends and sides so that the edge joints between the boards don't just run round the ends. Any edge joint between two boards gets overlapped at the ends.
That's exactly the question I was asking & it sounds sensible, so it's nice to know it wasn't just me overthinking things! It should be very easy to make the sides have joints in different places, so I'll do that. Thanks.
AndyT":1g1fttg6 said:As for choice of glue, I really rate the liquid hide glue, for its ease of use and easy cleanup. I have found that my newest bottle needed a dip in a jug of hot water to make it thin enough to use, but that's no big deal.
I'll find something to try it out on as soon as I can. I'm quite nervous about the edge jointing so I need to psyche myself up to that one. The only time I did it before, I used the power router to cut some biscuit slots and used the biscuits to help line everything up. That went pretty smoothly, but I'd like to manage to do it without the biscuits this time.
Dr.Al
Old Oak
... and so it begins.
I thought I'd start the edge jointing by making one of the sides. If I comprehensively c*ck it up, it's less work to remake a side than it is to remake the top or bottom!
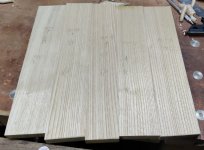
I worked out some sensible widths that would offset the joints from the joints in the top and then I cut the pieces slightly over width. I planed them roughly to the right size and then paired them up (with matching faces together) and planed the edges with my #7. For the first one, I tried just planing them individually, but I struggled to get a perfect match, whereas planing them together worked first time, so I stuck with that method for the rest of them.
With that done, I could lie them all next to one another and take a boring photo
Since it's still quite chilly, I thought I'd stick with known methods and use titebond 3, which has a fairly long cure time to allow me to work at my preferred glacial pace .
.
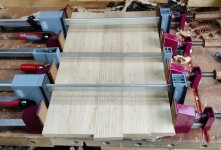
I got out my home-made clamps and some greaseproof paper out and, after a trial run, applied glue to both sides of each joint and did up the clamps. I gave the top-face a rub down with some plane shavings to get rid of the excess glue and then got some extra clamps and put them upside down in the gaps, although the clamp rails aren't pushing down on the board so I don't know how much the extra clamps will help keep it flat. The squeeze-out on the underside will have to be dealt with after the glue has dried.
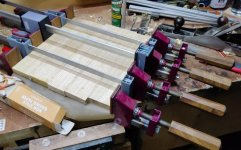
I'll leave that overnight now and then see what it looks like tomorrow.
I thought I'd start the edge jointing by making one of the sides. If I comprehensively c*ck it up, it's less work to remake a side than it is to remake the top or bottom!
I worked out some sensible widths that would offset the joints from the joints in the top and then I cut the pieces slightly over width. I planed them roughly to the right size and then paired them up (with matching faces together) and planed the edges with my #7. For the first one, I tried just planing them individually, but I struggled to get a perfect match, whereas planing them together worked first time, so I stuck with that method for the rest of them.
With that done, I could lie them all next to one another and take a boring photo
Since it's still quite chilly, I thought I'd stick with known methods and use titebond 3, which has a fairly long cure time to allow me to work at my preferred glacial pace
.I got out my home-made clamps and some greaseproof paper out and, after a trial run, applied glue to both sides of each joint and did up the clamps. I gave the top-face a rub down with some plane shavings to get rid of the excess glue and then got some extra clamps and put them upside down in the gaps, although the clamp rails aren't pushing down on the board so I don't know how much the extra clamps will help keep it flat. The squeeze-out on the underside will have to be dealt with after the glue has dried.
I'll leave that overnight now and then see what it looks like tomorrow.
Dr.Al
Old Oak
I got impatient and took it out of the clamps. It'd had about 3 hours and I figured that would probably be enough. The squeeze out on the back of the board was still a bit squidgy, but that made it very easy to get off, so I wonder if I timed it perfectly (luck rather than judgement!)
I gave the face side a quick pass with the #4 and then gave the other side a pass with the #5 to even the levels out (there was some variation in board thickness) followed by the #4 to smooth it off and it's looking really good to me (another boring photo to follow once it's daylight again ).
That feels like a really good start. It might seem very minor to all you veterans, but it's the first time I've prepared a wide board out of narrower ones entirely using hand tools, so it feels like a big landmark to me.
 bscene-drinkingcheers:
I gave the face side a quick pass with the #4 and then gave the other side a pass with the #5 to even the levels out (there was some variation in board thickness) followed by the #4 to smooth it off and it's looking really good to me (another boring photo to follow once it's daylight again
).That feels like a really good start. It might seem very minor to all you veterans, but it's the first time I've prepared a wide board out of narrower ones entirely using hand tools, so it feels like a big landmark to me.
bscene-drinkingcheers:
Dr.Al
Old Oak
AndyT":969oroxp said:You can give yourself an extra pat on the back for gluing up the whole lot in one go, rather than adding one at a time.
To be honest, it didn't occur to me that doing it one at a time was an option :eusa-doh: :lol:
NickM
Old Oak
Titebond should be a good choice for those edge joints. At the EB workshop, they use titebond original when they can. If they need a longer open time they use urea formaldehyde.
Dr.Al
Old Oak
NickM":3al58nmf said:Titebond should be a good choice for those edge joints. At the EB workshop, they use titebond original when they can. If they need a longer open time they use urea formaldehyde.
Good to know, thanks Nick. I'd been planning to use TB original but at the last minute decided to go for TB3 for the longer open time. I've never come across urea formaldehyde.
NickM
Old Oak
Dr.Al":134jbcan said:NickM":134jbcan said:Titebond should be a good choice for those edge joints. At the EB workshop, they use titebond original when they can. If they need a longer open time they use urea formaldehyde.
Good to know, thanks Nick. I'd been planning to use TB original but at the last minute decided to go for TB3 for the longer open time. I've never come across urea formaldehyde.
Like you, I find TB3 more “slippery” than TB original which is “tackier” and can lock up quickly. TB3 seems to lubricate the joint a bit which can be useful.
UF is a two part resin. I haven’t used it yet.

Phil
Old Oak
That timber looks good.
UF - is used to make MDF and PB.
There are health risks.
At one PB mill my eyes would water and burn if I walked too close to the press.
(old single daylight press)
UF - is used to make MDF and PB.
There are health risks.
At one PB mill my eyes would water and burn if I walked too close to the press.
(old single daylight press)
Dr.Al
Old Oak
Prepare yourselves for more photos that look much the same as previous photos :lol:
The first panel looks good to me:
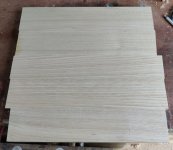
The second side panel is now prepared:
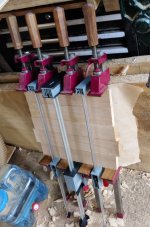
Mainly for my future benefit, I thought I'd write down the process I went through to make these panels.
Firstly, I gave the outside face of each piece a single pass with a #5 plane. The only reason for this was to take note of how nice they were to plane and to pencil on an arrow to show a direction that planed nicely. In all but one case, I got this right first time (and in the other case I stopped after less than 20 mm of the first cut, so I could just turn it round and plane the face in one pass). I don't know whether that's down to good judgement on my part or whether most of the sweet chestnut is just very easy to plane in either direction, but I'm happy that when the planks go together I'll be able to plane the whole piece in the same direction which will make my life easier later.
If I did this again I'd try to make a note on each piece when doing the initial dimensioning rather than having to take another pass later.
I then lay the panels out on the bench and stared at them for a bit to decide which side of each would be the outside and which one would go where. These aren't book matched panels or even particularly similar in grain structure, they're just a bunch of bits I got out of the stock I had. Most are fairly close to quarter sawn, so I'm not worrying too much about alternating end grain, although I did have a look at the ends in case I'd missed anything more dramatic. One or two have got quite changeable grains and two had knots in them, but more on that later.
With the panels laid out, I could use a pencil to write various cryptic symbols on them so that I don't forget which one goes there. I also wrote the target widths on each board to minimise the chance of visits from our friend the CUF.
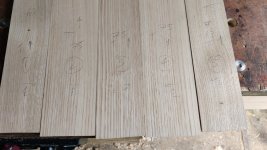
This photo was taking later in the process, but it shows the marks quite well. I probably went over the top with markings, but better safe than sorry. The "T" means that these pieces will be the top of the chest; the arrow is the planing direction; the numbers in circles are the order that the boards go (marked on both sides of the plank) and the arrows point towards the centre line (or in the case of the middle board, towards planks 2 & 4) so that I don't put them in the wrong order 5 to 1 instead of 1 to 5 (which is possible given that the marks are also on the underside in case I assemble them upside down).
I then decided to "cheat" and run the pieces through the bandsaw to reduce the width to slightly oversize. I do quite enjoy hand saw ripping (as opposed to resawing!) but I figured the bandsaw would produce a nice clean edge that would minimise the risk of the boards ending up too narrow after planing.
With that done, I put each plank in the vice and cleaned up the bandsaw marks with my #5.
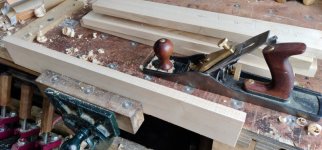
I then put them in pairs in the vice (with an extra clamp holding the end to the bench) and kept taking passes with the #7 until it was cutting all the way along both pieces.
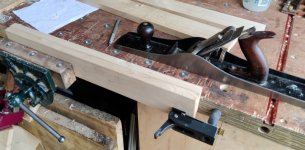
Once the second side piece comes out of the clamps (probably soon after lunch), I'll clamp up either the top or the bottom: both are ready to go, depending on what I decide to do about one knot.
I mentioned earlier that two of the planks had knots in. One of these was near the edge, so I decided to use that one as one of the (narrower) outer pieces and that resulted in the knot being cut off. That was a nice easy solution.
The other one is quite a large knot and I didn't want to waste the plank that it was part of. To minimise aesthetic issues or problems with planing the top surface, I put that knotty plank into bottom part of the chest, so it won't be visible, but I'm also planning to cut out the knot and use a graving piece / aka Dutchman to remove it.
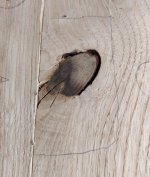
I've picked this plank to be the middle one of the five that make up the bottom, so hopefully it won't affect the structure.
As you can see, the knot is right on the edge of the plank. What I haven't decided yet (but need to, sometime in the next few hours!) is whether to cut out the knot, fit a graving piece and then glue the planks together or instead to glue the planks together and then drill/chisel out the knot and fit a graving piece.
The first option would be easier (as I'd have access to the edge of the plank for the cutting out), but the second option (which I'm leaning towards at the moment) would mean the graving piece could straddle the joint and probably make everything stronger.
I'd welcome any thoughts on this (as long as they come in the next few hours before it's too late to change what I've done :lol: ).
The first panel looks good to me:
The second side panel is now prepared:
Mainly for my future benefit, I thought I'd write down the process I went through to make these panels.
Firstly, I gave the outside face of each piece a single pass with a #5 plane. The only reason for this was to take note of how nice they were to plane and to pencil on an arrow to show a direction that planed nicely. In all but one case, I got this right first time (and in the other case I stopped after less than 20 mm of the first cut, so I could just turn it round and plane the face in one pass). I don't know whether that's down to good judgement on my part or whether most of the sweet chestnut is just very easy to plane in either direction, but I'm happy that when the planks go together I'll be able to plane the whole piece in the same direction which will make my life easier later.
If I did this again I'd try to make a note on each piece when doing the initial dimensioning rather than having to take another pass later.
I then lay the panels out on the bench and stared at them for a bit to decide which side of each would be the outside and which one would go where. These aren't book matched panels or even particularly similar in grain structure, they're just a bunch of bits I got out of the stock I had. Most are fairly close to quarter sawn, so I'm not worrying too much about alternating end grain, although I did have a look at the ends in case I'd missed anything more dramatic. One or two have got quite changeable grains and two had knots in them, but more on that later.
With the panels laid out, I could use a pencil to write various cryptic symbols on them so that I don't forget which one goes there. I also wrote the target widths on each board to minimise the chance of visits from our friend the CUF.
This photo was taking later in the process, but it shows the marks quite well. I probably went over the top with markings, but better safe than sorry. The "T" means that these pieces will be the top of the chest; the arrow is the planing direction; the numbers in circles are the order that the boards go (marked on both sides of the plank) and the arrows point towards the centre line (or in the case of the middle board, towards planks 2 & 4) so that I don't put them in the wrong order 5 to 1 instead of 1 to 5 (which is possible given that the marks are also on the underside in case I assemble them upside down).
I then decided to "cheat" and run the pieces through the bandsaw to reduce the width to slightly oversize. I do quite enjoy hand saw ripping (as opposed to resawing!) but I figured the bandsaw would produce a nice clean edge that would minimise the risk of the boards ending up too narrow after planing.
With that done, I put each plank in the vice and cleaned up the bandsaw marks with my #5.
I then put them in pairs in the vice (with an extra clamp holding the end to the bench) and kept taking passes with the #7 until it was cutting all the way along both pieces.
Once the second side piece comes out of the clamps (probably soon after lunch), I'll clamp up either the top or the bottom: both are ready to go, depending on what I decide to do about one knot.
I mentioned earlier that two of the planks had knots in. One of these was near the edge, so I decided to use that one as one of the (narrower) outer pieces and that resulted in the knot being cut off. That was a nice easy solution.
The other one is quite a large knot and I didn't want to waste the plank that it was part of. To minimise aesthetic issues or problems with planing the top surface, I put that knotty plank into bottom part of the chest, so it won't be visible, but I'm also planning to cut out the knot and use a graving piece / aka Dutchman to remove it.
I've picked this plank to be the middle one of the five that make up the bottom, so hopefully it won't affect the structure.
As you can see, the knot is right on the edge of the plank. What I haven't decided yet (but need to, sometime in the next few hours!) is whether to cut out the knot, fit a graving piece and then glue the planks together or instead to glue the planks together and then drill/chisel out the knot and fit a graving piece.
The first option would be easier (as I'd have access to the edge of the plank for the cutting out), but the second option (which I'm leaning towards at the moment) would mean the graving piece could straddle the joint and probably make everything stronger.
I'd welcome any thoughts on this (as long as they come in the next few hours before it's too late to change what I've done :lol: ).
Cabinetman
Sequoia
- Joined
- Oct 11, 2020
- Messages
- 5,784
- Reaction score
- 1,441
- Location
- Lincolnshire Wolds + Massachusetts
- Name
- Ian
That’s looking good Al, couple of observations, which way to plane a piece of wood, ie with the grain, it will become second nature to look at the edge to see which way the grain runs before you plane it, when I was teaching I used the analogy of stroking a cat, with the way the fur lays is good, ruffle the fur up and you might get scratched!
When planing an edge like that it’s easy enough to put the wood on top of the bench against the stop to plane it. It’s very good at training YOU to plane correctly, as if you don’t, by too much pressure on one side for instance the wood will fall over, too much pressure on one of the plane handles ie front or back at the wrong time, and the wood will lift up, annoying but good training, it’s also much quicker of course to set up.
Ian
When planing an edge like that it’s easy enough to put the wood on top of the bench against the stop to plane it. It’s very good at training YOU to plane correctly, as if you don’t, by too much pressure on one side for instance the wood will fall over, too much pressure on one of the plane handles ie front or back at the wrong time, and the wood will lift up, annoying but good training, it’s also much quicker of course to set up.
Ian
Cabinetman
Sequoia
- Joined
- Oct 11, 2020
- Messages
- 5,784
- Reaction score
- 1,441
- Location
- Lincolnshire Wolds + Massachusetts
- Name
- Ian
Your knotty problem, I would definitely do it before you glued the planks together, you should be aware though that the grain around that knot is curling all over the place, how close to the end of the board is it? I think if you have a long enough piece I would scarfe a new end on that board. Scarfing is a boatbuilding repair trick by cutting the end of a plank at an angle so that it resembles a plane blade, the same with the 'patch' then glue together, you should take care that the two pieces have the grain in the same direction- why give yourself a problem lol.
https://en.m.wikipedia.org/wiki/Scarf_joint
https://en.m.wikipedia.org/wiki/Scarf_joint
Dr.Al
Old Oak
Cabinetman":27jaus9d said:That’s looking good Al, couple of observations, which way to plane a piece of wood, ie with the grain, it will become second nature to look at the edge to see which way the grain runs before you plane it
That's the method I was using (and hence getting all-but-one of them right). I'd previously found when dimensioning the stock that one or two of the boards had not planed smoothly in the direction I'd expected (hence testing them all before assembly). The one that I got wrong this time round was one of the ones that seemed to plane smoothly in the "stroking the cat backwards" direction. I don't really understand why (changing grain direction perhaps?)
Cabinetman":27jaus9d said:When planing an edge like that it’s easy enough to put the wood on top of the bench against the stop to plane it. It’s very good at training YOU to plane correctly, as if you don’t, by too much pressure on one side for instance the wood will fall over, too much pressure on one of the plane handles ie front or back at the wrong time, and the wood will lift up, annoying but good training, it’s also much quicker of course to set up.
Eek. That sounds difficult! I think I'll put that on the list of skills I need to learn, but not necessarily right now :?
. A lot of the time that I'm planing a single edge, I'm moving the plane side-to-side depending on how square the edge is to the face (i.e. have the plane right over to the left if the left side of the wood is high). Do you still do that sort of planing with the board just resting on the bench?I've seen pictures of V-shaped bench stop things that seemed like a good idea for edge planing (as long as one edge is already square), but the vice seems a bit safer for my skill level at the moment
Cabinetman":27jaus9d said:Your knotty problem, I would definitely do it before you glued the planks together, you should be aware though that the grain around that knot is curling all over the place, how close to the end of the board is it?
Thanks for the advice (and I'm glad you said that before I started gluing that piece together!)
This is the only photo I could find that shows its rough position (taken before trimming to width). I'd guess it's about 200 mm from the end of the 550 mm long board.
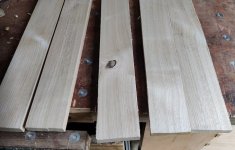
Cabinetman":27jaus9d said:I think if you have a long enough piece I would scarfe a new end on that board. Scarfing is a boatbuilding repair trick by cutting the end of a plank at an angle so that it resembles a plane blade, the same with the 'patch' then glue together, you should take care that the two pieces have the grain in the same direction- why give yourself a problem lol.
https://en.m.wikipedia.org/wiki/Scarf_joint
Eek. I've seen Leo Goolden doing a few of those on Tally Ho (also the place I first saw a graving piece being made and fitted, although I've since had a go at doing one of those on a bit of scrap). They look scarily difficult! I'll have a think and try to decide whether I've got the bottle...
Dr.Al
Old Oak
I found another photo showing the knot in context:
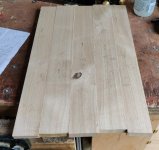
Dr.Al
Old Oak
After lunch, the second side piece came out of the clamps. The intention of the greaseproof paper described earlier is two-fold:
It worked very well for the second job, but obviously allowed some soak through which resulted in a bit of blackening:
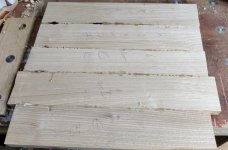
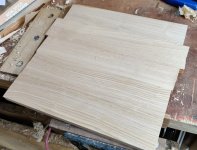
Thankfully, after scraping off the worst of the glue squeeze-out, the black marks came off with just a couple of light passes with a smoothing plane:
To try to stop that happening on the next glue-up, I employed some masking tape...
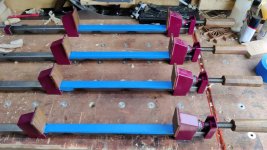
... but still used the greaseproof to catch any drips.
I'm obviously getting more confident in this as I even had time to take a photo part-way through the application of glue (before applying glue to the bottom edge of the middle boards):
After applying clamping pressure (adjusting the heights to get the top surface level as the clamps were applied) and then scrubbing with some plane shavings:
Some additional clamps for good measure and that one has now been left to dry:
- To keep the wood away from the bare steel of the clamps and stop the wood from blackening (sweet chestnut has tannin like oak)
- To stop the glue from falling on the bench or sticking the planks to something I don't want them to stick to.
It worked very well for the second job, but obviously allowed some soak through which resulted in a bit of blackening:
Thankfully, after scraping off the worst of the glue squeeze-out, the black marks came off with just a couple of light passes with a smoothing plane:
To try to stop that happening on the next glue-up, I employed some masking tape...
... but still used the greaseproof to catch any drips.
I'm obviously getting more confident in this as I even had time to take a photo part-way through the application of glue (before applying glue to the bottom edge of the middle boards):
After applying clamping pressure (adjusting the heights to get the top surface level as the clamps were applied) and then scrubbing with some plane shavings:
Some additional clamps for good measure and that one has now been left to dry:
Cabinetman
Sequoia
- Joined
- Oct 11, 2020
- Messages
- 5,784
- Reaction score
- 1,441
- Location
- Lincolnshire Wolds + Massachusetts
- Name
- Ian
I use electricians tape on my Record sash cramps, seems to work well, also stops rusty marks on the cramp bars.

Doug
Old Oak
I find clingfilm excellent & if you are careful you can reuse it quite a few times as the glue doesn’t stick to it.
AJB Temple
Sequoia
- Joined
- Apr 15, 2019
- Messages
- 7,830
- Reaction score
- 1,299
Just my own preference perhaps: I find I get less squeeze out and waste less glue and get a better glue up with much less clean up by brushing out the glue evenly before clamping. I use half inch very cheap paintbrushes (circa 10 for a fiver from river online). They wash out well with water based glues like titebond.
It looks like you are applying from the bottle to the wood and have thick areas and thin.
It looks like you are applying from the bottle to the wood and have thick areas and thin.
Dr.Al
Old Oak
Cabinetman":2k46oooq said:I use electricians tape on my Record sash cramps, seems to work well, also stops rusty marks on the cramp bars.
Thanks for the suggestion. I'd wondered about some sort of plastic tape - I used the masking tape mainly as it was closest to hand. Electrical tape sounds like a good option.
Doug":2k46oooq said:I find clingfilm excellent & if you are careful you can reuse it quite a few times as the glue doesn’t stick to it.
Interesting idea, thanks.
AJB Temple":2k46oooq said:Just my own preference perhaps: I find I get less squeeze out and waste less glue and get a better glue up with much less clean up by brushing out the glue evenly before clamping. I use half inch very cheap paintbrushes (circa 10 for a fiver from river online). They wash out well with water based glues like titebond.
It looks like you are applying from the bottle to the wood and have thick areas and thin.
I applied it with a spatula thing, but there's a brush on other end of the spatula, so maybe I'll try that next time! Last time I glued lots of edges together I used a small painters roller, which worked really well (but was a bit wasteful of glue due to the usual issue of the roller absorbing quite a bit of glue).
Dr.Al
Old Oak
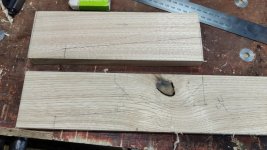
Well, what the heck. I decided to bite the bullet and try the scarf joint. As predicted, it was really hard!
I started by marking up something that looked moderately sensible to me:
I then attacked it with my dozuki, which I find is quite easy to use to cut straight lines along the grain.
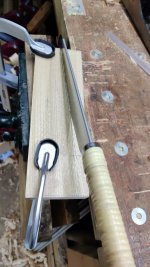
Getting into the corner isn't possible with the dozuki due to the back, so I then moved it into the vice and finished off the cut with a kataba...
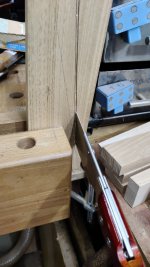
... and used the same saw to cross-cut:
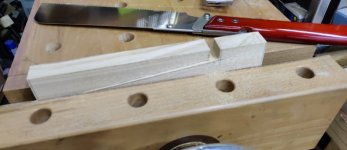
The next job was to try to get the cut-off face straight and square all the way along to the corner. This was really difficult as there's no way to get a plane to go all the way and if I took the nose off one of my 311s, it just dug in to the rising grain and made a mess of the face.
I went through quite a few different tools, including a Record 311,
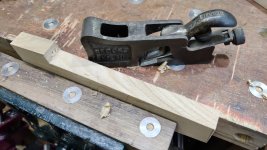
a selection of different size chisels, which worked well, but there's no easy way I could figure out to get a perfectly aligned knife line on both sides when you can't transfer lines round the edges. I've since thought of a way this might work, at least for the scarfed piece, but I'd have to try it to be sure.
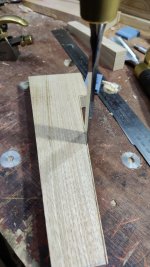
I also tried shooting with my repaired Axminster 311:
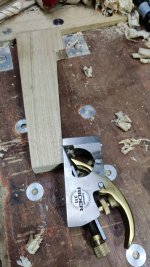
That felt like it should work well, but it's a pig to adjust to get the blade at 90° to the side.
In the end I managed to get it square and looking okay, so I shot the end square...
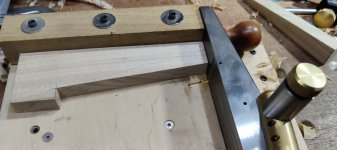
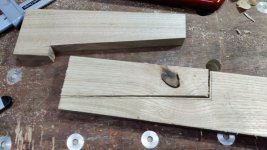
... and then used the new piece and a knife to mark where I needed to cut out the waste on the longer piece. I could then rough it out in the same way as before:
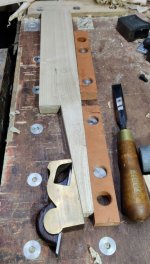
I tried a few more methods of trying to get the long edge square, including another little plane (which I later realised doesn't have sides that are perpendicular to its base!)
After all the tweaking and adjusting, I realised I'd taken too much off the long edges of the two pieces and the resulting scarfed piece would be too narrow, so I chucked the shorter piece in the bin and started again (this time marking the scarfed piece from the longer piece for obvious reasons)

This time I started with a wider piece for the insert so there would be a lot more room for tweaking stuff.
Much more embuggerance ensued, but without much in the way of photos as I was getting frustrated . In the end I found the block plane was the best for getting the joint square and smooth and I just had to fiddle and faff with a chisel to deal with the bit at the end that the block plane couldn't get to.
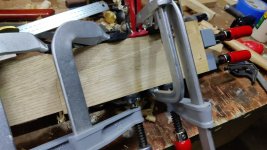
Lots more shooting of ends and tweaking of edges followed, but eventually it all got glued and clamped together and we'll find out tomorrow what it looks like.
Conclusion so far: I need to learn some better ways of doing this!
The scarfed in piece is thicker and wider than the longer piece; hopefully I'll be able to plane it flush and parallel without the final glued together board being too narrow. It's not the end of the world: I'll measure it before gluing the board together and if its narrower than the already glued boards, I can just remake the entirety of that one plank and write the scarf joint down to experience: I've got lots and lots more sweet chestnut to play with.
I started by marking up something that looked moderately sensible to me:
I then attacked it with my dozuki, which I find is quite easy to use to cut straight lines along the grain.
Getting into the corner isn't possible with the dozuki due to the back, so I then moved it into the vice and finished off the cut with a kataba...
... and used the same saw to cross-cut:
The next job was to try to get the cut-off face straight and square all the way along to the corner. This was really difficult as there's no way to get a plane to go all the way and if I took the nose off one of my 311s, it just dug in to the rising grain and made a mess of the face.
I went through quite a few different tools, including a Record 311,
a selection of different size chisels, which worked well, but there's no easy way I could figure out to get a perfectly aligned knife line on both sides when you can't transfer lines round the edges. I've since thought of a way this might work, at least for the scarfed piece, but I'd have to try it to be sure.
I also tried shooting with my repaired Axminster 311:
That felt like it should work well, but it's a pig to adjust to get the blade at 90° to the side.
In the end I managed to get it square and looking okay, so I shot the end square...
... and then used the new piece and a knife to mark where I needed to cut out the waste on the longer piece. I could then rough it out in the same way as before:
I tried a few more methods of trying to get the long edge square, including another little plane (which I later realised doesn't have sides that are perpendicular to its base!)
After all the tweaking and adjusting, I realised I'd taken too much off the long edges of the two pieces and the resulting scarfed piece would be too narrow, so I chucked the shorter piece in the bin and started again (this time marking the scarfed piece from the longer piece for obvious reasons)
This time I started with a wider piece for the insert so there would be a lot more room for tweaking stuff.
Much more embuggerance ensued, but without much in the way of photos as I was getting frustrated
. In the end I found the block plane was the best for getting the joint square and smooth and I just had to fiddle and faff with a chisel to deal with the bit at the end that the block plane couldn't get to.Lots more shooting of ends and tweaking of edges followed, but eventually it all got glued and clamped together and we'll find out tomorrow what it looks like.
Conclusion so far: I need to learn some better ways of doing this!
The scarfed in piece is thicker and wider than the longer piece; hopefully I'll be able to plane it flush and parallel without the final glued together board being too narrow. It's not the end of the world: I'll measure it before gluing the board together and if its narrower than the already glued boards, I can just remake the entirety of that one plank and write the scarf joint down to experience: I've got lots and lots more sweet chestnut to play with.
AJB Temple
Sequoia
- Joined
- Apr 15, 2019
- Messages
- 7,830
- Reaction score
- 1,299
How I do this in thinnish stock such as that you are using (as opposed to more complex variant in timber framing which has to resist various forces and be pegged) is cut extremely close to the line with fine tooth saw (or band saw) and then if necessary use a scraper (or wide chisel used as a scraper) to get it dead flat to a steel rule. No planing. Then try fit, glue and clamp tight.
I also, when marking out, try very hard to get grain follow on. You have slight offset. Joint is much harder to see if you can get at least some grain match.
However - very good effort and it's all a learning experience for all of us.
I also, when marking out, try very hard to get grain follow on. You have slight offset. Joint is much harder to see if you can get at least some grain match.
However - very good effort and it's all a learning experience for all of us.
Dr.Al
Old Oak
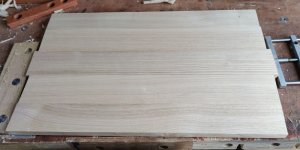
The top panel came out of its clamps this morning. I'd been too lazy to take it out of the clamps after 3 hours (as I had with the previous ones), so the underside squeeze-out needed a bit more effort to shift, but it didn't take long and the board cleaned up nicely:
The scarfed piece also came out of its clamps:
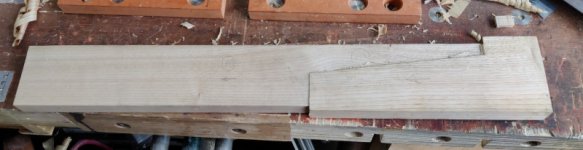
It looks okay from that angle, but unfortunately there's a bit of a bow in it:

I thought it's be interesting to bring the extra bit down to the same dimensions as the original bit to see what it looked like. It cleaned up quite nicely:
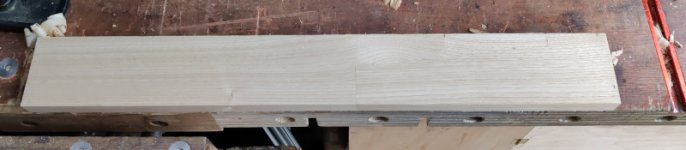
The joint is obvious (but then, this piece was going to be part of the underside of a tool chest, so I don't think that matters ). However, it's obviously warped as well as a little bowed as it doesn't sit flat on the bench. Getting rid of that warp would result in a bit of wood that was much thinner than the other pieces, so I decided to write it down to experience and start again. I think if I was doing this again, I'd do the scarf joint before dimensioning the timber so I had some room for manoeuvre after scarfing.
I'll probably do some more scarfs on some scrap wood for practice as I clearly haven't got the knack yet
It didn't take me long to make up a new middle piece out of the stock I had lying around - the middle plank in this photo is the new one:
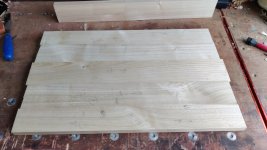
That's now glued and clamped together. I used a silicon brush to apply the glue this time and it worked much better than the spatula, thanks Adrian.
The scarfed piece also came out of its clamps:
It looks okay from that angle, but unfortunately there's a bit of a bow in it:
I thought it's be interesting to bring the extra bit down to the same dimensions as the original bit to see what it looked like. It cleaned up quite nicely:
The joint is obvious (but then, this piece was going to be part of the underside of a tool chest, so I don't think that matters
). However, it's obviously warped as well as a little bowed as it doesn't sit flat on the bench. Getting rid of that warp would result in a bit of wood that was much thinner than the other pieces, so I decided to write it down to experience and start again. I think if I was doing this again, I'd do the scarf joint before dimensioning the timber so I had some room for manoeuvre after scarfing.I'll probably do some more scarfs on some scrap wood for practice as I clearly haven't got the knack yet
It didn't take me long to make up a new middle piece out of the stock I had lying around - the middle plank in this photo is the new one:
That's now glued and clamped together. I used a silicon brush to apply the glue this time and it worked much better than the spatula, thanks Adrian.
Cabinetman
Sequoia
- Joined
- Oct 11, 2020
- Messages
- 5,784
- Reaction score
- 1,441
- Location
- Lincolnshire Wolds + Massachusetts
- Name
- Ian
Sorry to give you grief Al, but hell you made that hard on yourself! The stopped end was the bummer, if you had let the slope just run out to the edge it would have been simple to plane. But I was imagining that you would have just cut the end off the plank at 90° but at an angle as well so that it looked a little bit like a plane blade. You see Al your just too ambitious! Lol
Dr.Al
Old Oak
Cabinetman":1v6j3h8f said:Sorry to give you grief Al, but hell you made that hard on yourself! The stopped end was the bummer, if you had let the slope just run out to the edge it would have been simple to plane. But I was imagining that you would have just cut the end off the plank at 90° but at an angle as well so that it looked a little bit like a plane blade. You see Al your just too ambitious! Lol
It certainly felt like I was making it hard on myself, but all the pictures I'd seen of scarf joints looked like that (presumably intended to avoid having sharp and flimsy ends to the bits of wood. It did occur to me afterwards that the flimsy ends would have been in the middle of a big board so wouldn't have been that flimsy :lol:
I'm not sure I can visualise what you mean by the third sentence above though.
Dr.Al
Old Oak
Four boards all glued together and planed:
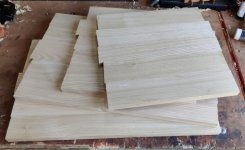
The next job is to make them into rectangles. I'm still pondering how I'm going to do that at the moment. The temptation is to get the track saw out as that would be quick, very easy and very accurate. The width of the boards is right on the limit of what I can hold on the shooting board, so the more hand-tool but accurate way to do it would be to hand saw it roughly to the line and then shoot it square. I've got a much, much longer shooting board that runs along the bench, but I've never got on with it really and I'm not convinced it'll produce an accurate 90° for me.
Given that the ends are going to planed post dovetailing, the other option would be just to saw them accurately by hand and deal with the saw marks after dovetailing, but the stumbling block there is the whole "saw accurately by hand" thing :lol:
The next job is to make them into rectangles. I'm still pondering how I'm going to do that at the moment. The temptation is to get the track saw out as that would be quick, very easy and very accurate. The width of the boards is right on the limit of what I can hold on the shooting board, so the more hand-tool but accurate way to do it would be to hand saw it roughly to the line and then shoot it square. I've got a much, much longer shooting board that runs along the bench, but I've never got on with it really and I'm not convinced it'll produce an accurate 90° for me.
Given that the ends are going to planed post dovetailing, the other option would be just to saw them accurately by hand and deal with the saw marks after dovetailing, but the stumbling block there is the whole "saw accurately by hand" thing :lol:

spb
Nordic Pine
Yes, if they're being dovetailed then the ends don't need to be perfect as long as there are no 'low' spots. The critical dimension is between the marked shoulder lines for the joinery; as long as there's at least the other board's thickness beyond the line at all points then you can plane off any excess material after glue-up.
Obviously the exception to this is if you don't have a big enough square to mark those shoulders from an edge and have to use a marking gauge from the end grain. In that case you do need the ends to be perfect.
Obviously the exception to this is if you don't have a big enough square to mark those shoulders from an edge and have to use a marking gauge from the end grain. In that case you do need the ends to be perfect.
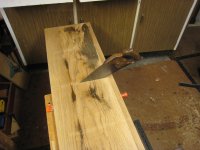
Al, there are several ways to make that cut by hand. Here's a photo of the top of a chest of drawers I made back in 2015. I had squared a knife line across, then deepened it with a chisel, and used a 14" tenon saw to cut all the way across in one line. Advantages: if you get it right you get a really straight cut. It's up on the bench where you can see what you are doing. Difficulties - the saw can jump out of the groove; if your saw is too fine the teeth will clog - so make sure you take the saw well forward to clear the sawdust. Also, you need enough depth of sawplate below the handle to clear the thickness of the wood - probably not a problem in your case.
I'd also use this sort of cut if I was making long housings.
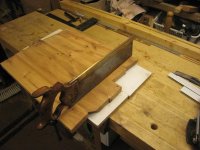
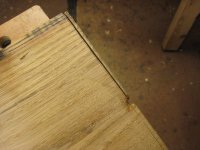
More conventionally, you'd just use a handsaw. I didn't join these two oak boards together, but they were a similar sort of width. I just used a Workmate as the only available way to get my body above the work and saw downwards.
I was quite pleased with this cut across the end, which left a small enough sliver for me to plane away
I guess you will also have the option of a Japanese saw for that cut.
I'd also use this sort of cut if I was making long housings.
More conventionally, you'd just use a handsaw. I didn't join these two oak boards together, but they were a similar sort of width. I just used a Workmate as the only available way to get my body above the work and saw downwards.
I was quite pleased with this cut across the end, which left a small enough sliver for me to plane away
I guess you will also have the option of a Japanese saw for that cut.
Cabinetman
Sequoia
- Joined
- Oct 11, 2020
- Messages
- 5,784
- Reaction score
- 1,441
- Location
- Lincolnshire Wolds + Massachusetts
- Name
- Ian
3rd sentence on Scarfe joints, like this.
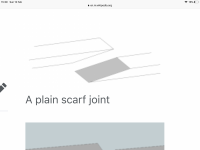

I would KISS it. If a track saw is quick, very easy and very accurate why make hard work and risk undoing all the good work so far?
AJB Temple
Sequoia
- Joined
- Apr 15, 2019
- Messages
- 7,830
- Reaction score
- 1,299
Andy - wash your mouth out with soap. This is about the ancient art of using hand tools. :lol:
Not being a masochistic purist I would have got the track saw out in a heartbeat. Might well have stuck some dominos in to make the wide boards as well.
Not being a masochistic purist I would have got the track saw out in a heartbeat. Might well have stuck some dominos in to make the wide boards as well.