• Hi all and welcome to TheWoodHaven2 brought into the 21st Century, kicking and screaming! We all have Alasdair to thank for the vast bulk of the heavy lifting to get us here, no more so than me because he's taken away a huge burden of responsibility from my shoulders and brought us to this new shiny home, with all your previous content (hopefully) still intact! Please peruse and feed back. There is still plenty to do, like changing the colour scheme, adding the banner graphic, tweaking the odd setting here and there so I have added a new thread in the 'Technical Issues, Bugs and Feature Requests' forum for you to add any issues you find, any missing settings or just anything you'd like to see added/removed from the feature set that Xenforo offers. We will get to everything over the coming weeks so please be patient, but add anything at all to the thread I mention above and we promise to get to them over the next few days/weeks/months. In the meantime, please enjoy!

Holiday Toolchest

... and that's all the pieces brought to somewhere near the same thickness as each other...
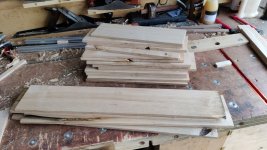
all_thicknessed.jpg

... along with a big pile of shavings to clear up:
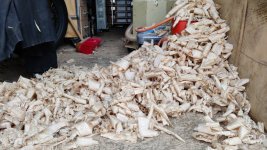
weekend_s_shavings.jpg
 
AndyT":1wl4y2e8 said:
Proper wood is so much nicer than MDF etc, isn't it!

Hell yes

Cabinetman":1wl4y2e8 said:
Quick look at those shavings tells me 3 things Al, you’re fit, you’ve been busy and you know how to set up and use a plane.
Ian
Thanks Ian. I've certainly been busy & it's nice to hear that I'm setting the plane up right: I've only got trial and error as a basis for my limited experience.

As for being fit, I certainly don't feel it after two days of sawing & planing :lol: I was really flagging by the end of the day today. I could be better described as scrawny than muscly (1.98 metres tall - 6'6" in old money & 80 kg) so I'm feeling properly knackered now!
 
A couple more evenings and a bit more stock preparation. I decided to make the drawer fronts (which will be a little thicker) out of walnut to match the drawer runners & front dividery thingies rather than out of sweet chestnut to match the rest of the chest.

Just to give myself even more of a challenge than I already have, I thought I'd cut all the drawer fronts out of one bit of walnut so the grain goes across the front of the piece (although it'll be broken by the front dividery thingies as they were made out of different bits of walnut). That way if I c*ck up the front of one of the drawers, I'll have to remake it and it'll nice and visible when that drawer doesn't match all the others :lol:

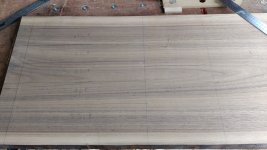
I started by grabbing a conveniently saved-for-the-purpose bit of American black walnut and marking out the drawer fronts, allowing quite a bit of excess (I actually used the side and base of the chest as a reference, marking the middle of each drawer runner onto the walnut so each drawer front has half a dividery-thingy thickness worth of excess top and bottom and a similar amount on each side):

01_source_walnut.jpg

The big Ryoba came out again to chop it up:

02_sawn.jpg

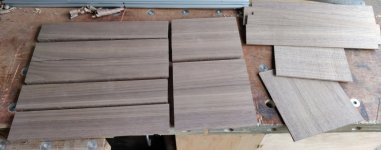
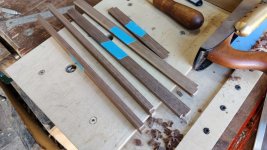
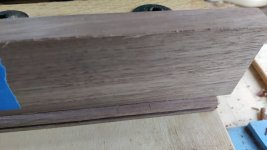
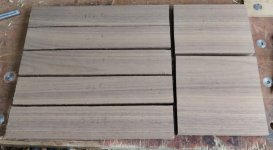
They then got hand planed on the front face and on one edge and shoved through the bandsaw before the second face got hand planed to thickness, leaving me with a nice set of drawer front fodder and a pile of thin bits of walnut that (optimistically) might just about be thick enough (after planing) to be used for box bottoms and linings in the future:

03_planed_and_thicknessed.jpg

The pile of plane shavings on the workshop floor (which I haven't got round to sweeping up yet :oops: ) has some brown highlights now :D

I rather enjoyed that planing session: ABW is lovely to plane and gives off a really nice smell as it cuts.

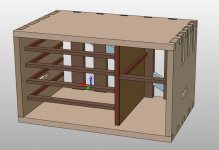
It's probably worth noting that the current plan is not to have a drawer in the bottom right of the box (see this slightly out-of-date CAD model), but I thought I'd prepare the drawer front anyway in case I change my mind in the future.
 
On the topic of stock preparation, one thing I'm going to need to decide relatively soon is what material to use for the drawer bottoms. I'm leaning towards drawer slips rather than gluing the base in, mainly because it feels a bit more traditional and also because it feels like it'll stretch my skills a bit more (which is part of the aim of this project). I need to be careful about how those drawer slips are made though: the way David Charlesworth does it in his drawer making video would result in quite a lot of height being lost to the base. I'm sure I can overcome that though.

For the base material, the choice is basically plywood or hardwood.

Advantages of plywood:

  • It would be quick
  • It would be easy to get a base of a consistent thickness with no possibility of needing to edge joint thin stock
  • It shouldn't bend and bow much (not that I think that'll be too much of a problem in drawers this size)

Advantages of hardwood:

  • Arguably more traditional?
  • Definitely more of a test of my skills so I'd probably learn more doing it this way
  • I wouldn't have to go shopping (I don't own any thin plywood!). This surplus plywood supplier looks interesting and is close by, so might be an option if he has enough of a sensible thickness at the time.

The other thing I'll need to decide is how thick to make the bases. If hardwood, I'd probably go for 4 or 5 mm, but not for any scientific reason. Comments on thickness (or choice of material) are of course welcome!
 
Dr.Al":2jofze5y said:
.......I rather enjoyed that planing session: ABW is lovely to plane.....

It's a lovely wood to work with all round. It has to be the easiest of the European hardwoods, I reckon.
 
Mike G":1h1zt92g said:
Dr.Al":1h1zt92g said:
.......I rather enjoyed that planing session: ABW is lovely to plane.....

It's a lovely wood to work with all round. It has to be the easiest of the European hardwoods, I reckon.

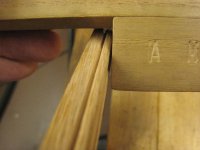
European hardwood? That's not how I would have expected you to describe American Black Walnut :?
 
Oops. OK, northern hemisphere. ABW and EW are similar, but not the same, and are both nice to work with.
 
I've probably already said that back in 2015 I had great fun making a little 5-drawer bedside cabinet from recycled wood. I wrote it all up in great detail on UKWorkshop. The posts are still there but not the pictures, so I shall share just a few here - I don't want to derail the thread too far.

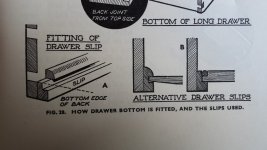
My starting point for the slips was this illustration from Hayward about the different types

20150430_102728_zpsxdrvdeqc.jpg

I went for the type B, as taking up the least space, though it does mean you need to rebate the bottoms. My slips were in oak, 3/8" square, with a 1/8" x 1/8" central groove. I used a scratch stock to cut the bead detail

IMG_3998_zps9diuvcla.jpg

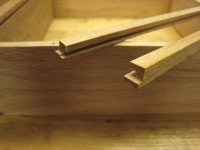
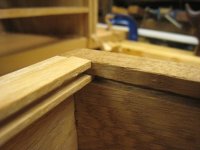
The ends need a little tenon, which fits into the groove inside the drawer front

IMG_4013_zpszm4zzhwf.jpg

IMG_4014_zpsmwgea6at.jpg

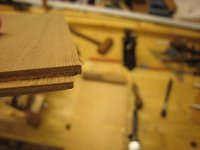
That looks wrong - how can the drawer bottom fit into both grooves? I had to go and check the finished drawers and it does make sense. I used 1/4" cedar, rebated down from the top on the end grain and up from the bottom on the long grain. (Cedar because it's traditional for drawers, straight and easy to work, and because I had some. These drawers will never be heavily loaded so strength wasn't an issue like it might be for you.)

IMG_4018_zps3coqn7ji.jpg

IMG_4021_zpsfbha9ggq.jpg

I'm not sure if this would work if you wanted to use ply for the bottoms and not rebate it, but I expect you can engineer a solution. I think if you find some decent quality ply, 3 or 4mm thickness would be fine at the scale you are working on - and that surplus plywood place looks a useful one.
 
Thanks Andy. Nice clear photos & good explanation.

That type of slip construction is the same as the one David Charlesworth used in his video & was what I was alluding to when I mentioned I was concerned about the extra height loss. With a simple groove all at the same height, the drawer height is reduced by the groove thickness plus the amount of support material below the groove. With the construction you showed & David Charlesworth used, it's reduced by two times the groove thickness plus the amount of support material. Okay, the difference is probably only 3 mm, but I'd like to try to come up with a method that has a single groove position on the three drawer sides.

I'm sure I'll come up with something that still supports the front of the slip: I just need to ponder on it a bit more.

Looking at it again though, I guess if I just have a simple groove, then the drawer slip will stick up above the base along the sides, which might not be ideal. Hmmmm.....
 
One of the jobs that's coming up soon is to make a few holes. There will be the 22 mm slotted holes that will serve two functions: handles for lifting the chest and spaces for clamps to hold the chest down to something-or-other. There will also be some smaller (8 mm) holes for the M6 screws that will hold the planing stops in place.

I've already mentioned that I'm trying to do as much as possible of this project with hand tools. Ideally, that means not using my Machine Mart pillar drill. In reality, I wouldn't consider it the end of the world to use a powered drill: I'm not trying to use hand tools for philosophical reasons, I'm using them because I prefer the peace and quiet that comes with them. Given that drills aren't especially noisy, they don't put me off in the way that an electric router would.

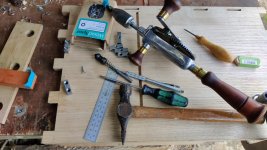
I've got a brace and I've got an eggbeater drill that you can see in the picture at this link. They would almost certainly be fine for all the holes (and I'll probably use one of them for the 8 mm screw holes). However, I'd like a really clean finish and a square cut on the 22 mm slotted holes in the sides. It seems to me that the best way to achieve that would be to use a Forstner bit in a pillar drill.

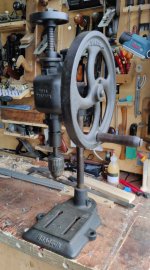
With all that in mind, I spent £55 on ebay and on the way home from Dolgellau I collected this:

drill.jpg

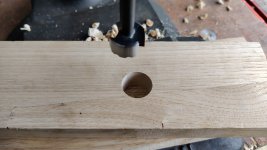
I tested it before collecting it, but I couldn't resist a proper test with a 22 mm Forstner bit when I got it home:

test_cut.jpg

I definitely haven't got space in the workshop for this to live in there permanently unfortunately. However it's light enough to lug around without too much trouble, so it's going to get a permanent home in the dining room and be dragged out to the workshop when I want to use it. Hopefully if I ever move house to somewhere with a bit more space it'll get a permanent workshop home.

I also need to find a chuck key that fits it properly as it didn't come with one.
 
Brilliant! I thoroughly approve. A lovely drill that will last several lifetimes.
 
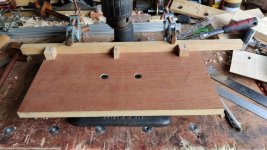
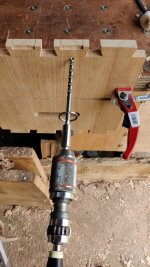
The drill got a little work-out this morning making the holes for the handles. I started by screwing a bit of plywood to the drill and clamping on a fence (so the holes can be made parallel to the bottom nice and easily). I also cut a few bits off an offcut of oak to use as spacers:

drill_fence_jig.jpg

The spacers allow me to reference the base of the dovetails against the fence rather than the end of the board:

spacers.jpg

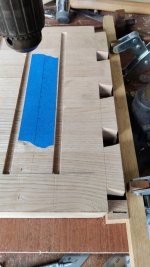
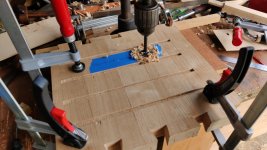
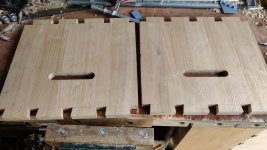
With the two sides clamped together, I drilled a 22 mm hole at each end of the slot:

drilling_22mm.jpg

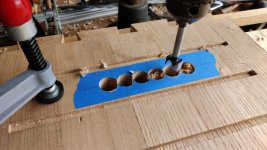
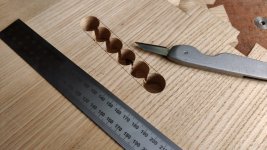
... and then some 20 mm holes in between to get rid of most of the waste:

drilling_20mm.jpg

A knife mark was drawn on each side of the slot and on each face of each board:

knife_mark_sides.jpg

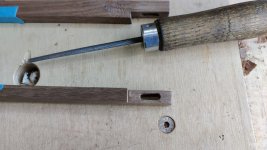
... and then I used a 16 mm chisel to rough out the waste, cutting from each face and leaving a small sliver on each side of the slot:

roughing_16mm.jpg

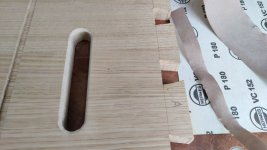
A freshly sharpened 18 mm chisel was then used to take the last bit of waste out, leaving two nice clean slots:

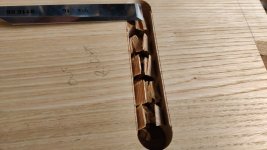
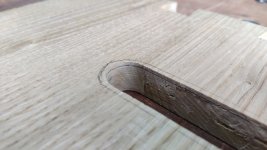
finished_slots_need_rounding.jpg

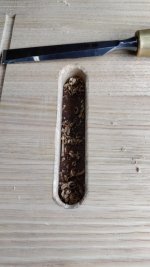
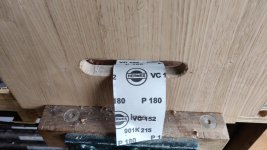
I need to figure out how to round the arrises of these slots to make them more comfortable to hold. The easy way would be to get a round-over bit in an electric router, but I'd like to try to do it by hand, even if it looks a bit shabbier. The straight edges can probably be done with some careful chiselling, but I can see myself resorting to sandpaper to sort the curves out. I'd welcome any alternative suggestions.

While I was in drilling mode, I thought I'd drill the holes for the M6 screws that will hold the planing stops in place. I did that with a brace. I drilled from one side until the tip protruded from t'other, then spun the board round and came back from the other side. This was probably unnecessary as the outer face is going to get cut away to set the planing stop flush, but I thought it was a good habit to get into.

brace_8mm.jpg

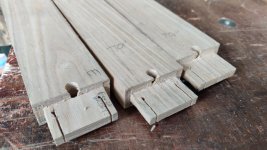
I then drilled some similar holes in three of the back slats. These holes (and the threaded bits that will be attached to the top on the inside) will allow me to clamp a fence or something similar to the back. I haven't quite figured all that out, but it'll be easier to do it now than after the chest is assembled.

Unfortunately, when I was drilling these holes, they broke out into the tenon (it's an 8 mm hole, 5 mm from the edge, so it's not that surprising with hindsight, but I'd hoped it would stay clear):

break_out_slats.jpg

I decided that the best thing to do about that break-out was just to double-down and turn it into a slot and hence make it look intentional! :D

slotted.jpg

That will have weakened the tenon slightly, but I don't think it's a problem. The slats are mainly there to (a) give something to clamp to on the back and (b) resist compressive forces when chiselling, so the tenons shouldn't be under much stress.
 
I'm getting ever closer to (the likely unmitigated disaster that is) the glue-up. However, there's still a bit more work needed on these walnut bits:

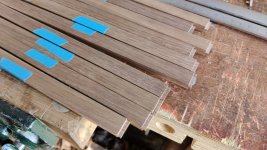
01_walnut_bits.jpg

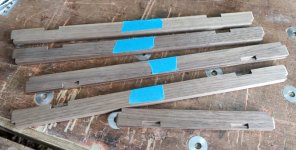
The first job was to use my home-made grooving plane to run a 3 mm wide, 3 mm deep groove down the middle of the back face of each piece. As the groove won't be exactly in the middle, for consistency I marked the face upon which the fence ran as the top side.

02_grooves.jpg

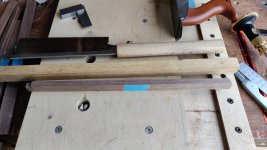
I then started cutting the tenons that will go into these grooves. I used an offcut (of the same thickness) to practice on and gradually tuned the two router planes until they were at the perfect setting, one for a cut from the top side and one for a cut from the bottom. With that done it was just a case of mark, saw, chisel, router plane.

03_tenons.jpg

Fairly quickly I was left with a pile of pieces, all the same length and with baby tenons on the end.

04_completed_tenons.jpg

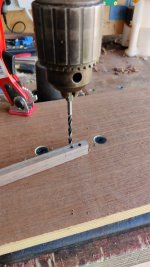
At the other end of each piece, I used my new hand-cranked pillar drill to drill three 4 mm holes:

drilling_holes_for_slots.jpg

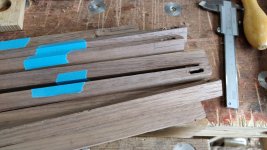
I then used a 3 mm and a 10 mm chisel to turn those holes into slots:

05_pared_slots.jpg

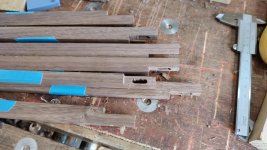
Finally, I cut a bit away so that the head of the screw that will go in these slots doesn't stick out. This step was probably pointless, but I did it anyway!

06_notched_slots.jpg

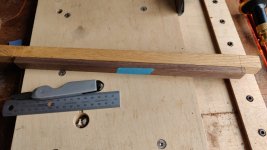
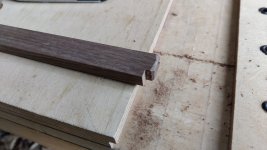
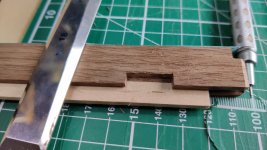
I think the last job on the walnut bits is to cut the front pieces to the right length. I've decided I'm going to make life difficult for myself by having a little notch at the end of the bits that go across the front. Something like this:

perspective.jpg

Cross-section:

cross_section.jpg

The small bit you can see in the bottom-right corner of the cross-section will be a strip of walnut that will cover the front of the middle support and bring everything flush (hopefully).

The reason I'm doing that is partly that I think it'll look better (you won't see the ends of the housing joints in the middle supports) and partly that the distance between the faces of the uprights (sides and middle support) is well defined with my story stick whereas the distance between the bottoms of the housings is less well defined. It seems to work in my head; we'll see what happens when I actually glue it all together!
 
I had a few hours free this evening so I thought I'd get on with a boring job I'd been putting off for quite a long time: making the brackets that will transfer the planing force into the top panel (and also allow me to clamp a to-be-designed fence onto the back as mentioned a couple of posts ago). In some ways it's good that I put it off for so long: if I'd have done it earlier I probably would have only made three of the brackets and would have had to do another session to make the ones for the back!

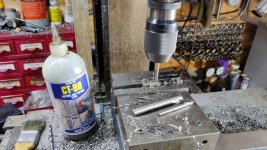
Anyway, it wasn't very interesting, just lots of drilling and a bit of tapping (done on the mill just because speed control is easier and stainless steel is horrible). One action shot because I've heard you like pictures...

action_shot.jpg

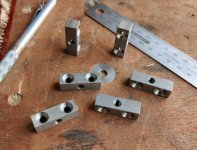
After much oily drilling and a bit of rough tidying up with a file (I'm much too lazy to make metal things look shiny), I ended up with six simple brackets, each with two countersunk 4.5 mm holes and one M6 threaded hole:

six_brackets.jpg

With them made, I thought I might as well drill the pilot holes and fix them to the top. My choice of stainless torx-head screws in the right sort of length was 20 mm or 30 mm. 30 mm might have protruded through the top surface so it had to be 20 mm. I've ordered some 25 mm ones and I'll replace the 20 mm ones when the longer ones arrive as I think the strength will help.

They were positioned a couple of masking tape thicknesses away from the edge so there's no chance of them stopping the dovetails from closing.

drilling_pilot_holes.jpg

Et voila:

all_done.jpg
 
I was feeling thoroughly frazzled after work today, so I didn't want to do very much (too much risk of a visit by the CUF). Nevertheless, I was brave enough to do a very small bit of gluing.

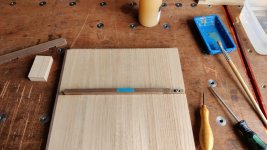
I got a thin offcut of walnut (that I'd actually been using as a push stick on the bandsaw as I thought it would be too thin/narrow to be useful!), cut it down to slightly over the required length and planed it until it was 5 mm thick and slightly wider than the middle support piece.

strip.jpg

I then brushed some fish glue onto it and the support piece and stuck it on the side (with the grain direction arranged to match the support piece):

glued_strip.jpg

All being well, I'll be able to trim it to size reasonably easily tomorrow.
 
Out of the clamps, planed flush (and chiselled flush in the case of the end grain) and then the whole of each face got a skim with a finely set smoothing plane. All being well, that's the last time I'll have to do anything with this piece before it's assembled into the chest:

out_of_clamps_and_cleaned_up.jpg
 
I haven't yet worked out why you've glued a strip of walnut onto the oak, but don't worry, I'm sure all will become clear in due course.
 
Mike G":q1lvzvi6 said:
I haven't yet worked out why you've glued a strip of walnut onto the oak, but don't worry, I'm sure all will become clear in due course.

Mainly aesthetics (I thought it might look a bit nicer without the fronts of the housing joints being visible and, since I was gluing something on, I thought I'd use walnut to match the drawer fronts & dividers). It's probably also because I like making life difficult for myself. Hopefully it won't be something I regret!
 
Walnut and oak is an excellent combination.
Being a bit cheeky here, have you booked the holiday to take this on? Are you on schedule? Can’t wait to see some al fresco woodworking.
 
Andyp":1kzrhn6z said:
Walnut and oak is an excellent combination.

As is the walnut & sweet chestnut I'm using here :D

Andyp":1kzrhn6z said:
Being a bit cheeky here, have you booked the holiday to take this on? Are you on schedule? Can’t wait to see some al fresco woodworking.

Yes and no, in that order :lol:
 
Firstly, a quick job. My needle files are all buried in a drawer behind a big slab of sweet chestnut, so not especially accessible. However, I wanted to tidy up the screw slots a little and I had an engineers file that just fit if I didn't shove it in too far, so I chamfered the edges a bit and generally gave the insides a bit of a tidy up. While I had the drawer supports in my hand, I lightly chamfered (with a block plane) the long edges to help them enter the housing joints.

01_tidying_slots_with_file.jpg

I haven't decided whether to shape the notch a bit more on those drawer runners (e.g. chamfer the sawn edge where the thickness reduces).

I then moved onto the round-overs for the handles. In the past I would have done this with an electric router, but I'm determined to do more hand toolery, so I thought I'd have a go at an alternative method (I'd be interested to know if there are suggestions for better ways, even though it's too late for this project!)

Firstly, I drew pencil lines inside and out, a few millimetres from the arris. I did this by eye. I'd like to repeat that: I did this by eye. Are you proud of me, an engineer who works for a metrology department and spends quite a lot of time working in nanometres, marking up by eye?! Well, I was impressed with myself :)

02_pencil_marks_around_handles.jpg

I then used an 18 mm chisel to (bevel down) to carve out most of the bit in between the pencil marks, aiming for something that would be fairly rounded to make the handles comfortable:

03_rough_carving_around_handle.jpg

Finally, I put the side in the vice and used sandpaper to even everything out (big strips for the long edges and narrow strips for the curved ends, but otherwise working in much the same way):

04_sanding.jpg

Et voila:

05_sanded.jpg

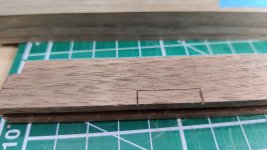
The next job was to cut the notches in the drawer dividers (if that's the right term: the horizontal things that go between the drawers and will be visible at the front). A week or two so ago I'd marked up a story stick with the right dimensions (measured off the other bits of the chest). I shot the end of a drawer divider, then marked in about 5 mm from the end (the housing joints are just over 5 mm deep). I then notched that mark against the notch in the story stick and used the other stick notch to mark where the other end should be:

06_story_stick.jpg

I then sawed (straight to the line - aren't I brave? :) ) a notch in each end of the divider:
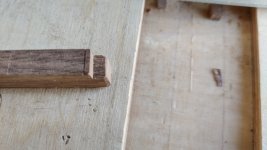
08_saw.jpg

Before marking 5 mm from the other notch and shooting the piece to length. Finally, I used a block plane to chamfer the corners (which will be hidden inside the housing joints) to ease their entry:

07_chamfered_corners.jpg

As I lined up the last drawer divider (the shorter one for the right hand side of the chest) to mark its length with the story stick, it didn't feel quite right to me so I decided to double-check the story stick. It turns out that I did something wrong marking the stick and the lengths were all wrong! :oops:

Thankfully, the difference was fairly small and all the pieces I'd made were too long, so I could mark up the correct place:

09_adjustment.jpg

... before recutting the notch, shooting off the chamfer and then cutting a new chamfer. Lucky escape I think.

That's the dividers almost complete:

10_dividers.jpg

It also brings me perilously close to that big scary glue-up. In fact I think I was close enough that I could plausibly have managed to get the chest glued together this evening, but I decided to err on the side of caution and stop for the day. Tomorrow morning when I'm feeling fresher, I can do the last few jobs and then (whimper) try to glue the chest together.

The remaining jobs are (I think):

  1. Make some cut-outs in the drawer-dividers for drawer stops
  2. Decide whether to do anything about the notch shape where the screw slot is on the drawer runners
  3. Give all the internal surfaces of the various parts a final plane or scrape as it'll be the last time they're accessible

I could also consider applying a bit of finish to the inside surfaces, but I'm on the fence about that at the moment.

My gluing plan is currently to fit the drawer runners first (using the drawer dividers as temporarily fitted spacers to make sure the runners go in the right place). They'll be much easier to fit while the chest is in pieces. Once they're in place, I probably won't wait for the glue holding them in (at the front only) to dry: they'll be fairly rigidly in place with the housing joints and the screw at the back.

Next job will be to (dry) fit the back slats into the bottom (or top, it doesn't matter), then glue the middle support into the bottom, then fit the top (with glue in the housing joint for the middle support and a dry fit of the back slats). The drawer dividers will then get glued into one side of the middle support and the chest side will get fitted: all being well the drawer dividers will slot into place if I'm careful. Finally, the drawer dividers on the other side can get glued into the middle support and the other chest side fitted.

At that point, I'll apply any clamps I think it needs and check that it's somewhere near square!

Once the glue's dry and the clamps are off, I'll glue and tap the wedges in. Leaving the tenons dry when I fit them into the mortices should allow me to wait until everything else is dry before worrying about the wedges, which should make the process ever so slightly less stressful.

If anyone thinks anything sounds wrong with what I've said, now's the time to say :D :D :D
 
Great stuff Al. I love all the details.

Just a tip......if you are chamfering with a chisel, then on the straight bits I would definitely go with bevel-up, skewing the chisel to push the shavings off the edge (if that makes sense). Bevel -up you get a reference from what you've already chamfered, and the back of the chisel can just slide along that. Don't try to take off the whole amount in one go. Use a variation of "Mike's Rule of Halves" to sneak up on the final line. Obviously around the curved bits at the end you'll need to be bevel-down. Good on you for doing that awkward little job with hand-tools. I reckon that in time you'll be able to do it without resorting to sandpaper.

Sounds like you've thought-through the glue up, which is 3/4 of the battle. You shouldn't need to panic at all because I believe I am right in saying that the fish glue is pretty forgiving and has a longish open-time. However, it is still worth practicing doing it the right way, and that particularly includes setting out all your clamps and blocks before you start, and having a plan for any squeeze-out. Spread your glue carefully enough that you avoid squeeze-out wherever possible............and good luck!
 
Mike G":1ulruu3g said:
Great stuff Al. I love all the details.

Just a tip......if you are chamfering with a chisel, then on the straight bits I would definitely go with bevel-up, skewing the chisel to push the shavings off the edge (if that makes sense). Bevel -up you get a reference from what you've already chamfered, and the back of the chisel can just slide along that. Don't try to take off the whole amount in one go. Use a variation of "Mike's Rule of Halves" to sneak up on the final line. Obviously around the curved bits at the end you'll need to be bevel-down. Good on you for doing that awkward little job with hand-tools. I reckon that in time you'll be able to do it without resorting to sandpaper.

Thanks Mike, that makes a lot of sense. I'll definitely follow that advice next time (if there is a next time & I haven't given up on woodworking completely after a disastrous glue-up tomorrow :lol: )

Mike G":1ulruu3g said:
Sounds like you've thought-through the glue up, which is 3/4 of the battle. You shouldn't need to panic at all because I believe I am right in saying that the fish glue is pretty forgiving and has a longish open-time. However, it is still worth practicing doing it the right way, and that particularly includes setting out all your clamps and blocks before you start, and having a plan for any squeeze-out. Spread your glue carefully enough that you avoid squeeze-out wherever possible............and good luck!

Good advice, thank you. I reserve the right to panic though :D
 
All sounds good, as Mike said do a dry run with cramps and blocks, perhaps tape the blocks in place if possible.
And maybe use a small paintbrush for the glue, as a lot of runs will seriously distract you.
A dry run can really pay off, I’m sure it will be fine as you’ve thought the process through, good luck.
Ian
 
Cabinetman":267fflzr said:
All sounds good, as Mike said do a dry run with cramps and blocks, perhaps tape the blocks in place if possible.
And maybe use a small paintbrush for the glue, as a lot of runs will seriously distract you.
A dry run can really pay off, I’m sure it will be fine as you’ve thought the process through, good luck.
Ian

Thanks Ian: also good advice. I've already got a small paintbrush lined up for gluing. Taping the blocks in place is a great idea: I wouldn't have thought of that.

Andyp":267fflzr said:
Turn your phone off and put a sign on the workshop door, DO NOT DISTURB. GLUE UP IN PROGRESS
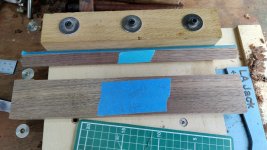
:D
 
I know a one time professional maker who does just that. Someone sticking their nose around the door, no matter how well meaning, asking “how is is it going” at just the wrong moment may just not want to hear the reply.
 
The first job this morning was actually a very small step backwards. As I was preparing to make the cut-outs for the drawer stops, I noticed that one of the drawer dividers had become slightly bowed. It probably wasn't enough of a bow to cause any real problem, but when I had been planing the stock for the dividers to size I'd made an extra one as a spare, so I decided to cut the groove and the notches on the spare and use that instead of the bowed piece.

With that done, I could get started on the cut-outs for the drawer stops. I decided to do two drawer stops per drawer. I'm sure one would be enough, but with two there I don't have to worry about any protrusion of the screw that holds the drawer bottom in place (which will be in the centre of the drawer).

I started by marking (with a pencil) two short lines, 20 mm apart, on each end of each drawer divider. I then put two strips of masking tape along the front edge of each piece and picked a position for each drawer divider so that I can use the corresponding drawer fronts when marking the position of the drawer stop:

setup_for_marking_stop_cutouts.jpg

The two layers of masking tape should ensure that the drawer front ends up ever so slightly proud of the drawer divider; I can take a couple of light skims with a smoothing plane to bring it flush.

To mark the stop positions, the masking taped front edge of the drawer divider was pushed up against my shooting board fence, as was the corresponding drawer front stock and then I used a knife to cut between the two pencil marks.

marking_stops.jpg

Finally, I used a square & a knife to mark the sides of the cut-outs. The lengths won't be all the same, but I can just tweak each stop to fit its corresponding hole.

marked_stops.jpg

I then sawed the edges of the cut-outs diagonally. I'm really enjoying using this little 180 mm Dozuki for small scale work like this. It's a shame it won't fit in this chest as it would probably be quite good for the sort of stuff I'm expecting to do on my travels :lol:

sawing_stop_cut_outs.jpg

With the edges cut, the next job was to chisel out the space. To stop myself from pushing the chisel too hard and punching through the bottom of the groove, I dug around in a drawer and found some left-over pieces of maple from when I made my Kumiko lid box. These were conveniently 3 mm thick so slid nicely into the groove and I used one as a bit of protection while chiselling out the waste with an 18 mm chisel:

maple_strip.jpg

All the cut-outs complete:

stop_cutouts_done.jpg

There will also need to be some sort of drawer stop (or stops) for the bottom-left drawer (which will sit directly on the sweet chestnut base), but getting a drawer stop in the right place is going to be virtually impossible before assembling the chest.

I'm still deciding what to do about that. One option is to put a stop on the underside of the bottom drawer divider. The other option is to screw some small pieces (probably brass) to the base. Being screwed in place, the position will be tweakable until it's right.

Apart from a very light plane or scrape of the remaining inside faces, I think I'm pretty much ready for the glue-up, so I took the opportunity to tidy up. I don't tidy the workspace very often, so I try to take a photo when I do!

tidy.jpg

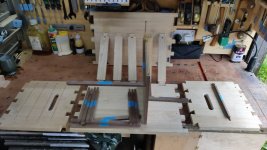
I then filtered through all the bits I've made and moved the ones (like the anti-rack piece and the drawer sides and fronts) that won't be involved in the initial glue-up out the way and laid out all the bits that will on the bench:

all_the_bits_to_glue.jpg

That's definitely the largest number of pieces I've ever had to glue together in one go :D

It also seemed a good opportunity to look out how the drawer dividers are going to go together. For Mike G in particular, but also for anyone else who was confused by the walnut strip on the middle support, this is the look I'm aiming for:

divider_arrangement.jpg

That felt like time to stop for a cup of tea. I need to think a little more about how I'm going to be sure that the middle support is in the right place (there's a millimetre or two of front-to-back wiggle room) to ensure that the drawer dividers aren't at all wonky. I think it should be straightforward with some care and attention, I'm just reminding myself to be careful.

After the cup of tea, I'll go back out and give all the inside faces a light skim until they look sufficiently pretty and then it'll be time for the scary bit.
 
Well, for better or for worse, it's glued together.

After my cup of tea, I went out to the garage to get going with the glue-up.

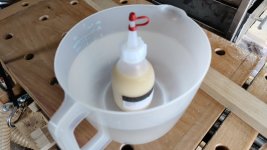
The first job was to give the inside faces all a good tidy up, but before I did that I put the bottle of fish glue in some warm water (at hot tap temperature) as I thought it might help give me more time for gluing. Here's a really interesting (and out of focus :D ) action shot:

01_warming_glue.jpg

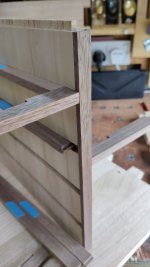
I then fitted the drawer runner onto the right-hand side of the middle support, using the drawer divider to gauge the right position. There's glue for about 20 mm at the front of the drawer divider (and on the middle support as I understand that it's best to glue both faces of a joint); the rest is glue-free.

02_fitting_shelf.jpg

The screw at the back is a torx-socket pan-head stainless steel screw. I guess the tradition would be to use a brass slotted screw but slotted screws aren't as nice to screw in as torx ones and in my (admittedly extremely unpopular :P ) opinion, slotted screws generally look rubbish as well.scared.gif

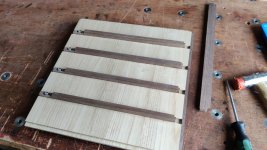
After fitting the right-hand side drawer runner, I flipped the board over (resting it on some blocks for obvious reasons) and fitted the drawer runners to the other side.

03_fitted_shelves.jpg

Before fitting the drawer runners to the sides of the chest, I got on with the general construction. I glued a strip of cardboard to the undersized tenon on the middle support (if you remember from long, long ago, I'd let the router plane cutter drop too far on the last cut and had one tenon undersize on one side). The slat tenons were tighter than I'd remembered, but they went in with a bit of persuasion (I didn't apply any glue to the slat tenons):

04_slats_in_place.jpg

I could then fit the top:

05_top_fitted.jpg

With the top fitted, I could measure the distance from the rear of the chest to the front of the drawer runners on the middle support and use that dimension as the reference when fitting the drawer runners to the sides of the chest.

There was then a long period where taking photos wasn't at the forefront of my mind :D , at the end of which the chest looked like this:
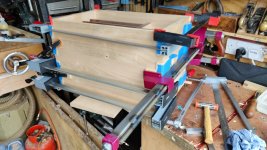
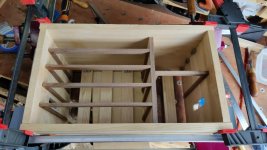
06_clamped_up.jpg

View from above (the front of the chest):

07_top_view.jpg

Generally it seems to have gone okay. From gluing the first drawer runners (in the middle support) in to walking away to go and have lunch took about 1 hour 40 minutes. There are definitely some gaps in the dovetails, but I think they're small enough that they might disappear with some strategic planing when I tidy everything up. The dimensions across the diagonals at the front of the chest match, which is a good sign; I haven't turned it over to check the diagonals at the back: I'm just hoping they're okay!

I did something wrong when I was having all those issues with the story stick and the lengths between the notches on the drawer dividers. The (single) divider on the right-hand side is spot on, but there are gaps on the left-hand side dividers:

08_gaps.jpg

I made sure the gaps were all at the left-hand end of the drawer dividers (so they're flush where they meet the walnut strip, which is more visible). I'll try to make some little bits of walnut that I can push into those gaps to tidy it up when it's all complete, although it's going to be entertaining making pieces the right length given that I'd like the grain to be going in the same direction as the rest of the divider.

I think I now need to leave it all overnight and then see what it looks like in the morning. I'd guess I could take the clamps off sooner than that (I don't think anything is going anywhere as most of the joints took quite a bit of squeezing to get them to close), but I'll see how impatient I get...

Then I get to fit the wedges, wait for the glue to dry on those as well and then there's quite a lot of overhanging bits and pieces (tails, pins, tenons) to bring flush with the sides and top, followed by general planing of all six faces of the chest.
 
Excellent Al. Well done. That's quite a complex glue-up. You'll be pleased to have that behind you. Personally, I never take the cramps off the same day, and it's one of the nice parts of woodworking to go out to the workshop and have the first job be the removal of clamps. You've suddenly got a whole project, not just a pile of pieces.
 
Mike G":3m3j40iv said:
Excellent Al. Well done. That's quite a complex glue-up. You'll be pleased to have that behind you. Personally, I never take the cramps off the same day, and it's one of the nice parts of woodworking to go out to the workshop and have the first job be the removal of clamps. You've suddenly got a whole project, not just a pile of pieces.

Thanks Mike, I certainly am pleased to have that behind me :)

I think not taking the clamps off is very wise. I went out to have another look and the fish glue in the pot and on the brush (which I'd completely forgotten to clean :oops: ) were still quite gloopy (about 4 hours after I finished the glue-up), so I think the fish glue needs a lot more time to properly do its thing.
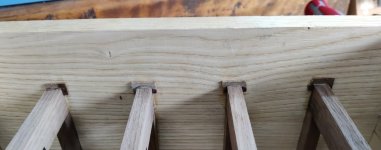
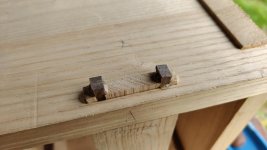
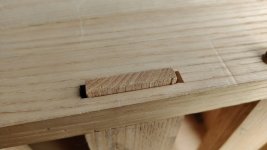
However, I couldn't resist adjusting the positions of the clamps slightly, to give me enough access to get some little slices off the end of an offcut into place (I did wipe off the excess after taking that photo)

wedgy_bits.jpg
 
I guess I'm a bit late to offer any suggestions... But I would only have said unnecessary things like Tidy up, lay out the parts, adjust the clamps and any blocks, warm the glue, use a little brush, leave the clamps on overnight... :D
Looking good.
 
When I went out to the workshop this morning, the fish glue left in my silicone glue tray was hard (and peeled off nice and easily in one piece), so I was fairly confident the glue on the chest would be dry.

Off came the clamps and it was time for wedging. The first pair went in nice and easily:

01_first_wedge.jpg

Then I came to the second pair and noticed something that made one or two bad words come out of my mouth: somehow I'd managed to miss the wedge slots in one of the tenons!

02_how_did_that_happen.jpg

Spot the difference:

03_in_context.jpg

After the steam stopped venting from my ears, I concluded there were two options available to me:

  1. The easy option: put the wedges on the outside of the tenon rather than in slots and accept that this tenon would look different to the others. It's on the bottom of the chest so no-one will ever notice.
  2. The stupid option: try to split the wood in the right place so that I could get a wedge in where I had hoped to put a wedge and hope that it looks alright when it's all tidied up. I don't think strength is really an issue (the slats are mostly under compressive force) so splitting the tenon shouldn't be a massive issue (as long as the split doesn't proceed down the slat!).

So: the easy option or the stupid one. Guess which I picked :D

I started by putting a couple of layers of masking tape around the tenon and a bit of cardboard on the bottom face of the chest and using a tenon saw (as it has a fairly thick blade) to cut a little way into the tenon in the right place:

04_sawn_cut_starts.jpg

I then used a thin knife down each side of the saw kerf to spread the cut slightly further down and a 6 mm chisel to initiate the split:

05_knife_and_chisel.jpg

With that done, I could shove some high angle (much higher than the angle of the side of the mortice) wedges in and give them a few taps. As far as I can tell, that seems to have worked :eusa-pray:

06_seems_to_have_worked.jpg

The wedges on the top side proceeded much more smoothly :)

07_row_of_wedged_tenons.jpg

Now I guess I need to leave them until tomorrow to let the glue fully cure, but I might be able to do some other stuff on the chest in the meantime if I'm careful (e.g. marking up the anti-rack piece on the chest and maybe tidying up the little walnut bits I shoved in the gaps yesterday.)
 
Great rescue, Al, and that's what I would have done too. However, I would have drilled a couple of holes, I think. Approximately in line with your slits, and as tight under the board into which the tenon fits as I could manage......and they would serve the purpose of preventing the splits working their way down the slats.
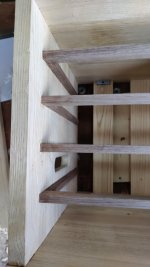
 
Mike G":3jiucjtz said:
Great rescue, Al, and that's what I would have done too. However, I would have drilled a couple of holes, I think. Approximately in line with your slits, and as tight under the board into which the tenon fits as I could manage......and they would serve the purpose of preventing the splits working their way down the slats.

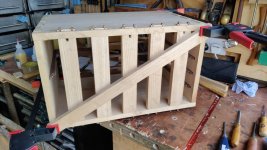
Thanks Mike: that's good advice for the next time I mess up a wedged tenon in the same way! :D
 
After gluing the wedges, I took the motorbike out for a quick spin as I haven't ridden it in ages. Once I got back I thought I'd do a little bit more on the chest before lunch.

First of all, I carefully manoeuvred it onto its back and attacked the little gap filling pieces with a few different skewed and straight chisels. It'll probably need a bit more tidying up before applying any finish, but it's looking a lot better than it did:

01_tidied_up_inserts.jpg

I then put the chest back upright and clamped on the piece that's hopefully going to prevent any racking when I plane on the top. With that clamped in place I could mark the sides of the half-laps on the back slats. Cutting those is going to be interesting given the lack of saw access, but that's a challenge for tomorrow I think :D

02_clamped_on_antirack.jpg

What I hadn't considered was how hard it was going to be to mark the half-laps on the anti-rack piece itself. Some were easy, but the ones in the left-hand half of the chest were far from easy as the drawer dividers don't make access easy. It's a good job I have scrawny arms: if I were muscular I don't think I would have managed!

03_squeeze.jpg

Thankfully I was able to mark all the cross-grain cuts by stretching. The short long-grain cut that will form the shape at the end of the piece was too hard to reach, but I managed to mark it by taping my knife to a bit of wood:

04_knife_on_a_stick.jpg

I was somewhat relieved that, when I took it all apart, I hadn't missed any of the lines:

05_marked_out_waste.jpg

The next job will be the relatively easy task of cutting the half-laps in the anti-rack piece (I say relatively easy, but I've never cut a half-lap joint before :lol: ). After that I'll figure out how I'm going to cut the half-laps in the back slats.
 
Back
Top