• Hi all and welcome to TheWoodHaven2 brought into the 21st Century, kicking and screaming! We all have Alasdair to thank for the vast bulk of the heavy lifting to get us here, no more so than me because he's taken away a huge burden of responsibility from my shoulders and brought us to this new shiny home, with all your previous content (hopefully) still intact! Please peruse and feed back. There is still plenty to do, like changing the colour scheme, adding the banner graphic, tweaking the odd setting here and there so I have added a new thread in the 'Technical Issues, Bugs and Feature Requests' forum for you to add any issues you find, any missing settings or just anything you'd like to see added/removed from the feature set that Xenforo offers. We will get to everything over the coming weeks so please be patient, but add anything at all to the thread I mention above and we promise to get to them over the next few days/weeks/months. In the meantime, please enjoy!

How best to chop up planks?

Dr.Al

Old Oak
Joined
Dec 31, 2020
Messages
3,707
Reaction score
2,494
Location
Dursley, Gloucestershire
Name
Al
My next project is probably going to be the wall-mounted bookshelf that Carolyn has requested. The current design is this (potentially with a back added if I can figure out what to make the back out of):

file.php


I've bought £48 worth of 25 mm thick Ash to use for this. My plan is to use a mixture of hand and power tools on this project so I can get it done a bit quicker than the tool chest!

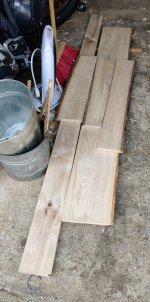
These are the (planed on one side) planks:
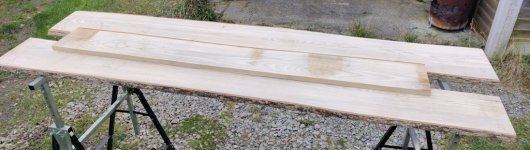
planks.jpg

If you click on this image for a bigger view, you might just about be able to read the dimensions:
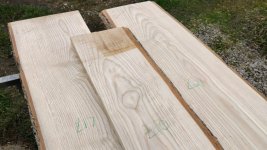
prices.jpg

In case it's not sufficiently readable, that's 25 × 200 × 1750 mm, 25 × 280 × 2240 mm and 25 × 240 × 2230 mm. From the drawing above I think I need a total of 4.6 metres of 200 mm wide board.

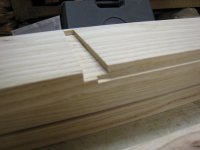
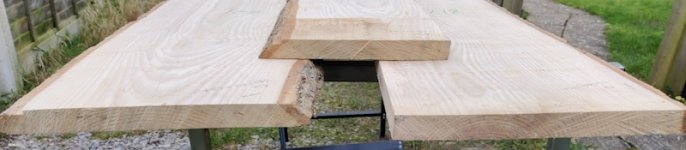
This photo shows what the end grain looks like:
end_grain.jpg

Am I correct in thinking that it would be more stable if I cut it up into narrower strips and glued the strips back together? If so, how would you go about doing this? Just 100 mm strips and balance the grain in a U ∩ pattern? Or something more complicated? Or would you leave it as 200 mm wide and just accept that they might bend?

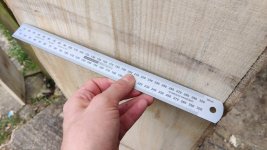
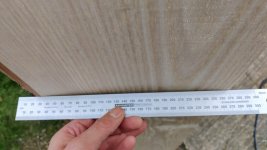
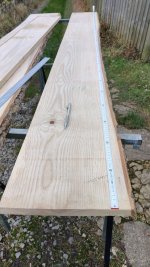
This is what one of them looks like with a straight-ish edge lying on it:
straight_edge.jpg

Given that the side of the board that this straight-edge is on is the one with the perpendicular grain, I'm torn as to whether to cut all the way down along that line or to follow the bark line. The advantage of following the bark line is that I'll get more of the quarter sawn stuff; the disadvantage is that I'd probably have to cut it into shorter pieces, which risks wasting more wood if I stick this through my (snipey) thicknesser.

Any and all help and advice appreciated! My only previous experience of making panels and such-like is using quarter sawn stuff (either by buying quarter sawn oak or by getting middle slices of a sweet chestnut tree and taking the outside bits of those slices).
 
If the timber is already pretty low in moisture content it's likely done all the moving that it's going to do anyway. I would say if you're joining those shelves into the sides with a trench that is going to hold them pretty flat as well.
 
Trevanion":xffpva2z said:
If the timber is already pretty low in moisture content it's likely done all the moving that it's going to do anyway. I would say if you're joining those shelves into the sides with a trench that is going to hold them pretty flat as well.

Interesting, thank you. What do you mean by "a trench"? I haven't worked out how the shelves will be attached, but I was planning something rigid (housing or M&T perhaps?)
 
I only do cut-and-shut with a board when it has already cupped or twisted. In your case, if it is dry enough then your joinery will have it held in a permanent arm-wrestle with itself, and it should stay true. If you were in any way worried about that then you could either do a dovetail housing for one or more of the cross members, or do a normal housing but chop out additionally for a couple of through tenons, and wedge them.
 
Dr.Al":2xycgovd said:
Interesting, thank you. What do you mean by "a trench"? I haven't worked out how the shelves will be attached, but I was planning something rigid (housing or M&T perhaps?)

A housing is a trench, it's just a woodworking dialect thing :D

If you wanted really rigid, a dovetail housing.
 
Trevanion":2fiuxp5i said:
If the timber is already pretty low in moisture content it's likely done all the moving that it's going to do anyway. I would say if you're joining those shelves into the sides with a trench that is going to hold them pretty flat as well.
Agreed. I'd chop each bit over long, say 30mm and bring it into a warmish room in the house (a cool bedroom is ideal) and condition them between sticks under a bed for a month or so; if there's any movement you should be able to see it. If you've got a moisture meter, it's also worth checking the MC; if it's around 10% or lower it should be fine indoors.

It's crucial also that the other side is skimmed as well, bearing in mind the old mantra of ''whatever you do to one side, repeat on the other'' so the ash conditions equally. Even so, you may be unlucky and it'll bow and twist as any stresses are released, as happened to my JK cabinet door :cry: a while back - Rob

Edit- if you're going to do shovetails as indicated in the plan, you're on a hiding to nothing if the wood ain't flat n'true. It's doable, but it takes a lot more effort.
 
I agree with most of the above, use of sliding dovetails / housings / dados (if you must) will keep things flat. But I don't think wood has ever done moving. If it wants to be difficult, clamping a board sandwiched between a couple of bits of 2x2 will force it flat for long enough to cut and assemble joints. Worked for me with sliding dovetails.
 
As suggested already, trenching the shelves in with a dovetail housing may keep them flat. My preference for bookcase shelves is the use of library strips and a return edge on the front to conceal any small gaps. This would probably not suit your design though. Piece of ash veneered ply would be ideal for the back, rebated or grooved into the outside elements. 6 or 9 mm being suitable.IMG_1355.jpeg
 
Thanks everyone for the advice.

Mike G":2y3lgalv said:
I only do cut-and-shut with a board when it has already cupped or twisted. In your case, if it is dry enough then your joinery will have it held in a permanent arm-wrestle with itself, and it should stay true. If you were in any way worried about that then you could either do a dovetail housing for one or more of the cross members, or do a normal housing but chop out additionally for a couple of through tenons, and wedge them.

Wedged through tenons sounds like a viable option. A sliding dovetail sounds a bit too difficult!

Woodbloke":2y3lgalv said:
Agreed. I'd chop each bit over long, say 30mm and bring it into a warmish room in the house (a cool bedroom is ideal) and condition them between sticks under a bed for a month or so; if there's any movement you should be able to see it. If you've got a moisture meter, it's also worth checking the MC; if it's around 10% or lower it should be fine indoors.

Unfortunately, I don't have a moisture meter and there's no way I can bring them into the house to condition: there simply isn't room anywhere that wouldn't result in us tripping over the pile of wood for the next month. Our house is almost as crammed with stuff as the garage is :D

One of these days we'll get round to moving somewhere bigger...

Sheffield Tony":2y3lgalv said:
If it wants to be difficult, clamping a board sandwiched between a couple of bits of 2x2 will force it flat for long enough to cut and assemble joints.

That's a good tip, thanks.

Mike Jordan":2y3lgalv said:
Piece of ash veneered ply would be ideal for the back, rebated or grooved into the outside elements. 6 or 9 mm being suitable.

I'd thought it would probably plywood of some sort, either birch ply or veneered plywood. The issue is getting some: I don't know of anywhere locally that stocks such things and a lot of places will be closing down for the Christmas break just as I get going on this project. The thin stuff can also be a bit of a pain to move around (vs e.g. some 18 mm ply which can be put on the roof bars) and delivery can be very expensive.
 
Here's a somewhat similar bookcase I made a few years ago. It's ash, but presumably kiln dried, bought PAR from Robbins. (I didn't know about Wentwood and their very good value supplies back then.)

The uprights and outsides are about 140mm deep and 20mm thick, with the shelves 16mm thick.

At the top there are half-lap dovetails, at the lower horizontal there are tapered dovetail housings. The sides continue down to the floor.

IMG_20231221_145202386.jpg

It probably wasn't all perfectly straight and square but it went together, with some persuasion, and looks square. The thinner shelves are loose, resting on little metal studs fitted into holes. They could be adjustable but there's no need, so they're not.

The wood has all stayed nice and flat and straight. The same applies to a simpler ash bookcase nearby.

Also, for my long-winded bed project, made from nice air dried ash, everything has stayed as it should in the year or so since it was finished.

So overall, I'd just cut the boards out from single pieces if I were you, and get it assembled.

Your design does look a bit challenging to glue up. I'd certainly advise using tapered dovetail housings - they aren't very difficult to cut and are much easier to assemble. Don't cut them too tight though, as you can get slight swelling of the wood during assembly that makes it suddenly tighten up.

You could leave the little half shelf loose and support it on pins or concealed wires.

Looks a nice project.

PS. Robbins do stock ash veneered ply - as used here - but it's not cheap any more.
 
Dr.Al":3tell1ti said:
.....Wedged through tenons sounds like a viable option. A sliding dovetail sounds a bit too difficult!....

If you're after tips, then I would suggest chopping out your mortices and doing your tenons BEFORE doing your housing. That way you can mark up your housing with absolute certainty using the boards trapped in their final locations by the M&Ts. This is particularly useful if you have hand-prepared your stock and there are elements of imperfection (heaven forfend :lol: ).

The other tip is that sliding dovetails are easier than you'd think, and well within your skill level. Try one on some scrap.

edit
Try doing a tapered dovetail housing. They're a bit more forgiving than a straight one, certainly for assembly. Don't taper both edges: keep one edge square to the board, and taper the other. That makes setting out so much easier.
 
I have had long lengths of wood laying up the stairs for years the wife doesn’t mind and if they aren’t to wide they are in a place you never tread.

But if you cut them to rough length they will fit under a bed or standing up in a corner.

Pete
 
I’ve had some baltic birch ply atop a wardrobe for 12 years or more, the off cuts from a couple of Tripp Trapp style chairs. I am sure I had another project in mind for them :eusa-think:
 
Timber on the stairs, that’s tame compared to the time I stacked sawn oak boards on top of a piece of furniture in the living room. It was one of those units that stood 2m high and 2.4m long and featured cocktail cabinet,China cabinet bookcase and drinks cupboard and writing desk.They were fashionable in the 1970s and was my wife’s pride and joy at one time. The only time adverse comments were heard was when I fitted Christmas lights to the timber at this time of year. It proved to be a great way to condition the boards.
 
Assuming the boards are currently at something like 8 - 12% MC then, as others have said, if the boards are currently flat enough to get all the parts needed out at your required thickness there wouldn't be any good reason to rip them into narrower strips, rearrange the strips and glue them back together. As long as the trued parts stay flat, i.e., they warp very little during subsequent construction, then the joinery, when assembled, will restrain any future potential for distortion. To help minimise distortion after initial dimensioning and in breaks during the construction period it would be best to carefully sticker parts to allow air to circulate, perhaps adding some weights to the top of the pile, or clamping the pile together, e.g., band clamps or G clamps.

Some mention has been made to incorporate sliding dovetail joints to help retain straightness, which is a good idea, but if you choose to use that type of joint avoid the standard version and go for the tapered sliding dovetail. I suggest this because I've seen quite a number of standard sliding dovetails go pear shaped during assembly, i.e., they locked up halfway assembled especially where two ends of a board, a shelf for example are fed into both carcase sides at the same time. This is a risk where the pair of joints are long, e.g., longer than about 180 - 200 mm. The tapered sliding dovetail on both ends of such a shelf, or other part, eliminates this likelihood. Slainte.
 
Just to continue the hinting, here's a tapered sliding dovetail on one end of the lower shelf of the bookcase I showed earlier.

IMG_4467.JPG

and the end of the shelf that goes into it (sorry about the focus)

IMG_4463.JPG

Really not that hard to do. Unlike the plain version, with the tapered one you can adjust the fit and get it right.
 
Thanks again for all the advice. I'll probably start attacking it asap after Christmas (there's really no space in the house: even the space under the beds is full) - if only to clear the Ash out of the garage.

Has anyone got any references (books preferably, or youtube otherwise) showing how to do the sliding dovetails? I wouldn't know where to start (except perhaps with a router table and some jigs, but I'd prefer to avoid a router & my home-made router table is in pieces in the shed).
 
Mitch Peacock is good at no-nonsense, brief videos on many different joints, including this one

[youtubessl]x8UZyHYR-OE[/youtubessl]
 
As a late comer to this thread, it's nearly all been said esp by woodbloke. Curious that he and I agree more and more these days and yet our tool set and methods could hardly be further apart :lol:

The other thing that stuck out a mile is your "snipey thicknesser" FFS a man of your calibre and attention to detail out to fix that as a priority so your P/T becomes a first tool of choice for timber prep.

Bob
 
9fingers":2vvvclob said:
The other thing that stuck out a mile is your "snipey thicknesser" FFS a man of your calibre and attention to detail out to fix that as a priority so your P/T becomes a first tool of choice for timber prep.

That's probably true. It's definitely something I'd like to improve. It's a thicknesser, not a P/T: it's one of the "lunchbox" style Makita things. I'd love to replace it with a P/T but really don't have space at the moment.

To be honest, it's not something I've spent a lot of time on (and I was quite enjoying learning how to do it by hand for the tool chest). I'd kind of just accepted that it was something that was inherent in machines like that. I don't know much about what's involved in addressing things like snipe - any tips / suggestions for where to start?
 
Well, Christmas has been cancelled† so I find I've got quite a bit of unexpected time on my hands, so I thought I'd get on with chewing up the ash planks.

I promise I did listen to everyone who said don't chop them up. However, I chopped two of them up anyway. This is why:

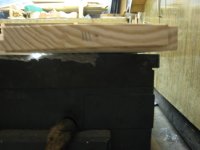
02_bent_2.jpg

I knew I was going to have to rip the bark of one at the very least as it's too wide for the thicknesser, but on closer inspection two of them were quite bent across the width:

01_bent_1.jpg

With that in mind, I decided the best thing to do was to rip them in half and thickness the two halves independently. Getting that bend out would have involved a massive reduction in thickness I think.

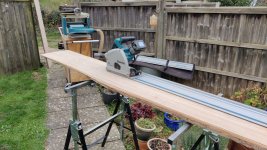
The outdoor workshop got set up:

03_outdoor_workshop.jpg

The shorter piece stayed whole; the two longer and wider pieces got ripped very, very roughly in half with the tracksaw and then I fed them through the thicknesser.

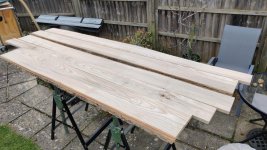
I started with the planed (by Wentwood) side down and kept going until all the saw marks had gone, then scribbled some pencil on the planed side and fed the pieces through the thickness with that side up until most/all the pencil marks had gone. That left them a little over 20 mm thick. They'll get some hand plane treatment after they've been reduced to somewhere near the final length.

04_thicknessed.jpg

That involved emptying the cyclone dust box thing twice (having also emptied it before starting). That thicknesser doesn't half produce a lot of waste quickly!

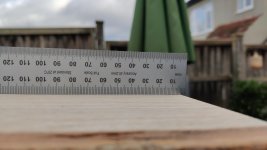
The snipe was nowhere near as bad as I'd remembered to be honest. It's possible that the last couple of times I'd used the thicknesser, it had been in the garage (where there isn't space for me to lift the "wings" on the stand, which seem to help a lot). Or I might have been doing something else stupid, who knows?

You can see the snipe if you look closely, but you have to look very closely:

05_snipe_not_so_bad.jpg


† Okay, that might be a little bit of hyperbole... more precisely, our Christmas travel plans have been cancelled as a result of my father getting covid :(
 
I've seen much worse snipe that that.

Bad luck on the family catching covid. Some of mine have caught it too and will be alone over the holiday.

One of the grandchildren, the 2 yo, ended up in hospital with RSV. Out now, and really pleased that FC and his elves came to visit her in her isolation room. Now her 3yo sister an -1yo brother are snotty!

There's some wicked bugs flying about.

I hope your father can recover soon so your family can get together.
 
Dr.Al":2ioj4pb5 said:
Well, Christmas has been cancelled.....

Thank goodness for that. Well, I mean, so long as christmas cake hasn't been cancelled.......
 
Dr.Al":31lqqv2j said:
It's a thicknesser, not a P/T: it's one of the "lunchbox" style Makita things. I'd love to replace it with a P/T but really don't have space at the moment.

To be honest, it's not something I've spent a lot of time on (and I was quite enjoying learning how to do it by hand for the tool chest). I'd kind of just accepted that it was something that was inherent in machines like that. I don't know much about what's involved in addressing things like snipe - any tips / suggestions for where to start?

From memory this is how I set up my generic chinese lunchbox thicknesser.

set the height of the rollers in the base to project the absolute minimum to that they just roll when a test straight edge is passed through.
set the cutter block perfectly parallel to the rollers - usually by adjusting the chain or sprockets or bevel gears.
Set the knives parallel to the cutter block with equal projection. I favour the drag method but there are various jigs that some folk like.

Now the ticklish bit, set the infeed and outfeed table height ( more correctly the angle usually) with a longer straight edge so that with a bit of pressure on the tables to take out the inevitable flexure the surfaces are in line with the rollers right the way across the width.

Run a sample through to check the snipe. minimise infeed snipe by tweaks to the infeed table and outfeed snipe using the outfeed table.

Now polish your technique. Rest the timber on the infeed table and lift the far end a little whilst starting feeding in then support level until half way through.transfer support to the outfeed end taking the weight but not lifting until the very end when you should lift very slightly.

I now use a Delta DC380 four post thicknesser which has much more support but the bed is precision levelled to my table saw and it's outfeed table a total nearly 3m and optionally I use a roller platform to give 600mm or so of infeed support
This one but without the hinge up tables in the video https://www.youtube.com/watch?v=4IUhxwZzyFo

HTH
Bob
 
Negotiations have occurred :D

Over lunch, I asked Carolyn how confident she was in the measurements she'd given me (before I start cutting wood to size, I thought it was worth checking). "Not at all" was the answer, so we took the tape measure upstairs and did some more measuring. The dimensions I'd been given turned out to be the absolute maximum size that would fit in the available space.

After some discussion, the bookshelf thingy has now reduced from 920 × 530 × 200 mm to 900 × 500 × 120 mm. The last dimension (depth) is a great result from my point of view as it means those planks that I ripped in half are wide enough without having to rejoin them.

:obscene-drinkingcheers:

We also discussed the back. Carolyn likes the idea of a painted (rather than ash veneered) back, so I can use the grotty bit of 6 mm plywood I've got in the shed (assuming it's big enough: I haven't checked yet) rather than having to go shopping for some expensive posh stuff. The only caveat was that she wanted the back to be removable so it could be repainted if we move house / redecorate. That shouldn't be a big deal as long as I set it in a rebate rather than a groove.

The plywood is shabby enough that it'll probably need some filler before painting it, but Carolyn is one of these strange people who like painting and she's happy to do all that, so my job should just be cutting it to size.

:obscene-drinkingcheers:

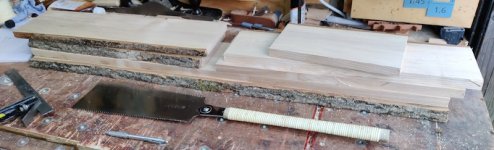
With that all agreed, I starting chopping some bits to (over) length:

06_to_length.jpg

The reduction in shelf depth has left me with a lot of spare ash for another future project:

07_spare.jpg

Whoop whoop!

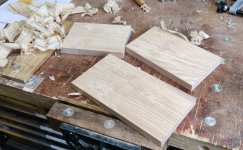
I took the grottiest looking one of the short pieces and chopped it up into even smaller pieces, then planed the faces and shot the ends square.

08_practice.jpg

Tomorrow morning, I'll try cutting a tapered sliding dovetail in those pieces and see how I get on... gulp...

In the video that AndyT shared a few posts above, Mitch Peacock used a tapered sliding dovetail for the intermediate shelves, but a tapered "half dovetailed housing" for the bookcase top - a tapered sliding dovetail on one side of the upright and nothing at all on the other side - just the face of the wood into a housing.

Is there a good reason for doing that for the upright→top joint rather than another tapered sliding dovetail?
 
No, I think that's a bit of a cop-out joint. Do your dovetails top and bottom and that's the ends of all the framing boards retained and restrained from moving. Use a full sliding dovetail (or wedged through tenons, housed) for the intermediate shelves, and they'll restrain the middle of the outer boards, and also be prevented from cupping or twisting themselves.
 
I suspect that in that video he's doing the half-dovetailed version just to be able to show multiple variations in one go. It's certainly easier to cut than the fully dovetailed version, but I don't see an advantage other than that.
 
Not sure if it's been mentioned already, but if you can it's best to select the best orientation of the bows in the side boards if there is any as it's rare that thin boards are perfectly flat even after planing. As you have dovetails top and bottom with the tails on the side, it would be best to have the convex bowed face facing out, that way when you draw it together with the shelves it will add compression to the piece and it will have a tendency to pull the dovetails into the top and bottom rather than push outwards over time.
 
Mike G":2wzqs1ly said:
... Use a full sliding dovetail (or wedged through tenons, housed) for the intermediate shelves, and they'll restrain the middle of the outer boards, and also be prevented from cupping or twisting themselves.
I've never cut one of those sliding dovetail thingies but use through wedged tenons instead (as mentioned above) They look particularly attractive (to me anyhow) when left proud by a couple of mm and then rounded over. They add a 'feature' to the job that wouldn't otherwise be seen if sliding dovetails were used - Rob
 
Woodbloke":2a8j68o9 said:
...I've never cut one of those sliding dovetail thingies but use through wedged tenons instead (as mentioned above) They look particularly attractive (to me anyhow) when left proud by a couple of mm and then rounded over. They add a 'feature' to the job that wouldn't otherwise be seen if sliding dovetails were used - Rob

Indeed. And they're not difficult. This is my son in law's first woodworking project, with a little supervision in my workshop (hand tools only):

EEUFIw8.png

YvJoUKW.png

It's not "fine furniture", but it looks good even in rough 'n ready stuff like this.
 
Woodbloke":1ahzte04 said:
I've never cut one of those sliding dovetail thingies but use through wedged tenons instead (as mentioned above) They look particularly attractive (to me anyhow) when left proud by a couple of mm and then rounded over. They add a 'feature' to the job that wouldn't otherwise be seen if sliding dovetails were used

That's what I was going to do before I got all the comments from various people on here telling me to do sliding dovetails :lol:

I still haven't decided yet, but I thought it would be good to get some practice at the dovetail housing / sliding dovetail as I'd never cut one before. Marking the tail from the socket is quite hard!

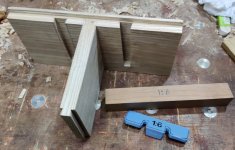
I was happy with my fourth attempt though:

01_fourth_attempt.jpg

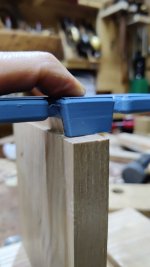
That little marking gauge is one of the reasons I like having a 3D printer - I made it for the job: it's a smaller version of some I made a while ago; the difference being that the tail marker drops down exactly the right amount for this tail:

02_marking_gauge.jpg

As I already had a parametric model, it took about 30 seconds to update it for the correct depth and then I left it for about an hour to print.

The fourth one goes in about this far with light hand pressure (as does the fifth one, which also worked well):

03_hand_pressure.jpg

A few light taps from a soft faced mallet push it the rest of the way.

Nice and square too:

04_square.jpg

Cutting the sockets is quite straightforward, although I resorted to a Western cross-cut saw as it seemed to work better than the Japanese saws I usually prefer (mainly because my Japanese cross-cut saws have teeth that don't go all the way to the tip). All the important edges (in the socket and on the tail itself) were cut with a chisel anyway, so the saw was only for roughing out.
 
Dr.Al":9li3c3af said:
.....Marking the tail from the socket is quite hard!.....

Hmmm......it would never have crossed my mind to try that. I would simply have marked them both out using a square, marking gauge, and a bevel gauge. Then I would have cut both, and an off-cut to act as a gauge for the socket.......and then offer-and-adjust in the time-honoured woodworking tradition.
 
Mike G":xa5i38ur said:
Dr.Al":xa5i38ur said:
.....Marking the tail from the socket is quite hard!.....

Hmmm......it would never have crossed my mind to try that. I would simply have marked them both out using a square, marking gauge, and a bevel gauge. Then I would have cut both, and an off-cut to act as a gauge for the socket.......and then offer-and-adjust in the time-honoured woodworking tradition.

That was what I tried on the first two attempts!
 
Back
Top