• Hi all and welcome to TheWoodHaven2 brought into the 21st Century, kicking and screaming! We all have Alasdair to thank for the vast bulk of the heavy lifting to get us here, no more so than me because he's taken away a huge burden of responsibility from my shoulders and brought us to this new shiny home, with all your previous content (hopefully) still intact! Please peruse and feed back. There is still plenty to do, like changing the colour scheme, adding the banner graphic, tweaking the odd setting here and there so I have added a new thread in the 'Technical Issues, Bugs and Feature Requests' forum for you to add any issues you find, any missing settings or just anything you'd like to see added/removed from the feature set that Xenforo offers. We will get to everything over the coming weeks so please be patient, but add anything at all to the thread I mention above and we promise to get to them over the next few days/weeks/months. In the meantime, please enjoy!

How to properly use an oil stone

Commander

Sapling
Joined
Apr 29, 2015
Messages
471
Reaction score
0
Location
Pretoria, RSA
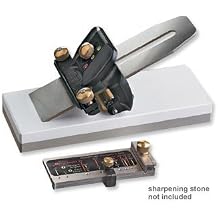
So I popped in to the local hardware a couple of days ago and bought a brand new blade for my jack planes (I think that is what they are :oops: ) I also bought a double sided oil stone. What oil should I use with it? Also what are the finer points of using the stone?

I still want to get a sharpening jig to make sure I keep the angles correct.
 
Any oil you like, but a light oil (sewing machine oil was my dad's choice) is best. The problem with oilstones is that they hollow out, potentially giving you curved blades.......but you'll be sharpening for a few years before this becomes an issue.
 
Erich, I always feel that there are others far more knowledgeable than I when it comes to sharpening as I do not believe I have neither the skills nor experience to call my self proficient. But here is my two pennyworth anyway. Oh, and I have not used an oil stone for years as I considered them to be too messy.

Get yourself a side clamp guide like the eclipse. Not sure of the availability in SA but easy to find in the UK. Like the one seen here:-
http://www.popularwoodworking.com/woodw ... one-please

This will give you a nice sharp (as sharp as can be expected with an oil stone) and consistent edge at the right angle. Great for chisels but it will leave you with nice sharp corners on the edges of the plane irons that will leave "tram lines" when smoothing a large surface. If you are only truing wood narrower than the plane iron then this is not a problem. If you need to smooth a large surface than those corners need to be knocked off. I manage this with mine by applying pressure on each side as there is just enough tilt to allow this to happen. I am not sure if that is possible with all guides of that style.

I suggest you give that a try and see how you get on with the tools you've got and the wood you are working on. If you are not happy with the results than there are a zillion other methods of getting the perfect edge which can be daunting to the uninitiated.

Different woods, differing grains will require differing levels of sharpness. Plenty of info on the web

FWIW I use a combination of diamond stones and Scary Sharp.

Years of membership on many woodworking forums has led me to conclude that you have to find out what is right for you when in comes to sharpening systems as everyone with have a different opinion.

Hope this helps. Very easy to get too bogged down in the subject.
 
Thanks for the tips guys! Andy, that is exactly the type of guide I would like to try, it seems effective and not overly complicate or expensive. I have been looking locally, but so far I have not found one. I will keep looking though!

On a side note, I only really realised how bad my current plane blades were after trying the new one. Even sraight from the package it worked much better then either of the old blades. I'm sure with a small amount of honeing it will be razor sharp. It also gives me the opportunity to do a bit of practice sharpening on the old blades!
 
Andyp":47b9ws61 said:
Get yourself a side clamp guide like the eclipse. Not sure of the availability in SA but easy to find in the UK. Like the one seen here:-
http://www.popularwoodworking.com/woodw ... one-please

As Andy quite rightly says, the Eclipse style guide is a great place to start and there are plenty of clones around so you ought to be able to pick one up quite easily, if not from your local tool emporium then certainly from t'interweb.
There are bazillions of different ways to hone an edge and all of them are slightly different, so you'll need to do some experiments to see what method works for you. Over the decades, I've tried the lot and have been using the so called 'Scary Sharp' system now for around six years. Before that, I used DMT diamond stones which were also pretty good - Rob
 
I managed to find a Stanley branded clone of the side clamp jig. It looks a bit different, but the functioning seems to be the same (will upload a photo at some point). It comes with a double sided stone and a small bottle of oil. Hopefully I will be able to try it out over the weekend! :D

Here are the pics:
CndDgss.png
DP2drcT.png
 
I eventually found some time to try out the jig yesterday afternoon. My first impression of the kit was a bit of disappointment as it isn't too well made. It has a small plastic piece that flips out to indicate how far the blade must be forward to sharpen to the different angles, this however does have quite a bit of play in it making me wonder how acurate it could be... The 2nd problem is that because the clamp holds from the rear and not the sides it is very difficult to make sure the blade face and the jig is parallel.

However, after a lot of measuring and checking I started with the task at hand, the old blade was actually in a bad state so I had to spend a lot of time on the rough grain getting the main angle even. After that a couple of minutes no the fine grain to polish the surface and then the final sharpening of the cutting face. I felt a small bur on the back so fliped the blade over and took that off with a couple of strokes, blade flat against the stone.

I took a off-cut and planed a couple of quick strokes and I have to say that I was impressed with the result! I do still have some tram lines here and there (I did try to put some extra pressure on the sides of the blade to give it a slight curve) but all and all it cuts very well, even smoother than the brand new blade I bought the other day.

In conclusion the jig isn't great (I'm a bit dissapointed in Stanley) and I wouldn't reccomend it unless you can't find a proper side clamp jig, but it does work. I will keep my eyes open for a proper side clamp jig to replace this one.

I did take some photos, but I'm not sure if they are clear enough to be helpful...
 
You know the rules, without pictures, it didn't happen[emoji13]

It does sound like the guide you have is not that good, the eclipse one is the that is the most usual one to start with, that does clamp on the sides of the tool.
 
For taking off lots of steel or a quick grind I use my cheapo Clarke grinder and homemade support - lots of details on the net:

bdbe475b6f3bb33a72d6aca775371a50.jpg


ecf75e8555567f5e9e0f78203a7bb15b.jpg


The rest on the right is a Veritas one.

For Scary Sharp I use a Kell II which I prefer to my Kell III.

Rod
 
Thanks for the feedback! I will post the pics as soon as I can. I will also take some pics of the guide so you can see the problems with it. I do have a meduim size bench grinder that I inhereted from my grand pa, but it is not mounted yet, and in all honesty I was afraid I would make it worse with the grinder! :lol:
 
Here are the photos as requested!

Here are some close-ups of the balde clamped and being sharpened.
tiFFLp6.png

9fNXFMa.png
Here you can see the blade getting sharper, there are still some dull spots that I need to get to (I didn't take a photo once I we completely done though, I also haven't started on the 2nd bevel during this photo)

44zZgjN.png
Here you can see the plastic gauge to give you the correct angles.

And some close-ups of the actual guide, apologies for the poor image quality...
czRVrtQ.png
hZTnAFx.png

And then finally a scrap board I plained quickly, alos not a great photo I'm afraid....
MhIOn4q.png
 
Goodness me..........you're a glutton for punishment Erich if you are grinding the primary bevel by hand on an oilstone! That must have taken for ever.
 
Mike G":1zlmtlqd said:
Goodness me..........you're a glutton for punishment Erich if you are grinding the primary bevel by hand on an oilstone! That must have taken for ever.

:lol: :lol: :lol:

It wasn't nearly as bad as I expected it to be! I'm just glad the blade is nice and sharp now! I will still setup the bench grinder to get it done quicker.
 
I sharpened some of my FIL's chisels last weekend and used them to practice making some mortice and tenon joints. I have made about 6 mortices and I think I'm slowly but surely getting the hang of it, no where near "fine furniture" quality yet, but each one is a little better than the previous.

I would love to try my hand at making some in another type of wood as I have been using pine so far, and it seems it is one of the more difficult woods to make proper mortises in.
 
I was fortunate enough to visit my sister in law and her family in New Zealand recently and while I was there I paid a quick visit to Bunnings where I was able to find this!

qNLNfrP.png

0GivHaB.png

I paid $18 for it and even though it seems to be a fairly cheap brand it is sturdy and works really well. I much prefer using this proper side clamp guide to the Stanley one.
 
That is a clone of the eclipse guide, I have had one like it for over 40 years, a very useful bit of kit.
It's repeatability if you set the tool projection correctly means you are always sharpening at the correct angle so the edge will be consistent.
 
Commander":2bwv6x5c said:
Here are the photos as requested!

Here are some close-ups of the balde clamped and being sharpened.
tiFFLp6.png

It might be just the way it looks in the photo, but the back of the blade doesn't look flat.
Which would be the 1st thing I sort when sharpening.
 
Hi Tusses, thanks for the input. I can't really remember if the back of the blade is flat (or if I even really checked) but I will have a look at it when I sharpen again. I can however say my hand planes have since become my favorite tool! It is just amazing how well they work once properly sharp and setup correctly.
 
you can see the corners are a different "smootheness" to the rest, as that's where they have been touching the abrasive. when it's flat, it will all look the same.

But I'm glad your happy with them now :-)
 
Andyp":1uso3cjx said:
This will give you a nice sharp (as sharp as can be expected with an oil stone) and consistent edge at the right angle. Great for chisels but it will leave you with nice sharp corners on the edges of the plane irons that will leave "tram lines" when smoothing a large surface. If you are only truing wood narrower than the plane iron then this is not a problem. If you need to smooth a large surface than those corners need to be knocked off. I manage this with mine by applying pressure on each side as there is just enough tilt to allow this to happen.

Veritas have overcome that problem with a Camber Roller

Neil
 
I have the Veritas Honing Guide. It's a little pricey but beautifully made and works extremely well, especially for the micro bevel. The instructions are excellent. I'm retired and don't use it all that much now, but when I was working as a guitar repairman a very sharp set of chisels was essential and sharpening with the Veritas was a pleasure rather than a pain.

41LQwe--dUL._AC_US218_.jpg
 
Back
Top