

So...the thread explaining how I go about making custom spindle moulder cutters is here. Time to put them into action. Door first.
This is what I'm aiming for, well a slimmer version.
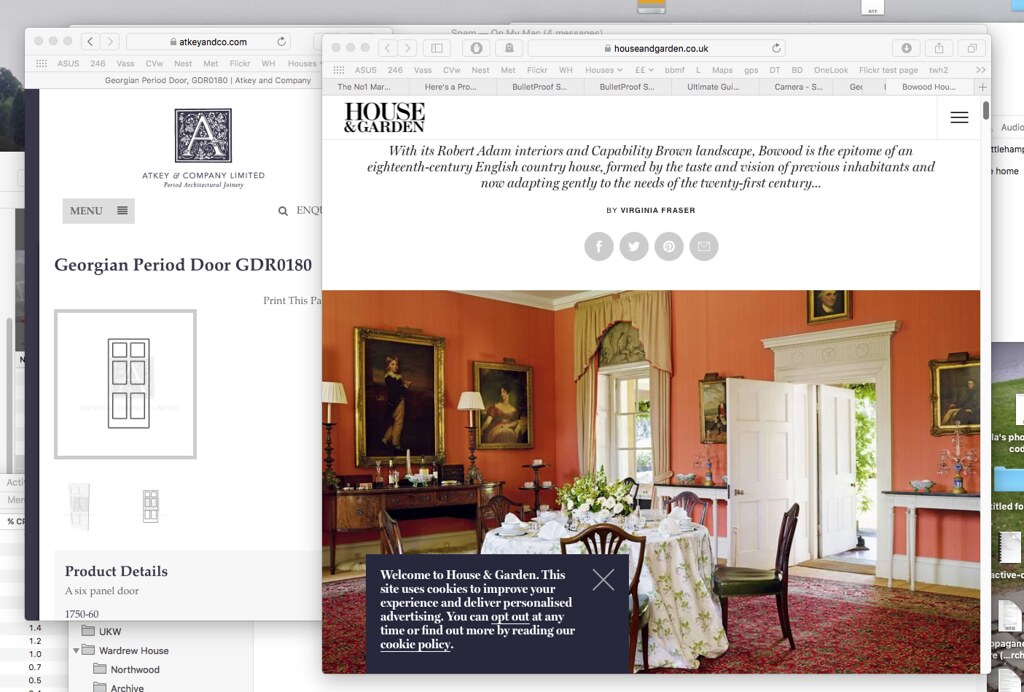
The only trouble is that the Georgians tended to go for wider doors than we do these days. In hindsight, we should have stripped out all the internal walls since they all ended up getting reboarded and plastered. That way we could have got wider door openings and straight walls! I would also not have given myself a whole load of hassle..to be discussed later. Ain't hindsight wonderful ?
But we are where we are and so need to adjust the width of the stiles and rails to suit. I drew up a full-size door, pinned it in place and then got CD's input. She asked for some of the rails to be made wider and also the central stile. Her wish is my command !

and the SketchUp drawing

The dotted lines are the tops of the mouldings ...absolutely critical to mark these in because, if you recall, I'm profiling and scribing the doors rather than make them up all-square and then apply separate mouldings. So I need to make sure the stock sizing takes these into account.
I have nine singles and one double door to make plus two externals.
Upstairs the doors are more or less the same size but the frames are slightly squint. To make life easier I plan to keep the central stile, panels, the two mid-rails all the same. The top and bottom rail and the two outside stiles will be all made slightly oversize, the finished door offered up into the frame, pencil mark round then trim to fit. By adopting this method I'd take into account any out of squareness in the frames. I mithered for ages about how I'd manage to get the finished door up onto the table saw etc to make the trim cuts as it was so heavy but then kicked myself as I'd forgotten my Festool TS55 track saw :eusa-doh: Easy-peasy with that.
The final thing to consider is whether the frames are coplanar ...ie no twist in them. If there was then at glue-up time I'd put in some wind into the door to match that of the frame. The way I check for wind in the frame is to bang nails in the corners and then place two lines across the diagonals. Where they cross, they should just touch if the frames are installed OK and with no wind. I find that dental floss is ideal for the lines. No furry bits of string to throw out the assessment. First frame for the prototype was in wind. Bit of a surprise TBH.
How am I going to make the internal door joints ? Purists look away now as I'll be using Festool dominos and this big beastie

At least that was the plan...we shall see how it actually panned out later on.
The other critical thing I've learnt with the Hammer combination machine is to have a very detailed workflow planned out.
This is it.
1) Rip and thickness rails and stiles to width
2) Cut to exact length..the benefit of using SketchUp and and dominos...no faffing about factoring in tenons.
3) Cut panels to size...they need to be oversize as they will sit in grooves in the rails and stiles.
4) Cut the slots for the dominos. Much easier to do when the ends of the rails and centre stiles are still square.
5) Cut the hole for the door latch in the stile. Much easier to do now when the stile is not part of a door !
6) Cut the rebates for the three hinges in the opposite stile for the same reason
7) Scribe the ends of the rails and centre stiles. If you do this before running the profile then you don't need to worry so much about breakout as the profile will remove any. In theory...in practice I still use a spelch block.
8) Profile everything
9) Cut the grooves for the panels
What can go wrong ? :?
First up, make a trial scribe and profile to get the spindle height right. Looking good...

Trial fit...bang on.

I've not shown steps 4 and 5. Step 5 is going to be a bit of a pain as CD wants the door knob a good distance away from the edge of the door so as to be more in keeping with the overall look and feel. Trouble is my Forstner bit ain't long enough.
Step 6 - cut the hinges out. I'm lazy..using this Trend jig. For the remaining doors I will make up a proper jig that will let me do all three hinges in one go and automatically give me the relative spacing between them and the top/bottom of the door.


Ought to sharpen up that router bit a tad
Steps 7 and 8
Scribe and profile all the rest. Notice the chalk marks on the timber. They remind me to either profile or scribe plus tell me which side is my reference side when I made the domino cuts. If you don't then it's very easy to get it all pear-shaped.


Time to dry-assemble. I have a few sanded down Dominos for this purpose because the unadulterated dominos are a very tight fit and virtually impossible to disassemble easily after a dry fit. And it was at this point that I realised I had a bit of a problem because although I thought I'd been careful when scribing and profiling I clearly had not and that it was either a case of getting the dominos lined up or the scribe and profiles....not both at the same time. It's become clear to me that scribing and profiling on both sides of the door panel as I've done and then trying to line up the dominos to compliment the fit of scribe and profile so that they all go together without any difficulty needs a lot more accuracy then I've achieved. You're talking fractions (as in 0.1mm) out of alignment and it doesn't go together.
Solution ? Forget the dominos and rely on glueing in the panels in their grooves to give the joints strength. Will the door fall apart ? Not in my lifetime.
And here it is on the bench..

And hung

What other admissions of guilt :eusa-think:
Sloppy groove cutting...a bit too wide TBH.
Even with my chalk marks I managed to get the stile with the hinges the wrong way round, had to fill in the hinge rebates and recut them after the glue had dried.
Lessons learned ?
Don't rush. I was trying to finish this room, which will be LOML's study, as a 'Xmas present' for her as it would be the first room in the house totally finished. Xmas came and went. So - Plan B - I wanted to enter the New Year with at least one room done as LOML's patience is wearing a bit thin. Didn't get there ..it's all the other things that are part of daily living that get in the way of achieving those goals.
We're nearly there as I type this. But I do need to find a better way of clamping down the timber when I make the profiles and scribes because the quirks are very small at 3mm and it doesn't take much movement in the timber post-planing and thicknessing to lose part of a quirk. I can see why professional shops might make the door in sort of shaker style and then apply the moulding afterwards.
So architraves next...
This is what I'm aiming for, well a slimmer version.
The only trouble is that the Georgians tended to go for wider doors than we do these days. In hindsight, we should have stripped out all the internal walls since they all ended up getting reboarded and plastered. That way we could have got wider door openings and straight walls! I would also not have given myself a whole load of hassle..to be discussed later. Ain't hindsight wonderful ?
But we are where we are and so need to adjust the width of the stiles and rails to suit. I drew up a full-size door, pinned it in place and then got CD's input. She asked for some of the rails to be made wider and also the central stile. Her wish is my command !
and the SketchUp drawing
The dotted lines are the tops of the mouldings ...absolutely critical to mark these in because, if you recall, I'm profiling and scribing the doors rather than make them up all-square and then apply separate mouldings. So I need to make sure the stock sizing takes these into account.
I have nine singles and one double door to make plus two externals.
Upstairs the doors are more or less the same size but the frames are slightly squint. To make life easier I plan to keep the central stile, panels, the two mid-rails all the same. The top and bottom rail and the two outside stiles will be all made slightly oversize, the finished door offered up into the frame, pencil mark round then trim to fit. By adopting this method I'd take into account any out of squareness in the frames. I mithered for ages about how I'd manage to get the finished door up onto the table saw etc to make the trim cuts as it was so heavy but then kicked myself as I'd forgotten my Festool TS55 track saw :eusa-doh: Easy-peasy with that.
The final thing to consider is whether the frames are coplanar ...ie no twist in them. If there was then at glue-up time I'd put in some wind into the door to match that of the frame. The way I check for wind in the frame is to bang nails in the corners and then place two lines across the diagonals. Where they cross, they should just touch if the frames are installed OK and with no wind. I find that dental floss is ideal for the lines. No furry bits of string to throw out the assessment. First frame for the prototype was in wind. Bit of a surprise TBH.
How am I going to make the internal door joints ? Purists look away now as I'll be using Festool dominos and this big beastie
At least that was the plan...we shall see how it actually panned out later on.
The other critical thing I've learnt with the Hammer combination machine is to have a very detailed workflow planned out.
This is it.
1) Rip and thickness rails and stiles to width
2) Cut to exact length..the benefit of using SketchUp and and dominos...no faffing about factoring in tenons.
3) Cut panels to size...they need to be oversize as they will sit in grooves in the rails and stiles.
4) Cut the slots for the dominos. Much easier to do when the ends of the rails and centre stiles are still square.
5) Cut the hole for the door latch in the stile. Much easier to do now when the stile is not part of a door !
6) Cut the rebates for the three hinges in the opposite stile for the same reason
7) Scribe the ends of the rails and centre stiles. If you do this before running the profile then you don't need to worry so much about breakout as the profile will remove any. In theory...in practice I still use a spelch block.
8) Profile everything
9) Cut the grooves for the panels
What can go wrong ? :?
First up, make a trial scribe and profile to get the spindle height right. Looking good...
Trial fit...bang on.
I've not shown steps 4 and 5. Step 5 is going to be a bit of a pain as CD wants the door knob a good distance away from the edge of the door so as to be more in keeping with the overall look and feel. Trouble is my Forstner bit ain't long enough.
Step 6 - cut the hinges out. I'm lazy..using this Trend jig. For the remaining doors I will make up a proper jig that will let me do all three hinges in one go and automatically give me the relative spacing between them and the top/bottom of the door.
Ought to sharpen up that router bit a tad
Steps 7 and 8
Scribe and profile all the rest. Notice the chalk marks on the timber. They remind me to either profile or scribe plus tell me which side is my reference side when I made the domino cuts. If you don't then it's very easy to get it all pear-shaped.
Time to dry-assemble. I have a few sanded down Dominos for this purpose because the unadulterated dominos are a very tight fit and virtually impossible to disassemble easily after a dry fit. And it was at this point that I realised I had a bit of a problem because although I thought I'd been careful when scribing and profiling I clearly had not and that it was either a case of getting the dominos lined up or the scribe and profiles....not both at the same time. It's become clear to me that scribing and profiling on both sides of the door panel as I've done and then trying to line up the dominos to compliment the fit of scribe and profile so that they all go together without any difficulty needs a lot more accuracy then I've achieved. You're talking fractions (as in 0.1mm) out of alignment and it doesn't go together.
Solution ? Forget the dominos and rely on glueing in the panels in their grooves to give the joints strength. Will the door fall apart ? Not in my lifetime.
And here it is on the bench..
And hung
What other admissions of guilt :eusa-think:
Sloppy groove cutting...a bit too wide TBH.
Even with my chalk marks I managed to get the stile with the hinges the wrong way round, had to fill in the hinge rebates and recut them after the glue had dried.
Lessons learned ?
Don't rush. I was trying to finish this room, which will be LOML's study, as a 'Xmas present' for her as it would be the first room in the house totally finished. Xmas came and went. So - Plan B - I wanted to enter the New Year with at least one room done as LOML's patience is wearing a bit thin. Didn't get there ..it's all the other things that are part of daily living that get in the way of achieving those goals.
We're nearly there as I type this. But I do need to find a better way of clamping down the timber when I make the profiles and scribes because the quirks are very small at 3mm and it doesn't take much movement in the timber post-planing and thicknessing to lose part of a quirk. I can see why professional shops might make the door in sort of shaker style and then apply the moulding afterwards.
So architraves next...


