• Hi all and welcome to TheWoodHaven2 brought into the 21st Century, kicking and screaming! We all have Alasdair to thank for the vast bulk of the heavy lifting to get us here, no more so than me because he's taken away a huge burden of responsibility from my shoulders and brought us to this new shiny home, with all your previous content (hopefully) still intact! Please peruse and feed back. There is still plenty to do, like changing the colour scheme, adding the banner graphic, tweaking the odd setting here and there so I have added a new thread in the 'Technical Issues, Bugs and Feature Requests' forum for you to add any issues you find, any missing settings or just anything you'd like to see added/removed from the feature set that Xenforo offers. We will get to everything over the coming weeks so please be patient, but add anything at all to the thread I mention above and we promise to get to them over the next few days/weeks/months. In the meantime, please enjoy!

Jewellery box

NickM

Old Oak
Joined
Dec 8, 2020
Messages
1,543
Reaction score
856
Location
Near Basingstoke
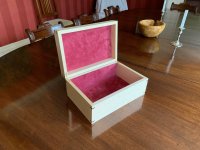
This isn't a WIP, but I mentioned in Steve M's thread that I'd been working on a box. Here it is.

IMG_8261.jpeg

IMG_8262.jpeg

It's not for any particular purpose. I was short of a project to work on and a board of birds eye maple I bought last year was one of the few bits of wood I had to use. I also wanted to have a go at a veneered panel for the lid which is flush with the sides. That also meant some stringing inlay to cover the join. I'm pretty happy with it.

The mitres on the lid haven't closed up 100%. I think that's because I made the veneered panel too tight and it very slightly stopped the mitres meeting perfectly. Stupid really, because the whole point of the stringing is to cover the gap you need to leave to stop that happening. Oh well, that's why we practice I suppose!

You'll see that the veneer on the inside of the lid doesn't match the outside. I didn't have two matching pieces, so the inside is purely a balancing veneer. I will line the inside of the lid (as well as the box) to address that.

I'm also planning to make a lift out tray for this box.

The whole thing needs finishing as well of course. I might French polish it...
 
Those splines are deceptive. From the first pic thought there were three on the base and one on the lid. It drew my eye away from the overall box and looked odd to me.
The fit between the two is almost too good.
May I suggest a very tiny round over champfer on the lid and base to make clear which is which?
I'm impressed with veneer and inlay, no way in this world do I have the patience to do that. :eusa-clap:
 
Thanks for the kind comments.

Inspiration for the box, and for the lining technique to follow, is from Custard's excellent tutorial on box lining which is available on (ahem) another forum.

I'll post some more photos when I next do more on it.
 
NickM":izk5g3k1 said:
Custard's excellent tutorial on box lining which is available on (ahem) another forum.

I'll post some more photos when I next do more on it.
It's a good technique which I've used for years now. There isn't really another way to line a box effectively apart from wrapping the edges of the lining over a bit of card; if it's not done that way, your eye gets drawn to the ragged edge which never seems to be smooth and even. I rarely line the box sides these days but I usually always do the base.

When you get around tuit, try using some 'Alcantara'....really good stuff and dead easy to manipulate - Rob
 
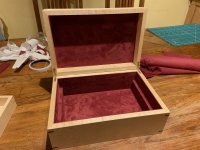
I made a start on lining the box yesterday evening.

IMG_8287.jpeg

The photo makes the lining look very pink but it's actually more of a red wine colour. Anyway, my wife chose the colour...

I haven't finally decided whether to line the sides of the lid or leave it as it is. I needed to line the inside top of the lid because I had used a random bit of veneer. I think I'll probably leave it as it is.

I haven't done the sides of the box yet, as I'm intending to make a lift out tray which will require support that also needs to be lined. I haven't decided how deep the lift out tray will be yet and that will dictate the size of the support pieces I need. I think I'll make the tray and go from there.

My tap and die collection is never going to have had such a good home... :eusa-whistle:
 
NickM":132t0q2l said:
I haven't done the sides of the box yet, as I'm intending to make a lift out tray which will require support that also needs to be lined. I haven't decided how deep the lift out tray will be yet and that will dictate the size of the support pieces I need. I think I'll make the tray and go from there.
Cracking job on the lining! However, you appear to be retro-fitting the tray but you've already lined the box, so the sides of the tray will be touching the pink lining, n'est pas?...which to my eyes will look a little 'odd'. What's normally done is to line the inside of the lid and base (if needed) and the interior; if a tray is required, it will sit on a couple of upstands and the interior isn't lined - Rob
 
Woodbloke":1mjo2287 said:
NickM":1mjo2287 said:
Cracking job on the lining! However, you appear to be retro-fitting the tray but you've already lined the box, so the sides of the tray will be touching the pink lining, n'est pas?...which to my eyes will look a little 'odd'. What's normally done is to line the inside of the lid and base (if needed) and the interior; if a tray is required, it will sit on a couple of upstands and the interior isn't lined - Rob

That's right. As I said, I'm using Custard's thread as my inspiration/guide and I think that's how he did it. (I hope he doesn't mind my borrowing this picture):

Jwllry-Box-2.jpg
 
Horses for dooberries! :lol: Both look 8-) But then in this one finished recently, I only lined...
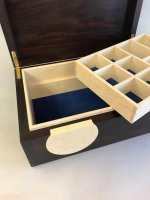
IMG_5074.jpg

...the base. The sides weren't lined as the Birds Eye Maple lining is around 6mm higher than the closing faces of the lid and box and it would have looked distinctly weird had I done so - Rob
 
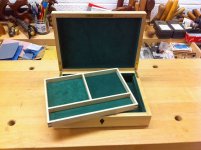
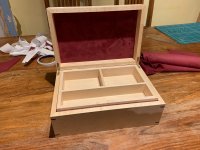
Still a bit more finishing and lining to do, but I've made the lift out tray and fitted the lined supports for that in the main box.

IMG_8291.jpeg

IMG_8292.jpeg

IMG_8293.jpeg
 
Back
Top