• Hi all and welcome to TheWoodHaven2 brought into the 21st Century, kicking and screaming! We all have Alasdair to thank for the vast bulk of the heavy lifting to get us here, no more so than me because he's taken away a huge burden of responsibility from my shoulders and brought us to this new shiny home, with all your previous content (hopefully) still intact! Please peruse and feed back. There is still plenty to do, like changing the colour scheme, adding the banner graphic, tweaking the odd setting here and there so I have added a new thread in the 'Technical Issues, Bugs and Feature Requests' forum for you to add any issues you find, any missing settings or just anything you'd like to see added/removed from the feature set that Xenforo offers. We will get to everything over the coming weeks so please be patient, but add anything at all to the thread I mention above and we promise to get to them over the next few days/weeks/months. In the meantime, please enjoy!

Jewellery Chest - not quite a WIP, more like random photos

StevieB

Nordic Pine
Joined
Jul 21, 2014
Messages
942
Reaction score
58
Location
Chatteris, Cambridgeshire
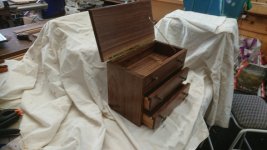
SWMBO asked for a jewellery box for Xmas. She asked in early October, knowing the rate at which I find time to work, and I finished it this morning, so pretty good estimating on her part! About 12 years ago when I was starting to move from DIY into woodwork as more of a hobby, I made her a jewellery box from oak that was a bit rough and ready (router cut finger joints, veneered panel in the top) and it is now too small. I wanted to make something better this time around, and even toyed with the idea of dovetails, but time and lack of timber to remake after inevitable mistakes means in the end I didn't go that far, but I am still pleased with the end result despite it still being far from what I would call perfect. I doubt I could have made it 12 years ago however, so that is some form of progress I guess. Rather than a proper WIP, I just took some photo's as I went as and when I remembered, so apologies for the jumping about in places.

First off, I started with a sketch and a mock-up. I knew I wanted to do more than a simple box, but couldn't find much I liked as inspiration online. In the end I went with a stack of drawers, roughly 380mm wide, 200mm deep and 250mm tall.
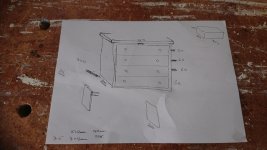
JC_1.JPG

JC_2.JPG

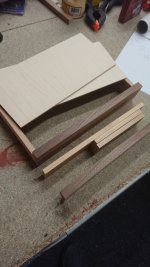
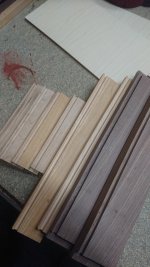
I also knew I didn't want to make it out of oak. I did have some maple, but far less than I thought, and in the end went with ABW. I had a single plank of this and a few sticks/offcuts, which is largely what determined the overall dimensions (and the somewhat odd construction method of the back) as well as my decision not to risk dovetails - there was no spare timber for repeats at all here. So prep the ABW:
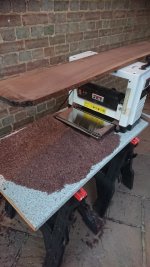
JC_3.JPG

Rough cut to size, being careful to keep all the pieces in the right order - I was paranoid about accidentally cutting the lid up for drawer fronts by accident - this was largely done an hour here and there in the evenings, hence starting in October:
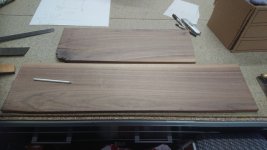
JC_4.JPG

and then using scrap pine where things wouldn't show e.g. drawer runners. I am well aware that this build is not 'proper' and I make no suggestion that this is the right way to do things, but as these parts would be hidden nobody will ever know!
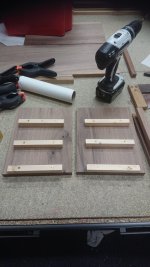
JC_5.JPG

Front runners in ABW scraps, again size largely determined by available timber. The back piece is some ABW veneered MDF (if you want relatively small quantities of this, I have found laser suppliers to be rather good, this came from kitronic, as did the maple veneered MDF)
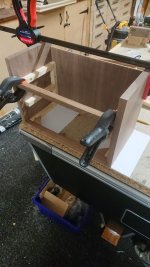
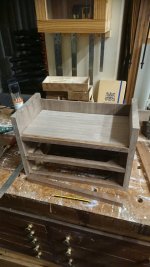
JC_6.JPG
 
Not sure of the photo limit for posts, so rather than lose the first post I will add another!

Finished basic construction. Note the back piece dies not come up fully - I knew I wanted to hinge the lid here so have a solid piece of timber to add to enable this

JC_7.JPG

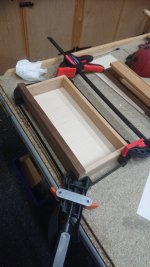
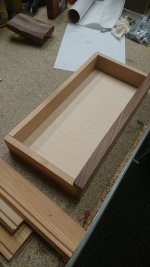
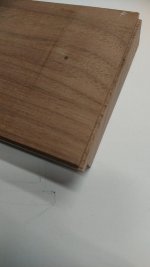
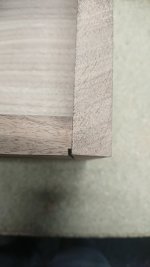
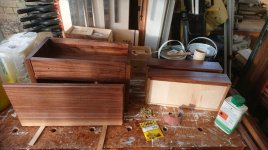
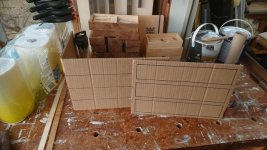
Then it was time to size the draw components. Due to 'ahem' a small measurement error on my part, I didn't have enough ABW for these. Looking through the scrap box I did have some maple that was long enough and thick enough, but it was not wide enough to give full height drawer sides. In the end I went with it, but in hindsight full height sides would have been better I feel. Not only did it make housing it into the side of the drawer fronts a pain, if fully opened I think the drawers will tip if not careful and it was too late to add a lower drawer runner to prevent this. I may be able to get in from the base if it becomes a major problem in the future

JC_8.JPG

JC_9.JPG

JC_10.JPG

JC_11.JPG

The top 'drawer' was always going to be false, being accessed by a hinged lid. To give this effect I cut a small groove into 3 edges of the top drawer and fitted this in place as a fixed component

JC_12.JPG

JC_13.JPG
 
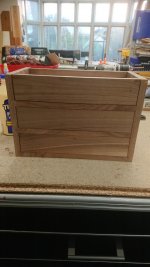
The dry fit of the drawers therefore looked something like this:

JC_14.JPG

In hindsight I should have cut the runners and drawers from the same piece of timber. The drawers are all cut from the same piece, but the effect is spoilt by the dividers not matching. Ho hum.

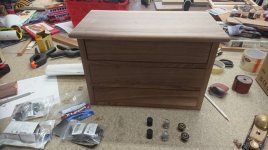
Perhaps the biggest decision was handles (see lathe thread) - couldn't find anything that jumped out at me so in the end ended up ordering 3 different styles, but one they had arrived only one set looked 'right' so went with those. The next shot shows the 3 handle variants as well as the lit dry fitted:

JC_15.JPG

Then it was just a case of adding some finish (2 coats of sanding sealer and 2 coats of satin varnish - I know, don't shoot me - it works!)

JC_16.JPG

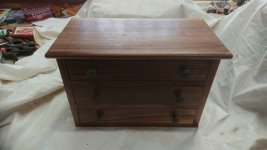
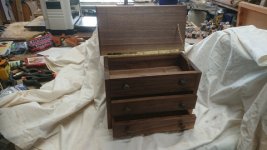
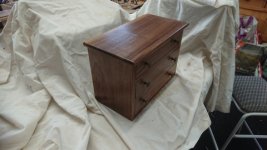
Adding the hardware and giving it a final polish. It was the devils own job to source an appropriate piece of chain as a stay - if anyone has a good supplier then please do let me know. Final piece (excuse the photo's, I will try and get some better ones):

JC_17.JPG

JC_18.JPG

JC_19.JPG

JC_20.JPG

I am moderately pleased with the final piece, but most of the flaws are hidden and hopefully SWMBO will never be aware of them. One day I will be brave enough to try a dovetailed piece, but as I couldn't afford to mess this one up it would have been foolish to try. Now just need to keep it hidden for another 48hrs!
 
Very nice Steve, I'm sure she will love it. :eusa-clap:

most of the flaws are hidden and hopefully SWMBO will never be aware of them

Not if she reads this thread though. :lol:
 
Very nice.

I've had a similar request this month but not for xmas so no time limit yet. Need to spend some time looking at design ideas. Think drawer linings and dividers will be required. Not had the detailed demand yet for what it has to do.
 
Nice job on the box and finished in time for the big day; you'd have been inhabiting a world of pain if it wasn't :lol:

Which reminds that SWIMBO has been gently badgering me for a while now about her current jewellery box which is now (so she maintains) too small, so that's another job on the 'tuit' list - Rob
 
Woodbloke":3hfyfjew said:
Nice job on the box and finished in time for the big day; you'd have been inhabiting a world of pain if it wasn't :lol:

Which reminds that SWIMBO has been gently badgering me for a while now about her current jewellery box which is now (so she maintains) too small, so that's another job on the 'tuit' list - Rob

Sell some of her jewellery and spend it on tools. - Then hire a divorce lawyer. :lol:
 
Woodbloke":3433srlz said:
.....SWIMBO has been gently badgering me for a while now about her current jewellery box which is now (so she maintains) too small, so that's another job on the 'tuit' list - Rob

Pick your moment carefully, Rob. Selling excess jewellery can alter the household atmosphere somewhat.
 
I rather like that, Steve. It's a mini chest of drawers, really. Were you tempted to sit it on a plinth/ skirting/ base/ feet?
 
Very nice. Glad my missus does not have enough jewellery to fill one of those drawers. :)
I always think of jewellery boxes as being lined though to protect the precious contents.
 
Thanks all for the kind comments.

Mike G":3pcbyofm said:
I rather like that, Steve. It's a mini chest of drawers, really. Were you tempted to sit it on a plinth/ skirting/ base/ feet?

Yes, but lack of timber and lack of time precluded that idea. It is something I can potentially do separately however so never say never. I vaguely took inspiration from Norm, who made something similar:

https://www.youtube.com/watch?v=pJ6BcUK ... x=4&t=140s

but adapted to what I had. He also cannot spell jewellery..... ;)
 
Andyp":166y2wic said:
Very nice. Glad my missus does not have enough jewellery to fill one of those drawers. :)
I always think of jewellery boxes as being lined though to protect the precious contents.

Yes, that is a fair point. For whatever reason, the missus likes to keep hers in the separate boxes they came in, so necklaces and brooches are already in boxes or bags etc. Easy enough to line out if needed in the future I guess.

And I am hoping that this sees me out - it is 3x the size of the current one, let's just hope it is not seen as a challenge to fill it!
 
You can buy sheets of sticky back felt on the internet for very little money.
I used decent quality card and stuck the felt to that and then fitted the result into the drawers, tidier finish for someone like me who has a personal cock up fairy.
 
StevieB":3snobmm2 said:
......

Yes, but lack of timber ....

...as an excuse doesn't hold water any more, Steve. I have loads of chunky bits of ABW left over from the staircase if you needed some feet etc. You'll have to be quick tho' as Sam Q and Lons have also been promised some :D
 
Back
Top