kirkpoore1
Old Oak
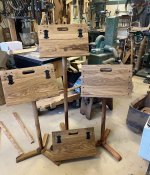
The typical metal fold-up music stand doesn't exactly add to the ambiance of a medieval themed event. Because of this, a friend of mine developed a design for a music stand inspired by pictures of medieval lecterns. I updated his design by changing the shape, making a multi-piece post for easier carrying and height adjustment, and adding a new foot design for more stability. This is the result:

When you take it apart, the feet and post parts all fit inside the top, and the handle makes it easy to carry. As a result, musicians like these a lot.
I started working on a new batch earlier this week to sell at an event next month. These are actually pretty simple. The only glued parts are the shelves which hold up the sheet music and sections on the feet. The rest is nailed together, with the post being assembled with threaded inserts, t-nuts, and hanger bolts.
First pieces done were the sides, with beveled trefoil decorations

Each foot has two added blocks glued on.
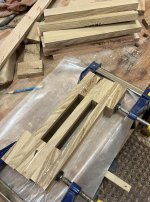
The feet overlap and interleave, so are drilled to different levels.
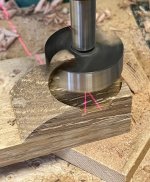
A single bolt goes through all three feet to engage the t-nut.

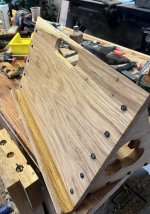
Working on the back, with the hand hole and shelf.


Current Status:


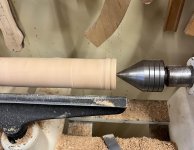
Next up is to turn the post parts and add the threaded inserts and hanger bolts.
More later. After turning I'll start on the finish before assembly.
Kirk
When you take it apart, the feet and post parts all fit inside the top, and the handle makes it easy to carry. As a result, musicians like these a lot.
I started working on a new batch earlier this week to sell at an event next month. These are actually pretty simple. The only glued parts are the shelves which hold up the sheet music and sections on the feet. The rest is nailed together, with the post being assembled with threaded inserts, t-nuts, and hanger bolts.
First pieces done were the sides, with beveled trefoil decorations
Each foot has two added blocks glued on.
The feet overlap and interleave, so are drilled to different levels.
A single bolt goes through all three feet to engage the t-nut.
Working on the back, with the hand hole and shelf.
Current Status:
Next up is to turn the post parts and add the threaded inserts and hanger bolts.
More later. After turning I'll start on the finish before assembly.
Kirk


 iI’s heavy enough that a sliding adjustment might be too flimsy.