• Hi all and welcome to TheWoodHaven2 brought into the 21st Century, kicking and screaming! We all have Alasdair to thank for the vast bulk of the heavy lifting to get us here, no more so than me because he's taken away a huge burden of responsibility from my shoulders and brought us to this new shiny home, with all your previous content (hopefully) still intact! Please peruse and feed back. There is still plenty to do, like changing the colour scheme, adding the banner graphic, tweaking the odd setting here and there so I have added a new thread in the 'Technical Issues, Bugs and Feature Requests' forum for you to add any issues you find, any missing settings or just anything you'd like to see added/removed from the feature set that Xenforo offers. We will get to everything over the coming weeks so please be patient, but add anything at all to the thread I mention above and we promise to get to them over the next few days/weeks/months. In the meantime, please enjoy!

Mike builds a teardrop (Another question)

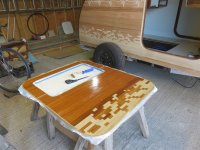
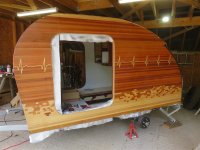
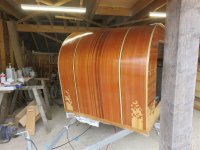
Yes it brings out the decorative bits a treat. Not completely sure I’m right in saying this Mike but you aren’t actually fibreglassing are you? The fibreglass is the white coloured mat that is held together and set solid by the resin that you’re using, just how you describe what you’re doing I’m not sure. Gelcoating?
 
Yes it brings out the decorative bits a treat. Not completely sure I’m right in saying this Mike but you aren’t actually fibreglassing are you? The fibreglass is the white coloured mat that is held together and set solid by the resin that you’re using, just how you describe what you’re doing I’m not sure. Gelcoating?
Yes, it's glassed. I used a 6oz cloth. There'll be a full post on the process in the next few days, showing the magic of the invisible fibreglass mat.
 
Some odds and ends before I post about fibreglass.....

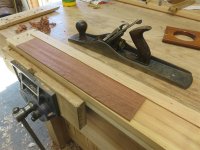
I made a little cable cover in sapele:

IMG_0460.jpgIMG_0461.jpg

IMG_0464.jpg

It will cover the cables that emerge out of the top of the control panel, before they head under the wine rack. Here's the control panel, with an additional "kill" switch (for the solar panel):

IMG_0466.jpg

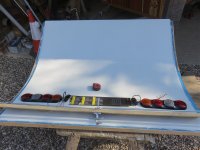
The only place in the teardrop where wires are buried is within the hatch. I'll cover the wiring later on, but here I am working out on the inside where everything on the outside will sit. The cardboard mocks up a number plate:

IMG_0483.jpg

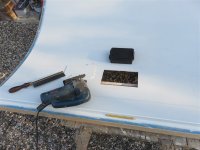
I've got a junction box for all the lights, and I want a removable panel behind the lights and over the junction box. I thought I would make a template and use a trim cutter in the router to cut 3 neat openings:

IMG_0484.jpg

It didn't go well:

IMG_0485.jpg

The curve was the problem. The bearing rode up and down with the curve, and the hot melt glue failed because of the board fighting it to get back to straight. I made a bigger but neater hole using a jigsaw:

IMG_0486.jpg

....then walked away from the job and did something else.
 
Last edited:
Right, the job I've been worried about for the last 3 or 4 years since I first thought about building this thing. Time to do the fibreglass.

Before I start, let me make it very clear that no-one should use this as a tutorial. I am a rank amateur at this, with no experience other than what I am about to show you. If you are planning on doing something similar yourself, go to West System's website or Youtube channel, and watch one of Mark Reuten's (Nomad Boatbuilding) tutorials. You should be watching Mark Reuten anyway for the woodwork.

I invested hundreds of pounds in some of West System's epoxy. They developed these formulae for boatbuilders, and it's available at chandlers. One of the great things they have is a series of calibrated pumps, which mean you don't have to weigh or measure your resin and hardner each time:

IMG_0473.jpg

It's just one pump of each to give the correct ratio. I am using their 207 "Special Clear Hardener", which dries completely clear. It's also a slow-acting resin, which is a big bonus for a novice, particularly when it is so hot (epoxy sets faster when it's warm). Note the drill protected by a plastic bag and with a bit of bent coathanger: that's my mixer. You have to go slow or you whip air into it like whipped cream.

I decided to start with one of the doors, because they are the only small area I've got and it would give me a chance to get my eye in. I made just about every mistake it's possible to make.

The West System's help desk is extremely helpful and patient, but the first thing they suggested I did was put a generous primer coat on the bare wood, and then lay the fibreglass cloth on that whilst it was still wet. That proved extremely difficult. After "wetting out" the cloth, you then build up coats on top of that just at the point when the epoxy is "kicking off" (starting to set. Even now, I find it quite difficult to judge exactly the right moment. Epoxy binds to itself extremely well, but in only 2 distinct ways: chemically or mechanically. These could also be described as "wet" or "dry". If you choose to do it wet, you have to start applying the next coat at the right point as I described. If you choose to do it "dry", you let it set overnight, abrade the surface (80 grit sandpaper), and after cleaning thoroughly, you apply the next coat.

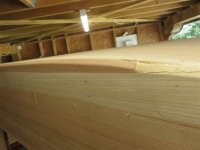
I got the wetting out coat about right, and the next coat, but the coat after, I started applying too soon, and it pulled up the previous coat into nasty little globules/ mounds with every pass of the roller:

IMG_0474.jpg

That left me with no option but to allow everything to dry, and then sand it smooth, before continuing with the coats. It came out well in the end:

IMG_0472.jpg

IMG_0475.jpg

I decided I had learnt all I could learn from that exercise, and had to just get on with the main body. I did a final sand and clean up, vacuuming the surface for probably an hour. I roughly removed the arris between walls and roof with a course belt sender:

IMG_0476.jpg

Ideally, I would like to lap the fibreglass from the walls onto the roof, but cloth doesn't bend easily. I didn't have high hopes this would work. I removed the kitchen entirely so that I could stand in the back and reach well up the roof:

IMG_0477.jpg

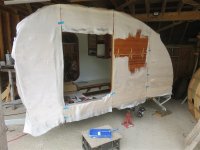
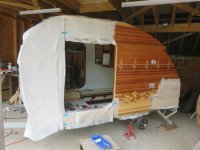
Then, as a result of the lesson from the door, I did a primer coat of epoxy over the entire body. Here you can see I am in the middle of doing it, just to show you the contrast:

IMG_0478.jpg

IMG_0479.jpg

The tape is covering a couple of repairs to my veneer pattern where I had sanded through them. Anyway, I soon covered the entirety of the outside:

IMG_0480.jpg

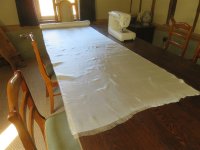
I left that to set overnight, and went inside to cut my cloth:

IMG_0481.jpg

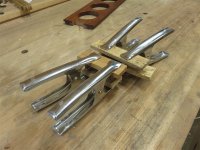
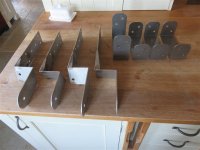
It's 6oz cloth, which is very light and thin. There is only one layer. It's job is to strengthen the epoxy, not strengthen the vehicle, and its main feature is that it becomes invisible. At this point I received a delivery of some brackets I'd designed:

IMG_0482.jpg

The following day I went over the primer coat with 80 grit on DaveL's random orbital sander:

IMG_0487.jpg

After vacuuming off the dust I carefully taped the cloth in place. This was so much nicer an experience than trying to do it on wet primer:

IMG_0491.jpg

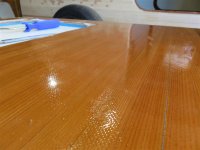
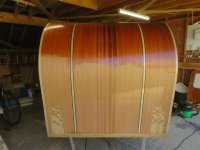
Now, watch the magic happen. When you add epoxy, the cloth disappears:

IMG_0492.jpg

IMG_0493.jpg

IMG_0494.jpg

Isn't that incredible? I'm sure there's witchcraft involved. You can't even see the cloth if you know it's there and you go searching for it.

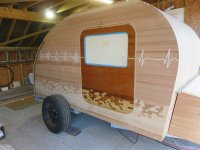
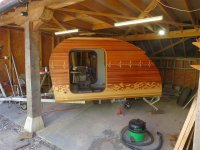
I did both sides, 4 coats, in a day. That's a pretty full-on day when it's warm. As a bonus, the cloth folded neatly over the junction, giving me the lap I wanted between roof and wall coverings:

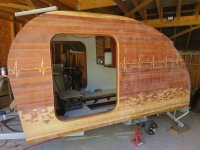
IMG_0495.jpg

Today, I quickly sanded the over-spill on the roof before laying up the cloth:

IMG_0496.jpg

It took nearly 2 hours to wet out (saturate) the cloth with the first layer, which meant I had only a few minutes between finishing that coat and starting the next. As I write I am waiting for the 3 coat to dry to tacky before going out to apply the final coat:

IMG_0497.jpg

IMG_0498.jpg

The process from here on is to allow this a week to fully cure, then sand it down and start applying Epifanes 2 part varnish, which is an extreme gloss varnish. There'll be more epoxy to do because the rear hatch isn't finished yet, and the other door hasn't been done.
 
Last edited:
That is looking great. If it were me there would have been days of hesitation whilst I worked up to such a commitment.
I am thinking of getting Wests epoxy for my next challenge project, So good to read the support is good. How long did it give you to work?
I have seen some that even though they have the pump action nozzles they still weigh it just to be sure.
 
Wonderful stuff, I remember the cloth becoming pliable when wet, I also remember but not the name of a superfine cloth which I think was the last layer, how smooth will the surface be before you high gloss it?
Ian
Edit, just also remembered the Microballoons used in the west system for creating a bulky foam type stuff which I think was used on boats for reducing flexing in boat hulls and it also provided some buoyancy. Let’s hope you never need any of that!
But it did just make me wonder how you would arrive at a rebuild figure for insurance?
 
Last edited:
I watched Neil Paskin's video on fibreglassing a canoe a few years ago & it looked quite the job so I'm very impressed.

Sounds like you've gone about it in a sensible & methodical way & it has clearly paid dividends. The caravan looks great, well done.
 
That is looking great. If it were me there would have been days of hesitation whilst I worked up to such a commitment.

Days? That's positively bull-in-a-China-shop compared with me. I've done everything I could put to put this job off, for weeks now. Frankly, the big lesson from it is that it isn't something to be scared of.

I am thinking of getting Wests epoxy for my next challenge project, So good to read the support is good. How long did it give you to work?
I have seen some that even though they have the pump action nozzles they still weigh it just to be sure.

Working time depends on temperature and the hardener you choose. There is a fast one for the winter, and this 207 which gives you 2-1/2 hours ish on a day like this. There is no time pressure with the job...just timings issues. The pumps are completely reliable, and whilst you can check the calibration, there are enough people online who have done that that there is no point.
 
Wonderful stuff, I remember the cloth becoming pliable when wet, I also remember but not the name of a superfine cloth which I think was the last layer, how smooth will the surface be before you high gloss it?

It will get sanded pretty smooth. From memory about 150 grit....but I'll be checking that soon, so don't rely on that.

But it did just make me wonder how you would arrive at a rebuild figure for insurance?

Insurance? I suppose I ought to think about that, hadn't I. It hadn't crossed my mind.
 
What a wonderful result. I never even knew this type of fiber cloth existed. Incredible how much better the wood pops out at you after you applied the epoxy. Thanks for showing us this is possible. I am sure this knowledge will come in handy sometime in the future.
 
WOW, that's quite some transformation and a lot of work. (y)

How did your recovering injury stand up to that?
How did you get on with the sander? Presumably you had it hooked up to a shop vac. I've been using mine for the last couple of days and couldn't do without it.

The insurance question is something that probably should be addressed soon rather than when it's finished, just in case of catastrophe.
 
WOW, that's quite some transformation and a lot of work. (y)

How did your recovering injury stand up to that?

Thanks.
My injury is fine for everyday life, now. I'm a bit hesitant climbing onto things, still, but I can be on my feet all day without problem. I'm a long way from fully recovered, though, and will be doing a 20/ 30 minute exercise regime shortly, having done it twice today already.

How did you get on with the sander? Presumably you had it hooked up to a shop vac. I've been using mine for the last couple of days and couldn't do without it.

Very well, and yes, it's hooked up to a Henry.

The insurance question is something that probably should be addressed soon rather than when it's finished, just in case of catastrophe.

I'll talk to the NFU tomorrow, and see where that leads.
 
Right, the job I've been worried about for the last 3 or 4 years since I first thought about building this thing. Time to do the fibreglass.

Before I start, let me make it very clear that no-one should use this as a tutorial. I am a rank amateur at this, with no experience other than what I am about to show you. If you are planning on doing something similar yourself, go to West System's website or Youtube channel, and watch one of Mark Reuten's (Nomad Boatbuilding) tutorials. You should be watching Mark Reuten anyway for the woodwork.

I invested hundreds of pounds in some of West System's epoxy. They developed these formulae for boatbuilders, and it's available at chandlers. One of the great things they have is a series of calibrated pumps, which mean you don't have to weigh or measure your resin and hardner each time:

View attachment 57623

It's just one pump of each to give the correct ratio. I am using their 207 "Special Clear Hardener", which dries completely clear. It's also a slow-acting resin, which is a big bonus for a novice, particularly when it is so hot (epoxy sets faster when it's warm). Note the drill protected by a plastic bag and with a bit of bent coathanger: that's my mixer. You have to go slow or you whip air into it like whipped cream.

I decided to start with one of the doors, because they are the only small area I've got and it would give me a chance to get my eye in. I made just about every mistake it's possible to make.

The West System's help desk is extremely helpful and patient, but the first thing they suggested I did was put a generous primer coat on the bare wood, and then lay the fibreglass cloth on that whilst it was still wet. That proved extremely difficult. After "wetting out" the cloth, you then build up coats on top of that just at the point when the epoxy is "kicking off" (starting to set. Even now, I find it quite difficult to judge exactly the right moment. Epoxy binds to itself extremely well, but in only 2 distinct ways: chemically or mechanically. These could also be described as "wet" or "dry". If you choose to do it wet, you have to start applying the next coat at the right point as I described. If you choose to do it "dry", you let it set overnight, abrade the surface (80 grit sandpaper), and after cleaning thoroughly, you apply the next coat.

I got the wetting out coat about right, and the next coat, but the coat after, I started applying too soon, and it pulled up the previous coat into nasty little globules/ mounds with every pass of the roller:

View attachment 57624

That left me with no option but to allow everything to dry, and then sand it smooth, before continuing with the coats. It came out well in the end:

View attachment 57622

View attachment 57641

I decided I had learnt all I could learn from that exercise, and had to just get on with the main body. I did a final sand and clean up, vacuuming the surface for probably an hour. I roughly removed the arris between walls and roof with a course belt sender:

View attachment 57625

Ideally, I would like to lap the fibreglass from the walls onto the roof, but cloth doesn't bend easily. I didn't have high hopes this would work. I removed the kitchen entirely so that I could stand in the back and reach well up the roof:

View attachment 57626

Then, as a result of the lesson from the door, I did a primer coat of epoxy over the entire body. Here you can see I am in the middle of doing it, just to show you the contrast:

View attachment 57627

View attachment 57628

The tape is covering a couple of repairs to my veneer pattern where I had sanded through them. Anyway, I soon covered the entirety of the outside:

View attachment 57629

I left that to set overnight, and went inside to cut my cloth:

View attachment 57630

It's 6oz cloth, which is very light and thin. There is only one layer. It's job is to strengthen the epoxy, not strengthen the vehicle, and its main feature is that it becomes invisible. At this point I received a delivery of some brackets I'd designed:

View attachment 57631

The following day I went over the primer coat with 80 grit on DaveL's random orbital sander:

View attachment 57632

After vacuuming off the dust I carefully taped the cloth in place. This was so much nicer an experience than trying to do it on wet primer:

View attachment 57633

Now, watch the magic happen. When you add epoxy, the cloth disappears:

View attachment 57634

View attachment 57635

View attachment 57636

Isn't that incredible? I'm sure there's witchcraft involved. You can't even see the cloth if you know it's there and you go searching for it.

I did both sides, 4 coats, in a day. That's a pretty full-on day when it's warm. As a bonus, the cloth folded neatly over the junction, giving me the lap I wanted between roof and wall coverings:

View attachment 57637

Today, I quickly sanded the over-spill on the roof before laying up the cloth:

View attachment 57638

It took nearly 2 hours to wet out (saturate) the cloth with the first layer, which meant I had only a few minutes between finishing that coat and starting the next. As I write I am waiting for the 3 coat to dry to tacky before going out to apply the final coat:

View attachment 57639

View attachment 57640

The process from here on is to allow this a week to fully cure, then sand it down and start applying Epifanes 2 part varnish, which is an extreme gloss varnish. There'll be more epoxy to do because the rear hatch isn't finished yet, and the other door hasn't been done.
One of the most gripping posts I think I have ever read on a forum 🫡
Well done for taking us along with you on this journey.
Are you ready to be "even more" of an Internet sensation Mike?:unsure::eek::ROFLMAO:
Cheers
Andy
 
For those with caravans, campervans etc.......which gas do you use for cooking? My cooker will apparently work on propane or butane (or "Camping Gaz"). So, what's the argument for either?
 
Mike I believe propane is more usable at lower temperatures, you normally need to shake the butane bottle when it gets low in cold temperatures to get the last out of the bottle, although butane is supposed to release more energy
For the past 25 years we have used bottled gas to cook and heat our water, we always use propane
 
Yes for many years my businesses used Propane for cooking, never had a problem even in the severest cold. Both do release quite a lot of water into the air when burning, not too bad for you as you’re cooking outside of course.
 
OK, and I use propane as well for the hob in our kitchen at home. So, propane it is.
 
Last edited:
Over here (due to higher pressures) propane bottles cannot be stored indoors. How does that affect caravans etc?
During my camping/backpacking days we always used Taymar screw top butane gas cylinders; I still have a couple. No longer available of course but the ability to unscrew the stove from the cylinder made storage a lot easier.
 
Unless you're using it in low temperatures of around 4 or 5c butane would be ok but most people use propane because it's more reliable in our climate. I carried 2 lightweight 6kg bottles in both the caravan and motorhome though jast a back up we used very little as were normally on mains hook up.

Just a thought Mike and I'm sure you already know to put air holes in the base of your bottle locker in case of leaks. Mesh over those as well or mice can get in.
 
Last edited:
Andy? Not just a pressure consideration; see my, and Lons's, replies earlier re ventilated gas lockers. You need a vent in the bottom as gas is heavier than air.
In a canal boat, this is especially dangerous as it 'fills' the body of the boat if a leak occurs.
 
I'd also suggest looking at what size and type is most widely available if you want to do long trips and would need to swap while out.

There was a bit of a panic a couple of years ago when Calor announced that they were going to discontinue two smaller sizes - 3.9kg propane and 4.5kg butane. (They later reversed that decision.)
 
Back
Top