• Hi all and welcome to TheWoodHaven2 brought into the 21st Century, kicking and screaming! We all have Alasdair to thank for the vast bulk of the heavy lifting to get us here, no more so than me because he's taken away a huge burden of responsibility from my shoulders and brought us to this new shiny home, with all your previous content (hopefully) still intact! Please peruse and feed back. There is still plenty to do, like changing the colour scheme, adding the banner graphic, tweaking the odd setting here and there so I have added a new thread in the 'Technical Issues, Bugs and Feature Requests' forum for you to add any issues you find, any missing settings or just anything you'd like to see added/removed from the feature set that Xenforo offers. We will get to everything over the coming weeks so please be patient, but add anything at all to the thread I mention above and we promise to get to them over the next few days/weeks/months. In the meantime, please enjoy!

Mike's ext'n & renovation (solar panels)

Rod":rfoitu9m said:
The savolit boards sitting in the rebates - do you seal them or does the rendering take care of that?

Rod

Rendering does that. It's what these boards are designed for.
 
I've been a bit distracted messing about with the picture hosting but I have found time to keep up with your progress.

Hard to think of some new comment to make. How many times can I say impressive :)

You tackle things that would daunt the best of us like they are easy jobs and at such a pace. Sure I've said thanks for posting before too but it bears repeating - thanks.
 
Thanks guys, much appreciated. Really, these positive comments do help through some of the more tedious days.

I worked for 10 hours on the porch today, and it looks exactly identical to how it did last night. So, I'll wait until tomorrow to post some more photos.
 
jules70":2hxuvqbc said:
Is it not a bank holiday tomorrow?

And?

I just plod on whenever the weather allows it, and the next couple of days should be lovely. So, tomorrow, the roof.
 
Wow Mike, looks amazing.
Im really interested in the render boards. The interior of our farmhouse was all covered in those render boards and plastered in. It was an absolute nightmare, joiners here gave its nickname, the grey death for Oak framed buildings. After the war it was a wonder construction material for modernising old buildings and combined with poor choice of cement based plaster it has caused so many problems trapping moisture against and within the frame. They literally used it everywhere.
It was an absolute pain to get rid of as it cant be recycled and they hate having it in skips (different waste types have a different prices, all by weight).
I can see how when used with lime based products it would work well. What are you planning to use as insulation and finish behind the board?
 
That's a very different stuff from Savolit boards, which have only been around for a few years, and can be recycled. They're vapour permeable, too, so they don't trap moisture, and work well with lime render.
 
Next on the list was the roof. These were the easy part:

R10NOZ0.png

I had thought long and hard about how to make the oak rafters at the front elevation. They were a real complication, because you need the ridge in place to mark out its location on the rafters, but the ridge stops you getting the rafters in place to mark anything out. So, I decided to make the softwood rafters, and use a pair of those to capture the position of the ridge beam:


6dxJNdI.png

fbxPJYS.png

Hdhok8H.png

oAQ5Dap.png

LJ6P3Fp.png

Having got the birdsmouth over the ridge beam sorted, and the feet cut, I then offered the rafters up into position to mark for the joints with the tie/ door head, and the little window heads. There is a big bridle joint at the top, and I made this next:


nB9c3BK.png

3njIwn1.png

z0NZG93.png

That one joint was nearly half a days work, and, frankly, it was a little too loose. I also chopped out the mortises for the connection to the tie beam/ door head.

The joint on the end of that tie beam looks a bit odd because it is joining a 5x5 piece to a 4 inch wide rafter:

c3arBdm.png

It went together absolutely beautifully. I couldn't have hoped for better:

dZ1Dayn.png

Finally, the little window heads which retain the rafter feet needed their joint doing:

kmXjPA2.png

CtRmqgp.png

At this stage, the porch had gone backwards from where we were a couple of days ago:

jWp8TrA.png

Time to start putting it all together again.Window heads on, tie beam on, and a pair of rafters fixed securely to the house. Before doing the latter I had trued everything up and got the walls exactly where I wanted them (they still flapped about a bit at that end):

WkiJJNl.png

I put in another temporary ridge support beam, whilst I come up with something nice in oak. Then the ridge went in:

LJYnqKz.png

Finally, I could offer up the oak rafters, and located the Savolit infill panels:

YEmkkvZ.png

The only way the rafters could move was horizontal, because of the tenon on the tie beam. I had to wax all the bearing surfaces and all the joints, and get my biggest sledge hammer. It took some messing around, and lots of loud hammering, but everything dropped into place beautifully. I captured all the pieces top and bottom with stainless steel screws, with pegs to follow in the next day or two:

7VAYpdG.png

Finally, I was able to nail up the softwood rafters:

y5OaEeU.png

zTnDoXS.png

There's a reason for the odd spacing, which you'll see tomorrow. You'll also hopefully see oak sprockets, and membrane and battens, giving us a watertight roof.
 
Mike G":259w4btc said:
jules70":259w4btc said:
Is it not a bank holiday tomorrow?

And?

I just plod on whenever the weather allows it, and the next couple of days should be lovely. So, tomorrow, the roof.

Your right, the weather has been beautiful for plodding along. Laid some turf two weeks ago so knew it was going to turn !!
 
Ah ha, I see what you've done now - very good Sir! :eusa-clap: 8-)

I wasn't intending on my question to fall into the 'astute' bracket. I started out as a chippy and my main passion was cut roofs - but that was 25 years ago and I had to give it up due to bad knees after a motorbike accident. Such a shame because I used to love it. I wouldn't have the energy to do it now anyway.

I know your porch is only serving a cottage Mike, but nonetheless, she's full of presence and delight, an aura of protection and an 'ahhhh' if I know you. This is a porch of substance! She's what an oak cottage porch should look like, displaying great craftsmanship, care, love, and a confidence to share for a boundless future of centuries to come. Just lovely. 8-)

:obscene-drinkingcheers:
 
Another forum I belong to has a "Nominate" button for the highest quality writing. If this forum had the same, I'd be nominating that post of yours Paul.

And thank you so much. It means a lot.............
 
Sprockets!

I had ordered timber especially for the sprockets, but with so many off-cuts lying around, I thought I would use those instead. Starting by measuring the off-cuts, I then moved on to the sprocket design, making them fit to what I had. It meant making them a couple of inches shorter (up the roof) than I might have done otherwise, but still, I was happy with the shape. I made a quick MDF template, and started marking out:

pjSH3kM.png

The into the workshop, where I cut them out mainly on the bandsaw, then cleaned everything up on the planer, and with my pneumatic drum sander, finishing off the edges with a spokeshave:

UcwfHE2.png

Then I screwed them onto the roof:

k5Rwlkc.png

Before slipping in the eaves closer pieces, and screwing on the (softwood) tilting fillet:

zSomBf4.png

3S8TnHz.png

With rain threatening, I rushed the membrane on, and started battening:

ADvhPzj.png

I eventually got both sides done, and spent the rest of the evening making 40-odd pegs from the old floorboards I took up a few weeks ago when I did the stairwell. I didn't even get a third done, although they're all roughed out, and the centres found.
 
Another thank you from me, the blow by blow account is staggering, particular when you look back at some of the earliest posts. The conceptual design work, the implementation and the sheer energy are an inspiration. Thaknyou very much and please keep updating!

Ian
 
I was rushing on a bit yesterday because rain was threatening, so took fewer photos than I might have otherwise. I was going to explain the odd rafter spacing.

You can see in this photo, just, that I have put a noggin across between the two rafters nearest the house, and added in a stub rafter:

zSomBf4.png

This is because the rafter attached to the house will actually be buried in the depth of the render, so the exposed sprocket would not only be nearly lost in the render, but would be an awkward feature to make watertight and so on. Besides, I want to see it. So, if you like, the structural rafter is against the house, but the more decorative element, the sprocket, is 3 inches clear of the wall.
 
I've had to draw for 2 or 3 days, and just got back into things yesterday afternoon. Wanting to carry on with oak work, I thought I'd tackle to little canopy of the porch door. I didn't start with the brace, despite what the photos suggest, but made the simple beam, with a tenon on the end and a mortise. You'll see a piccie in a minute, but first, this is me setting out the curve for the brace:

SflKJ31.png

It's only just over 2" thick, so I was able to persuade my bandsaw to co-operate to cut out the curve:

cc6wUy2.png

The back curve was just set off the front with a mortise gauge, and cut on the bandsaw, then it was just a bit of hand-sawing and chiseling, and the braces was done. Here it is sitting next to the 4x4 beam:

0GNylpv.png

Note that I let the end of the brace into the timber. I hate to see light through a join, and these timbers will shrink. Here is the letting in on the door post, for the bottom end of the brace:

DrN4VDR.png

Ready to be fitted:

XRQfA4B.png

These are purposefully tight joints, and it took a lot of whacking to get the brackets fully in place and seated on their shoulders:

tvtnx7a.png

xW1TvbF.png

Finally, I started the front rafters:

vRXyCvB.png

rey9eUz.png
 
Lovely work as ever - looked back at the drawing will this little canopy be open to see the rafters? How about in the porch? I'd want to leave as much exposed as possible if I could work oak that well!!!
 
The canopy will be entirely exposed. There won't be any "felt", so you'll see the underside of the tiles, and the battens, plus of course the rafters. The porch itself will show almost all of the oak on the inside, with the exception being the inside face of the two end rafters which will buried behind some plasterboard and plaster.
 
Will you applying finish to the oak, Mike? Or let it silver gracefully over time ?
 
Rod":3b0s3cuv said:
Have you got an interesting door knocker planned?

Rod

I'm thinking of a bell inside in the house (not the porch), with a cable attached to a pull outside. But with a vaulted ceiling and low windows, routing the wire/ cable isn't easy. If I could hear a knocker through the inner front door I'm planning I'd be really disappointed.
 
RogerS":222flejh said:
Will you applying finish to the oak, Mike? Or let it silver gracefully over time ?

I would like to limewash over the whole thing; render and frame. As decisions are taken collectively around here, this may not happen. ;) Otherwise, no, the oak will be left bare, unfinished.

 
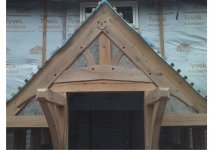
A quick re-cap. I made a pair of rafters, and did a bridle joint at the top:

vRXyCvB.png

rey9eUz.png

The next job was to make the tie beam (if you can use the word beam for something which is only 900mm long). I tend not to make these straight:

eQhKuls.png

Look at those peculiar tenons! Why would anyone make them at that sort of angle? Well, there are a couple of reasons. One, is that it makes the mortise easier, being orthodox, with right angles everywhere. The second will reveal itself as we go on:

RCRahJn.png

eT5VVwn.png

p7WohNc.png

There's your clue. These things will be a bit of decoration, and as they are tenoned into the rafters, the tenons (and mortises, obviously) have to be parallel to any others fixing to the same piece of timber, otherwise assembly is impossible:

1MqGXEO.png

o5q9sDV.png

Once the joints had been made on those funny little bits of timber I swung an arc from the point at which the rafter met the tie, and cut them to the curve. The mortises, BTW, were a pain in the neck to do being 3" deep but only just over an inch x 1-1/2". It's hard to work in the bottom when you can get no angle on the chisel.

HOQUj5U.png

Before packing up for the day I took a pattern from the rafters so as to be able to make the other 2 pairs, and then popped the truss up in place to see what it looked like:

2ukbCZ6.png

bMSs2nr.png

It was a short day today, with a late start, then, as this build is considered performance art by most of the locals, endless conversations with passers-by. Most cyclists shout something encouraging as they go by, and a number stop for a chat. Cars do to, often with complete strangers curious as to what I am up to. One guy who stopped asked some knowledgeable questions, and then said he was a carpenter. He asked about the corner joints of the sole plate, and when I said it was a mitred bridle, he said that he'd never made one of those in his life. I imagine the carpenters who built this house originally would have made dozens before they'd finished their apprenticeships.

I can blame the most stupid cock-up in the most glaringly obvious place on the whole porch, on one such passer-by. I was listening to what he was saying as I was marking out peg hole, so wasn't really concentrating. I meant to have a vertical pair of pegs in the bridle joint at the top to the front rafter pair, but mis-read which piece was which, and ended up with them near horizontal. The "near" word is critical, too. They aren't horizontal, because the rafters aren't at 90 degrees, so they will either stay as a permanent reminder that I am a blundering incompetent buffoon, or I'll conjure up some piece of decorative something to plant over the top and hide them.
 
Stonkingly brilliant, Mike.

I've had two neighbour say "like your roof', and that's it.

Oh, and while I was up the ladder painting the soffit facia, the deaf Italian neighbour was talking loudly with her Italian friend, both in English, when the friend said loudly in my view and hearing, 'it's a looking a nice a next a door a now', as if I wasn't there!
 
Thanks Malcolm.

I forgot to add that I dropped my big chisel 3 times onto the concrete of the path today, and my 1" chisel once. Mashed the corners of them both, so, they both need re-grinding. I'd got the 1-1/2" one soooooo sharp, too. Disappointing. What with the peg cock-up, "bumbling incompetent clumsy buffoon" feels about right this evening, but I feel a bit better looking at the "after" photo.
 
I don't think anybody else would notice but I suppose it will always irk you.
Can you mount a small carved plaque over the holes?

Rod
 
Yep, something like Rod. Maybe a fake coat of arms or something!! :lol:
 
I've just checked. They're about 2mm out. I reckon I'll put up with that for while, as there are more important things to do. In a year or two, when everything else has been ticked off, I'll come up with a plan.
 
Back
Top