• Hi all and welcome to TheWoodHaven2 brought into the 21st Century, kicking and screaming! We all have Alasdair to thank for the vast bulk of the heavy lifting to get us here, no more so than me because he's taken away a huge burden of responsibility from my shoulders and brought us to this new shiny home, with all your previous content (hopefully) still intact! Please peruse and feed back. There is still plenty to do, like changing the colour scheme, adding the banner graphic, tweaking the odd setting here and there so I have added a new thread in the 'Technical Issues, Bugs and Feature Requests' forum for you to add any issues you find, any missing settings or just anything you'd like to see added/removed from the feature set that Xenforo offers. We will get to everything over the coming weeks so please be patient, but add anything at all to the thread I mention above and we promise to get to them over the next few days/weeks/months. In the meantime, please enjoy!

My first coopering. Finished, with turnings!

Mike G

Petrified Pine
Joined
Jul 30, 2014
Messages
12,481
Reaction score
3,033
Location
Suffolk
Name
Mike
I made a pair of gates for a friend:

kLJV0JZ.png

.....and it generated a few off cuts of some rather nice pine, 14mm thick. I have had a little coopering project in mind for a while, and with cocking up the timings of gluing and filling, I had a few hours in the workshop to spare. I thought I'd have a go. This is mainly a hand-tool project, plus the bandsaw.

I cut some of the scraps to 300 long:

1QNNURI.png

1uDR5Bu.png

Then set the bandsaw table to a bit of a slope:

1Px7dJj.png

.......and did some ripping:

ZJ8N2sB.png

I planed up one edge on each stave, checking the angle with a mitre gauge:

0hWRE6R.png

I then used this lashed-up rig to get them all the same width and parallel, planing down to the edge that the jig created:


SMhMJ4M.png

9qQB2YS.png

Bear in mind I'm making this up as I'm going, with no experience to rely on. I thought it might be sensible to create a lip to fix the bottom to before gluing, so a few minutes with a tenon saw and the bandsaw:


w6VN3Yg.png

73UPq0v.png

Glue up consisted of stapling some tape sticky-side-up on the bench, then laying the staves in place one by one after gluing:

VF5gsGg.png

It actually all went fairly smoothly:

vS6LTgf.png

My angles weren't perfect. The lower edges of each half should have sat flat on the bench. Never mind, I own a plane:

sbPB1O2.png

Glue up complete:

L4dfVNx.png

The following day I realised that removing one of the staves brought all the angles to about perfect, so instead of planing the edges and having an odd egg shap, I ran a knife down a glue joint , cleaned up, and glued the two "halves" together. I forgot to take a photo. I also glued up some off cuts to make the bottom.

The little step thing at the bottom was facetted, and I didn't want to try to make a facetted base......so I got out the appropriate sized gouge and took a scoop out of the end of each stave until I'd got a reasonable circle:

ilIG9PC.png

The base went in second time of asking, and pulled everything nice round:

YBh5JCL.png

I pondered leaving the outside facetted, but settled for rounding it. I made some sort of an ad hoc rest for it in the vice, with a stop, and started planing:

BQLtiQf.png

If I wanted it perfectly round I would have to get some sandpaper out, but I can't be doing with that, so it retains an organic just-about-round feel. I glued the base in and came to post the photos:

IMEln5u.png

I'll have to devise some sort of a lid, and some little handles. That will involve thinking......
 
Cool indeed.

So this coopering....waste bin? bread bin? sock bin?
 
The idea was to be a flour bin. I mix flour for bread, and instead of having 3 bags of flour occupying a shelf, I plan to tip it all into a bin-thing and save some space.
 
That’s very nice Mike, a satisfying exercise with a successful conclusion, very sensible not trying to round out the inside shape.
It brought back a lot of memories of me making the 3 oval supports for the mammoth desk I made, very similar holding arrangement in the vice to plane the outside shape, mine had splines in grooves between the staves and I used ratchet straps to tighten it all together though, getting all the angles correct on an oval was a challenge.
I have shown some pics of it before, and can again if anyone shows an interest, or I could start a fresh thread?
Ian
 
Yes please Ian.

Mike - why three flours? As you know I make sourdough a lot and use rye ferment and strong white for the bread dough based on that (plus seeds added sometimes). Are you using spelt for example?
 
My usual mix is 150g of wholemeal, 50g of strong white, and 300g of malted seeded flour.
 
Thanks for that Mike. Interesting and thought provoking. Do you think that would be anywhere close to watertight?

After another visit to the Mary Rose a week or so back my missus demanded I make her coppered jug just like the ones on display.
You’ve just piled on more pressure for me to get it done.
 
AJB Temple":2iqyfqg3 said:
Yes please Ian.

Mike - why three flours? As you know I make sourdough a lot and use rye ferment and strong white for the bread dough based on that (plus seeds added sometimes). Are you using spelt for example?

Due to huge popular demand (one's enough ) I shall start a thread, no please don’t all yawn at once!
 
Yet again, Mike, you casually demonstrate how something that we think hard can be done quite simply, if you just get on with it. Inspirational!
 
Nice job.

I presume you need some sort of bands around it if you need a watertight version. That way the staves swell and tighten any gaps when wet. Without the bands I'd expect the whole thing to expand in circumference by maybe 5% when wet, and the bottom to fall out !

Obviously for flour storage you want everything dry anyway, so not needed.

Getting the angles right must take some practice. I marvel at the barrel makers in old time videos who make staves angled, tapered and with a concave inner surface using a curved draw knife seemingly mostly by eye ? I guess with the steel bands driven into place while the wood is hot, a fair bit of inaccuracy can be absorbed ?
 
Yes. Nice work from Mike as usual, but I agree with Tony that old style barrel making with a draw knife and coopers planes is probably a whole different ball game.

Years ago I did a practical luthiery course (violins) in Cremona and the place is full of little workshops. Next door to the one where I was being taught, a woman was making lutes. These had a sort of shell or gourd shaped back, with a deep bowl and a taper to to the neck (almost like a tapered wine flagon cut in half lengthways). Each strip alternated between dark wood and light wood and they were about an eight of an inch thick. She had a big pile of rough cut (by hand) blank staves and then trimmed these by hand to get the required chamfer. This was done in long strokes end to end on each side. She let me have a go and it was beyond difficult. :shock: Same as a barrel I suppose really.
 
That must make a fairly heavy bread Mike?

I make sourdough four at a time and freeze three. Consumption had to be cut right back as I was making my own barrel. 8-)
 
Sheffield Tony":2mq0jk14 said:
...I marvel at the barrel makers in old time videos who make staves angled, tapered and with a concave inner surface using a curved draw knife seemingly mostly by eye ? I guess with the steel bands driven into place while the wood is hot, a fair bit of inaccuracy can be absorbed ?

Yep, I'm with you. That was impressive skills with the most basic of tools. I think the steel bands were a hugely important part of the process, and of course, the coopers worked with an "offer-up-and-adjust" approach. They weren't intent on having all the staves identical, just in having a tight barrel.
 
Pete Maddex":tk8w2tpx said:
Mike I thought you where making an uplighter...

I remember those now. You left them facetted, didn't you?
 
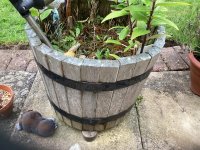
I cheated a little with this iroko tub, the hollows and rounds make the angles flexible. I didn’t use any glue and it’s looking a bit rough after about thirty years holding an ornamental fir tree, but the method is worth a try.IMG_1317.jpeg
 
De-clamped, and a couple of minutes with a block plane on the ends:

Zb0UW3b.png

m7TmpTt.png

GJZGPpo.png

Handles and a lid left to do, so I guess I'll have to find a path through to the lathe. I'd also like to use some little hand-made pins into the base, but I don't think I've got any.
 
Nice work Mike, are you intending to use a plastic bag as a liner or will the flour be in contact with the pine?
I can’t see any health risk but pine might add something to the flavour?
 
It won't pick up anything from the wood, but even if it did, it would have to be better than picking up something from plastic.
 
I turned up a shape, and cut it up on the bandsaw:

LQuwwIe.png

UyslD4H.png

With a bit of refinement on my bench sanding arrangement.....:

xLlQFci.png

They made some acceptable handles:

5VIepH1.png

Just add glue:

MN2EA5f.png

...and a bit of clamping pressure in the vice:

JvASPQg.png

and they seemed to work OK:

UR9rowr.png

Time to make a lid. I glued up some bits of wood:

QKN0fvn.png

After roughing out a circle on the bandsaw, I turned up a thingy with a sticky-out bit on it which pushed through a hole in the middle of the lid quite tightly. This enabled me to mount it on a lathe chuck and start turning it to round. It decided to de-mount itself.

I cut a slot in the middle of the sticky-out bit, and whacked in a wedge:

wTTG3dD.png

zgyGrgL.png

I won. It stayed properly mounted. I was able to turn the underside, then pull the wedge out, flip it over, and turn the top:

JZ6j0ws.png

4aI8bM0.png

I don't have any curved-ended lathe tools, so hollowing out was a little difficult. I couldn't risk getting too close to the mounting arrangements, so I ended up taking a gouge to the top and carving off the excess:

BUaZCIY.png

Then I cut short the sticky-out thing and hot-melt glued the lid in place to clean up the inside. I used copious amount of sandpaper in the process. One day I'll learn how to do this stuff properly.

I spindle-mounted a scrap and turned up a knob with a tenon:

zEM4Qjx.png

Unfortunately, everything was now too tall:

XVOvOqF.png

So I hacked 15mm off on the bandsaw:

j0EDHIT.png

hJIGr0X.png

I re-planed the top edge of the barrel, removed the arrises, and took it inside:

WpAxV5L.png

3NGxQFf.png

It fits!

exsDewY.png
 
It's not impossible, Bob, but if it does I can get a small screw through from the inside into the handles. I guess I could also use hot-melt glue, which is quite flexible.
 
Nice work. Creative handles. Good use of wood.

You must buy flour in small quantities I suppose. Mine comes in 25kg and 16kg sacks and I just leave it them in the larder.
 
Some creative thinking going on there, great result.

If you can find the time a day spent on a woodturning course will be time well spent. Once you have the basics, which I think you can learn in a day, the rest is just practice, in my opinion of course.
 
Andyp":38jlolum said:
......If you can find the time a day spent on a woodturning course will be time well spent. Once you have the basics, which I think you can learn in a day, the rest is just practice, in my opinion of course.

I don't know of any such courses locally.....but DaveL of this parish is a keen turner, and lives just a couple of miles away. One day when I've nothing to do I might try persuading him to spend some time next to me at the lathe.
 
AJB Temple":3mlstlrh said:
Nice work. Creative handles. Good use of wood.

You must buy flour in small quantities I suppose...

Two loaves a week = 1kg of flour/ week. A 25kg sack would mean I was using 6 month old flour at some point, and I'd rather use fresh. I have thought about doing it, with a visit to Marriages, but as I say, I'd rather use fresh flour.
 
Fair enough on the flour. I bake quite a bit more as I am also providing bread for others. Flour keeps well and the harvest is only annual.

Have you thought about milling grain yourself so that the flour is aways very fresh. I've been tempted to do this as you get super fresh flour, but the expense of the milling machine (at least £300) put me off a bit, plus good grain is harder to source in small quantities where we live.

I agree that a turning course is a good idea. Axminster did some at their place in Kent. Just two days I think and the small group learned a lot very quickly, including some useful short cuts and a lot on safe tool handling.
 
AJB Temple":t78hnlwd said:
....... Flour keeps well and the harvest is only annual.....


Fair points. I have no idea whether it makes a difference or not, but farmers around here (the "breadbasket of England") often store grain in their barns/ warehouses for getting on for 12 months, selling it only when they need to clear the space in preparation for the next harvest.Whether it stores better as grain or flour I have no idea, but my instinct (and take that for what it is worth), is that the grain is likely to be longer-lasting than flour.
 
Back
Top