
I’ve always admired well veneered work but have generally considered it outside the scope of my skills/equipment and so avoided it.
However, in my desire to use timber that would otherwise prove to be rather expensive (and wasteful if it goes wrong) and add to my skill level I thought it time to have a go!
Plenty of reading and watching videos as well as some encouragement from a chap on a Facebook group lead to the purchase of some elm and zebrano.
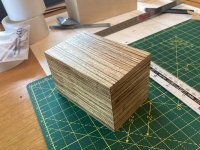
I had a few plywood boxes knocked up for various projects and thought one of those would make an ideal first project. I’ve kept it simple and it was basically pva and parcel taped cauls together with some careful trimming and light sanding.
I did have a monemt of panic after I’d glued the ends on:
Lots of squeeze out (despite being careful with the glue) and what appeared to be grey blotches. Careful scraping removed the glue but the blotches have been very stubborn. It was nearly a bin it moment but I persevered just for the hell of it and even if I say so myself the finished product (just shellac and wax) isn’t too bad. The boss liked it enough to insist it was lined.



You can still the grey blotches, no idea what they are or what caused them.
Not the biggest veneered project ever undertaken but very useful for me to learn a bit more.
Due to using an already assembled box I didn’t use a balancing veneer and appear to have got away with it (I suspect using plywood also helped). I do plan to have a go ‘from scratch’ and veneer panels then make the box but as I’ve still got a couple of pre made boxes I do have some fiendish plans …….
However, in my desire to use timber that would otherwise prove to be rather expensive (and wasteful if it goes wrong) and add to my skill level I thought it time to have a go!
Plenty of reading and watching videos as well as some encouragement from a chap on a Facebook group lead to the purchase of some elm and zebrano.
I had a few plywood boxes knocked up for various projects and thought one of those would make an ideal first project. I’ve kept it simple and it was basically pva and parcel taped cauls together with some careful trimming and light sanding.
I did have a monemt of panic after I’d glued the ends on:
Lots of squeeze out (despite being careful with the glue) and what appeared to be grey blotches. Careful scraping removed the glue but the blotches have been very stubborn. It was nearly a bin it moment but I persevered just for the hell of it and even if I say so myself the finished product (just shellac and wax) isn’t too bad. The boss liked it enough to insist it was lined.
You can still the grey blotches, no idea what they are or what caused them.
Not the biggest veneered project ever undertaken but very useful for me to learn a bit more.
Due to using an already assembled box I didn’t use a balancing veneer and appear to have got away with it (I suspect using plywood also helped). I do plan to have a go ‘from scratch’ and veneer panels then make the box but as I’ve still got a couple of pre made boxes I do have some fiendish plans …….


