• Hi all and welcome to TheWoodHaven2 brought into the 21st Century, kicking and screaming! We all have Alasdair to thank for the vast bulk of the heavy lifting to get us here, no more so than me because he's taken away a huge burden of responsibility from my shoulders and brought us to this new shiny home, with all your previous content (hopefully) still intact! Please peruse and feed back. There is still plenty to do, like changing the colour scheme, adding the banner graphic, tweaking the odd setting here and there so I have added a new thread in the 'Technical Issues, Bugs and Feature Requests' forum for you to add any issues you find, any missing settings or just anything you'd like to see added/removed from the feature set that Xenforo offers. We will get to everything over the coming weeks so please be patient, but add anything at all to the thread I mention above and we promise to get to them over the next few days/weeks/months. In the meantime, please enjoy!

New Workshop ...

Blackswanwood

Old Oak
Joined
Jun 27, 2020
Messages
1,531
Reaction score
1,125
Location
North Yorkshire
Name
Robert
My new workshop has had a long gestation period but finally the build started this week. During the civil engineering phase my role is labourer ...

Having emptied the log store the roof came off.
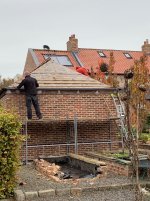
B5A9D356-74B4-4565-9651-9352E76D6ABD.jpeg

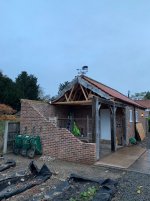
The the wall came down carefully so the bricks can be reused. The lime in the mortar was doing it’s job well making clean up of the bricks a bit of a chore.
34B65C9A-7443-408F-9702-4862F260E951.jpeg

A couple of big bits of oak needed to come out.

124EE4A6-7C99-4463-964A-B7CEDD4BB4F1.jpeg

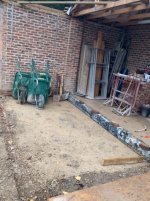
Then the concrete floor was cut and broken out ... even with a concrete breaker that was hard work!
0EEC6E2A-407D-49D4-965C-8F536F2D3D12.jpeg

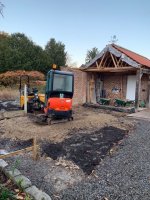
And then the digger was brought in

A68444F7-DD64-4186-8611-C885F2451653.jpeg

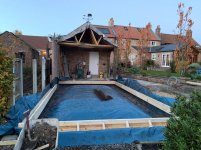
Once the digger had finished it was time for some woodwork to build the shuttering for the raft.
12CA415F-8499-4A6A-B10A-D818C1A8DC16.jpeg

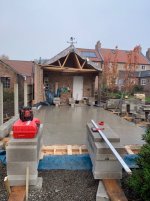
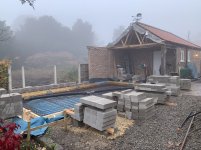
This was the scene at 7.45 this morning ... everything weighted down so it doesn’t float when the concrete goes in. The first thing the concrete pump operator said when he saw it was he’d seen full packs of blocks lifted but he thought we’d be okay ...
25856FB8-DF48-4C6D-8965-F8DB415E0AD1.jpeg

The concrete arrived on time

08FA31F7-3054-493E-BE80-1FE5FD1582FE.jpeg

Pumping starts and we all keep checking that it’s not floating ... the shuttering lifted by 1mm which was judged a success.


C497E887-254D-4A36-965E-C999981BC1AE.jpeg

10am and waiting for it to set

CC70C0AE-ADAA-4F93-A3D6-696EAF6AB516.jpeg

Walls should be up by this time next week.
 
Damn, this photo-rotation quirk.......

That looks thoroughly professional to me. Did you float the concrete?
 
Mike G":w8zpe5v1 said:
Damn, this photo-rotation quirk.......

That looks thoroughly professional to me. Did you float the concrete?

No we didn’t Mike. There is 100mm of insulation and a screed to go in in due course so hopefully no one will ever see it!

Cheers

Robert
 
That’s cheating getting it pumped round :lol: looks like a promising start :eusa-clap:
 
Good progress over the past few days.

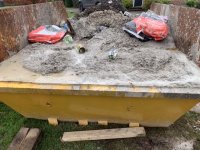
I learned that letting the concrete driver offload what was left into the skip isn’t a great idea ...

E93E3BC2-913F-426B-9BF7-924241B0BAD3.jpeg

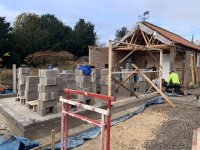
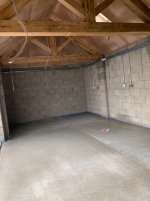
First job was to move the blocks that were used for ballast and take off the shuttering so the blockwork could start. The setting out of the first course was meticulous.

CCC5C98E-801A-4CA6-8501-EAAE8F0901AF.jpeg

The frame was knocked up last week and is to make the opening for the sliding doors. Once the first course was in the blocks went up quickly.

565B6CDF-509D-4C2F-A271-DD4781683D4D.jpeg

7E33602B-4062-4322-A5F7-2B8EF6A16DEE.jpeg

Then it was time to bring the bricks in. The inner skin of blockwork is built off the main slab and the outer skin of brick off the toe of the foundation.

45A9D019-3CAB-4745-A3BB-C9A91435935B.jpeg

7C17CFFE-2811-4AB9-AF29-E95EAA8823CE.jpeg

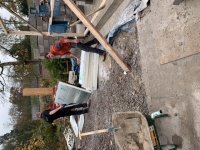
The insulation supply chain is apparently erratic at the moment ... so the joiners dug the brickies out of a hole by cutting the 2.4m sheets down to size!

A33C7F94-1F7D-48B4-B5FE-9F033AEE4F6A.jpeg

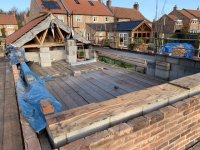
Brickwork done to dpc level. Another bricky joined in today - they are needed for another job from next Tuesday so have their orders to get on with it over the next couple of days.

5EF89392-2F6B-49B5-9369-A049978BFA67.jpeg

Scaffolding goes up early next week so the joiners can get the roof structure in and hopefully roofers on the job by the end of next week.
 
That's such a fiddly detail, building a toe on a raft, but it does pay dividends in the end. There's usually quite a bit of steel involved.

It looks to me like this is being built with an eye on converting it to living accommodation at some stage in the future. Is that right?
 
Mike G":32gssifr said:
That's such a fiddly detail, building a toe on a raft, but it does pay dividends in the end. There's usually quite a bit of steel involved.

It looks to me like this is being built with an eye on converting it to living accommodation at some stage in the future. Is that right?

There is a fair amount of steel Mike.

IMG_4849.jpeg

There isn't a plan for it to be converted - once we went down the brick and block route (which was dictated by a planning complication we have to contend with) it felt sensible to do the extra few miles and get it to habitable standard. Once I'm in there I won't be giving it up!
 
Forgive me Bob, I wasn't suggesting you had an inadequate amount of steel, for a second. I was talking in general terms about toes, which involve quite a lot of formwork, and quite a lot of steel.
 
Mike G":2roplcm8 said:
Forgive me Bob, I wasn't suggesting you had an inadequate amount of steel, for a second. I was talking in general terms about toes, which involve quite a lot of formwork, and quite a lot of steel.

No worries Mike and definitely nothing to forgive - I just added the picture to illustrate for anyone following that you were right!

Cheers
 
Things have slowed down since my last update due to one of the guys needing to self isolate as his wife had been working with someone who tested positive for COVID-19 which led to us missing our slot with the scaffolders.

The outer skin of the brickwork went up

F1A28400-141C-43C9-905B-174BD23C51AA.jpeg

70ED7C14-789F-4B1C-A8A2-D54221C6BCD7.jpeg

Then the scaffolding

1D2AF2E2-91B4-42C9-A5F8-C78CD787E992.jpeg

The plan had been to bring in a lift to get the beam up to height but someone forgot ... so with no further ado it went up the ladder

992F2121-9227-413A-8D8D-4AD77BBB9CEE.jpeg

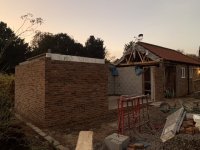
This is the end of day picture with the beam in place and brick/blockwork completed to wall plate height

606E0926-70E8-4836-8717-48B17368C07B.jpeg

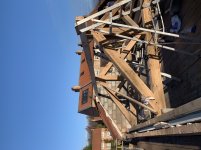
The oak trusses were also a challenge to get in place.

46C5D60B-5435-4FB4-8508-3939BE7D1A37.jpeg

After a bit of pushing and pulling they came together.

F16DF54C-0E0C-4066-B0E4-571D8E92D607.jpeg

Joiners will be back tomorrow to finish off

A7FB22E4-73C1-4034-A451-7046536A05EB.jpeg
 
That looking very good :eusa-clap:

Blackswanwood":282h695s said:
There isn't a plan for it to be converted - once we went down the brick and block route (which was dictated by a planning complication we have to contend with) it felt sensible to do the extra few miles and get it to habitable standard. Once I'm in there I won't be giving it up!

I went down the same route when I built my shop 16 years ago, I’ve not regretted it & the added bonus that with an insulated duct from the house I tapped into the central heatings so it’s pleasant in there whenever I walk in & no worries with rust :D
 
This is a really lovely build. The kingpost roof is a northern thing, mainly. I don't see a tenon for a ridgebeam, though. What's happening there?
 
There are kingposts down here in Devon, but the post is a touch thinner above the diagonal brace.
 
Wonderful to see the progress being made on this job, love the bricks, and obviously love the oak work did you do that?
In the past week I have had four electricians in my workshop and three of them have already had Covid, all without any complications whatsoever. There is more of it about than you realise Ian
 
Just out of interest, I see from earlier pictures that the old part of the roof has fink trusses. It's a big improvement to put King post oak in for the new part. Presumably you plan to do a high ceiling room with insulation at high level. I would be interested to see the drawing of how that is planned.
 
Thanks for the comments guys.

Mike/Adrian, the trusses need to be trimmed down to height. The plan is to do once the gable wall is up to height which happened today. The beam will sit on the top - the design is as per Adrian’s comment. Here are some drawings to illustrate it better than I can describe ...

22E80C12-B707-48F6-AA7C-EF1034EF329E.jpeg

3B22B86F-0DF0-48A6-9520-663BD51984E7.jpeg

4CAC8DDC-6EEB-4F8F-A075-80FAD30D4194.jpeg

I have managed to fix a couple of days off and will be getting stuck in on getting the rest of the roof timbers up. Compared to the graft others have put in on workshop builds I must admit to feeling like I am cheating!
 
Ah, I see. Purlins rather than a ridge beam.

I'm looking out for stopped chamfers. ;) :D
 
So everything has slowed down due to one thing and another.

Mike G’s question about the roof structure and a discussion with the electrician made me realise that Purlins could be a complication so after a call to the engineer it was agreed we were okay to go with a ridge beam.

532B5229-2341-4081-BD78-F12665F77838.jpeg

With a little bit of fettling this was soon in place.

0BFF0A37-E12F-46FE-8925-BB217F793D24.jpeg

Then onto measuring and cutting the rafters which led to a bit of head scratching. The rafters on this side worked fine but on the other just missed the wall plate. After two hours checking all the measurements with the laser and finding everything was spot on the solution was to raise the wall plate by 25mm (a batten has been added) which did the job but it still bugged me as I couldn’t work out why.

64AB55CE-B828-4AB9-9A6B-5BC02E82F670.jpeg

After sleeping on it even though it doesn’t really matter I spent three hours on Sunday morning with a tape measure and plumb line looking for the reason (in case the laser was inaccurate) ... the laser was right and it remains a mystery! We are following the roof line of the existing building and I think the problem is there.

Progress was slowed by the BBC who were filming at the big house and kept sending a runner to ask us to pause work while they were doing a take. If you notice the noise of a circular saw in the background while watching a Georgian period drama in the near future I do apologise! However finally the roof timbers were done.

A02F6F65-3719-47AC-BF54-1D3CDA33D867.jpeg

The picture shows the barge boards and insulation added. The roof took longer than expected and was finished just in time for the delayed arrival of the roofers to get started.

EBBFE2D5-9E7E-49AB-8314-0B1C51793E0A.jpeg

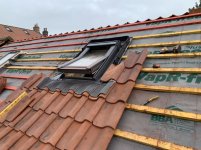
One of the reasons I wanted to ditch the purlins is that they complicated the positioning of the velux windows and lighting.

81A56BD9-ECBD-4718-ABF6-786732E00065.jpeg

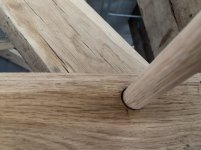
Bit of an error on the dowel size for the oak trusses. I had to wait for stock to come in but I picked up the right size today and will bang them in tomorrow.

DB34969C-6F42-4E0B-B8CB-35231DB90AEF.jpeg

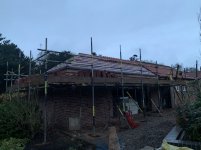
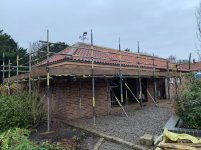
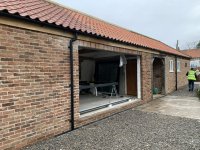
The roof is finished. The difference in the colour of the new and existing pantiles for some reason is much more stark on a photograph. The new ones are pre-aged and therefore more expensive! It seems the supply chain on roofing materials is still recovering from lockdown.

8207AA95-D1A9-423B-819D-6C5A0313058C.jpeg

Counter battens fitted, wiring for the lighting (led panels) and insulation being finished.

F899FFE7-B935-49A7-A973-E218CCA0D5C3.jpeg

8A794D3A-446A-43EB-8120-D2CD0B2C8AAF.jpeg

Plasterers are back on Monday to skim the ceiling. I am hoping that the doors will catch up and arrive on Tuesday so they can be fitted before the floor insulation and screed is poured on Wednesday afternoon. If they don’t shuttering will need to be put in so the pour can go ahead. I am thinking I will put a dehumidifier in for a week to get it dried out before I put the chipboard down on the floor.

Apologies that some of the pictures are on their side - not sure what I need to do differently to stop this happening?
 
Good progress and fastidious work. I hope the BBC compensated you for cost of lost time!
 
This is a tremendous build, could I ask a couple of questions

1. Was the brick skin tied to the blockwork? Not a challenge just interested
2. Did you use green oak for the trusses?

cheers
Mike
 
Hi Mike

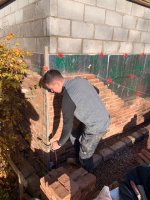
Yes - here’s a picture of one of the walls going up. Each of the insulation clips is attached to one of the wall ties.


CA5AF92F-16AA-4F79-A8B2-EA5EC6E76D13.jpeg

The oak is air dried.

Cheers

Robert

Ps I wish I could find how to rotate pictures the right way!
 
9fingers":znser0e0 said:
Blackswanwood":znser0e0 said:
Ps I wish I could find how to rotate pictures the right way!

Without trying to be smart :D the best way is take them in landscape with volume control buttons(Apple?) pointing to the ground.

Bob

If you want to rotate them after you have taken them the only way, as far as I can see, is to do what I have done above. Save the image from the forum post it will then be on you device sideways, rotate it in your image editor, save, then upload to the post again.

Until we can get the forum software sorted it would be easier to take all images in landscape mode as Bob’s suggestion.
 
At long last my new workshop is nearing completion after a few more twists and turns.

The plan had been to be watertight by Christmas but it didn’t work out that way.

The first issue was a mix up over the door opening size. Don’t ask how the apprentice didn’t notice the opening was too tall until he’d ripped 5mm off each side of the wrong frame (softwood rather than oak) so it couldn’t be sent back!


11A6FAE2-76CF-4B2C-8E1F-8E20F4E7B843.jpeg


In fairness mistakes happen and a bricky was back quickly and the opening lowered with no fuss.

The aluminium window has been caught up in the lockdown supply chain issues but believing it was finally on it’s way we cracked on with the floor insulation and screed.

640A7813-07D3-4561-96C9-13477BBE7742.jpeg

I was supposed to have taken off the paperwork that was taped to the Velux windows but forgot ... as you can see it came down of it’s own accord the night the screed had gone in. Luckily the screed was already firm so no damage done.


3F726D21-6D54-4676-B756-6DD3702CD431.jpeg

Once poured the screed was sprayed with an agent to slow down the curing process and it took a good three days before it was hard enough to walk on.

Work had got very busy for me which blew my plan to have the walls and ceilings painted before the scheduled time for the electrician to be on site.

FC7BAD70-67A0-40BE-9210-D6E7A7D77AB4.jpeg

Then some good news .... the big door had arrived.

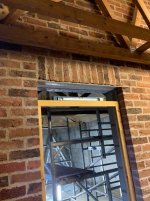
B16C2E8A-B605-4B2C-B6AA-FDB8AAA491CB.jpeg

Unfortunately it was a false start. Note the three bricks in the opening ... that should be a full course. There had been a bit of a mix up. With bi-folds they pack them up when fitting and then put the final course of bricks in. These aren’t bifold though so the bricks need to be laid first. After much standing around and debating who should have spotted it we agreed to reconvene on the 4th January by when the brick course would be sorted and the door could be fitted.

So, a very cold few days with a polythene sheet for a window while painting ...

BEBB6B55-A121-4A53-A665-F965D98CC718.jpeg

The 4th January came and the window fitter tested positive for COVID-19 .... no point in complaining!

Finally we get there late last week.
6836F098-0A4D-4BAC-9DC5-A966C000A671.jpeg

The original plan had been “Crittall” type windows. We have a complex planning position and the building is supposed to match the unsafe one that came down when we bought the place. I was amazed to get away with the lift and slide ...

68A4B6CF-F98A-44FE-BA53-8C5DC9FCEC67.jpeg

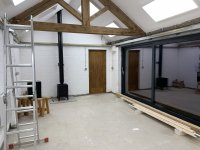
So this is where I am up to ...

2200DC0D-91C8-43CE-8024-558C3D7CD432.jpeg

D73DD101-CF87-4726-82D2-9F01086EA04E.jpeg

My wife has decided it resembles a prison hospital ... not sure when she has seen one of those ...

The dehumidifiers are doing their thing drying the building out - I have some painting to finish and then the floor can go down so I can move in :obscene-drinkingcheers:
 
That is one special workshop. :eusa-clap: :eusa-clap:
 
Nah I'm not jealous either.

Actually I am. Superb!

I’m planning a much more modest build of brick, insulated cavity and block. You seem to have a nice painted finish which is exactly what I’m thinking of. Are they special blocks? What kind of paint did you use?
May I also ask are those large LED panel lights and if so - what are they?
 
You can’t beat a good high ceiling :text-bravo:itlooks a really useful space that I’ve no doubt will fill up rather rapidly :eusa-think:

Can’t fault you opting for the patio doors I went down that route when I built mine & I've not regretted it, the light floods in. I set mine back in the opening & put wooden doors in front as even though the shop is fairly secluded you never know what scrotes are lurking, also handy at night when I don’t want light blaring out of the shop.

Doesn’t look like any prison hospital I’ve ever seen.
 
stevegruk":3c5mp40g said:
Nah I'm not jealous either.

Actually I am. Superb!

I’m planning a much more modest build of brick, insulated cavity and block. You seem to have a nice painted finish which is exactly what I’m thinking of. Are they special blocks? What kind of paint did you use?
May I also ask are those large LED panel lights and if so - what are they?

Steve - nothing special about the blocks and the paint is simply Leyland Trade White Emulsion. If all had gone to plan I would have sprayed it which would have been a lot easier.

The lights are cool white LED panels.

Cheers
 
Back
Top