• Hi all and welcome to TheWoodHaven2 brought into the 21st Century, kicking and screaming! We all have Alasdair to thank for the vast bulk of the heavy lifting to get us here, no more so than me because he's taken away a huge burden of responsibility from my shoulders and brought us to this new shiny home, with all your previous content (hopefully) still intact! Please peruse and feed back. There is still plenty to do, like changing the colour scheme, adding the banner graphic, tweaking the odd setting here and there so I have added a new thread in the 'Technical Issues, Bugs and Feature Requests' forum for you to add any issues you find, any missing settings or just anything you'd like to see added/removed from the feature set that Xenforo offers. We will get to everything over the coming weeks so please be patient, but add anything at all to the thread I mention above and we promise to get to them over the next few days/weeks/months. In the meantime, please enjoy!

Not quite a workshop build

Last fall, the concrete mixer driver had a laugh when he saw the mesh in my small concrete base and asked if I was building a bomb shelter.

But…..it survived an earthquake!
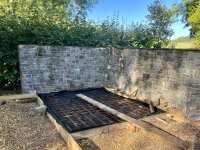
3484F7AB-23B5-45B2-A06A-269B4A3FB3C6.jpeg
 
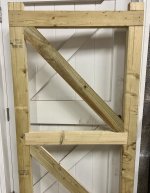
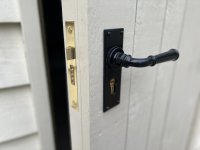
Seems like I am going to need to use a 5 lever mortise lock for my door. I was thinking to keep it simple with the materials I have and do 4x2 stiles with 6x1 ledges rebated flush into the stiles and 4x1 diagonal braces. I would cover the whole thing with 6x1 with the edges lapped by 25mm. Overall, this would make the door about 66mm thick and just over 900mm wide. Too heavy? Back of the envelope sketch below which should show the cladding stop at the 4x2:

Scannable Document on Feb 26, 2023 at 19_12_38.jpg

With a heavy door, I am thinking I need to be careful on the door lining. 175mm gives me the correct 40mm edge for the cladding but an outward opening door would have the hinge mounted on that thin, overhanging edge. If I am thinking about it right:
Option 1: 7x1 door lining and inward opening door (not a significant access issue)
Option 2: 6x2 (+ a ripped batten) and outward opening door

Any thoughts or suggestions? Shoot as many holes in it as you can.
 
If you are keeping the strap hinges on the inside that’s good, outside and you will need carriage bolts through the door and frame to stop anyone just undoing the hinge screws and then they are in. Whichever I would still fit jamb bolts. Having been on the wrong end of burglars efforts for a lot of years I do feel that a ledge and brace door isn’t strong enough, depends how likely you are to be a target I suppose.
Not related, I came across this recently, burglars are using letter box openings in doors as a starting place to cut the door in 1/2 horizontally then just push open the top or bottom half that doesn’t have the lock on it.
Ian
 
With the 44mm width on the 4x2 edge, I was thinking I would just use heavy duty butt hinges.

Interesting note on the burglar techniques. I have always believed your best bet is to be a hard target and hope they move on.
 
Just catching up on your thread and noticing that you were looking for cladding. I don't know the S Wales suppliers but I do know about Wentwood Timber Centre, near Usk. They don't have a huge range, as they only process what is available locally. The big advantage is that their prices are low and have stayed low for several years while imported timber has shot up in price.

They do list some nice looking larch cladding at £18 +VAT per square metre:

http://www.wentwoodtimbercentre.co.uk/Cladding.htm
 
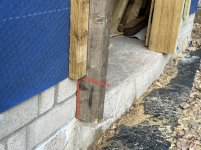
I didn’t fully understand the implications of using Mike’s original vs improved plinth design so there are some undesirable details to resolve like the overhang at the bottom of the door frame. The frame is not fixed in place yet. What looks the best here, just squaring it off? Thanks.

2CF26B90-E6BF-4876-AF0B-EF64E7E8FD19.jpeg
 
Is your door going to open out or in? If out, then leave that as it is, and have the door hang outside the edge of the slab, and finish half an inch below it. If in, then those cheeks don't need to project so much just to cover the ends of the F/E boards. I'd leave them straight in both circumstances.
 
Was going to open out which is why I went for the sturdier 6x2 door lining. That does have the door hovering over the concrete step or maybe just clearing it….another drawback to not using the wider plinth!

I don’t have the FE boards yet but from ex38 stock, I was expecting to need 40mm coverage on the trim. Is that too much?
 
Not as much time (or posting) as I hoped recently but back making progress again.

Finished the door and it turned out better than I hoped with limited tools. I did figure out too late, after re-reading Mike Gs post, that I should have only nailed one edge of the 6x1. If they split, I can replace them easily enough because they are on a frame. I went for 3mm gaps which also might have been a mistake but the boards were all very dry so I thought they were more likely to expand than shrink.

45CBD589-A773-4806-9F21-92FCB8431422.jpeg

0AA33807-402D-478C-8DFD-BA3812C7BF25.jpeg
 
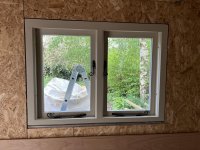
Also made some repairs to a salvaged window and got that installed. Incidentally, it is painted with Bedec MSP which was colour matched to F&B (so it is possible now).

61F02AE1-F79A-4202-9881-4EE19AE6925C.jpeg
 
I have been making progress on the slate roof. Using reclaimed slates as a first attempt at slating has had a learning curve but the effort makes the building blend in better and half of the slates were free.

This advice from Mike to add an extra rafter was invaluable as the battens still bounce a little.

Mike G":1edalxsc said:
There is a lot of nailing with a slate roof, and nailing in the middle of big gaps means everything bounces around. (Don't nail the slates down tight, by the way. They should hang from the nail, rather than be pinched by it). Also, make sure you get the right length aluminium nails. They should not protrude through the rear of the batten, or they'll tear the roofing membrane.
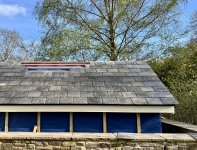
83A87233-8D15-432D-A3B4-8D14F8D3DE63.jpeg
EB08BE6E-4AEA-4CB0-8B6E-8DE049CEB7CC.jpeg

I am at the point now where I need to decide between a dry ridge or traditional as it will determine the ridge tiles. On the one hand, a dry ridge seems easy to fit and not that expensive for what should last without maintenance. The issue is that capped angle tiles are common for the area and match the existing house and would not work with a dry ridge. Any thoughts/advice welcome.
 
In my view dry ridge tiles are an eyesore. I would always do it the traditional way.
 
F&E boards delivered this morning while I was out. Ordered ex36 150mm because I couldn’t find 175mm. It is not a big building so I thought the smaller profile would work and they were cut from good stock.
IMG_4109.jpeg
They delivered ex36 200mm!! They were very apologetic and happy to replace it but also happy for me to keep it. I got the same linear meters so I would have more than I need depending on the cover I choose at over £100 discount.

If I do a 50mm overlap and 150mm on show, it looks decent and stays below 40mm at the thickest point. Any drawbacks to that approach I am not thinking of?
 
Yes. Don't do that. The lap of 50mm would force the nail to be about 60mm from the bottom edge of the boards, and that would allow cupping. You'll get a lot of very distorted boards. Stick with a 25mm lap.
 
Just when I think I have a plan figured out, Mike drops the wisdom and I change the plan.

Would a 30mm or 35mm lap be risky? The F&E is still about 25mm thick at the nailing point.
 
You'd get away with 30mm, which sort-of happens here and there anyway when doing 25mm laps. I wouldn't push it any more than that.
 
Definitely the most tedious job so far and I have only made it through the first coat on the trim and soffit boards. Colour matched barn paint is working well though.

IMG_4128.jpeg
 
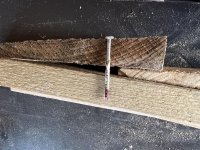
Doing some test fitting. Did I mess up on the nail length or will these work? Also, is there a consensus on always choosing the flat side down (as in the picture) vs. trying to fight the cupping towards the building?

IMG_4148.jpeg
 
My inclination is flat side to the back like in the picture.

I've no idea if there's any evidence, but as the rain runs down the outside face, I would want it to gather and drip at that edge, rather than run underneath. So the less than 90 degree angle suggests to me that it might drip quicker.
 
Andrew J":1csp0772 said:
Doing some test fitting. Did I mess up on the nail length or will these work?.....
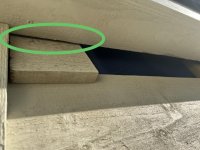
The counterbattens will be on studs, so it wouldn't matter if the nail was too long. 65mm is the usual length for f/e nails.
 
Thanks Malcom and Mike.

Those nails are only 50mm. Would you risk it or get 65mm?

Also, when screwing in fascia and soffit boards do you follow the one fixing principle to allow expansion or is it not necessary with 6x1 sawn timber?
 
I'd definitely buy the right nails.

No, fascias and soffits etc need 2 fastenings. Soffits are out of the weather, so can't let water in even if they split. Fascias are generally hidden behind gutters and under the edge of the tile overhang, so are relatively protected. The point of the single fixing in feather-edge boarding is that it holds the bottom edge of one board, and traps the top edge of the board below (whilst still allowing it to expand and contract). This means the boards can't easily curl. If you only used one fixing for soffits and fascias (and barge boards), they would curl. As they are an inch thick, they're strong enough to pull the nails to where they want them to be as they expand and contract. That's definitely not the case with feather-edge, which can be 4 or 5mm thick at the top in some cases.
 
I am making good progress on the cladding but I have a question about when it meets the soffit. I took a chance on fixing the soffit using 4x1 that I had before cladding. A better solution would have been to rip 6x1 to fit once the cladding was on but I am where I am.

I can think of three options:
1) Glue a shim to the last board where it meets the battens so it is tight to the soffit and closes the 3mm gap that can be seen in the picture.
2) Fix as in the picture and fill the gap with silicone
3) Take the 4x1 out and rip down a 6x1 (least preferred but would if it was necessary)

Any views on these options or does anyone have a better idea?

IMG_4176.jpeg
IMG_4177.jpeg
 
Yes, it's ideal to come up underneath the soffit with the top board. But no matter, unless you are looking for work I would just fill the gap with silicon......after your final coat of paint.
 
I have done a poor job of posting progress updates so in the event any of it is useful, I will do a catch-up post here.

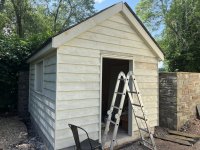
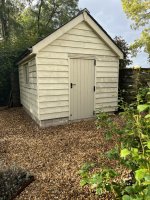
I finished the cladding back in June with the nice weather. Following all the tips here made the job go very smoothly. For reference, it ended up being 200mm FE with about 30mm cover (delivered the wrong size but got a discount). It is painted with a colour matched Bedec barn paint to the Farrow and Ball colour on the main house. Soffits, eaves and barge boards are done in a colour matched Bedec MSP.

25FF3DE7-9AEC-426B-B63D-4B5D9229102B.jpeg

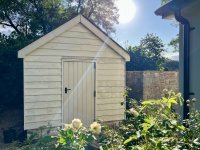
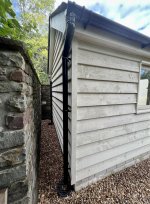
Next job was getting the door hung. I experimented with a framed ledge and brace design using the scrap wood I had it came out ok. I used Mike’s ‘bent hinge’ approached and it worked well but as another consequence of choosing the original single brick plinth, the door had to be set back further to use a mortise lock set. You can also see the corner of the garage and the soffit detail I was trying to match.

DBEFFC22-2FB9-45F8-BBEC-3FC694CE1B82.jpeg

106CCDA3-693A-4CA4-9E34-B7DA21B22A18.jpeg

Next job was finishing the roof slate along with the ridge tiles as I worked my way off the roof. This was easily my least favourite job because it was so awkward to move around and I couldn’t point it as well as I wanted to. I strongly considered a dry ridge for simplicity but went traditional to have the experience and to use the capped ridge tiles I had salvaged. I started out with a wood form of sorts to help get the bed down but quickly abandoned it. In the end, I probably ended up with too thick of a bed under the tiles but better than too thin I guess.

8558DF92-41E1-4832-9DC7-96448668CDEC.jpeg

Always good to teach your daughter life skills.

BC444989-DB72-4A3D-AAA2-38F1BE7E676B.jpeg

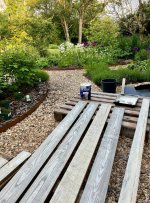
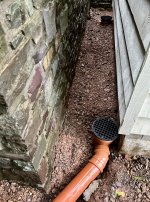
Last jobs were guttering, drainage and putting the gravel bad back. Cleaned up some recycled gutter pieces and bought gulleys on eBay for half price to make a nice job of it.


77BE0443-8C76-4CAA-B28D-F0928DD2D561.jpeg
D7AC1BD0-65F4-45CF-9B5C-BD12771DB52E.jpeg
A092A897-2C88-4A19-9099-DDCC27AC808C.jpeg

Only thing left is to get an electrician to connect up the mini consumer unit for a few sockets and a light inside. Cables are all run in through conduit underground to the garage consumer unit.

E735F72E-0D7E-496A-B24D-CBA290C10756.jpeg
 
I’ll shall ask one of my girls later if they consider fitting ridge tiles on a workshop roof is a life skill . :)
Good on you and her.

All looks very smart
 
I'd forgotten about this one. It looks very smart. I hope you're pleased with it.

I'm with you on ridge-tiling. It's always a pain. I rather look forward to it because it means the roof is finished, but you have the perpetual problem of where to put stuff, and where to put yourself. Many roofers sit at right angles to the position you adopted, and work to their side. This gives them access to the ridge on the other side from which they are working, and that's another little bit of precious storage space.
 
Thanks all.

This was only possible with all of the generous advice in this thread and the build threads that others have shared. I must have have read and re-read the threads of Malcom, Dan and Mike in particular dozens of times.

I had never made anything more complex than a bat box before this so there is hope for anyone.
 
Andrew J":3w49adsm said:
Thanks all.

This was only possible with all of the generous advice in this thread and the build threads that others have shared. I must have have read and re-read the threads of Malcom, Dan and Mike in particular dozens of times.

I had never made anything more complex than a bat box before this so there is hope for anyone.


Well done, Ole Son!

But that went for me, too. I hadn't done anything like this before, either. And look at me now! Making musical instruments!
 
Back
Top