-
Hi all and welcome to TheWoodHaven2 brought into the 21st Century, kicking and screaming! We all have Alasdair to thank for the vast bulk of the heavy lifting to get us here, no more so than me because he's taken away a huge burden of responsibility from my shoulders and brought us to this new shiny home, with all your previous content (hopefully) still intact! Please peruse and feed back. There is still plenty to do, like changing the colour scheme, adding the banner graphic, tweaking the odd setting here and there so I have added a new thread in the 'Technical Issues, Bugs and Feature Requests' forum for you to add any issues you find, any missing settings or just anything you'd like to see added/removed from the feature set that Xenforo offers. We will get to everything over the coming weeks so please be patient, but add anything at all to the thread I mention above and we promise to get to them over the next few days/weeks/months. In the meantime, please enjoy!
You are using an out of date browser. It may not display this or other websites correctly.
You should upgrade or use an alternative browser.
You should upgrade or use an alternative browser.
Ornamental lathe restoration
- Thread starter wallace
- Start date

")
SamQ aka Ah! Q!
Old Oak

SamQ aka Ah! Q!
Old Oak
"Ornamental Turning" T.D.Walshaw. ISBN 1 85486 108 5.. Page 31.
I hope Argus Books will forgive me plagiarising the photo in return for the nil-cost publicity they are now getting.
Sam
I hope Argus Books will forgive me plagiarising the photo in return for the nil-cost publicity they are now getting.
Sam
A bit more done


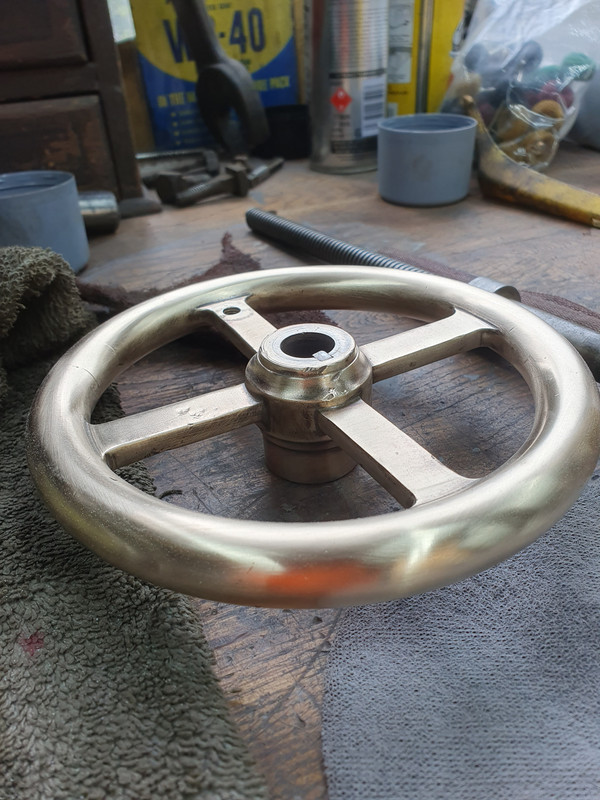
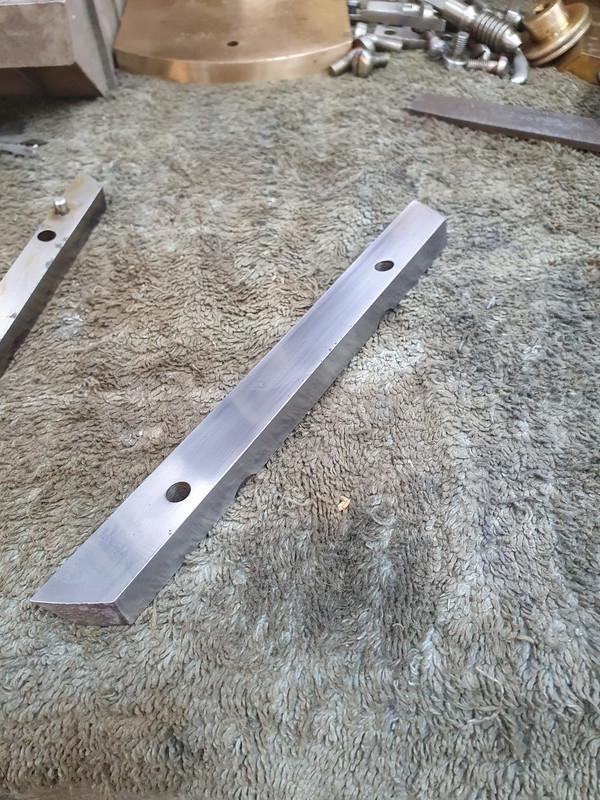
Someone has spent alot of time and effort on this at some point, this has a new screw and nut, the machining detail on the screw is really good.


I collected the bed from blue diamond machine tools which is a machine wonderland. Its only 5miles from me and I never knew it existed until a little while back. He did a lovely job, he had to take quite a bit off because an inclusion appeared. I've noticed lots of parts have casting faults and are filled with metal.

My little lump looks tiny on the beast of a grinder


That was fun getting it on the bench

went over with a file to get rid of highspots


Someone has spent alot of time and effort on this at some point, this has a new screw and nut, the machining detail on the screw is really good.
I collected the bed from blue diamond machine tools which is a machine wonderland. Its only 5miles from me and I never knew it existed until a little while back. He did a lovely job, he had to take quite a bit off because an inclusion appeared. I've noticed lots of parts have casting faults and are filled with metal.
My little lump looks tiny on the beast of a grinder
That was fun getting it on the bench
went over with a file to get rid of highspots
History is repeating itself!Someone has spent alot of time and effort on this at some point, this has a new screw and nut, the machining detail on the screw is really good.
duke
Old Oak
I like your grinder Wallace, I bet it gets good use for your restorations.
Third time lucky, maybe this time it wont end up a rusty mess. But one never knows, we are just temporary custodians. When I peg it the scrap man might have a field day. I could always leave my ornamental stuff to the Society of ornamental turners. They find good homes for machines as permanent loans to members.History is repeating itself!
I wish I had it 15years ago, instead of 2years ago. It would of been really useful.I like your grinder Wallace, I bet it gets good use for your restorations.
A bit more done, there is a lip on the casting which is going to bug me. So I had a bright idea to rout it off. Cast iron is pretty soft stuff. I only took light cuts and it worked a charm.


I had another bright idea to help stop the rust beast eating my bits in the cabinet. I put a vivarium heat matt in. I used to do something similar by putting an incandescent light bulb in my tooling cabinet.

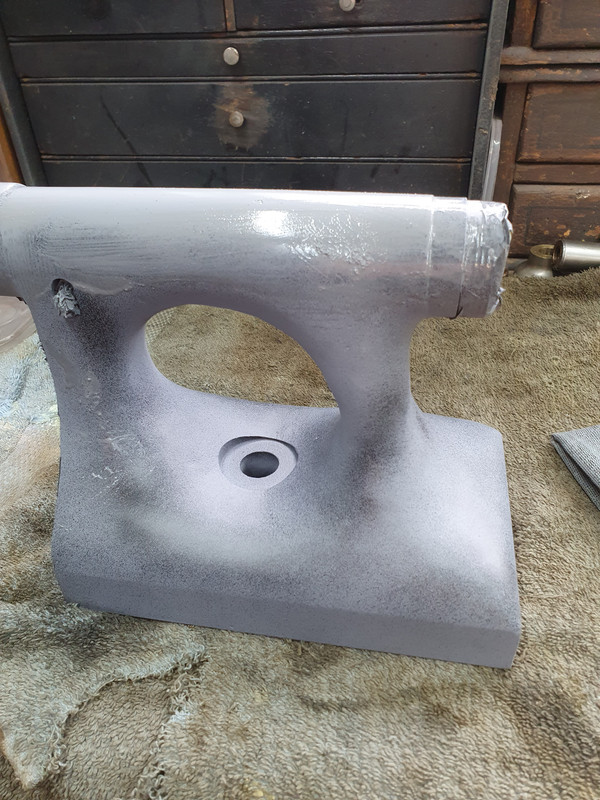
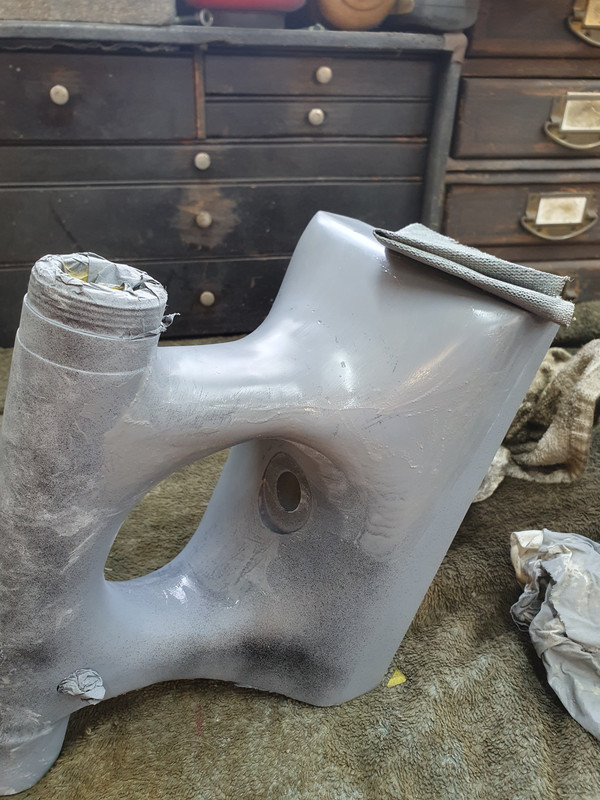
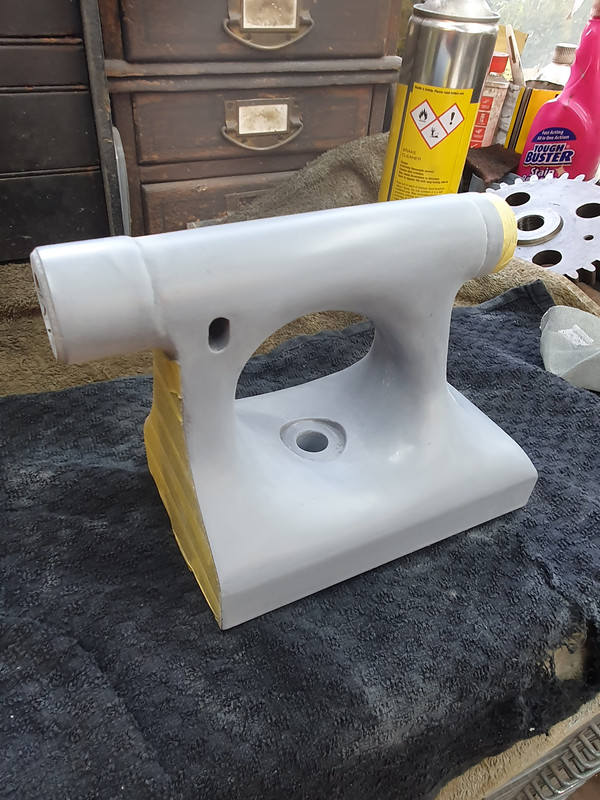
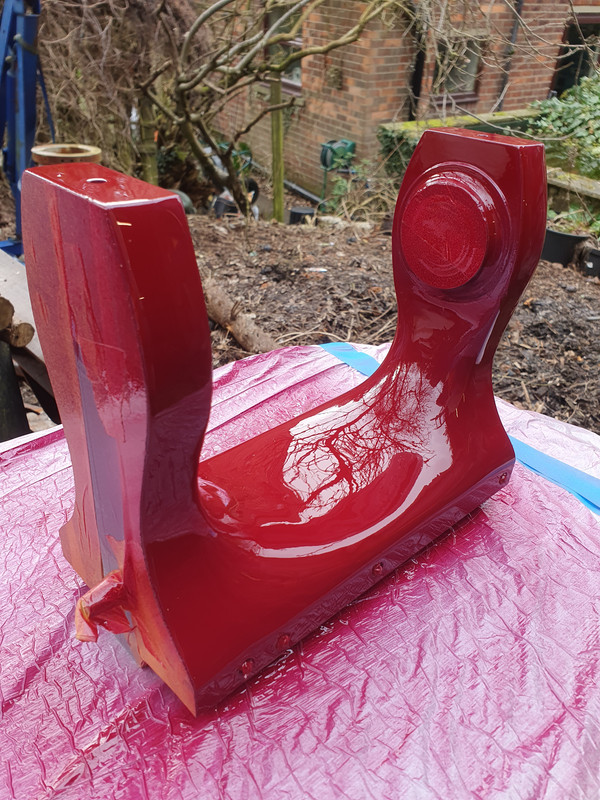
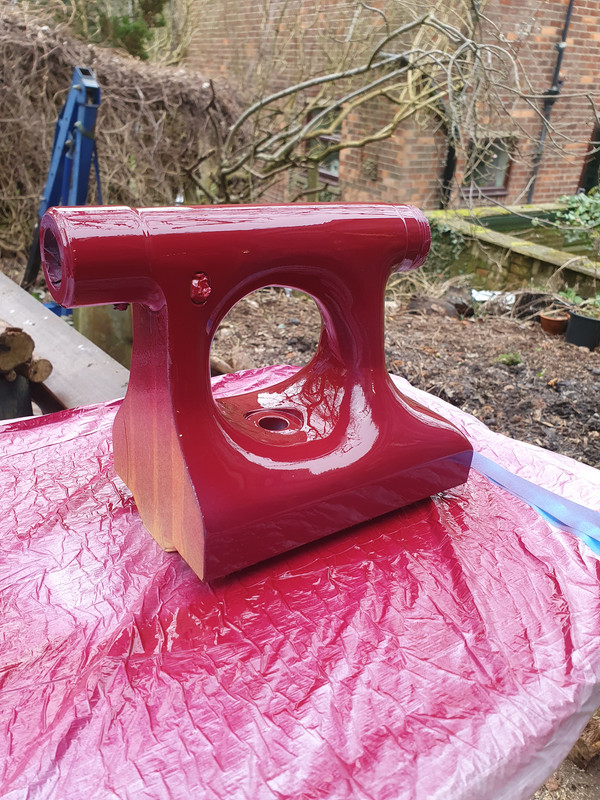
I've done quite a bit of spraying


The bed got a decent coat of polyester spray filler


Followed by lots of sanding and a few coats of primer, then lots of wet sanding


I had another bright idea to help stop the rust beast eating my bits in the cabinet. I put a vivarium heat matt in. I used to do something similar by putting an incandescent light bulb in my tooling cabinet.
I've done quite a bit of spraying
The bed got a decent coat of polyester spray filler
Followed by lots of sanding and a few coats of primer, then lots of wet sanding
AJB Temple
Sequoia
- Joined
- Apr 15, 2019
- Messages
- 7,720
- Reaction score
- 1,200
Just amazing quality of work. I am in awe. Such attention to detail.
fiveeyes
Sapling
Outstanding workmanship, Wallace. The paint, looks like liquid glass.
First time I've used this type of paint plus its getting a bit cold for painting, hence the big run, once its hardened up a bit I will scrape it back with a stanley blade and recoat. This type of paint is used on canal boats and I quite like it, except the curing time is ages.Outstanding workmanship, Wallace. The paint, looks like liquid glass.
Im contemplating going full on fancy and adding some gold leaf to the moulded sections. It looks easy enough, anyone done it before?
No. But don’t let that stop you.Im contemplating going full on fancy and adding some gold leaf to the moulded sections. It looks easy enough, anyone done it before?
SamQ aka Ah! Q!
Old Oak
Brilliant idea! (No, no pun on bulbs intended!). My nephew keeps snakes and the idea never dawned on me; incandescent bulb suppliers are dwindling and Im down to two. Thanks, Buddy.put a vivarium heat matt in. I used to do something similar by putting an incandescent light bulb
Thinking about adding some gold embellishments, people who restore old sewing machines can buy ready made reproduction decals/water slide transfers quite readily. Some suppliers of those might have decorative elements that could be adapted, or maybe would be able to make bespoke designs?
Dr.Al
Old Oak
It might be worth asking "The_Yellow_Ardvark" on the MIG-welding forum; I'm pretty sure he's done something like that before.Im contemplating going full on fancy and adding some gold leaf to the moulded sections. It looks easy enough, anyone done it before?
SamQ aka Ah! Q!
Old Oak
He's also on...you know...t'other place. Take your flak jacket; Jacob lurks there.It might be worth asking "The_Yellow_Ardvark" on the MIG-welding forum
Wallace a friend of mine used to do a lot of guilding on timber mouldings and has done it on a few kitchens I built. From experience the only problem with guilding is when the humidity eventually gets in you lose the gold colour.
Back in 2014/15 I spent the best part of a year building a library and the client wanted some of the carved cornice picked out in guilding, we ended up not using the guilding but a gold paint and it still looks good.
If you want to go the purist route and have a go at guilding I can ask my mate his secrets….. from memory you can’t go cheap on the leaf and you need to hit it with lacquer before the humidity kills the colour.
Dr.Al
Old Oak
Wallace a friend of mine used to do a lot of guilding on timber mouldings and has done it on a few kitchens I built. From experience the only problem with guilding is when the humidity eventually gets in you lose the gold colour.
Back in 2014/15 I spent the best part of a year building a library and the client wanted some of the carved cornice picked out in guilding, we ended up not using the guilding but a gold paint and it still looks good.
If you want to go the purist route and have a go at guilding I can ask my mate his secrets….. from memory you can’t go cheap on the leaf and you need to hit it with lacquer before the humidity kills the colour.
I'm really surprised by that. Gold plating on electronic circuits is considered the (ahem) gold standard for finishes as it doesn't oxidise & retains its clean surface (and hence original colour). Is there something different about gold leaf or is it just a matter of cheap stuff being impure?
The way I understand it is there is cheap gold leaf books which are made from copper and other stuff which is thicker and really quite cheap, a few quid a book. This stuff can tarnish easily and needs sealing to preserve it. Then there is real gold leaf which is just gold, a full book of 25 squares weighs 14g and costs about £45. The real leaf is very good for outside work and is very durable it maintains its finish without the need of laquers.I'm really surprised by that. Gold plating on electronic circuits is considered the (ahem) gold standard for finishes as it doesn't oxidise & retains its clean surface (and hence original colour). Is there something different about gold leaf or is it just a matter of cheap stuff being impure?
Dr.Al
Old Oak
Thanks, that makes a lot of sense.The way I understand it is there is cheap gold leaf books which are made from copper and other stuff which is thicker and really quite cheap, a few quid a book. This stuff can tarnish easily and needs sealing to preserve it. Then there is real gold leaf which is just gold, a full book of 25 squares weighs 14g and costs about £45. The real leaf is very good for outside work and is very durable it maintains its finish without the need of laquers.
AJB Temple
Sequoia
- Joined
- Apr 15, 2019
- Messages
- 7,720
- Reaction score
- 1,200
Consider looking at catering gold leaf. Used in patisserie. Cheaper than the price you note above. But very fragile and difficult to handle. You will need a brush to lift it. And no air drafts.The way I understand it is there is cheap gold leaf books which are made from copper and other stuff which is thicker and really quite cheap, a few quid a book. This stuff can tarnish easily and needs sealing to preserve it. Then there is real gold leaf which is just gold, a full book of 25 squares weighs 14g and costs about £45. The real leaf is very good for outside work and is very durable it maintains its finish without the need of laquers.
Got sidetracked a wee bit with this thing.
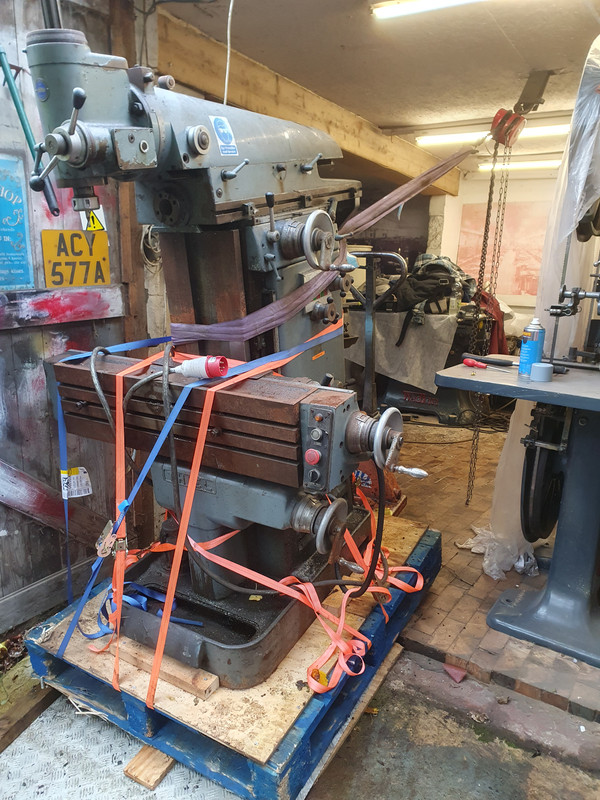
Its a theil milling machine probably the best germany built. it is way to good for my capabilities but it cost a similar amount to the little tom senior I had so who am I to resist. I had to beef up the support for my shed as it had already sunk a bit and with this weighing well over a tonne.
Not sure if this has been seen
or this bit
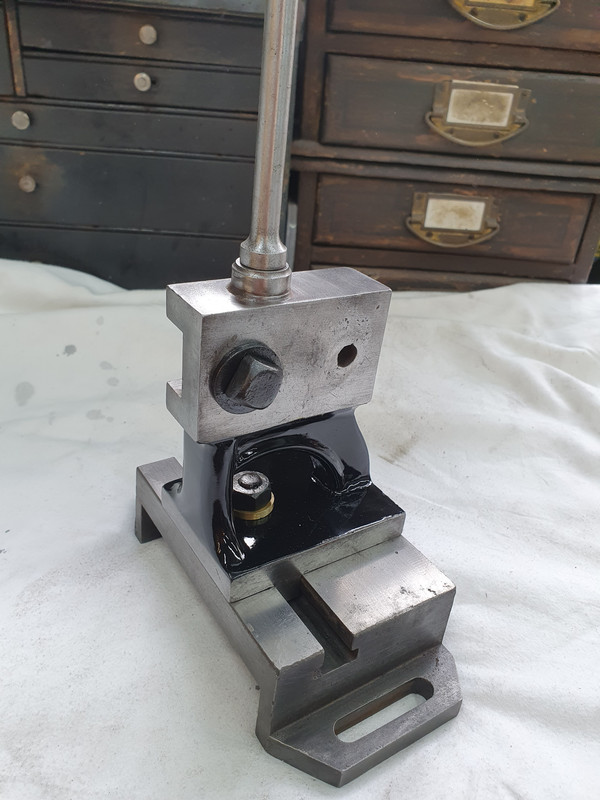
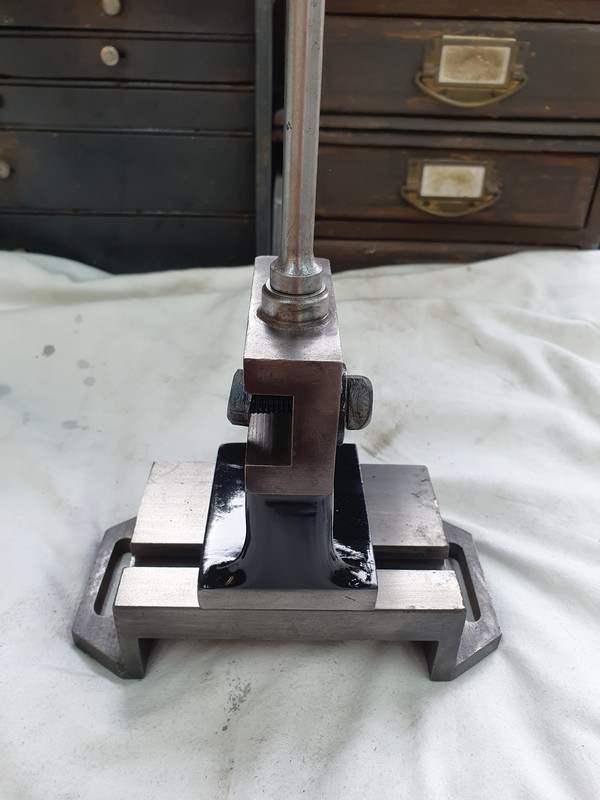
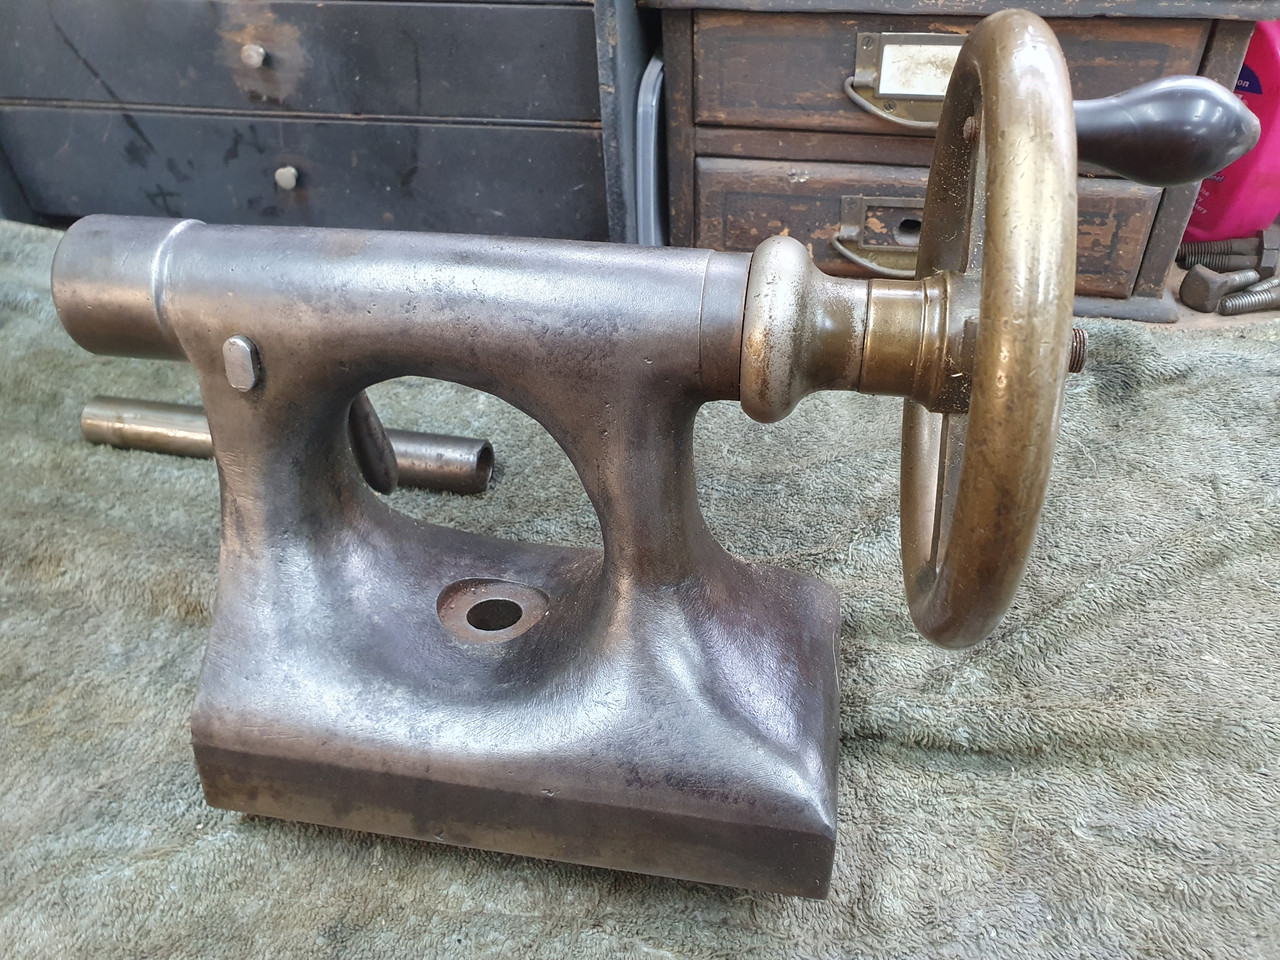
Tailstock
Finished with scotchbrite, not sure if I will give it a full on shiny finish
I put a guide coat of black and then wet sand
Its been to cold to spray so Ill move onto the headstock
Its a theil milling machine probably the best germany built. it is way to good for my capabilities but it cost a similar amount to the little tom senior I had so who am I to resist. I had to beef up the support for my shed as it had already sunk a bit and with this weighing well over a tonne.
Not sure if this has been seen
or this bit
Tailstock
Finished with scotchbrite, not sure if I will give it a full on shiny finish
I put a guide coat of black and then wet sand
Its been to cold to spray so Ill move onto the headstock
duke
Old Oak
Nice Wallace, you must be getting cramped in your machine shop. ")

The sale of the tom senior mill nearly paid for the thiel and freed up a bit space, I also had a purge of stuff and did some reorganizing, so my shed is a nice place to be. I had a visit from the president of the society of ornamental turners so cleaned the place up a bit as you do.Nice Wallace, you must be getting cramped in your machine shop.
The thiel is up and running, just needed some new fuses and a clean. I've put a cheap digital readout on it and made chips. Feels weird to use because you stand at the side to operate instead of at the front like a normal mill. Its weird not having to mince around with light cuts.Can you remember your past lives, as No 1 Fettler for Messrs Holtzappfel and Wadkin?
Looking great, but that's one hell of a side project you've got yourself there...
SamQ aka Ah! Q!
Old Oak
Love it!Its weird not having to mince around with light cuts.
Understand exactly what you mean; I trained (briefly, about a year of night classes) on.a stonking big Bridgeport. Got things done, no messing!
Cabinetman
Sequoia
- Joined
- Oct 11, 2020
- Messages
- 5,528
- Reaction score
- 1,231
- Location
- Lincolnshire Wolds + Massachusetts
- Name
- Ian
Reminds me of when I was at Teacher training college in the 70’s new lecturer who was a big I am, teaching us how to use a stonking great milling mc, stood about 8’ high, well he got the cut and feed calculations out by 10% maybe both? and the thing nearly left the floor, it was out of operation for months, he wasn’t there for much longer!
I pretty much make it up as I go along but er on the cautious side. I've been playing with my new shell head santa brought me.Reminds me of when I was at Teacher training college in the 70’s new lecturer who was a big I am, teaching us how to use a stonking great milling mc, stood about 8’ high, well he got the cut and feed calculations out by 10% maybe both? and the thing nearly left the floor, it was out of operation for months, he wasn’t there for much longer!


Dr.Al
Old Oak
Having been using my Fisher Price milling machine quite a bit over the last few weeks, I'm feeling very jealous of that beast!
Cabinetman
Sequoia
- Joined
- Oct 11, 2020
- Messages
- 5,528
- Reaction score
- 1,231
- Location
- Lincolnshire Wolds + Massachusetts
- Name
- Ian
Love the sign! And he definitely was a f…wit.I pretty much make it up as I go along but er on the cautious side. I've been playing with my new shell head santa brought me.
View attachment 38282
View attachment 38283
Utterly wasted on my capabilities, I still cant get over that I sold my tom senior mill for £650 and got this for £750.Having been using my Fisher Price milling machine quite a bit over the last few weeks, I'm feeling very jealous of that beast!
There's a few different ones dotted around to remind me not to do stupid stuff. There off Ave on youtube.Love the sign! And he definitely was a f…wit.
Dr.Al
Old Oak
Utterly wasted on my capabilities, I still cant get over that I sold my tom senior mill for £650 and got this for £750.
Your old Tom Senior would be a huge step up from my Sieg.
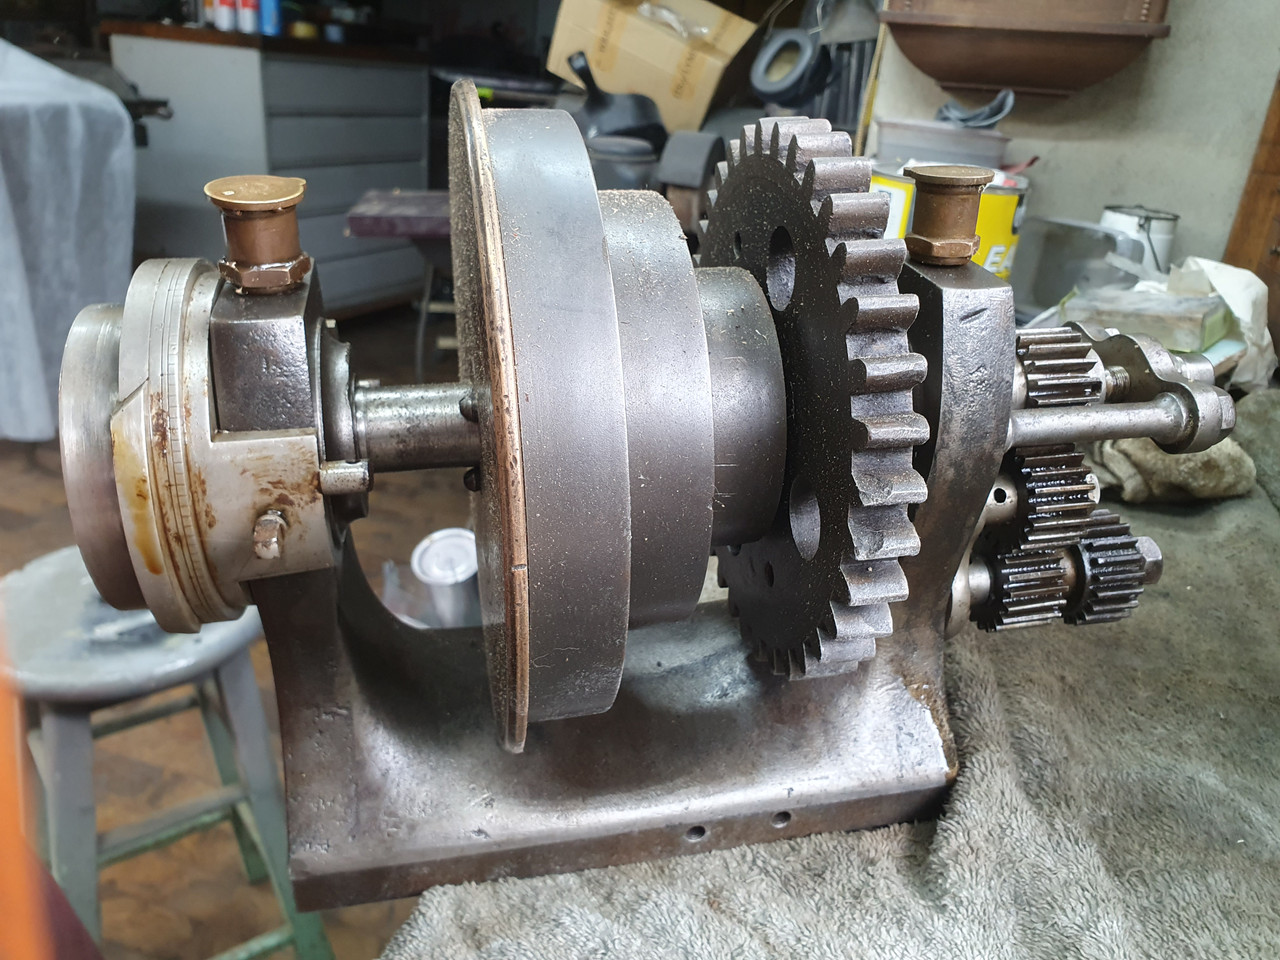
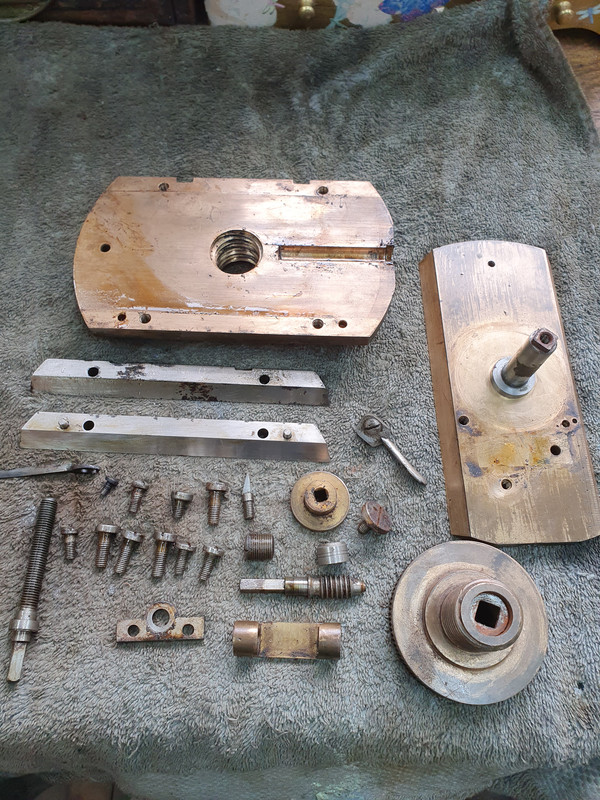
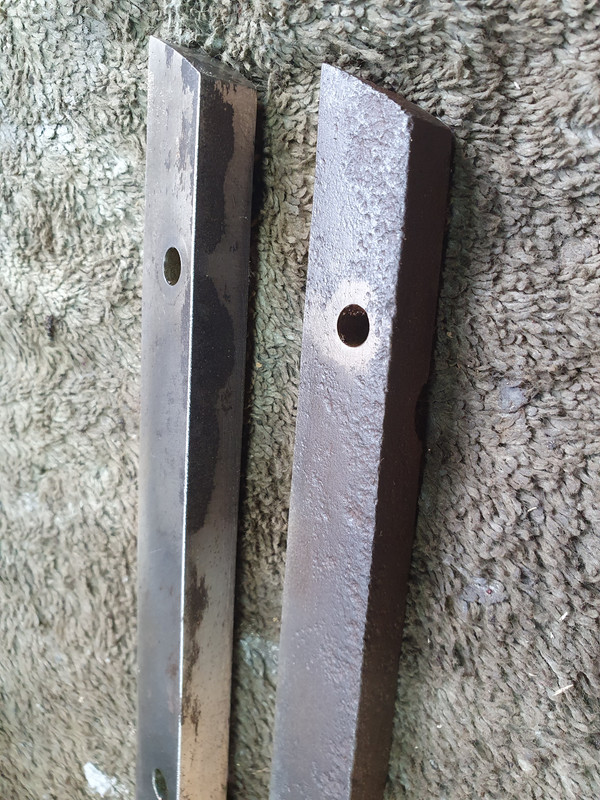
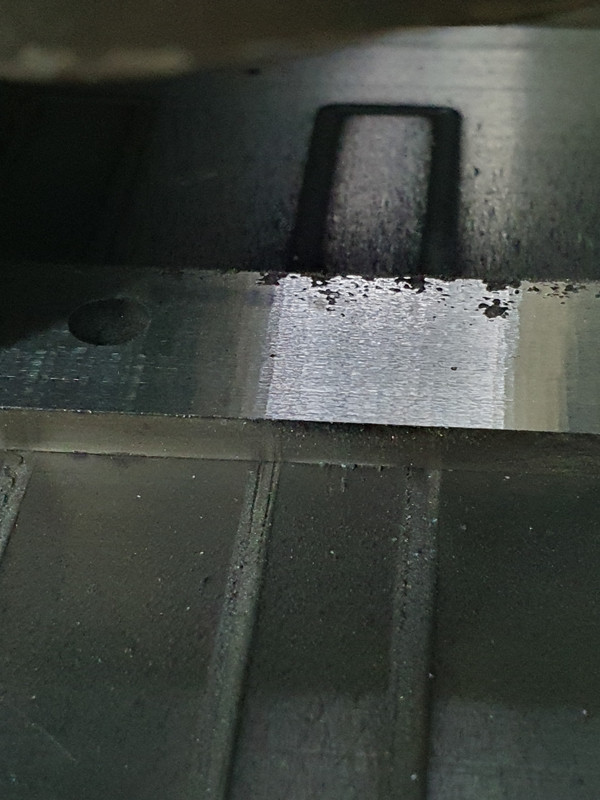
A bit progress. This took ages to clean the holes out.

A gear has a tooth missing,
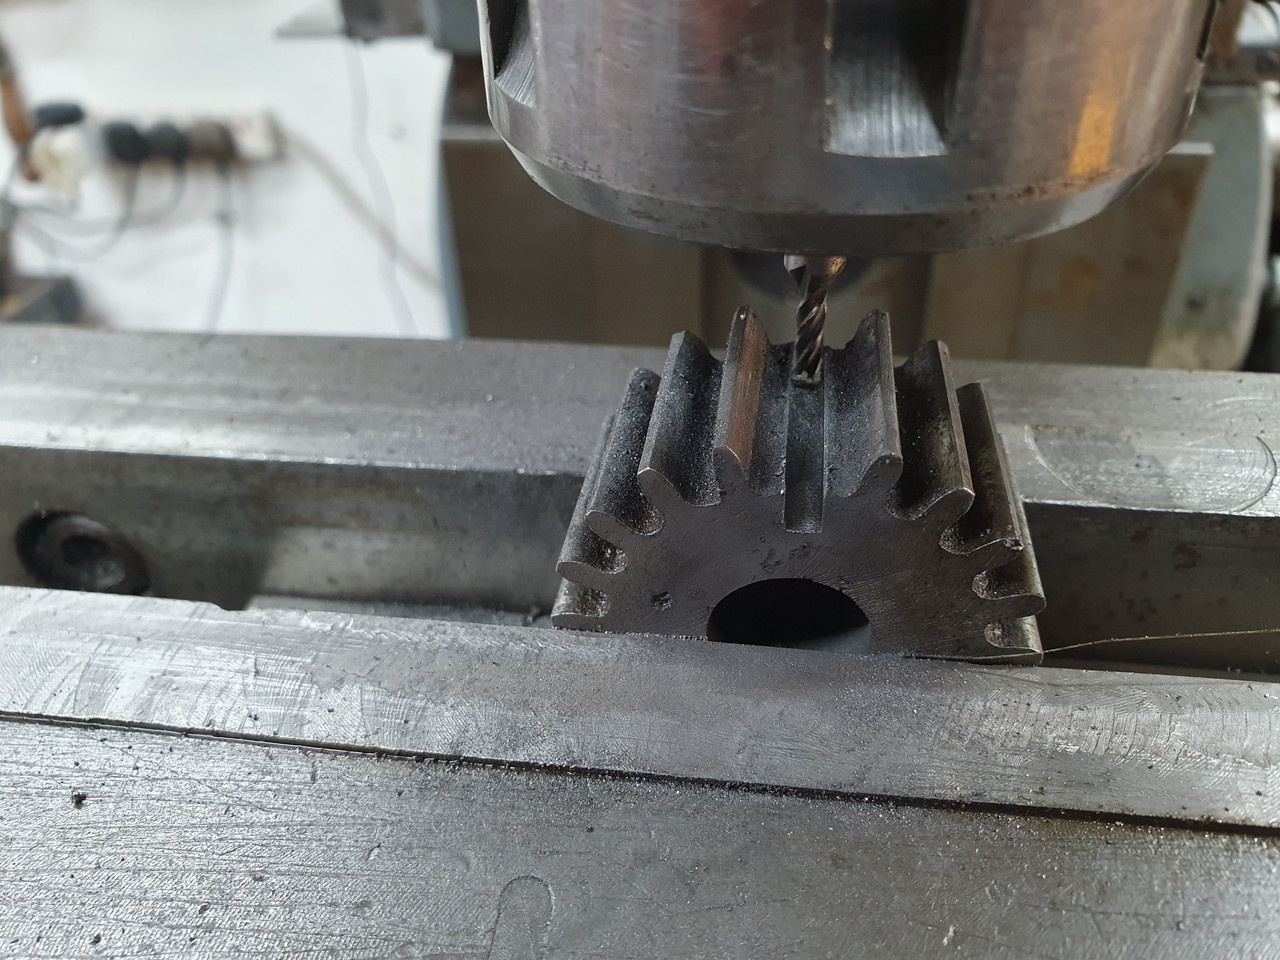
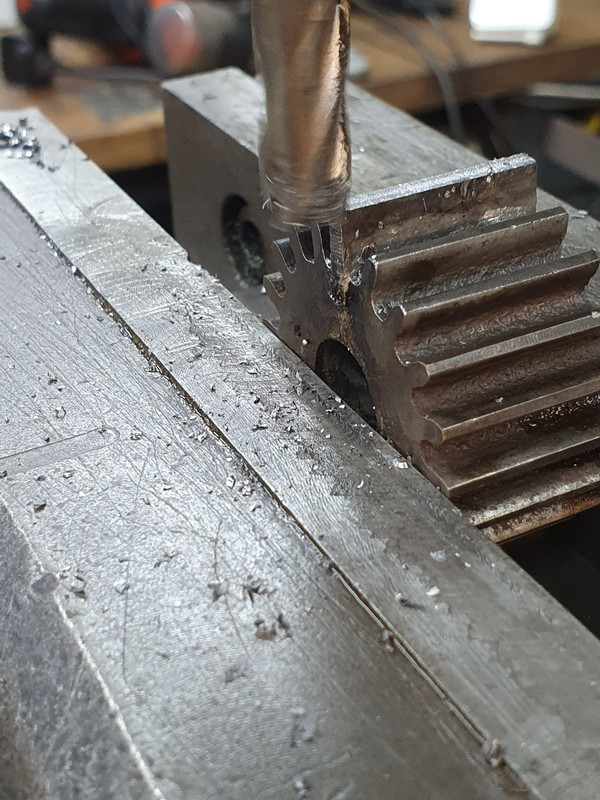
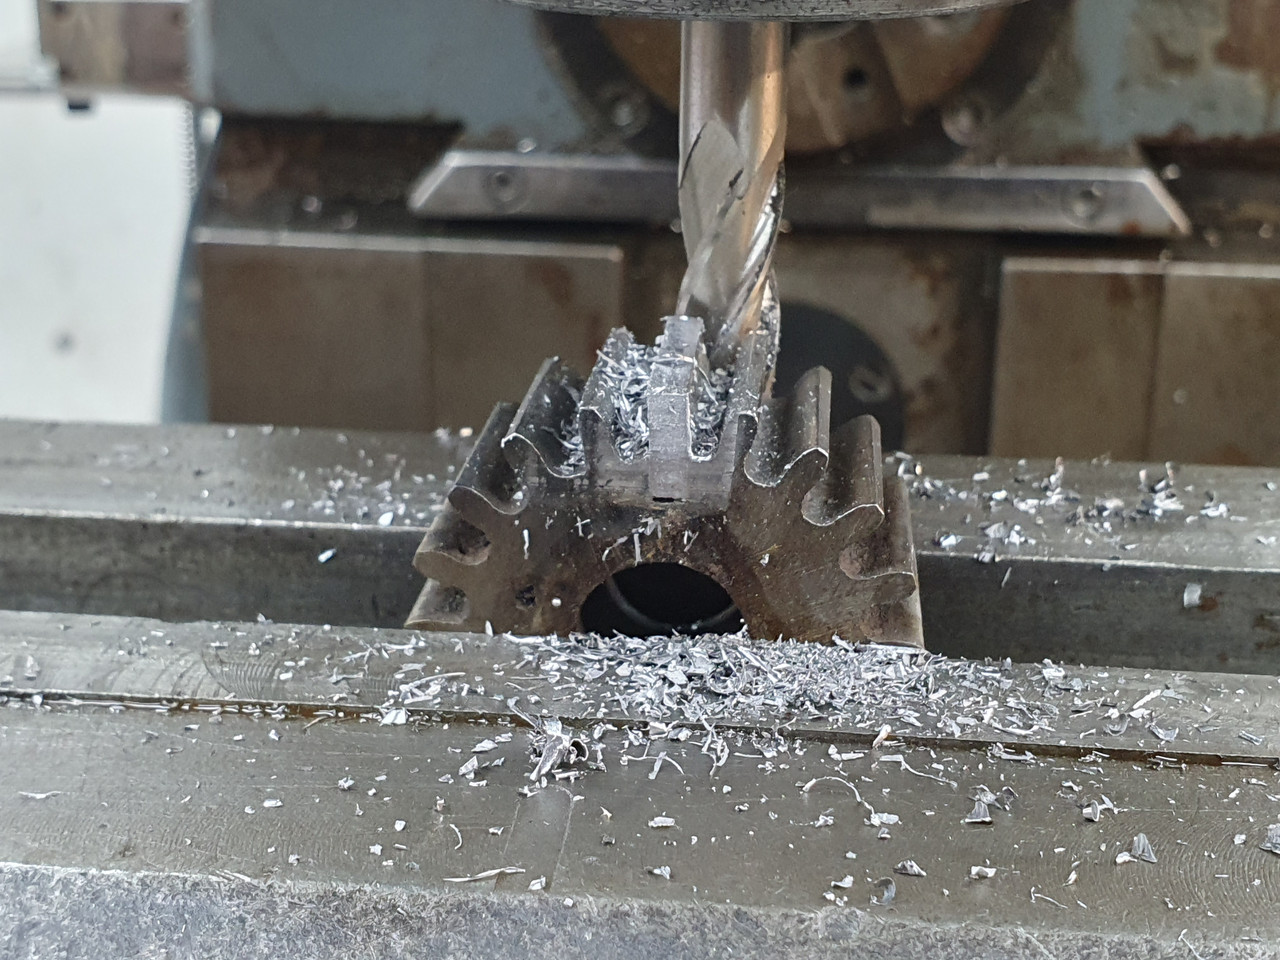
Finished off with a file
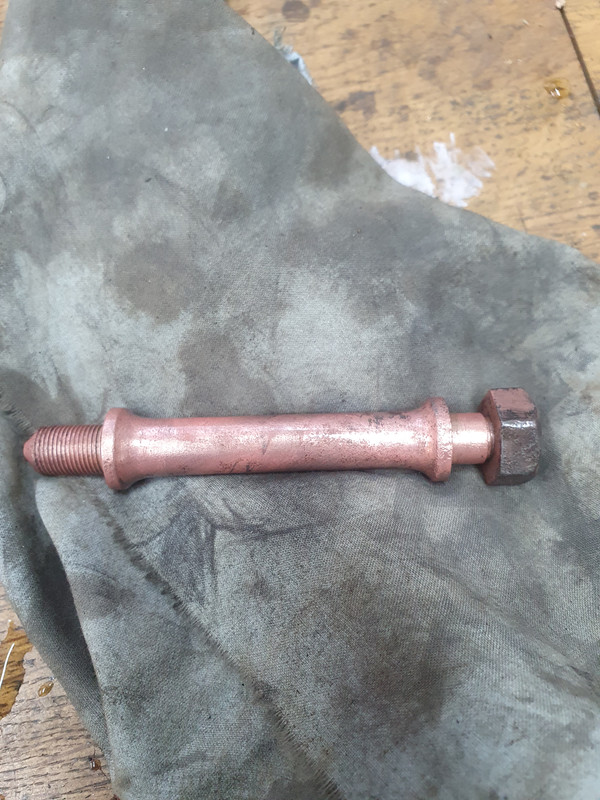
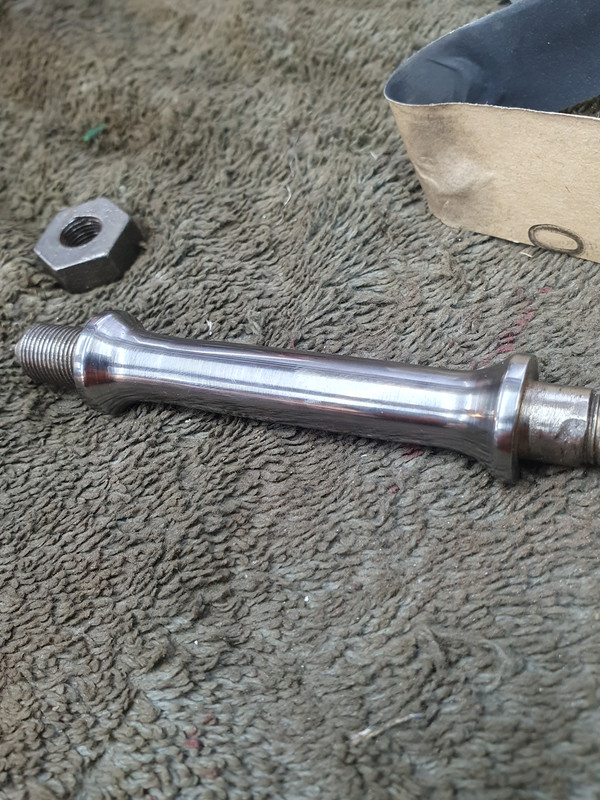
This piece from the tail stock was very pitted, so I removed the nickel finish. Alot of pieces have been copper plated first.
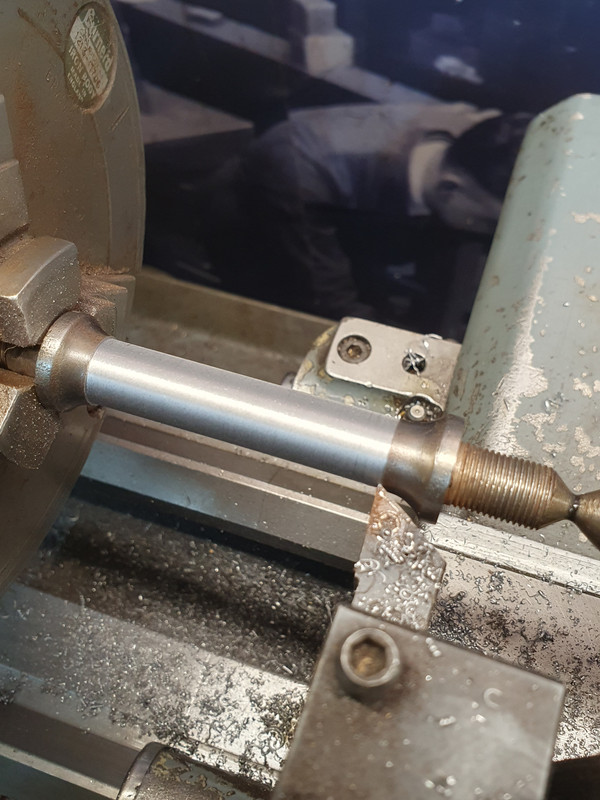
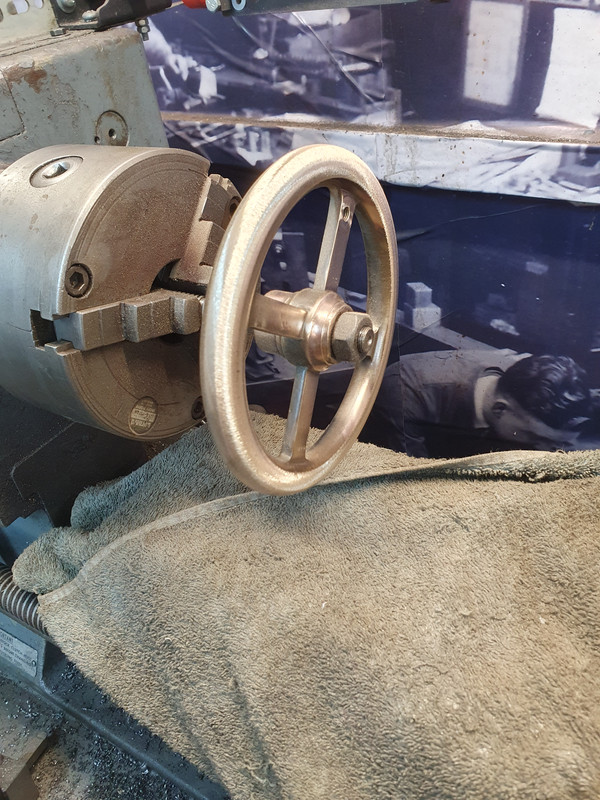
After nickel plating and polished
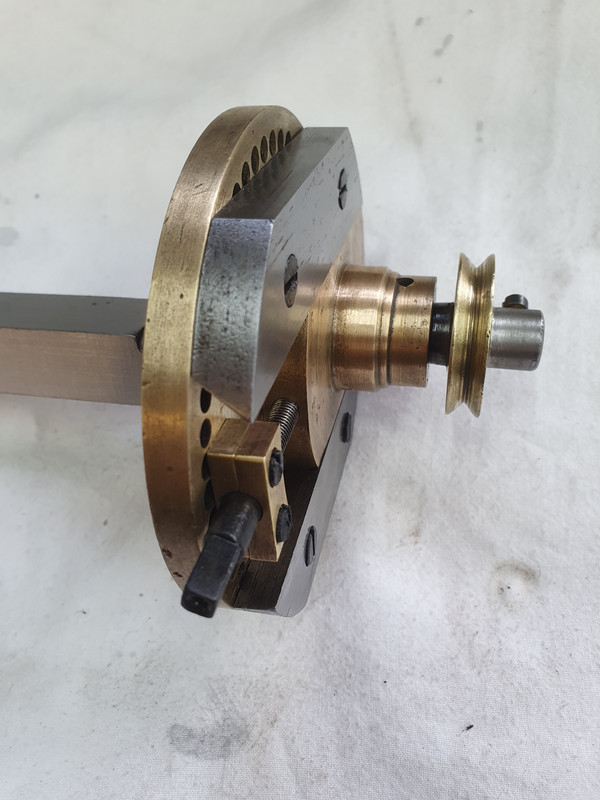
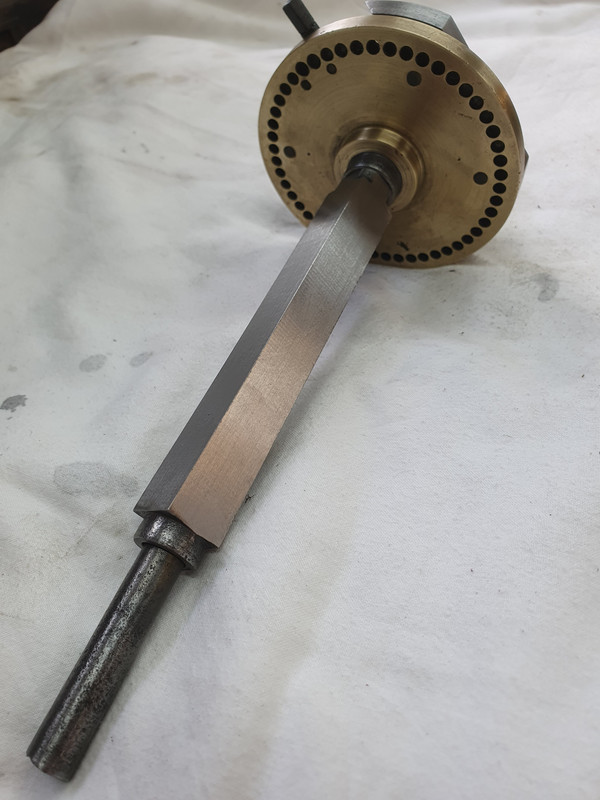
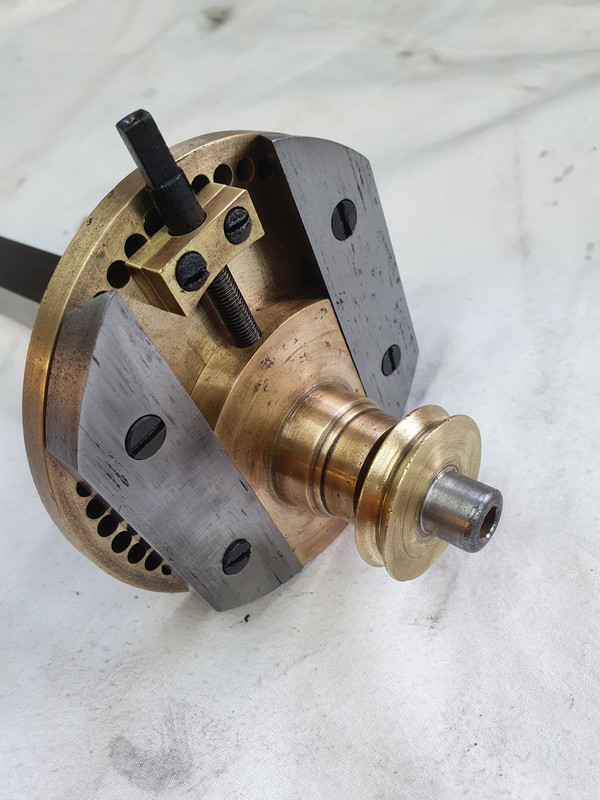
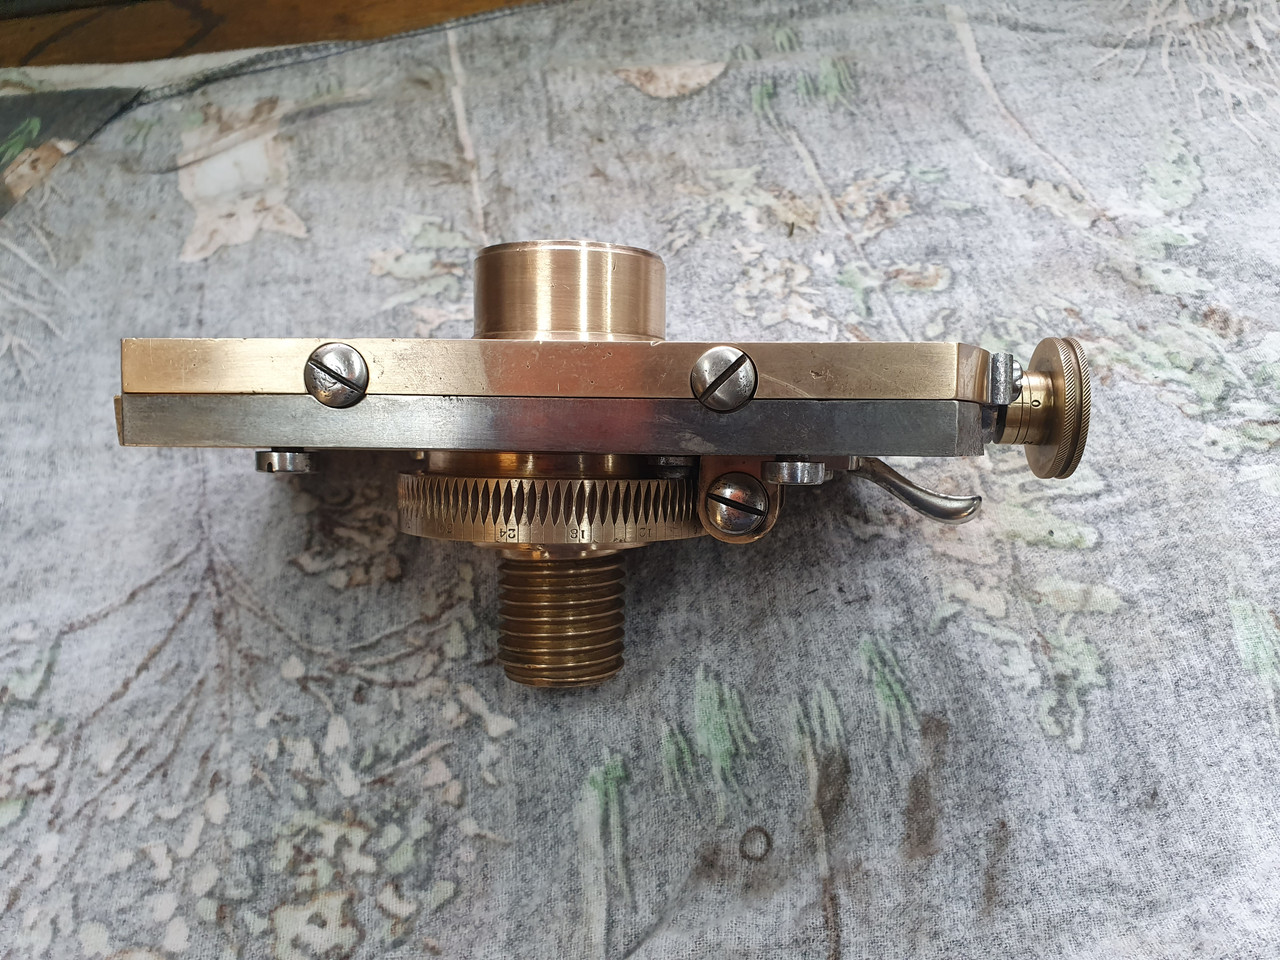
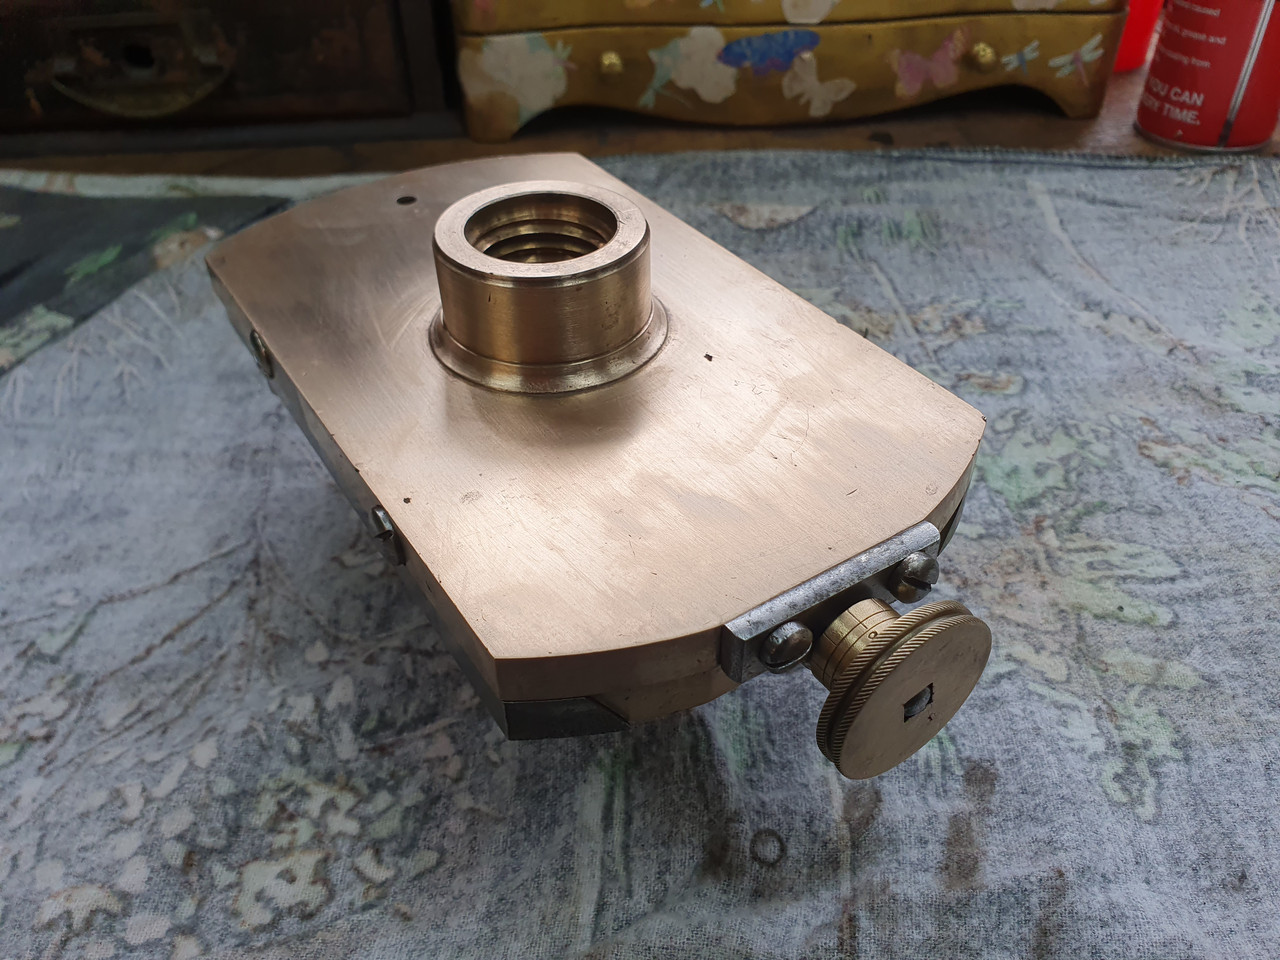
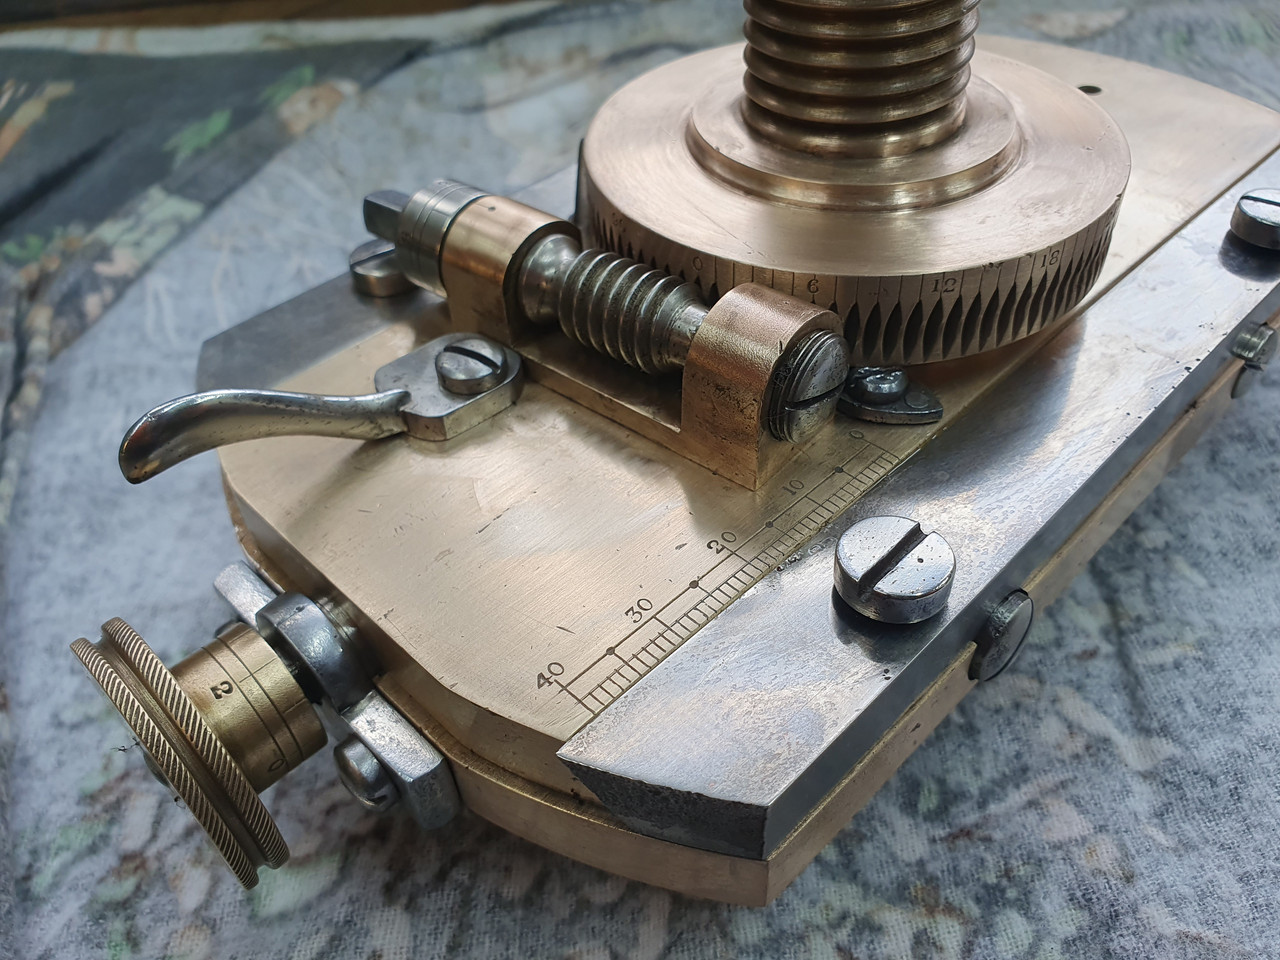
This is a eccentric chuck
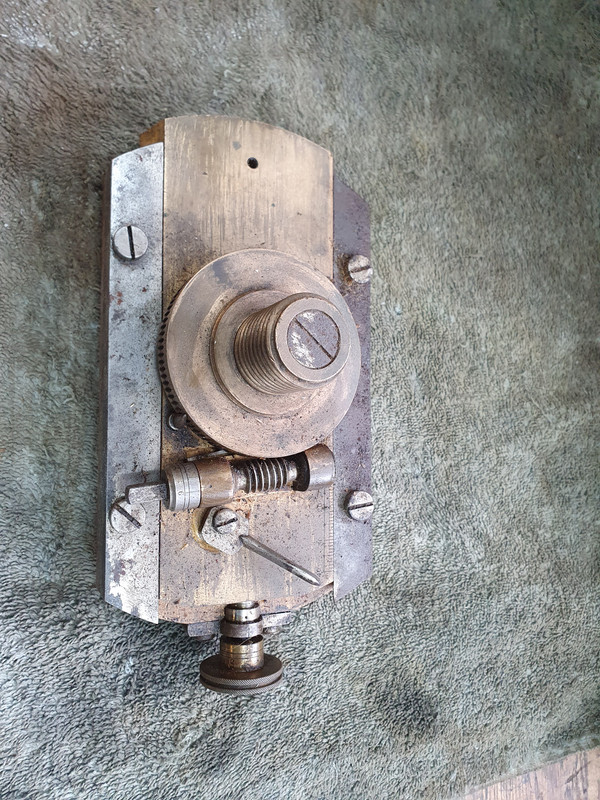
A bit crusty
Surface ground
And replated
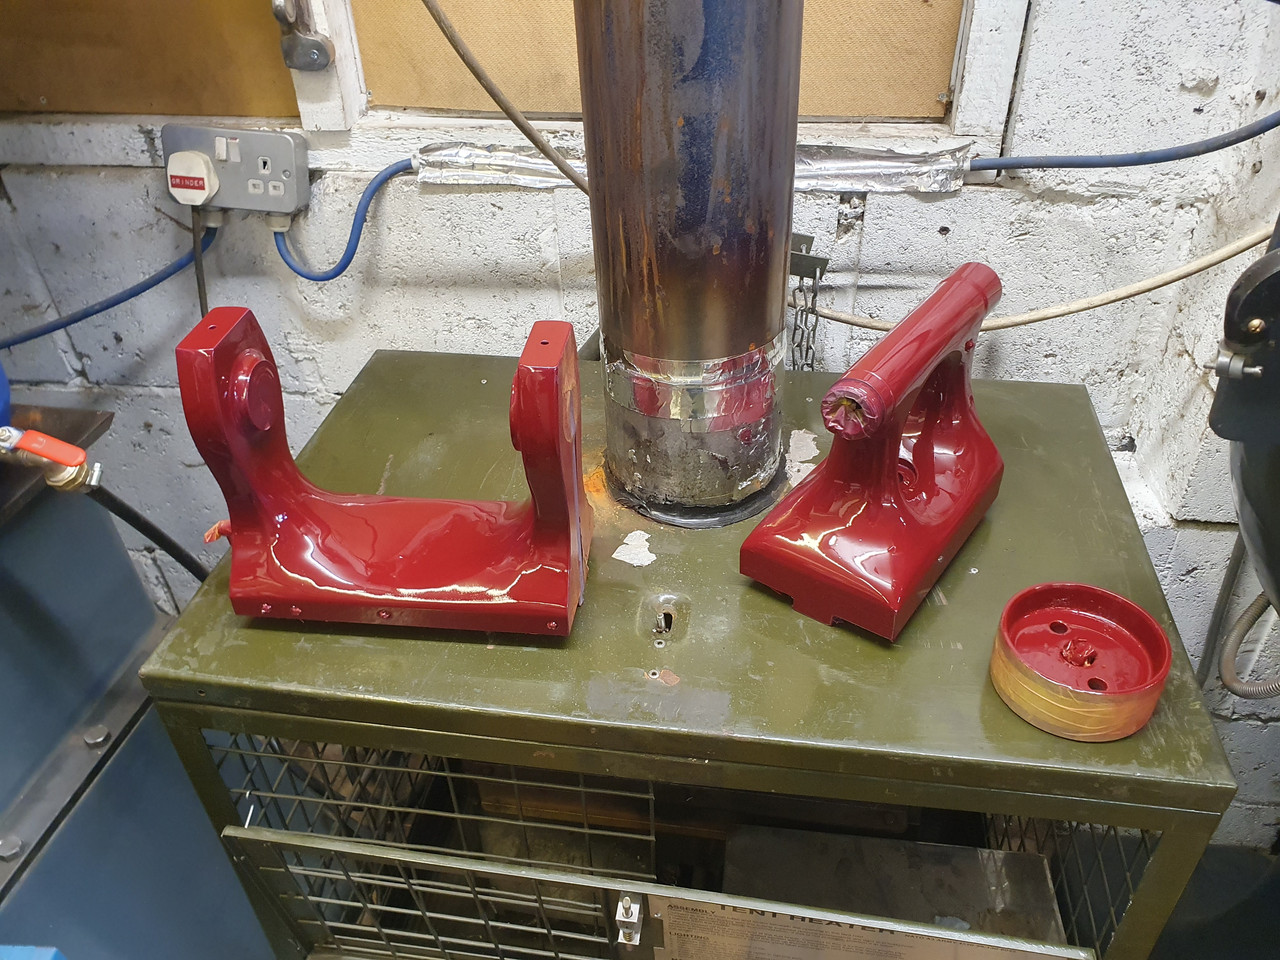
I even managed to get some spraying done
Stuck them on top of the army heater to help cure
A gear has a tooth missing,
Finished off with a file
This piece from the tail stock was very pitted, so I removed the nickel finish. Alot of pieces have been copper plated first.
After nickel plating and polished
This is a eccentric chuck
A bit crusty
Surface ground
And replated
I even managed to get some spraying done
Stuck them on top of the army heater to help cure
duke
Old Oak
Wallace, you have a lot of skill and patience refurbishing your machines. I would definitely forget where all the bits would go.
Dr.Al
Old Oak
Wow. I don't think I'd ever have the confidence to repair a gear like that - I think I would have felt the need to start from scratch.
Cabinetman
Sequoia
- Joined
- Oct 11, 2020
- Messages
- 5,528
- Reaction score
- 1,231
- Location
- Lincolnshire Wolds + Massachusetts
- Name
- Ian
Wow! As said that’s a lot of bits to put back together correctly. Especially when you look at the mc as a whole.
I dont have the knowhow to create a gear but I can bodge most things. A box of bare gear castings came with the lathe.Wow. I don't think I'd ever have the confidence to repair a gear like that - I think I would have felt the need to start from scratch.
Lots of pictures. I've never seen this lathe assembled so should be fun trying to work it out.Wallace, you have a lot of skill and patience refurbishing your machines. I would definitely forget where all the bits would go.
I used to like everything looking brand new but like you say some things look better with a bit ageI really like the colours and textures where there are bronze and steel parts together. Old but cared for is so much better than all brand new.