Lons
Old Oak
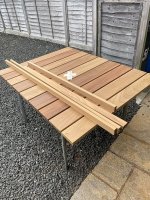
We bought an aluminium and Glass topped table and four chairs from Costco donkeys years ago and my wife hates the glass top which always looks scruffy. She's been making noises for ages about buying a new set but the prices of decent stuff definitely doesn't appeal to me at all.  So after close inspection, the chairs are in good nick as is the aluninium frame and legs so I decided to make a hybrid table using the reclaimed science bench tops that Ray bet his house on being iroko.
I originally intended to just plant it on top of the existing round frame maybe in a bit like a sunburst pattern but decided to use just the legs and make a rectangular shape instead of around 1100 x 1400. My intention is to fit breadboad ends and sides around 50mm deep.
Initial spacing out
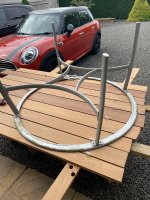

Frame glued and clamped having dug out my old little used biscuit jointer for the joints. (Some of us don't own a domino) and dowels would have been more hassle.

Frame sanded and all edges rounded with the screaming Makita midget.
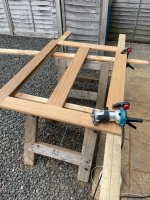
A bit of enjoyable edge planing of the top sections using the lovely Bedrock I managed to aquire from a mate - thanks Sam
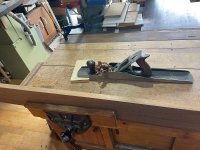
Then more routing
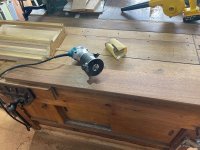
I hate the mess they make.
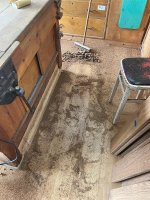
A quick session with the ROS

Then out with the Titebond premium and loads of screws.
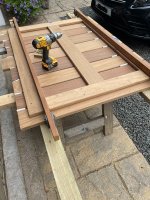

That's enough for today and hopefully I can get back on to it over the weekend so the next step is to use a tracksaw to trim the top to size and I intend to fit a 50mm deep edge all round probably using the biscuit jointer again, round everything over including the corners, drill a hole in the centre for the brolly, final sand and treatment before fixing to the legs which need cleaning up first.
Happy wife, no out of pocket expense so happy me and I'm sure it will be worth oodles of brownie points from the missus.
So after close inspection, the chairs are in good nick as is the aluninium frame and legs so I decided to make a hybrid table using the reclaimed science bench tops that Ray bet his house on being iroko. I originally intended to just plant it on top of the existing round frame maybe in a bit like a sunburst pattern but decided to use just the legs and make a rectangular shape instead of around 1100 x 1400. My intention is to fit breadboad ends and sides around 50mm deep.
Initial spacing out
Frame glued and clamped having dug out my old little used biscuit jointer for the joints. (Some of us don't own a domino) and dowels would have been more hassle.
Frame sanded and all edges rounded with the screaming Makita midget.
A bit of enjoyable edge planing of the top sections using the lovely Bedrock I managed to aquire from a mate - thanks Sam
Then more routing
I hate the mess they make.
A quick session with the ROS
Then out with the Titebond premium and loads of screws.
That's enough for today and hopefully I can get back on to it over the weekend so the next step is to use a tracksaw to trim the top to size and I intend to fit a 50mm deep edge all round probably using the biscuit jointer again, round everything over including the corners, drill a hole in the centre for the brolly, final sand and treatment before fixing to the legs which need cleaning up first.
Happy wife, no out of pocket expense so happy me and I'm sure it will be worth oodles of brownie points from the missus.


 I try to do a quick clean up after every session even if just to keep on top of the thick stuff as I hate starting the next day wading through shavings.


 ). The panels were grooved with glued in...