Phil
Old Oak
Ok, so I have not made much apart from bee hives and also time limited.
Play the music for the show .............
:eusa-violin:
:text-givemebeer:
 bscene-drinkingbuddies:
Project – Picture frame stand
Wife asked me a couple of months (maybe years?) ago to make her some picture stands for some small paintings that were given to her by friends when we moved.
I envisaged something with hinges and fold out legs, and that just blanked out my thought process.
Roll on to our first Wednesday tea in July 2023.
2 Of the residents were going to do a flower arranging demonstration with a lucky draw. Wife was off to physio and I was delegated to attend. (it is also a social get together of the husbands in the back corner of the hall.)
Being the first lucky number to be drawn I had a choice of arrangements to pick from.
Collecting it I noticed that they had placed a painting on a stand which looked like no hinges.
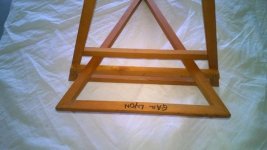
I walked over to the one resident house and borrowed the stand which turned out to be in 2 pieces (triangles) with one slotting into the other one. The lady paints and she stands her canvas on this stand.
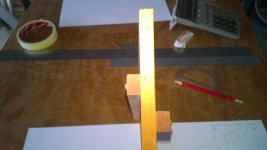
Moving forward (faster than normal) I drew the triangles in 1:1 scale with all the measurements.
Then looked at what timber was available. Found a piece of Meranti 60mm wide 1200mm long and thickness varied between 10mm and 20mm.
Once fed through the thicknesser, the table saw cut 3 lengths, which went back the thicknesser to trim to same dimensions.
Now the cut stock is not enough for the frame.
Onto CAD-Excel – draw shape with dimensions.
Then calculate a re-size to 80%, 75%, 70%, 60% determining how much timber would be required for each size.
The 75% would do just fine leaving a small offcut.
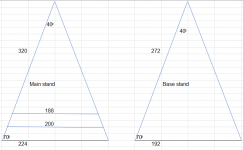
The corner angles were measured and the base corners were 70 ͦ to be cut at 35, which left the top at 40 to be cut at 20.
For small thin bits like this I would not attempt the RAS or table saw.
They will be cut by hand using a very fine hacksaw blade.
The corners will all be joined using 3mm dowels (read 3mm bamboo skewers)
The corners turned out ok requiring some tweaking with a Stanley blade and sand paper.
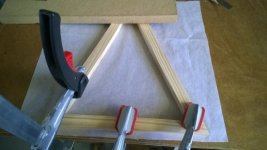
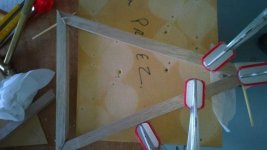
Drilling the holes for the dowels required serious clamping down of the frame and accurate drilling. Then gluing and knocking in the dowels.
The 2 cross pieces were cut and the angles measured to the frame.
First assembly test = CARP. Had to unscrew and break the glue. Not too much damage.
A bit of clamping and fiddling around and they were ok.
Some light sanding, 2 coats of Woodoc 10.
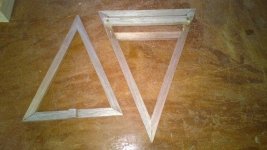
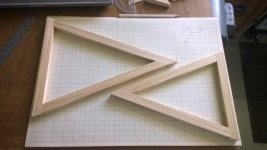
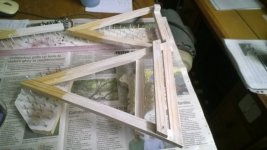
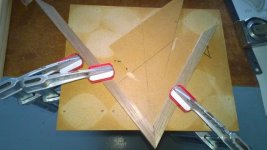
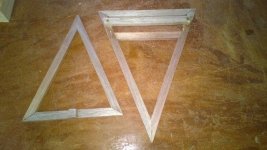
The 2 frames
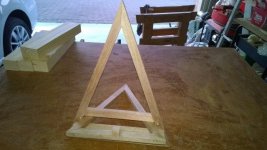
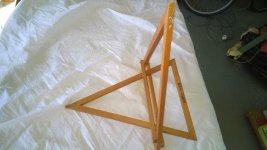
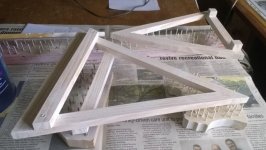
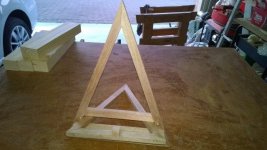
Assembled
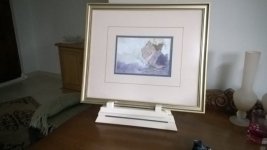
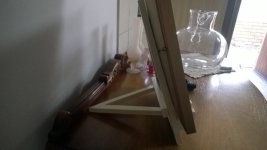
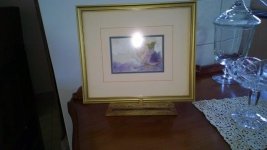
Here is the stand being used with a small painting
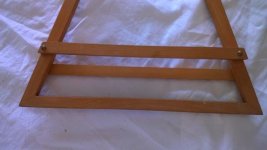
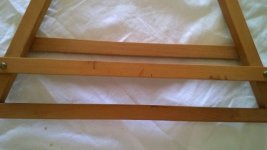
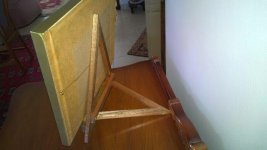
And the back
The size of the stand is just right for the size of the frame.
The picture frame is landscape view 335mm x 285mm
The stand needs to be sized to suit the picture stand.
As I don’t use CAD I will see what I can do in my Excel sheet.
The other picture and frame is larger and a portrait view.
Play the music for the show .............
:eusa-violin:
:text-givemebeer:
bscene-drinkingbuddies:Project – Picture frame stand
Wife asked me a couple of months (maybe years?) ago to make her some picture stands for some small paintings that were given to her by friends when we moved.
I envisaged something with hinges and fold out legs, and that just blanked out my thought process.
Roll on to our first Wednesday tea in July 2023.
2 Of the residents were going to do a flower arranging demonstration with a lucky draw. Wife was off to physio and I was delegated to attend. (it is also a social get together of the husbands in the back corner of the hall.)
Being the first lucky number to be drawn I had a choice of arrangements to pick from.
Collecting it I noticed that they had placed a painting on a stand which looked like no hinges.
I walked over to the one resident house and borrowed the stand which turned out to be in 2 pieces (triangles) with one slotting into the other one. The lady paints and she stands her canvas on this stand.
Moving forward (faster than normal) I drew the triangles in 1:1 scale with all the measurements.
Then looked at what timber was available. Found a piece of Meranti 60mm wide 1200mm long and thickness varied between 10mm and 20mm.
Once fed through the thicknesser, the table saw cut 3 lengths, which went back the thicknesser to trim to same dimensions.
Now the cut stock is not enough for the frame.
Onto CAD-Excel – draw shape with dimensions.
Then calculate a re-size to 80%, 75%, 70%, 60% determining how much timber would be required for each size.
The 75% would do just fine leaving a small offcut.
The corner angles were measured and the base corners were 70 ͦ to be cut at 35, which left the top at 40 to be cut at 20.
For small thin bits like this I would not attempt the RAS or table saw.
They will be cut by hand using a very fine hacksaw blade.
The corners will all be joined using 3mm dowels (read 3mm bamboo skewers)
The corners turned out ok requiring some tweaking with a Stanley blade and sand paper.
Drilling the holes for the dowels required serious clamping down of the frame and accurate drilling. Then gluing and knocking in the dowels.
The 2 cross pieces were cut and the angles measured to the frame.
First assembly test = CARP. Had to unscrew and break the glue. Not too much damage.
A bit of clamping and fiddling around and they were ok.
Some light sanding, 2 coats of Woodoc 10.
The 2 frames
Assembled
Here is the stand being used with a small painting
And the back
The size of the stand is just right for the size of the frame.
The picture frame is landscape view 335mm x 285mm
The stand needs to be sized to suit the picture stand.
As I don’t use CAD I will see what I can do in my Excel sheet.
The other picture and frame is larger and a portrait view.
Last edited: