Sheffield Tony
Nordic Pine
I seem to post too much general chat and not enough woodwork. Probably reflects on life at the moment ! Anyway, a tiny bit to redress the balance. A frame, for my son. Reclaimed wood from old furniture.
Just glued up, checking the fit of the backing board and the glass.
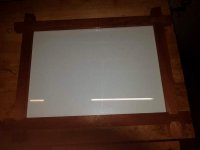
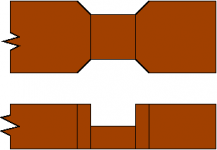
I wanted a hint of the far East to this one. The corner joints are a lap joint, with kind of mitred shoulders. The main purpose of the mitres is to allow the glass rebates in the back to meet nicely at the corners, and it gives somewhere to plane into when cutting the rebates. This was one of the rare occasions I chose the Stanley #78 in preference to my WS A78; the later has the 2 arms for the fence and is generally better, but the Stanley can take the depth stop and fence on either side, which the WS can't. It was also the first time ever for me using the forward iron position to work into the corner. I found myself wishing for a proper bullnose plane, the length of the short sides is only just enough to get a #78 in.
Those corner joints I found a bit of a devil to cut. To avoid scribe lines I marked them out in pencil, which makes an accurate result more difficult. I think I might mark them out with the knife and plane the marks away if I do it again. The first ones I cut are not as tight as I'd like; I got better with practice.
Darkened a bit with Van Dyck crystals, a couple of coats of Osmo. In place:
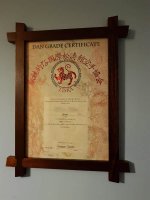
Sorry about the lighting - it has always gone dark by the time I'm finished !
Just glued up, checking the fit of the backing board and the glass.
I wanted a hint of the far East to this one. The corner joints are a lap joint, with kind of mitred shoulders. The main purpose of the mitres is to allow the glass rebates in the back to meet nicely at the corners, and it gives somewhere to plane into when cutting the rebates. This was one of the rare occasions I chose the Stanley #78 in preference to my WS A78; the later has the 2 arms for the fence and is generally better, but the Stanley can take the depth stop and fence on either side, which the WS can't. It was also the first time ever for me using the forward iron position to work into the corner. I found myself wishing for a proper bullnose plane, the length of the short sides is only just enough to get a #78 in.
Those corner joints I found a bit of a devil to cut. To avoid scribe lines I marked them out in pencil, which makes an accurate result more difficult. I think I might mark them out with the knife and plane the marks away if I do it again. The first ones I cut are not as tight as I'd like; I got better with practice.
Darkened a bit with Van Dyck crystals, a couple of coats of Osmo. In place:
Sorry about the lighting - it has always gone dark by the time I'm finished !


 bscene-drinkingcheers: