• Hi all and welcome to TheWoodHaven2 brought into the 21st Century, kicking and screaming! We all have Alasdair to thank for the vast bulk of the heavy lifting to get us here, no more so than me because he's taken away a huge burden of responsibility from my shoulders and brought us to this new shiny home, with all your previous content (hopefully) still intact! Please peruse and feed back. There is still plenty to do, like changing the colour scheme, adding the banner graphic, tweaking the odd setting here and there so I have added a new thread in the 'Technical Issues, Bugs and Feature Requests' forum for you to add any issues you find, any missing settings or just anything you'd like to see added/removed from the feature set that Xenforo offers. We will get to everything over the coming weeks so please be patient, but add anything at all to the thread I mention above and we promise to get to them over the next few days/weeks/months. In the meantime, please enjoy!

Post a photo of the last thing you made...

Not technically woodworking, more chipboard manipulation.

We’ve recently refurbed my daughters bedroom now we’re not going to be moving, and she chose a whole suite of IKEA furniture. Not our ideal choice but it’s her room and easy enough to shift on and recoup some money in the future.


She chose a bed with a headboard section that contained bookshelves for additional storage, but because of the weird shape of the room the bookshelf bit pushed the bed out too far into the room so had to go.

Rather than try and send it back after it had been assembled I had a brainwave. She has a strip of LED lighting she wants to run around the perimeter of the room (as is apparently the wont of tweens nowadays) so I took a few measurements and disappeared to the workshop with the parts from the bookshelf addition.

After fighting my way in and clearing some space I spent far too long pondering the best construction method (biscuits, domino, pocket holes) and eventually stopped myself from procrastinating and just went for the quickest and easiest way to fulfil the job to be as strong as it needs to be…glue blocks!

225be667dd50309ed624f036d1607a33.jpg


6c564dfc9eb2e103848ea4212c3243b0.jpg


I clamped it all in place nice and square and added a few glue blocks in the corners, top centre and down each leg. Initially rubbed in place until friction kept them in place then added some clamps too.

The reason for it being inside the edge of the headboard is so it is just far enough in so that it will create a nice shadow/light effect when the LEDs are turned on.

I then screwed the whole thing to the back of the bed and pushed it back in place. Unfortunately the wall appears to have quite the bow to it so tomorrow (or later this evening) I will scribe it and trim back so it’s flush to the wall all the way.

d881d38a6c75f67bddebb232fce15eac.jpg


Gap left so she can access the plug sockets still. I considered moving the sockets out to the sides but that would just be a cosmetic thing that only I was bothered about and take valuable time I need for other endeavours.

Anyway, hardly master craftsmanship but satisfied my desire for a little tool/workshop time and knocked another little job off the To-Do list!
 
alternatively to scribing it you could always use caulk with a cramer fugi kit just an idea.
 
In social media parlance that’s referred to as a #ikeahack Mark, taking something from ikea & altering it to suit your needs.
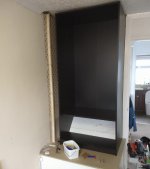
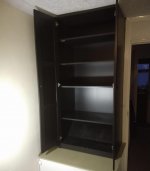
Did a little of that myself this week for a customer with one of ikeas wardrobes cutting it down to fit on a bulkhead in a home office, lined with shelves for storage rather than clothes.

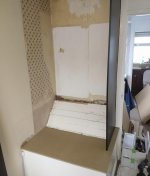
Old cupboard & bulkhead top removed & replaced

6046FE24-CCBE-4024-B8D3-C0E1ECA0A97D.jpeg

Initial fitting

7C0FD5E3-2D25-4972-92F3-D6F811F7A8F8.jpeg

Job done.

F55C4A34-BA32-4688-8C0B-7D7BB529DBBC.jpeg


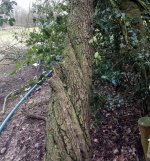
Had an unexpected phone call today the winds last night had caused a customer’s Hawthorn tree to lean over at a precarious angle & would I like the timber, it also meant me cutting it down but I was round there like a shot.

This was the tree,

A78262DA-9DDF-4C88-9F5E-9D31D4DB315C.jpeg

It came down a treat though by the time I’d got it loaded in the van I’d lost the light so didn’t get a photo of the felled trunk, but it’s a really decent size for a hawthorn so I’m well happy.
 
I don’t mind Ian I’m hoping it will throw up some interesting timber for turning, it does turn really well.
 
Cheers guys, yeah tbh I will probably not bother scribing, daughter isn’t bothered and it isn’t visible unless you look for it so I’m minded to leave it or maybe caulk as suggested.

Nice work Doug, and nice haul on the hawthorn too!

 
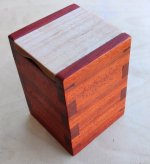
Another padauk, maple & lead box:

wbb2_overview_800.jpg

A while ago I made a little "weighted base box" for keeping earplugs in on the bedside table. There's nothing wrong with it, but I'd always hoped to have an integral lid rather than a separate one and I decided the easiest way to get that was to make another one.

Since I like the look of the previous padauk in maple one and I've got lots more of that horrible-to-plane padauk lying around, I thought I'd use the same materials again but this time do dovetails for the joints.

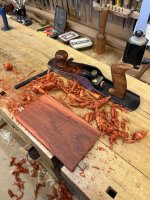
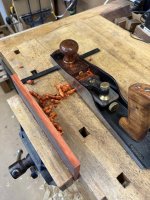
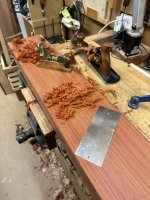
The scraper plane I recently bought from forum member Mike Jordan really came into its own on this as it dealt with the padauk beautifully, something which I've never really managed to do well even with a very high angle blade in my LA jack plane.

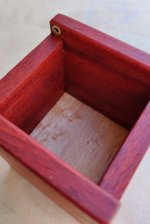
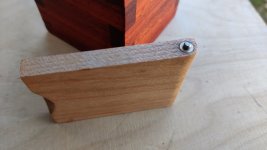
The lid is held in place with some 3 mm steel pins in some simple brass bushes:

wbb2_inside_800.jpg

wbb2_lid_800.jpg

When I first made the box, I had a bit of a moron moment. I'd carefully shot the hinge end of the lid square but left the other end rough as I was going to trim it to length later. I then stupidly drilled the holes for the brass bushes in the wrong end of the lid. I didn't notice, so I carried on assembling the box (the lid gets put in place at the same time as the dovetails are all being assembled). Only when the glue had dried and I came back to it did I realise that the lid wasn't lining up with the box :eusa-doh:

After trying to stick a great big bevel on the side of the lid to try to make it look okay, I decided I wasn't happy with it. After pondering on how to deal with it overnight, I decided to cut the old lid off and make a new lid with some sprung pins.

The new lid (shown in the photos above) has the same 6 mm diameter, 5 mm long brass bushes, but the lid is drilled all the way through 4.5 mm and there's a spring from an old pen in the middle. Thus the pins can be pushed in and out of the way but once the lid gets fitted, they should (hopefully) spring out and go into the bushes in the body.

I'll do that once it's had another coat of MMM.
 
Cabinetman":327wl2um said:
I’ve never tried Padauk, sounds hard work! Nice fix and super small Dtls on the ends.

I would say it's very similar to Iroko which is more common to our trade. In terms of working with it, it has a very similar grain to Iroko which can sometimes be interlocking but fine most of the time.

Unbelievably messy stuff though, if you're wearing anything white it will forever be stained a funny shade of red after sanding Padauk.
 
Woodbloke":2anf3a87 said:
Cabinetman":2anf3a87 said:
I’ve never tried Padauk, sounds hard work!
It's not actually; easy to plane and cuts well with saw. Really nice stuff to use - Rob

Not the stuff I've got. All the way along the plank the grain goes in the same direction. Problem is, the direction changes every ~20 mm across the width of the board.

Even with a 40° bevel iron in my LA jack (so 52° cutting angle), it tears out on one set of strips or the other, depending on which way you plane.

Cus nicely with a saw, but horrible to plane without the scraper plane.
 
Dr.Al":1fgejerj said:
Woodbloke":1fgejerj said:
Cabinetman":1fgejerj said:
I’ve never tried Padauk, sounds hard work!
It's not actually; easy to plane and cuts well with saw. Really nice stuff to use - Rob

Not the stuff I've got. All the way along the plank the grain goes in the same direction. Problem is, the direction changes every ~20 mm across the width of the board.

Even with a 40° bevel iron in my LA jack (so 52° cutting angle), it tears out on one set of strips or the other, depending on which way you plane.

Cus nicely with a saw, but horrible to plane without the scraper plane.
I'll have to have a further play with some, but my stuff cuts beautifully on all sides...I think - Rob
 
I've just been out to the 'shop and found a random offcut and planed it up with a freshly sharped LA blade (42 degrees so effective pitch 54) and it's fandabby:

IMG_0518.jpeg

Planing an edge was equally good:

IMG_0520.jpeg

...although on The Wood Database it says there may be tear out on quarter sawn surfaces - Rob

https://www.wood-database.com/african-padauk/

Edit: Two of my big baulks do exhibit some qs grain and there is some tear out:

IMG_0522.jpeg

...but it does respond well to a scraper plane and card scraper
 
Whilst your all making nice pieces my latest piece is probably the most uninteresting piece of wood work.

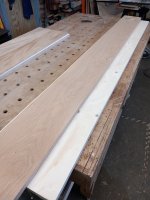
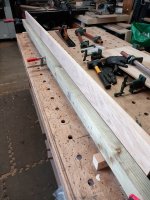
Not really much to see in the way of skill or creativity, but the most exiting thing I got to do on Thursday/Friday was to make up some door Oak linings, needed to be 310mm wide in this case, so we start with a 27mm thick oak board, plane both faces and resaw in half:
plank 1.jpg

plank 2.jpg
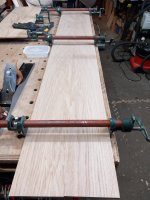
Got to shoot the edges to try and get a book match:
plank 3.jpg
Satisfactory:
plank 4.jpg

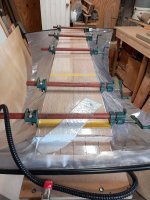
Then cut a piece of 24mm Spruce ply as a substrate, apply glue bring together then shove it all in the vacuum press and leave for a few hours:
plank 5.jpg

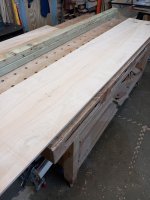
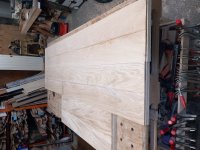
Result 2 jambs and 1 head, need to run them through thicknesser to get down 32mm finished thickness.
pank 6.jpg

The end....
 
Dr.Al":4zi5cdk2 said:
The new lid (shown in the photos above) has the same 6 mm diameter, 5 mm long brass bushes, but the lid is drilled all the way through 4.5 mm and there's a spring from an old pen in the middle. Thus the pins can be pushed in and out of the way but once the lid gets fitted, they should (hopefully) spring out and go into the bushes in the body.
Now that's a clever idea!

Unfortunately, I am to engineering what I am to cooking (unless!).
 
Interesting re the door casings Paul, I would never have thought of doing it that way, but then I’ve never had a vacuum setup and timber has in the past been cheap enough to do it in solid.
Your way will make it dead easy to do the lap or housing joints at the top corners, so brill.
 
Cabinetman":1g6you1b said:

Thanks Ian, getting wide boards could be an issue to do them as solid pieces, I would need to buy 41mm thick stock to start with and as well as pricey (probably +£350.00) it is wasteful, more to the point you never see most of it when its fitted and the architraves are on, they would probably cup like mad as well, I had some 27mm boards on the rack so made sense to use them, I trench the heads, which I did today after cleaning up, using a simple router jig and guide bush, so they are ready to install now.
 
Cabinetman":3hehnghd said:
Crikey £350, timber has really got expensive!

Oak - KD - 1st Q - SQ Edged 41 x 160 Qty 1 X 2.400 @ £75.72 + VAT

Lifted this off a quote I got this morning, that's 0.5560 cu ft, its a part of a small order and delivery rates are included, however It is good quality stuff, I don't have to factor in much for waste.
 
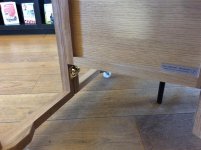
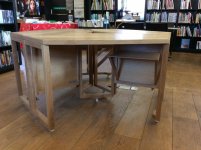
I made these computer tables a while ago for my local Library, but it was only after designing and making them that I realised it reminded me of the NatWest logo - Doh! The panels are Oak veneered mdf and all the rest is solid Oak. Part of the design brief was that it must be able to be moved through a doorway hence the brass catches allowing it to be split it into three parts.
It has proved to be an immediate hit with students doing their homework.
They were finished in water based Polyurethane varnish, and still not a mark showing even after a couple of years of hard use.
A4002230-CBC2-4EB0-9C1B-E7ACA6915206.jpeg

91E158AC-44C9-4C0D-9ECD-96D117033381.jpeg

BA7C4C69-63CA-4BDC-831D-1061613B679F.jpeg
 
Cabinetman":1f3inde5 said:
I made these computer tables a while ago for my local Library, but it was only after designing and making them that I realised it reminded me of the NatWest logo - Doh! The panels are Oak veneered mdf and all the rest is solid Oak. Part of the design brief was that it must be able to be moved through a doorway hence the brass catches allowing it to be split it into three parts.
It has proved to be an immediate hit with students doing their homework.
They were finished in water based Polyurethane varnish, and still not a mark showing even after a couple of years of hard use.


View attachment 1

View attachment 2
What's the Salisbury Design connection? - Rob
 
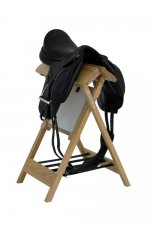
That was the name I traded under Rob, Salsbury being my surname, the reference to field pursuits was because I did a lot of saddle racks and stands, bridle racks etc, all in solid Oak. My most famous client was Charlotte Du Jardin. I along with my son at the time developed a shaped saddle rack that negated a lot of the problems caused by saddles not being stored correctly, my racks were shaped to support the saddles correctly. Ian
Well spotted btw
 
It’s gone a bit quiet so I’ll throw this in.
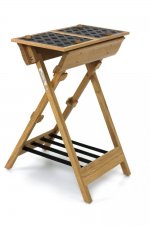
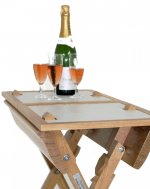
As mentioned, this version is one of my saddle stands, it has stored double sided tables that fit onto the top for tack cleaning and for when celebrating a win out in the field, the stand comes with nylon peg feet, and is perfectly strong enough to sit on whilst on a saddle.

F26799FC-E458-46A9-80CE-76D9112DC911.jpeg

880F3E4C-BDE6-4FE6-8956-8633F4E61779.jpeg

1B141C91-135D-4F03-8CDF-54466F3D65CE.jpeg

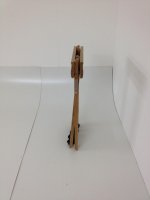
And it also folds up to next to nothing for transport.

0A40307A-7F1D-48F5-9CD8-566D67FB08A7.jpeg
 
Cabinetman":2i6jn9jh said:
my saddle stands

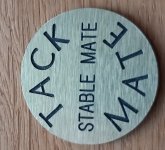
That's neat, I made a range of wooden saddle stands and accessories 34 years ago, pre internet, branded them under the name of "Tackmate", I think I have a flyer somewhere that was printed up at the time, and the paperwork to register the name, sold a few but we then went into a recession so didn't pursue it.
 
Hi Paul that’s interesting and round badges, I wish I thought of that, so much easier than trying to router oblong ones in! We were asked to make a few wall racks for a friend and we realised it was probably a good way in to people with money for furniture, doesn’t necessarily mean because they have money they want to spend it of course.
We tried a couple of horsey events but they priced people like us out of the market, after that we relied on the website and word of mouth. Ian
 
Dr.Al":1ytuoamg said:
Andyp":1ytuoamg said:
Please tell the less engineering minded amongst us, or maybe just me, how that was made Dr.

The stainless steel bar is two pieces. Each piece of 26 mm bar is very carefully faced on the lathe to have a flat end and is drilled and tapped (M8 I think, but I can't remember for sure). A bit of M8 threaded rod is used to join the two pieces tightly together and then the combined piece is machined to reduce the diameter of the middle bit and then cut the (four start) thread.

Once that's done & the nut has been made, the two stainless parts are unscrewed, the nut added and the stainless parts screwed back together again.

Because a lot of care and attention was paid to making sure the two parts were faced perfectly flat at the start and because the join is in the threaded portion, the join is virtually impossible to see without a microscope or similar.

I'm missing something. When I looked at it, I thought two pieces of steel with a thread on each end. Screw one halfway into the nut and repeat with the other piece.

:eusa-think:
 
RogerS":1brkeb33 said:
Dr.Al":1brkeb33 said:
Andyp":1brkeb33 said:
Please tell the less engineering minded amongst us, or maybe just me, how that was made Dr.

The stainless steel bar is two pieces. Each piece of 26 mm bar is very carefully faced on the lathe to have a flat end and is drilled and tapped (M8 I think, but I can't remember for sure). A bit of M8 threaded rod is used to join the two pieces tightly together and then the combined piece is machined to reduce the diameter of the middle bit and then cut the (four start) thread.

Once that's done & the nut has been made, the two stainless parts are unscrewed, the nut added and the stainless parts screwed back together again.

Because a lot of care and attention was paid to making sure the two parts were faced perfectly flat at the start and because the join is in the threaded portion, the join is virtually impossible to see without a microscope or similar.

I'm missing something. When I looked at it, I thought two pieces of steel with a thread on each end. Screw one halfway into the nut and repeat with the other piece.

:eusa-think:

That would work until you move the nut, then it would be obvious that it was two pieces. The nut will go anywhere along the length and there's no visible join.
 
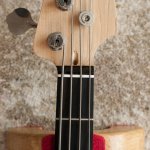
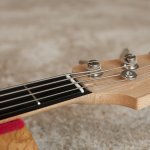
talking of nuts...I just shaped this for my p-bass, it still needs polishing through the grits but it looks much better
 

Attachments

  • finished_pbass_nut-1.jpg
    finished_pbass_nut-1.jpg
    797.3 KB · Views: 177,584
  • finished_pbass_nut-3.jpg
    finished_pbass_nut-3.jpg
    940.3 KB · Views: 177,584
  • finished_pbass_nut-2.jpg
    finished_pbass_nut-2.jpg
    702.7 KB · Views: 177,584
  • finished_pbass_nut-4.jpg
    finished_pbass_nut-4.jpg
    678.1 KB · Views: 177,584
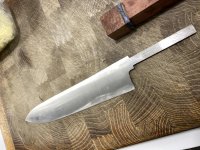
This is a knife I'm making very slowly whilst waiting for paint to dry on the job I'm supposed to be doing. It's a gyoto or Japanese style variant of a western chef's knife. Quite big. Double bevel. Handle has just been glued up ready for shaping, but not decided what handle profile to do yet. It is a "Wa" style and the tang will be burnt in: I've already cut an undersized slot in the three parts and the tang will be filed a bit before I attempt to fit it.

As I don't have a proper metalwork linisher, all grinding on this hand forged blade (which I made a while ago - it's part of a batch) has been done on a titchy Robert Sorby (with the guard off as it gets in the way). It is really slow. Now it needs to be polished to high gloss and sharpened. This one is approx Rockwell 62 hardness (knife maker friend tested it for me). Made from an old cart axle spring originally.

IMG_3825.jpeg
IMG_3827.jpeg
 
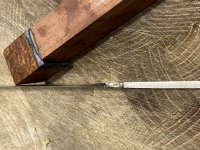
Second pic was supposed to show the choil and thinning profile of the blade, but snap didn't come out very well. Probably wants a bit more thinning behind the edge ideally.
 
What wood is that sandwiched in there Adrian? And I suppose you have to get the temperature just right as too hot will cause problems to both pieces, and not hot enough won’t burn enough wood away or harden the wood that’s left. - have I understood the process correctly?
 
The woods are all exotics that I bought 30 odd years ago for musical instrument making. Bubinga, and something that if I recall was sold at the time as "white ebony". It obviously isn't ebony but is very highly figured when it is cut and polished (as you will see eventually). Much harder than figured maple. To my shame I didn't label things back then and as I bought job lots it was all just chucked together. I will have a better idea when I have shaped and polished them. The ring inserts / ferrule spacers I have are mostly semi precious stone or abalone and things like that I bought originally to do inlays with. I glue them up with slow setting epoxy. I'n no expert btw: I've only made about 1o knives in my life, and most of those were in Japan with tutoring and another 2 were with Will Catcheside in Herefordshire and also tutored. I've got some feather damascus rough forged blades to do that I made with his help in his workshop.

When burning in, you don't need to worry too much about the different woods. What you do need to worry about is making sure the slot hole is dead straight unless you want a wonky knife. In Japan practically all knives are made with a light coloured softish wood, such as Japanese cedar and are rarely fancy: that is a bit of a western affectation. Ferrules usually buffalo horn traditionally (plastic on cheap stuff).

The trouble with burning in is that you need the tang really hot. So it expands and when it cools it contracts. So you want an interference fit slot in the handle - if it is too tight you will split the handle as you knock it and if not tight enough the handle will come off. Japanese knife makers know from experience what is just right, but for hardwoods some people use epoxy and I might do that here, on a rough filed tang.
 
Back
Top